Hey, guys, this is Sidd and today’s guide is going to be different than my other two guides.
Today I’ll be giving you a guide on some cool, unexpected plays that you can make on your opponent to catch them off guard, to save you loads of damage or to deal tons of damage.
Some of these plays are hard to make and need great timing, but when mastered can pay off well.
So I’ll start with the easiest of the moves, and then the difficulty of the moves will increase as we go on so let’s get into it.

7 Advanced Tips for New Players
#1 How to counter split Archers
The oldest trick in the book, the Split Archers but have you ever thought how to save that little trickle of damage, those two annoying gals getting the damage of even though you can stop it.
If you remember from my first guide, I did mention how to counter Split Archers.
It’s as simple as one frozen snowball, the one elixir card: Ice Spirit.
The easiest move in this guide.

When split Archers are coming to your way, wait until they cross the bridge so that the Crown Tower can target the Archers but the Archers don’t.
The moment this happens, deploy the Ice Spirit in the middle, one tile behind The River. So that at least one of these two things happens
The Ice Spirit distracts both the Archers and one of them dies to the Crown Tower, and the Ice Spirit jumps on the other Archer t slow it down and to be killed by the Crown Tower.
Or the Archers get countered because they are both distracted by the Ice Spirit, and the Crown Tower kills the Archers. In this, the Ice Spirit gets killed by the Archers before it can even do anything but its worth it.
All in all, you can get a positive two elixir trade without taking any damage to your tower.
#2 The Wall against The Hog
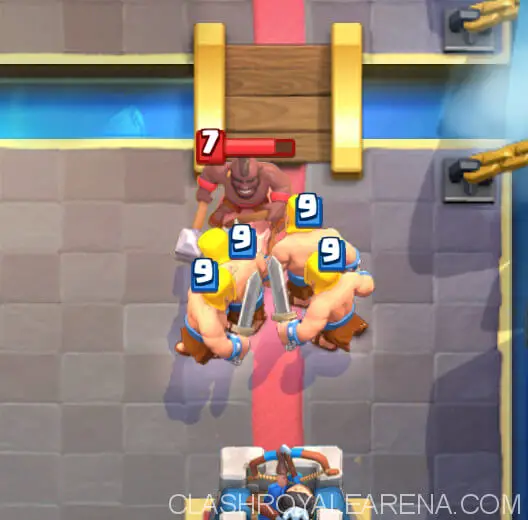 This is less of a tactic, but it does work either way, so let’s get into it.
Okay, so in Clash Royale if you deploy some ground troop in front of a Hog Rider, the Hog will pass through it.
The bigger the troop is, the longer it takes to pass through it.
More troops mean it takes longer to get through that.
So that means if you make a wall of troops in front of the Hog Rider, it will take extremely long to get around, or it might not even get there.
So that’s the plan.
This tactic might put you in a big elixir disadvantage but its best in use when there are 10 seconds left and there’s a Hog coming at a Crown Tower with only 200 HP left.
The best cards in this tactic are Skarmy + Ice Golem, Barbarians, or Lone P.E.K.K.A and some others.
#3 Clone’s Hidden Ability
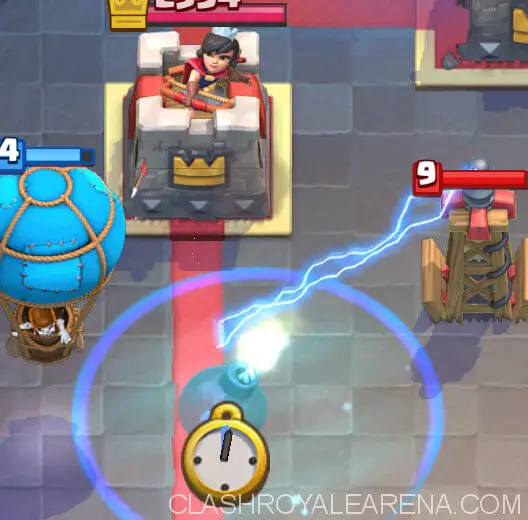 As we all know Clone hasn’t been doing great in any meta recently because it’s useless and there are loads of other cards, you can put in decks to make it more functional.
But there is one cool thing about Clone that you can use during the battle that will give you soo much damage.
As we all know, when you clone a card the clone comes on the right of the card and the original card you clone move to the left.
That’s the advantage you can use.
If you’re a pro player, you already know this, but for the people who are unknown to the fact here, it is.
Suppose you deploy a Balloon and they deploy a Tesla to counter it. Just before any of the lock on each other (basically when your loon is just about to cross the bridge), Clone the Balloon so that the Balloon moves to the left and goes out of the reach of the Tesla and locks on the Crown Tower.
And even the Tesla will target the nearest Balloon which is the Cloned one.
Awesome move to try does nee a great sense of timing but helps you deal a ton of damage when mastered.
#4 How to activate the King Tower without Tornado
So this is a cool trick.
You can use a variety of ground swarm troops in this method (even Archers), but I prefer the two cheapest cards in the game: Ice Spirit and Skeletons.
Since Bandit is pretty fast at times, I going to use her as an example.

So when you see a Bandit coming, deploy Skeletons in the middle, four tiles ahead of the King Tower so that the Skeletons split and the Bandit looks at the Skeletons.
When the Bandit is about to finish dealing with the Skeletons, you deploy an Ice Spirit 1 tile in front of the King Tower, three tiles away from the right Crown tower and four tiles away from the left Crown Tower.
The bandit will immediately look towards the Ice Spirit the moment it deploys and will dash towards it since the Ice Spirit is right in front of the King tower, the Bandit will immediately hit the King tower after it kills the Ice Spirit. This will activate the King tower.
So that’s the trick you can use against. It saves you loads of Crown tower damage and can activate the King Tower for a cheaper cost. Cool trick to try needs a great sense of placement and timing and is an unexpected play.
You can substitute the troops mentioned here with whatever you want but keep it as cheap as possible.
#5 How to pull troops by using Miner
Now, this move needs specific timing and placement so here me out well. This trick is mainly used when you want to pull a hard counter to the other side.
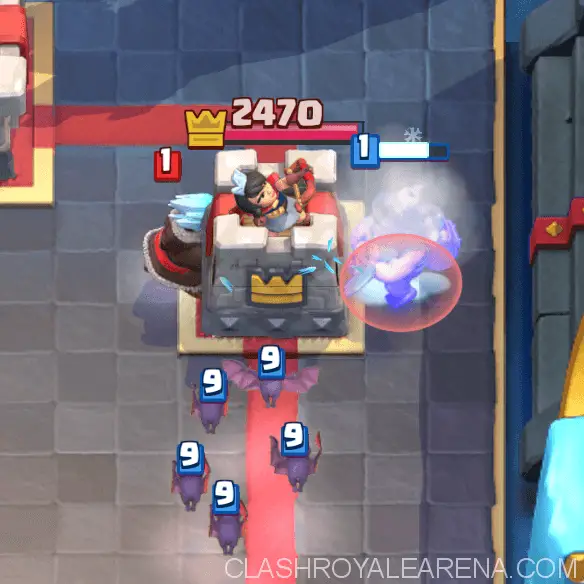 For example,
So let’s say after a counter push, you have survived Bats coming towards the enemy Tower and he has an Ice Wizard walking from the back, approaching your Bats.
Wait till the Ice Wizard is about to cross the Tower, play your Miner on the other side so the Ice Wizard will be locked on it. Make sure that your Bats haven’t been targeted yet.
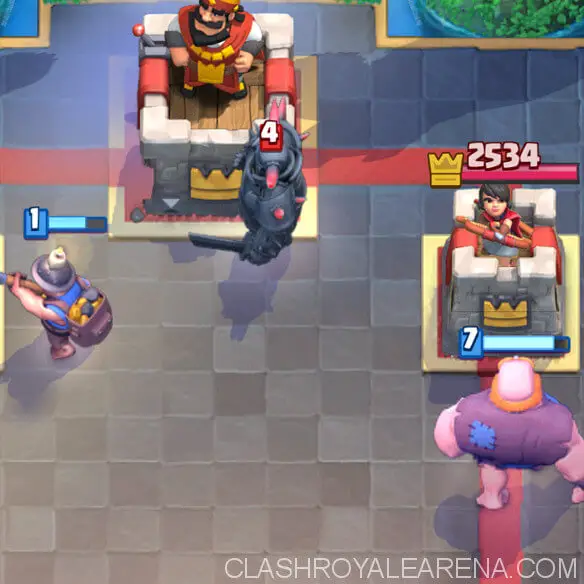 Another Example,
So let’s say you have a lone Giant walking down towards the enemy Tower and there’s a P.E.K.K.A approaching your Giant from the back.
Wait until the P.E.K.K.A is about to pass the Arena Tower, draw your Miner to the middle of the enemy Arena (four tiles left from the P.E.K.K.A) so that it will target the nearest Arena and the P.E.K.K.A will be distracted by the, giving your Giant a clear path ahead.
This play needs precise timing and placement. When mastered it’s a move that helps you deal a ton of damage.
#6 The hidden Goblin Barrel
This is one of the hardest tips I’m going to give you today.
This trick is pretty famous, and you probably know it if you’re a pro, or you are a Clash Royale nerd (I’m the first one just saying)
So, for this technique, you need a Rocket in your deck as well, and you hide the GB under the Rocket to catch your opponent off guard.
You have to deploy them together like below:
This is the trick to hide the Barrel. Just hope your opponent has the game muted because of the Barrel is kind of loud (;
#7 How to counter Goblin Barrel with Dark Prince
This is the hardest play of all of them because this is a prediction play and this is a pro play.
As you might already know, the DP has a 360-degree hit while charging but we are never able to use it to kill the triangle formation GB on the tower.
So when you think that the opponent is about to deploy a Goblin Barrel, deploy a the DP at the back of the lane you think your opponent is going to deploy the Goblin Barrel.
So if you think the person is throwing the GB to the right, you put the DP on the right side.
You have to deploy the DP a few seconds before your opponent is going to put the GB down so that the DP can start charging by the time the GB travels across the arena through the sky.
If you placed the DP at the right time, the charing DP would slam all of the Goblins at once like OJ’s gif below.
This needs insane predicting skills and timing, and you are probably not going to get it right in the first try, and you have to be experienced to get it right.
So that’s the end of this hopefully interesting guide.
I’ll see guys in my next guide and till then keep on clashing.

