My name is IK-_-IK, I posted this guide onto Reddit earlier and it got a lot of attention so I want to repost it here. My Reddit username is u/Ikizzyk, you can DM me if you need proof that it is me.
Hey Guys! Today I will be talking about the different tile placements of the Miner. In terms of placement, the Miner is probably the most complex card and there are a huge amount of possibilities which can massively vary the outcome of the play and so this guide will be purely focused on the placement of the card.
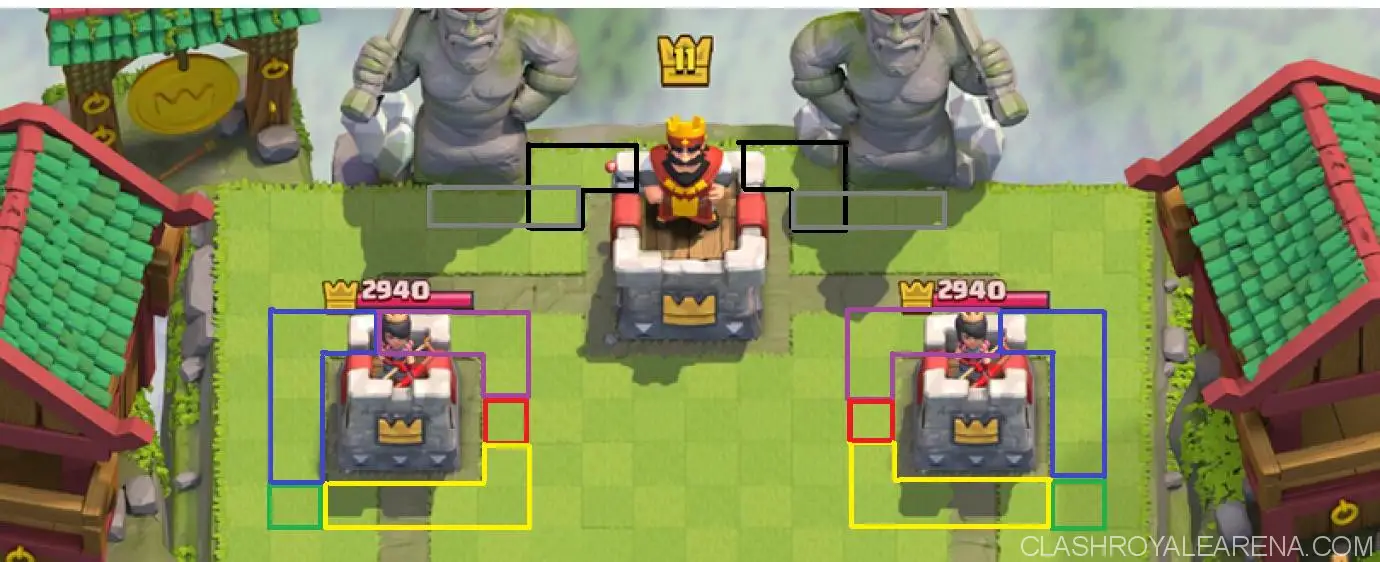
Before we start this is a colour coded map which this guide is based on:
Best Miner Placements
Direct Damage Placement
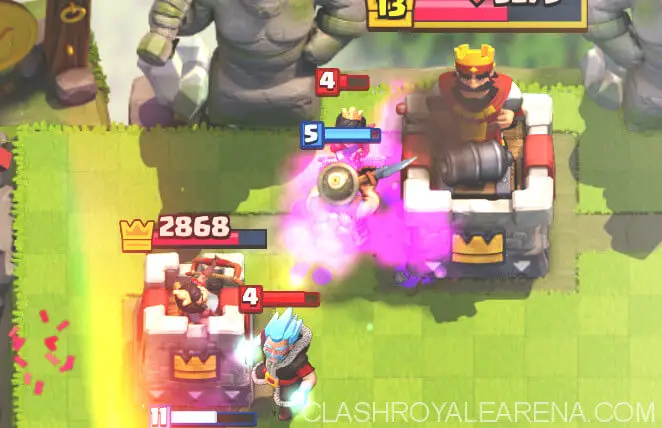
When using the Miner, you want to take advantage of the fact that it can be placed anywhere on the map. One way to do this is by directly placing it onto the opponents’ towers so that it deals damage. When spawning the Miner in this way there are 3 key rules to remember in order to be successful.
- Place it on one of the tiles directly surrounding the tower (16 for arena towers, 20 for king towers) This is to minimize walking distance and maximize damage
- Mix up placement as much as possible to prevent your opponent from predicting your plays
- Avoid placements that will put you at a disadvantage in certain situations (more on this later)
So for direct damage, we have a choice of 16 tiles for arena towers. These tiles can be put into 5 different groups, all having advantages and disadvantages of their own. These groups are shown in the map; the blue zone, yellow zone, red zone, green zone and purple zone. For this section of the guide we will pretend that this is an opponent’s left arena tower (from your view). For the right tower, everything is simply mirrored vertically.
Pros
- Covered from buildings and troops in the centre of the map
- Cannot be targeted by other arena tower
- Not very vulnerable to being tornado pulled and having the king tower activated
Cons
- This is the placement used by most players and so it is the most predictable
- Can be targeted by king tower (once activated)
Pros
- Mostly out of range from buildings and troops in the centre of the map
- Cannot be targeted by other arena tower
- Only placement which is completely invulnerable to being tornado pulled to the king tower
- Only placement which cannot be targeted by the king tower (once activated)
Cons
- Common placement and so fairly easily predicted and countered
- When trying to fireball or rocket a troop deployed to counter the miner, it is harder to hit both the tower and the troop since the placement is close to the front of the tower
Pros
- Cannot be targeted by other arena tower
- Unless constantly used throughout the match, it is hard to predict this placement
- Not very vulnerable to tornado
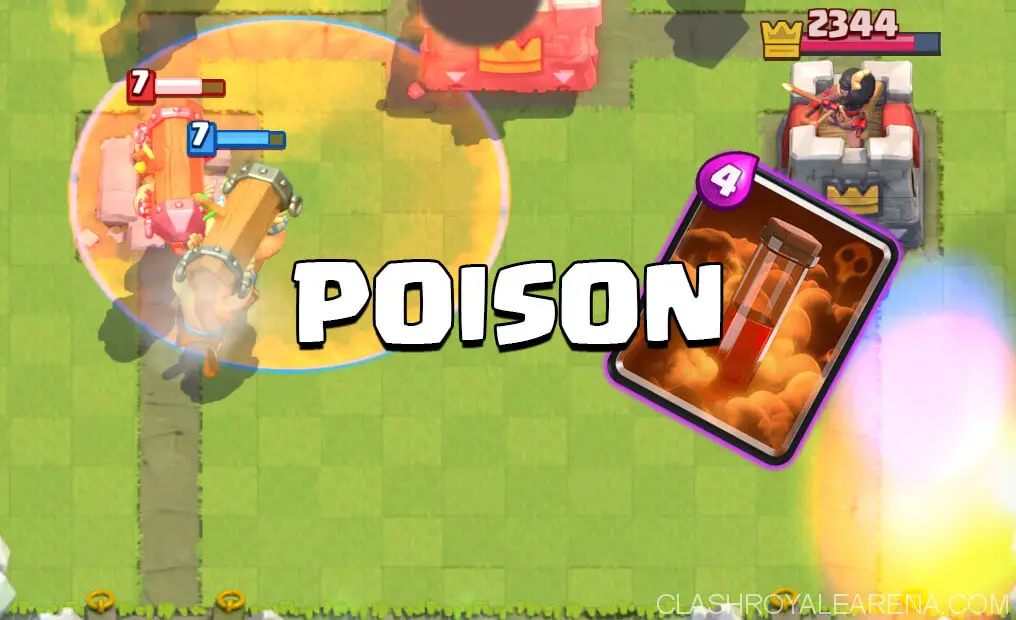
- Easier to get good value from poison to hit both the arena tower, a building (eg elixir collector) and any troops that are placed to defend the miner
Cons
- When trying to fireball or rocket a troop deployed to counter the miner, it is harder to hit both the tower and the troop since the placement is close to the front of the tower
- Can be targeted by king tower (once activated)
- Vulnerable to troops or defensive buildings placed in the centre of the map
Pros
- Very hard to predict
- Decent placement for getting positive trades with rocket, fireball or poison
Cons
- Can be targeted by other arena tower (for this reason alone, this placement should be almost always avoided)
- Vulnerable to tornado
- Can be targeted by king tower (once activated)
- Vulnerable to troops or defensive buildings placed in the centre of the map
Pros
- Covered from buildings and troops in the centre of the map
- Hard to predict
- Cannot be targeted by other arena tower
Cons
- Very vulnerable to tornado
- Can be targeted by king tower (once activated)
Although it depends on the deck, due to the nature of the Miner (chip damage card), most times you will (and should) not be attacking the king tower with your Miner. A smarter option using a Miner control deck would be to attack the other arena tower or play for a draw. However in the rare case that you do attack the king tower with the miner, there is not much to it except for 3 tile placements which can give you an advantage when the opponent has an arena tower still up. These are shown as the black zone in the map.
The black spots are blind spots for arena towers and so if one tower is down, the miner should be placed on one of the black tiles on the opposite side of the arena tower which is still alive.
Overall summary for the groups:
- Blue is the standard option but since It is predictable, yellow and purple should also be used to maximise damage output
- The 5 vertical tiles on the right side are the least predictable. Use them especially when you need the last few hits to win the game
- Green is the best placement when the king tower is activated, also the best to prevent king tower activation from tornado
- Mostly avoid red due to it being in range of the other arena tower
Other Miner Placements
As mentioned earlier, in most cases you will want to get direct chip damage from the Miner. However it is very situational. In this section of the guide, other uses and placements for the Miner will be explained.
Tanking for troops
When the Miner is tanking for a troop/ troops, placement should be varied depending on the situation.
- When tanking for low HP hordes of troops – it is a good idea to plant the miner in a way to block any splash troops from targeting the low HP troops. For example if there is an executioner facing directly towards your minion horde, plant the miner behind the executioner. If there is a furnace in the centre of the map, place the miner in front of the building to absorb the wave of fire spirits. Also if the opponent relies on spells to take out your low HP troops, avoid Miner placement in the front side of the tower (Yellow, Green and part of Blue zone). This is to avoid spells hitting both the Miner and troops its tanking for.
- When tanking for ranged troops – it is usually optimal to plant the Miner behind the tower, this way the opponent has 2 separate things to deal with.
Taking out troops
A common strategy in Golem or Lava Hound decks is to use the Miner to take out ranged troops while the troop is locked onto to your main tank. The key to being successful with this is to decide whether you should or shouldn’t make the target re-agro onto the Miner. In some cases for example when the target is locked onto a Lava Hound, you don’t want to make the target re-agro since the Miner will be vital to tank for the pups after the hound dies. On the other hand, if you were sending in a Miner tanking for a skeleton army to kill a princess, you want it to retarget as one princess shot can wipe out the whole army. There are specific methods required to do this.
- To not make target re-agro – Do not plant the Miner directly onto the troop as it will make it re-agro. Instead, it should be placed at least 1.5 tiles away from the target to allow the Miner to take out the troop undisturbed.
- To make the target re-agro onto the Miner – the easiest way to do this is to place the Miner on top of the target. When the Miner pops up from underground, it will cause the target to move slightly causing it to retarget.
Be extra cautious when using the Miner in this way. For example if you know the opponent has a skeleton army in hand, it is likely that they will use it to block your Miner. Always have the right cards prepared and don’t use this method if there are many other troops surrounding the target.
Taking out buildings
The Miner is often used to take out buildings such as spawners and elixir collectors. Again, placement is important.
- Against spawners – Do not use the Miner on a tombstone, it is a waste. Against other spawners, it is best to wait a few seconds after a new wave has spawned before planting the Miner (especially key vs barb hut)
- Elixir Collector – Important to note that a collector placed in front of a king tower means the Miner will be targeted by both arena towers but behind a tower only 1 will target it. Also it is useful to prepare a zap when using the miner to take out a collector in order to kill low HP troops as well as getting 2 more elixir off the collector. The grey tiles (shown on map) can be described as a gamble spot. After taking out the collector, the Miner will proceed to activate the king tower but that is only if the Miner is untouched. The positioning will usually not cause any trouble however against skilled players, be aware that they could use this to their advantage.
- Against Inferno Tower – In some decks, the Miner is used as a mini tank along with another main tank such as the Giant, Golem, Lava Hound, Royal Giant, Pekka. Against Inferno towers an effective strategy is to let the Miner take the inferno towers agro which will both damage it and give your main tank more time to approach the building.
And that’s all folks! If you made it here you are now a master of Miner placement! … Not quite. The last step is to practice, this will help you make these decisions on placement almost innately.
Until next time, peace.

