Home Blog Page 45

Golem EBarbs Deck

0

Hi Clashers! It’s Krux here and I’m back again with cyclonic wind and a new deck guide. Golem is never out of fashion and we can find a Golem player in any season at any time. There are players who like Beat down decks the most and use them on the ladder all the time. If you are looking to learn a beatdown deck, the Golem Ebarbs deck is here!

Mother Witch Mega Knight Deck

Clash Royale GolemClash Royale Elite BarbariansClash Royale Lightningskeletondragon

Clash Royale Night WitchfishermanClash Royale BomberClash Royale Tornadocopy deck

deck cards banner 1


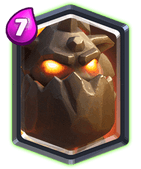
  • Golem: Our win condition. The big tank and building chaser. We will look for ways to connect the Golem with the enemy tower.
  • Elite Barbarians: They are the tank killers for this Golem Ebarbs deck. Our punishment for the opponent can be spammed at the bridge.
  • Lightning: Pump response and the heavy damage spell. To be used as support with Golem too.
  • Skeleton Dragons: Our anti-air troop for defence and subsequently the support in the counter-push.
  • Night Witch: Night witch is the major support card in this deck. Also, the bats work as air defence.
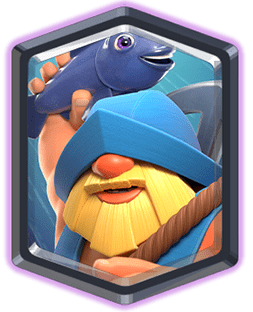
  • Fisherman: Fisherman is a saver for Golem and to pull the enemy defence out of the way.
  • Bomber: The 2-elixir tiny friend is the best support Golem can have. Also a defence for swarms.
  • Tornado: Tornado is our level-independent defensive spell in this deck.

deck strategy banner

The Golem EBarbs deck with an average elixir cost of 4.5 is a new beatdown deck to try in ladder. It has a good offence and a good defence. The free-to-play score is mediocre for the Golem Ebarbs deck but it can give us some good wins. Let’s bring those towers down with our Golem!

Golem Ebarbs deck

Opening: We have a heavy deck in hand and we will wait for our opponent to make the first move. We don’t want to get clapped in the first minute by placing our Golem. If the time is slow, we will start with the Night Witch at the back of the King tower. We will never bridge spam Elite barbarians or Golem. That would be the recipe to lose the match. After the Night Witch, we will see the enemy’s defence and react accordingly. We can use our Tornado for the skeleton army, or Skeleton dragons for a dragon. Most probably we will have to place the Fisherman in the middle to take out a ground troop. It is advisable also because we want our Skeleton Dragons to be alive. After these steps, keep Tornado or Lightning handy to take out any more defence only if we have the Fisherman and Night Witch alive. If they are dead, we won’t elixir trying to get damage.Golem Ebarbs Deck

In another scenario, if the opponent tries to push on us aggressively using unwise bridge spam or puts a heavy tank like Golem or Lava hound at the back. We need to put pressure on the other lane with our Golem Ebarbs deck. We can’t let them build a big push with the Golem or Lava Hound or even Pekka in a lane. We will immediately place our Elite Barbarians in the other lane and will be keen to use the Tornado or Fisherman. It will force the opponent to react and they won’t be able to place support troops with the push.

Mid-game: Either our first attack has damaged the enemy tower somewhat or we have defended and still cycling troops. We will still try with the same strategy for a while till we are near the double elixir. Golem should not be played in the initial. When we are near the double elixir, we will place the Night Witch at the back. When she just ahead of the Princess tower, we will put a Golem at the bridge. Or vice versa, Golem at the back first and then Night Witch behind it. If we don’t get an attack on the other lane, we will also place our Bomber or Skeleton Dragons as support to kill the defence the opponent puts. Bomber for swarms and ground troops, Skeleton Dragons for air defence. If they try to attack the other lane which is very possible, we will let go of our Bomber for it. If it is a heavy tank, elite barbarians. This way, we are defended. After this, we will wait for the elixir to build up for the lightning. We will need to clear the way for our Golem. Struck and the Golem connects.

golemWe won’t overcommit after this. We should be in a good position after the push with their tower down a lot of health. We will now defend again for some time before launching the next attack.

Endgame: After successfully defending, it’s time to push on their tower with our army again. Golem Ebarbs deck have the advantage that we can defend dual lane pressure using Elite Barbs and if they try. We won’t waste our elixir early and wait for the opponent’s defence. Wait for it is the motto. With the Golem leading our push, Night Witch and Bomber trailing behind, we will go again to see the tower crumble. At the same time, we will have Fisherman, Skeleton Dragons, or Lightning at our hands to defend the other lane or make the push bigger. Two successful pushes should be enough for us to get a crown.

Try the new Golem Ebarbs deck and tell us on our Discord how you like it. Stay tuned with Clash World for more deck guides, royale news, and other interesting articles. Clash On!

Mother Witch Mega Knight Deck

0

Hi Clashers! It’s Krux here and I’m back again with some May vibes and a new deck guide. Mother Witch was released half a year ago and it is not one of the cards that are dead on its coming. Today we are gonna see the Mother Witch Mega Knight deck that works wonders on the ladder. So if you are the player who likes MK and Mother witch and wants to have some fun with both the cards, this is for you!

Mother Witch Mega Knight Deck

Clash Royale TeslamotherwitchClash Royale Mega KnightClash Royale Skeleton

Clash Royale Magical ArcherClash Royale ZapClash Royale Royal HogsClash Royale Tornadocopy deck

deck cards banner 1


  • Tesla: Only building in Mother Witch Mega Knight deck. Used for defence and killing big troops like Giants, Pekkas.
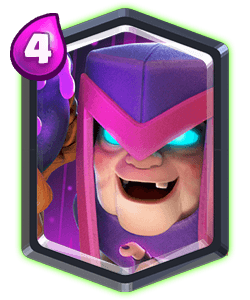
  • Mother Witch: Hail the witch! Our defence for swarms, support for the Mega Knight and wise advisor for the next move.
  • Mega Knight: Mid-ladder knows it very well. To smash a herd of enemy troops.
  • Skeletons: Three little skeletons, a big brain game. Our investment to cycle the cards, to use as defence for Mini Pekkas and others.
  • Magic Archer: It comes as our major anti-air attack and defence with a long range. Can support too.
  • Zap: The 2-elixir versatile card to deal with skeleton army, goblins, and to reset the enemy troops.
  • Royal Hogs: Our win condition is Piggies go! Building chaser and spell bait in the deck.
  • Tornado: Tornado is our level-independent defensive spell in this deck.

deck strategy banner

The Mother Witch Mega Knight deck having an average elixir of 3.8 is a medium cycle deck. It has a moderate offence and a good defence. The free-to-play score is also average of Mother Witch Mega Knight deck but it doesn’t mean this is not viable. It is a good choice to enjoy the mid-ladder with your favourite cards.Mother Witch Mega Kngiht

Opening: We have decent openings in our Mother Witch Mega Knight deck if you don’t like waiting for the first move. We can start with the Mother Witch at the back of the King tower. Or we can invest the elixir in Skeletons to cycle the cards. Or even Magic Archer in the back. We also have some mistakes to avoid. We will never put the Mega Knight first. Also never send the Royal hogs on the bridge.

mwmkk

These two follies can be costly for our match. After placing the Mother Witch or Magic Archer, we will place the Hogs at the bridge ahead of them. Do not place the Mega Knight instead of the hogs. Using Mega knight without reason will be deadly. Magic Archer and Mother witch are paired well with Royal Hogs. Keep the Zap handy to quickly kill the skeleton army or minions the opponent places to kill the Hogs. Once the push been sent to the opponent’s tower, let them defend it.

Mid-game: Our first attack has gotten us some advantage by damaging the enemy tower. They will defend it and we have now to defend the counter push. Possible troops will be Mega Knight which they placed on the Hogs, or Wizards, or some Dragon. We have an answer to all of them. We have Mega Knight for the enemy Mega Knight, and Magic archer or Mother Witch as air defence depending upon what you used in the opening attack.

Mother witch mega knight deck

Use Mega Knight to smash if there are smaller troops incoming, e.g. Wizards, Valkyrie etc. Also if there is a Mega Knight or Giant, we’ll use the Magic Archer or Mother Witch at the middle of the arena paired with Mega Knight. If the opponent uses a building chaser like Hog rider, we will place the Tesla in the middle of the arena. Tesla paired with MW or Magic archer and let the elixir build up. We can also wisely use the Skeletons on Mini Pekkas or some other ground troop that is attacking Tesla or Mega Knight. Tornado is the card to gather all the enemy troops in line with the Magic Archer. We won’t use Tornado on big tanks though, it will be wasted.

Endgame: After successfully defending the counter push using Mother Witch Mega Knight deck, we have our support troop (MW or Magic Archer) alive and Hog again in cycle. We will use Hogs again ahead of the support. Also zap is in our hands to take out swarms as quickly as possible. We want to squeeze maximum damage from the Hogs. Also if we haven’t used the Tornado in defence, we can now use it to put the enemy troops in line with the Magic Archer. After this, we will repeat the same to defend the counter-push and attack again. Three or four Hog stampedes will earn us the crown.

Weaknesses
1. Golem: Our Mother Witch Mega Knight deck is fun to use and works fine in the ladder. Golem decks can be a problem when we are learning to use our deck. We don’t have a big spell in our deck and two small spells. So if a giant Golem push has been made against us, it will tough to fight it with just MK and MW. In such matchups, we should apply dual lane pressure using the Royal hogs and Mega knight paired with a support card. When Mega knight and MW is going in one lane, use Hogs on the other one with Zap. We have to force the opponent to keep using elixir so that they can’t make a full-blown Golem push on our tower.

I have been using this deck for two days now and it is funny to win against meta. Opponents get angry when they lose to Hogs damage. Try it and tell us on our Discord your antics and matchups. You can also discuss decks, guides, or anything about the game there. Stay tuned with Clash World for more deck guides, royale news, and other interesting articles. Clash On!

Miner Pekka Poison | Clash Royale Deck

0

Hello Clashers! I hope you all are doing great. It’s Krux here and I’m back again with a gust of cool air and a new deck guide. Miner was buffed in the last balance changes and it has been out of meta for some time. This is no reason to stop us from playing the little digger. Today we are going to see the Miner Pekka Poison deck. Let’s go!

Miner Pekka Poison Deck

Clash Royale PoisonClash Royale Royal GhostClash Royale P.E.K.K.Amotherwitch

Clash Royale The LogClash Royale MinerClash Royale Flying ZappiesClash Royale Goblin Hutcopy deck

deck cards banner 1


  • Poison: Our pump-response card and to be used with Miner and Pekka. Poison’s relation with these goes a long way.
  • Royal Ghost: Our level-independent defence and sometimes the mini-tank to divert enemies.
  • Pekka: Our answer to Mega knights and Golems. Also, the investment to build a push.
  • Mother Witch: Mother witch is the defence troop for swarms and the support card to be bused with Pekka. Go Piggies!
  • Log: The log is here to save the Pekka from skeleton armies and goblins in the Miner Pekka poison deck.
  • Miner: Miner paired with Poison. It is our bait, mini-tank to divert attention, and the chipper.
  • Zappies: Our defence for air attacks, speedrunners and bait for fireball.
  • Goblin Hut: In Miner Pekka poison deck, the Goblin hut is the defensive building and the investment when the elixir starts leaking.

deck strategy banner

The Miner Pekka Poison deck comes with an average elixir of 4. It has a good offence, defence and an average synergy score. The deck has four legendary cards and that makes it somewhat less preferable for free-to-play clashers but it is fun in mid-ladder if the cards are not maxed. Miner Pekka Poison

miner pekka poison deck

Opening: In this deck, we should know what not to do at the start of the game. Do not place the Pekka at the back. Do not send the miner digging and Poison or Royal Ghost to chip. These will be costly mistakes as our deck is not a fast cycle and we have heavy troops like Pekka and Mother Witch. It would be better to wait. If the opponent is also adamant, you can start with Goblin Hut or Zappies in the back. Just one move and then respond to what the opponent places to defend. If they place a heavy tank, you can summon the Pekka. If anything else, use Royal Ghost or Mother Witch if it’s an air troop. Our defence will be the push after defending successfully.

Mid-game: We have defended the opening attacks and now we should have the defence alive—Royal Ghost or Mother Witch or Zappies. Whichever it is, we will send our Miner to chip on their tower. Also, keep Poison handy to use at the right place to clear out the swarms if the opponent puts for the Miner. They will also defend the support (Royal ghost or MW). Let it be. Do not overcommit at this stage. This Miner Pekka Poison is not a one-push deck. We will be ready to defend their counter-push with our Zappies, Goblin Hut, and Pekka.miner pekka

Endgame: The point about this deck is that it can be used in two ways—Pekka poison deck and Miner with Royal Ghost. Zappies and Royal Ghost are our defensive troops and they will be the support after we send the Miner to the opponent’s tower. When we use Pekka as a defence for tanks, we will pair it with Miner and Poison. Repeat the defence-counter push cycle two or three times. It will take cycles to destroy the tower.

Weaknesses
1. X-Bow: X-bow deck with Fireball, Knight and Archers. It can be a bit tricky to handle when we are new with our Miner Pekka Poison deck as we don’t have many low elixir cards. Our defences cost 4-5 elixir while X-bow is a fast cycle, especially in double elixir. IN such a matchup, we have to be extra cautious and count the opponent’s elixir and plan out the strategy. Try to make a big push with Pekka, Mother witch and then use Poison and Miner. Divert the miner to the X-bow and include the X-bow in the poison circle when you can.

This deck is replenishing the need for fresh enjoyment in the game. If you are in mid-ladder and want to try a new deck, Miner Pekka Poison is for you. Join our Discord to discuss new decks, clash royale news and mid-ladder frustration. Stay tuned with Clash World for more deck guides, royale news, and other interesting articles. Clash On!

Log Bait Mini Pekka | Clash Royale Deck

0
Log Bait mini pekka deck

Hey there, Clashers! It’s Krux here and I’m back again after a break, with some early summer breeze and a new clash royale deck guide. There are many log bait decks in the game and they keep evolving. Today we are going to see the Log Bait Mini Pekka deck which is an awesome deck to learn in the current Season 23. Let’s get started!

Log Bait Mini Pekka Deck

Clash Royale Goblin GangClash Royale KnightClash Royale Inferno TowerClash Royale Furnace

Clash Royale The LogClash Royale Goblin BarrelClash Royale Mini P.E.K.K.AClash Royale Princesscopy deck

deck cards banner 1


  • Goblin Gang: These goblins provide high DPS together, best for defence and counter-attack when paired with another card that takes the enemy attacks. They also are bait cards.
  • Knight: This is our low elixir tank. Can be the tank for the goblin gang in defence or for goblin barrel and princess in the offence.
  • Inferno Tower: Our answer to the regular Giants and Pekka.
  • Furnace: The second building card in the Log Bait Mini Pekka deck. It is our investment card to be placed when our elixir bar gets full.
  • Log: No introduction needed. Pretty good for squishy troops. Just be cautious if you are facing a log bait.
  • Goblin Barrel: These three tiny goblins can be our win condition. To be used when the opponent is out of spells. Chip away the tower!
  • Mini Pekka: Our pancake-loving friend can be used both as defence and offence in this deck. Also, a punishment if the opponent overcommits.
  • Princess: She is a super effective opening play, chipper, baiter and pressure play to keep the opponent on toes with their spells.

deck strategy banner

The Log Bait Mini Pekka deck has an average elixir of 3.4. It has a good offence, defence and synergy score. Also, it has an average free-to-play score, so if we don’t have to worry about that too.Log Bait mini pekka deck


Opening: Start with the royal girl. We can drop Princess at the back as the first move. She is a good opener. The next step is to drop the Knight in the middle ahead of the princess. This way, the KNight will tank for the princess keeping her safe. Either the opponent would use a spell to take out the princess or just kill the knight with a troop. If they place some dragon, don’t place the goblins to die. If they use defence like a Mini Pekka or lumberjack, use Goblin Gang to take it out and keeping Princess alive.
If they make the first move and place some high elixir tank on the back, say Golem, don’t panic. Rush the other lane with Mini Pekka paired with Goblin Barrel. Don’t overcommit, two cards are enough to damage their tower and force them to defend.logbait

Mid-game: Furnace comes to our rescue in the mid-game and when the battlefield is silent. If your elixir bar gets full, place the furnace in the middle of the arena. Then place the Princess at the back. Wait for the response. The opponent’s move would determine if we should use a Knight or a Mini Pekka here. Use any of them to tank their offence and Princess and furnace chips away. If they attack with a balloon or a huge tank such as Mega Knight, Inferno Tower should be placed in the middle. We can also use our goblin gang here if they don’t have any swarm killer at hand. So, this is our defence in a few words-Tank Knight at the front, the Princess at the back and the building in the middle of the arena.
Endgame: After defending, we can attack their tower with the Goblin Barrel to get some damage. Repeat the Log Bait Mini Pekka cycle as we did at the start. If they put a tank behind their King tower, punish Mini Pekka and Barrel. If they don’t put Princess at the back and keep her alive with Knight or furnace as the tank. Also, the cycle gets faster in double elixir and try not to leak elixir if you are not used to fast cycle decks.

Weaknesseslog bait
1. Other Log Bait decks: Ours is the Log Bait Mini Pekka. There are a dozen of Log bait decks that players use. And one of them can be a tough nut to crack when we are just learning this deck as they have Princess, goblins, and tanks just like us. And we have only the Log. We don’t have any medium or big spell in our deck and the Log must be used cautiously.

A few misplacements in a match against log baits can be damaging for us. In that, we will have to defend the goblin barrel and the princess while also pushing with ours.

Log bait Mini Pekka is really fun when we win some games with it. It takes some time to get a hang of it for new players but that’s the way. That’s all for today. Stay tuned with Clash World for more deck guides, royale news, and other interesting articles. Clash On!

Another 5 Clash Royale Glitches

0

How’s it going Clashers? It’s MindgameR here with another Clash Royale Glitches article. I wrote the Top 5 Clash Royale Glitches article but there are more bugs in the game which are hella interesting. So we are here again to know another five Clash Royale glitches. Let’s go!

5. Bomb Tower Explosion Glitch

This glitch was a little bit weird. Whenever the Bomb Tower exploded after being hit by

Screenshot 20210402 180157 YouTube 1

 something that has a projectile range like Magic Archer or The Log, its explosion would increase the projectile range to some extent. This was super amazing whenever the Bomb Tower was placed near a Tower. For example, if a Bomb Tower is placed near the King Tower, and a Log comes and hits it and destroys it, though the Log doesn’t have enough range to reach the King Tower but because of the Bomb Tower explosion, it would cause some damage to the King Tower and activating it.


4. Confusion Glitch

This glitch is an OG glitch, but recently a new variation of it was seen. Earlier there was a glitch in which the Hog Rider would get confused between the tower and the Tesla as the Tesla opens up and closes down. It was in this way: When the Hog Rider would try to go towards a Princess Tower the Tesla would open up as it does whenever something comes in its range. Then, as we know troops like Hog Riders get distracted towards the closest building. So, the Hog Rider seeing the Tesla as it opened up would turn and run towards it. But, by the time the Hog turns towards the Tesla, it would have gone out of sight of Tesla and Tesla would close down again. Then the Hog would no longer be able to see it. But again by the time it turns back to the Tower, it would have been in the range of the Tesla would open up, distracting the hog once again. LOL!!! This process would keep on going until either the Tesla gets destroyed or something pulls the Hog out of this Circle of Confusion and puts him in some other place or tile.  This same thing happened with the innocent Golem but in a different manner. The Golem was in such a place from where an enemy Cannon and an enemy Princess Tower were at the exact same distance. Therefore, the Golem got confused about where to go first?!Screenshot 20210402 180234 YouTube 1

3. Game Crashing Bug

This Bug was something that caused real trouble. Whenever you dropped Lightning on the Electro Giant the game immediately crashed! This also occurred when you used the one card glitch with your one and only card placed on the second card slot from the left on the top layer. Whenever you try to play that card, just like the E-giant Glitch, the game instantly crashed.

2. Side Stacking glitch

This Glitch was introduced when the Mortar Time Challenge came into the game. But this can be done in any mode with a building in the centre of the river in the Arena. But, this glitch is only applicable for ground units. In this Glitch what you have to do, is that: To stack any normal card, we need to place that card at the very side of the Arena and then before it moves, we need to clone it so that it’s clone pushes it forward and Bravo! We have successfully stacked that troop into the side of the River.  But if we wanna stack the Skeletons of Skeleton Barrel then we have to just Fireball the Skeleton Barrel once it reaches the top of the side of the river. By using these methods we can literally stack INFINITE amount of troops into that small area!!! It was a popular meme on Reddit; at first there were only a few Skeletons seen stuck in the side of the river. But once they were cloned they formed like 100 Skeletons. 

1. One Card Glitch

The One Card had 2 ways to execute it. The first one was mainly used for 1v1s but that is too complicated to understand. The second one was used for 2v2s and it was quite simpler than the first one. In this, you had to first play a regular 2v2 match and then when the match ends, you hit play again and leave the match. Then in your deck slot, you select your deck which has less than eight cards and then your partner hits play again and you magically enter the match as well with your cheesy incomplete deck! And this glitch in my opinion is one of the juiciest bugs that ever existed in Clash Royale.

Clash Royale glitches

This is how the deck looked in-game.

So these were the most interesting Clash Royale glitches recently. Stay tuned with us for more Clash Royale articles.

Top 5 Clash Royale Glitches

0

Hey there! It’s MindgameR here. In today’s Clash Royale article, we’re going to take a look at some of the most interesting bugs and Clash Royale glitches that have occurred in Clash Royale. So without any further ado, let’s go!

5. River Crossing Glitch

This particular glitch had two ways to execute. Out of which one way was an OG way which already got fixed. We could perform this glitch by pulling any unit like an enemy Pekka with an Ice Golem to the opposite lane and then when the Pekka starts to walk towards the Ice Golem and comes near the river pushing it with The Log would result in the Pekka getting pushed back to the other side of the arena. The second and the latest way to do this is using any troop that you want to directly cross the river without jumping or floating over it, a little tanky card like an Ice Golem and Clone Spell. You need to place the main card in the front of the Ice Golem at the edge of the river and then immediately clone both of them so that the two clones push the main card in the front and force it to break the rule.

4. Backdooring Glitch

In this glitch, what we do is that we simply fill up our side of the arena such that there is no place for another card to be placed there and hence, that card is directly placed at the top left corner of the enemy’s side of the arena.Screenshot 20210331 162651 YouTube 1 It is especially easy to do with the Royal Recruits as they need a lot of tiles in the arena to be able to get deployed. This was also performed with other cards like X-Bow etc. This glitch was broken in the touchdown mode, as there when the Recruits spawn on the top left of the arena, it was a direct win. Another variation of this glitch was in a way where all 6 men will spawn in one side of your arena and help you create a strong push.

3. Clone Spell Bugs

There were 2 different Clash royale glitches with the Clone Spell a few months back. 

Screenshot 20210331 162802 YouTube 1

The first one was with the Skeleton barrel. It was executed when the Skeleton barrel was cloned and it wouldn’t pop unless it got damaged. The second was a total game-changing glitch. It was performed with the help of the Mother Witch. Even when the Mother Witch would attack the cloned units, it would still spawn the cursed piggies. After this, it was so easy to create an army of cursed piggies as the cloned units only take one hit. 

2. Back Stacking Glitch

This glitch originally came out in 2019. This was only applicable in the 2v2 mode. In this glitch, we basically need to place a spawner building at the very back and side of the Double King Tower and place a Golem at the very back of it. 

Screenshot 20210331 170522 YouTube 1

This would result in the Golem being stuck there and we could stack as many units behind the Golem as much as we want. The Golem would only move forward when that Building gets destroyed. This was very useful for the Golem Beatdown decks as it helped it to create very big and strong pushes by stacking everything behind the Double King Tower. Even if the enemy tried to directly kill units there itself, he/she would end up activating the King Towers.

  1. Giant Tombstone Bug

This Clash Royale glitch came out as an April Fool’s prank back in 2016 and was only given to some Youtubers. 

Clash royale glitches

What happened in this was that the 3-elixir Tombstone turned into a Giant Tombstone and it spawned the same number of Giant Skeletons as it would have spawned skeletons normally! Just for the cost of 3 elixir one would get so many 6-elixir Giant Skeletons. The arena was filled with explosions. Boom!


That’s all for today. I hope you enjoyed reading about the top Clash royale glitches in the game. Stay tuned for more!

Top 10 Mechanics in Clash Royale – Season 21

0

What’s going on everyone, it’s VJ here. Welcome back to another Clash Royale Article. In today’s article, we’re going to have a look at the Top 10 Game Mechanics of Clash Royale in Season 20. So let’s get going…

What are Game Mechanics?

Game Mechanics basically are some specific rules in the game, that whenever tried will give the same particular result. These are also termed Interactions. Game Mechanics also mean the tactical and non-magical/non-supernatural abilities in the Game. These abilities are mainly related to science.

10. Multi-Targeting Mechanic

This Mechanic comes in handy mainly during offensive times. In Clash Royale only 1 single card has this ability, and that is the Electro Wizard. Due to this ability of the E-Wiz, when used in the offence can target a unit while at the same time also targeting a Tower and causing a good amount of damage. Whereas in defence this Mechanic of him might be proved the other way around as in defence if he targets 2 different units his damage will split n both of them, therefore, resulting in less damage to each unit and also making it easier for the opponent to distract him.

9. Push Back Mechanic

The Push Back Mechanic of Clash Royale has 2 different types. The first one is where the unit after hitting or shooting at something pushes itself back by a few tiles. We can find this mechanic with the Firecracker and the Sparky of the Clash Royale Arena. This Mechanic is very useful as it makes it difficult for the opponent to counter the cards having this ability because when someone places a unit to counter them it might not target them or we might misplace the unit if at that time they are attacking something; they will push themselves back after shooting.

The second one is where the enemy units are pushed back due to a Spell placed by us. This mechanic is super amazing and useful. The Log and Fireball are the only 2 Spells and Cards in the whole Game that have this type of mechanic. That’s why these 2 spells are quite popular as they cause a good amount of damage to the enemy units and also push them back while at the same time forcing them to reset their target.

8. Charge Mechanic

The Charge Mechanic can be used in offence as well as defence. Prince, Dark Prince, Battle Ram and Ram Rider are the cards that can use this. When attacking these cards can be either played at the back of a tanky unit or can be directly played at the bridge or at the back in the Bridge Spam style. When its time for defence, always try to play these cards a little further so that they have time to walk 3.5 tiles before they start hitting something in order to trigger their dangerous ability. But be careful because even small units like Zap, The Log, Ice Spirit etc. can reset their charge.

7. Jump and Dash Mechanic

These 2 mechanics – Jump and Dash though might be a little different, but have the same basic concept. Only the Bandit has the Dash Mechanic and only Mega Knight has the Jump Mechanic so far in the game.

Firstly talking about Mega knight’s jump, his jump gets triggered at 2 certain situations. Number one, when you place it. Yes, you heard right no matter whenever and wherever we place MK, it spawns with a gigantic jump. And number two, when it sees a ground target within a certain range, it jumps on it. And also to mention, that, MK can be damaged and killed while in mid-jump.mega knight 3

Secondly, when talking about Bandit’s Dash, it’s quite different from MK’s Jump. Bandit only dashes when it sees a target within a particular range. And unlike MK, it cannot be damaged, killed, pushed back etc. while in mid – dash. This is the most unique thing about Bandit.

6. After Death Mechanic
This is one of the few mechanics that a lot of cards in the game have. This mechanic basically means that when a unit dies it leaves something behind such that, it gives a favourable advantage to the Player that played it. Here’s a complete list of all the cards that can trigger this and their abilities:

1. Lumberjack – Rage Spell
2. Giant Skeleton – Death Bomb
3. Bomb Tower – Death Bomb
4. Balloon – Death Bomb
5. Lava Hound – Lava Pups
6. Night Witch – Bats
7. Barbarian Hut – Barbarians
8. Goblin Hut – Spear Goblins
9. Goblin Giant – Spear Goblins
10. Tombstone – Skeletons
11. Canon Cart – Transforms into a smaller Canon
12. Golem – Death damage & Golemites
13. Elixir Golem – Elixir Golemites – Elixir Blobs
14. Ice Golem – Death damage & Slows down units
15. Goblin Cage – Goblin Brawler
16. Battle Ram – Barbarians

We will be covering the rest of the game mechanics in the second part of the article. Till then, enjoy the game and the new season!

Bad Matchups: Splashyard

0

What’s going on everyone, its VJ here. Welcome to another article (Article 3) of the Bad Matchups Series. Today we are going to take a look at the very orthodox archetype of Clash Royale, and that is Graveyard, or to be more particular it is Splashyard. Since there have been changes in the meta, balance changes and new cards, this specific deck, Spalshyard, has been changed and improved all way since 2017. We’re going to analyze the latest working in – meta version of it.

Deck:

Clash Royale GraveyardClash Royale Baby DragonClash Royale Ice WizardClash Royale Tornado

Clash Royale KnightClash Royale Goblin CageClash Royale PoisonClash Royale Barbarian Barrel

Deck Overview:

Clash Royale GraveyardGraveyard:

The win condition of this deck as you’ll know is Graveyard i.e. a total Game Changing Card. It can be played with anything which is a bit tanky, but at the right moment.

Clash Royale Baby DragonBaby Dragon:

The one and only air unit in this deck is baby dragon. It deals a good amount of splash damage and is quite tanky.

Clash Royale Ice WizardIce Wizard:

The Ice Wizard does what it name means i.e. Magic. He magically slows down the units by 35% due to his freezing powers. Just like Wizards and Muskets, the Ice Wiz doesn’t die to fireball alone. Therefore, it helps a lot in defense.

Clash Royale TornadoTornado:

When talking about defense, the Ice Wiz – Nado synergy can’t be forgotten. Tornado is a very useful card specially after its pull strength buff. It is a single 3 elixir counter for cards like Goblin Barrel, Hog Rider and even Golem (If Nado is paired with The Log). King Tower Activation is super easy with Nado in your deck.

Clash Royale KnightKnight:

The most tankiest card of this deck is the Knight. It is a 3 elixir ground unit that can pretty much counter every ground unit. It will Ultra Synergize with GY due to his tankyness and high DPS.

Clash Royale Goblin CageGoblin Cage:

Goblin Cage is the defensive building in this deck. Before it, Bomb Tower was more popular in this deck. The only reason why Cage is better thnBomb Tower is because of the Body Builder Goblin Brawler that it spawns upon getting destroyed. Goblin Brawler is quite useful in defense and offense as even he is tanky enough with high DPS.

Clash Royale PoisonPoison:

When playing with GY, there will always be the need of a spell like Poison in it, in order to take out all the units (especially swarm) defending the GY.

Clash Royale Barbarian BarrelBarbarian Barrel:

In basically every deck there is a need of a small spell. Here, that role is played by the Barb Barrel. It is just similar as The Log except that its range is a little shorter than Log and even its width is a bit smaller than it. But on the bright side it spawns a nasty looking Barbarian when it travels as much as its range is.

Gameplay and Strategies:

Graveyard should never be placed on the central tiles of the princess tower. It should always be placed 2 tiles towards the non – King Tower side. And when playing on the King Tower, it should be placed on one of the 2 central tiles of King Tower.

With this Splashyard deck, our main strategic plan to to win is:

  • Not being too aggressive in the starting.
  • Playing passive and defensive and trying to build a big push to play GY.
  • You can rush with GY if you see something heavy like a Golem or Lava Hound played at the back and if you are in a good position in terms of elixir.
  • Always trying to counter attack after defending things sent by the opponent.
  • Being too aggressive in 2x and 3x elixir time and creating a streak of continous GY pushes.
  • GY can also be used at defense when there are just a few seconds remaining and you are up in crowns/damage and there is a big push coming your way. You can directly place the Graveyard upon it or to be safe a little before it so that nothing connects to you tower because sometimes if there are a lot of units, the behind units might push the front ones and if they reach close enough to your tower some units might start targeting your tower.
  • So in this way all the enemy troops and buildings will be distracted to the GY for complete 8 seconds, and the advantage here is that they cannot use any spell on it to completely kill it and stop it from distracting. Even if they use poison (the deadliest hard counter to GY), still the skeletons would spawn and keep distracting things as even Poison takes 1 sec to kill skeles.
  • A King activation is always healthy against GY.

Bad Matchups:

Clash Royale Goblin BarrelLog Bait:

  • Log Bait in my opinion is the most hard counter to Splashyard. And these days, except the classic Log Bait, the Log Bait archetype has developed into a lot of new variations like Mega Knight Log Bait, Prince Log Bait, Mortar Bait etc.
  • Never be too aggressive else they can punish you hard.
  • Try to keep the Cage on the map most of the time to avoid chip damage from Princesses and Dart Gobs.
  • Usually a King Activation is unfavorable for GY, but in this case sometimes it is ok. Because we don’t do that, they will keep placing Princesses and Dart Gobs at the back of the King to defend the GY.

Clash Royale X-BowX-Bow:

  • Focus more on defending X-Bows in single.
  • Always try to keep the Poison ready whenever you attack with GY.

Clash Royale MinerClash Royale Wall BreakersMiner WB Cycle:

  • Play passively in single.
  • Be ready to defend Dual Lane pushes.
  • Never hesitate to switch lanes.
  • More than defending the Miner, focus on defending other cards like Spear Gobs, Bats, WB or Knight as Miner alone won’t do much damage compared to when paired with these units.

THANKS FOR READING!

Giant Mini Pekka Deck

0

Hello clashers, we are here again with a new deck ‘Giant Mini Pekka’ deck. It is kind of a bridge spam deck where you have to play very aggressively and put pressure on the opponent till they break. So, without further ado, let’s get started!

Giant Mini Pekka Deck

Clash Royale GiantClash Royale Mini P.E.K.K.AClash Royale Magical ArcherClash Royale Miner

Clash Royale The LogClash Royale ZapClash Royale BatsClash Royale Skeleton

copy deck

Deck Cards

  • Giant: Heavy-hitting bulky tank card, also, the main win condition, play the supporting
    troops this way that your giant can connect to their princess tower.
  • Mini Pekka: For this Giant Mini Pekka deck, this card is very important and is to be properly used, because it is the only tank killer/ heavy hitter which can be used for defence.
  • Magic Archer: Brings air defence to this deck by his excellent range, according to me he has the highest skill-cap in the game, it's all about who uses his geometry better.
  • Miner: A tank for cards like bats and skeletons, used as a counterattack after defending a push, pairing bats with the miner makes it hard for the opponent to react as they have low elixir after attacking and thus you get positive elixir trades.
  • Log: To finish the skeleton army, goblin gang which obstructs the path of your giant also
    used to pushback heavy-hitting units like Pekka for that extra giant hit.
  • Zap: The reason this deck has log and Zap is because of Mini Pekka, Giant and Miner, all the swarms that give positive elixir trades to your opponent are to be destroyed and zap does that perfectly, Minions, Bats can be destroyed by Zap hence forcing your opponent to spend more elixir to defend.
  • Bats: High DPS 2-elixir card, versatile but, to bait we have skeletons which are deadly on defence also, bats can be used at the offence as well when paired with a miner/giant.
  • Skeletons: Mainly work as a distracting card, to make positive elixir trades on defence.

Deck Strategy

giant mini pekka

Opening: Start should be aggressive, pair Miner and Bats, or just Miner(if bats aren’t in hand). Do not push with the Giant straight without knowing their counters and cards. After you play Miner to know their cards, analyze what counters they have to your Giant and other cards and try to bait them out.
If they make the first move by playing something high cost, rush the other lane with Giant or Mini Pekka, Bats, anything you have in hand, that is the best way to make their cards unsupported and thus making it easy to counter them getting positive elixir trades. Pair your Giant with Bats, Mini Pekka and even Skeletons as your opponent cannot ignore the push and has to respond to it. Screenshot 2021 01 18 15 36 09 144 com.supercell.clashroyale
Double elixir: If After 2 minutes of the game you are not able to make any progress, the double elixir is the time, DO NOT let your opponent accumulate elixir, don’t let their bar go up to 10, always pressurize them by playing troops at the bridge, constantly rush as, if you let them build elixir up, it can easily destroy your tower because of fewer defensive capabilities in the Giant Mini Pekka deck such as Mini Pekka which can easily be distracted, Magic Archer who dies by Fireball/Poison, Bats, Skeletons, die by Zap, that is why you need to constantly push.
Endgame: After you have made a breakthrough, DO NOT ease up, if they are trying to attack your tower, attack their king tower with Giant Mini Pekka as they cannot be ignored, attacking cards in these decks, cannot be ignored while the defence is versatile, also, during defence, you need to bait their spells out to defend against their troops by your Bats, Magic Archer, Mini Pekka.

Weaknesses
1) Beatdown decks – Golem, Goblin giant, Lava Hound beatdown decks demand building up the elixir and if you let them, you are doomed XD, so don’t let that happen by rushing them the other lane which they cannot ignore and if they do, they lose their tower, now you attack their king tower for an easy 3 crown.
2) Decks having hard-hitting troops like Pekka, Mini Pekka, Prince, for this, wait till your opponent makes a mistake i.e if they play their heavy-hitting troop, rush the other lane to get damage, but, if they are wise and they play their troop only when you play your Giant, then you can always use geometry and refrain from using your Giant, instead use Miner/Bats after you bait their spell out. You have to change your mindset while you play according to your matchup, search, and analyze what your opponent cannot counter or has difficulty to counter, play that constantly.

This Giant Mini Pekka deck is pretty fun and easy to play, hoped you liked the guide and it proved useful to you. Until next time!