Hey guys! Its Blaze back with another guide for you all! Today, I will be talking about a card everywhere in the current meta: The Battle Ram!!
When the Battle Ram first came out it was pretty under-rated and was considered an off-meta card. But a few players started trying out and slowly and slowly the popularity of Battle Ram started to increase until it became one of the strongest meta card right now.
The Rise to Prominence:
As players began to experiment with the Battle Ram, its true potential started to shine through. Its ability to offer value in a variety of deck archetypes made it a versatile choice for both offensive pushes and defensive maneuvers. With a relatively low elixir cost, it became a staple in many competitive decks, gradually rising through the ranks to become a top-tier card.
One of the key factors in the Battle Ram’s rise was its unpredictability. Opponents never knew whether to expect a sudden offensive onslaught or a defensive counterattack, keeping them on their toes and forcing them to adapt their strategies on the fly.
Mastering the Battle Ram:
To harness the full potential of the Battle Ram, players must understand its mechanics and how to leverage them to their advantage. Proper placement and timing are essential when deploying the Battle Ram, as a mistimed charge can leave it vulnerable to counterattacks.
Additionally, synergizing the Battle Ram with other cards in your deck can amplify its effectiveness. Whether pairing it with support troops to clear the path or using spells to deal with swarms, building a cohesive strategy around the Battle Ram is key to success.
Countering the Charge:
While the Battle Ram is a formidable force on the battlefield, it is by no means unstoppable. Players must be prepared to counter it effectively to prevent their opponents from gaining the upper hand. Cards like the Skeleton Army, Mini P.E.K.K.A, or Inferno Tower can quickly neutralize the Battle Ram’s charge, turning the tide of battle in your favor.
Maintaining pressure on your opponent’s side of the arena can also limit their ability to build up a significant push with the Battle Ram. By forcing them to allocate resources defensively, you can disrupt their game plan and seize control of the match.

Battle Ram – The In-depth Guide
Overview of Battle Ram:
- Battle Ram is a Rare Card costing 4 Elixir and is unlocked from Arena 6 (Builder’s Workshop).
- It is a building-targeting troop.
- The Battle Ram charges to the nearest building and after it is destroyed, it will spawn two Barbarians. The charge mechanic is similar to that of the Prince and Dark Prince.
| Cost | Speed | Deploy Time | Range | Target | Transport |
| 4 | Medium | 1 sec | Melee | Buildings | Ground |
| Level | Hitpoints | Damage | Charge Damage | Barbarian level |
| 1 | 430 | 140 | 280 | 3 |
| 2 | 473 | 154 | 308 | 4 |
| 3 | 520 | 169 | 338 | 5 |
| 4 | 571 | 186 | 372 | 6 |
| 5 | 627 | 204 | 408 | 7 |
| 6 | 688 | 224 | 448 | 8 |
| 7 | 756 | 246 | 492 | 9 |
| 8 | 829 | 270 | 540 | 10 |
| 9 | 911 | 296 | 592 | 11 |
| 10 | 1,001 | 326 | 652 | 12 |
| 11 | 1,100 | 358 | 716 | 13 |
Overview of Battle Ram:
The Battle Ram is a Rare Card with a moderate elixir cost of 4, making it accessible for a variety of deck compositions. Unlocked from Arena 6 (Builder’s Workshop), it becomes available to players relatively early in their Clash Royale journey. This building-targeting troop brings a distinctive twist to the battlefield dynamics with its unique charge mechanic.
Mechanics and Functionality:
The Battle Ram’s primary function revolves around its charging ability, akin to the Prince and Dark Prince. Upon deployment, the Battle Ram locks onto the nearest building and charges towards it with formidable speed. Upon reaching its target or being destroyed, the Battle Ram unleashes its payload: two Barbarians poised for battle. This dual-purpose nature of the Battle Ram adds layers of strategic depth to its usage, allowing players to leverage it both defensively and offensively.
Strengths:
One of the Battle Ram’s notable strengths lies in its ability to apply immediate pressure to the opponent’s defenses. Its rapid charge can catch opponents off guard, forcing them to react quickly to prevent significant damage to their structures. Furthermore, the Barbarians spawned upon the Battle Ram’s destruction can serve as a secondary threat, potentially overwhelming the opponent’s defenses if left unchecked.
Additionally, the Battle Ram excels in synergy with various support cards, such as spells like Zap or Log to clear the path for its charge or splash damage troops to cover its weaknesses against swarms. Its versatility makes it a valuable asset in a wide range of deck archetypes, from beatdown to cycle decks.
Weaknesses:
Despite its strengths, the Battle Ram is not without its vulnerabilities. Its reliance on targeting buildings makes it susceptible to distractions, such as low-cost troops or buildings placed strategically to redirect its charge. Swarm units, such as Skeleton Army or Goblin Gang, can quickly dismantle the Battle Ram before it reaches its intended target, nullifying its impact on the battlefield.
Moreover, opponents familiar with the Battle Ram’s mechanics may anticipate its charge and prepare accordingly, mitigating its effectiveness through timely deployment of defensive measures. As such, maintaining unpredictability in deployment and pairing the Battle Ram with complementary cards becomes crucial to maximizing its utility.
Optimal Strategies:
To harness the full potential of the Battle Ram, players must adopt strategic approaches tailored to their deck composition and playstyle. Incorporating cards that synergize well with the Battle Ram, such as support troops or spells, can enhance its effectiveness on the battlefield.
Furthermore, maintaining flexibility in deployment and timing is essential to catch opponents off guard and capitalize on openings in their defenses. Utilizing the element of surprise by deploying the Battle Ram in unexpected lanes or pairing it with other threatening units can pressure opponents into making suboptimal plays, tipping the scales in your favor.
Tips for using Battle Ram:
The Ram acts as a shield for the Barbarians. This makes it a great card on defense in order to absorb damage and buy some time. After the Ram is destroyed, the Barbarians will damage the opposing troops.
It is a great kiting card. Placing it in the centre of the arena but a bit towards the other lane, the opposing troops will target and follow the Battle Ram. Then you can use other ranged troops to target the opposing card while the Battle Ram escapes due to its charge mechanic. Sometimes, it can also reach the opponents Tower.
Battle Ram is able to resist the pull-effect of Tornado while it is charging. So, rather than been pulled it is kinda stuck in the place, neither moving forward nor backward.
When placed behind a tank, Battle Ram is deadly as the player will need to counter the tank first and then the Battle Ram. Battle Ram due to being fast while charging can go straight to the Tower or destroy any buildings that is distracting the tank. This combo is vulnerable to splash.
The Battle Ram stands out as a versatile and dynamic option that can turn the tide of battle when utilized effectively. Here are some tips to harness the full potential of the Battle Ram in your Clash Royale strategy:
1. Defensive Shield, Offensive Sword: The Battle Ram’s unique mechanic of transforming into Barbarians upon destruction makes it a formidable defensive option. Placing it strategically can absorb incoming damage from enemy troops, providing valuable time for your own defenses to retaliate. Once destroyed, the Barbarians emerge to counter-attack, turning the tables on your opponent’s offensive push.
2. Mastering Kiting: The Battle Ram excels as a kiting card due to its charge mechanic. Placing it slightly off-center towards the opposite lane lures enemy troops towards it, allowing your ranged units to target them while the Battle Ram makes its escape. This tactic not only mitigates damage but can also result in unexpected tower damage if the Battle Ram reaches its destination.
3. Resistance Against Tornado: Unlike many other cards susceptible to the pull effect of Tornado, the Battle Ram stands its ground while charging. This resistance allows it to maintain its forward momentum, denying opponents the opportunity to manipulate its path. Understanding this interaction can give you a tactical advantage in countering Tornado-heavy decks.
4. Deadly Duo with Tanks: Pairing the Battle Ram with a tank unit creates a deadly combination that demands immediate attention from your opponent. With the tank absorbing damage and drawing focus, the Battle Ram charges ahead, either targeting the enemy tower directly or clearing distractions like defensive buildings. However, be wary of splash damage units that can quickly dismantle this combo if left unchecked.
5. Adaptability is Key: Flexibility is the hallmark of a skilled Clash Royale player, and the Battle Ram embodies this trait perfectly. Whether used defensively to thwart enemy advances or offensively to spearhead your own assault, its versatility makes it a valuable addition to any deck. Experiment with different placements and synergies to discover the optimal strategy for your playstyle.
How about Weaknesses?
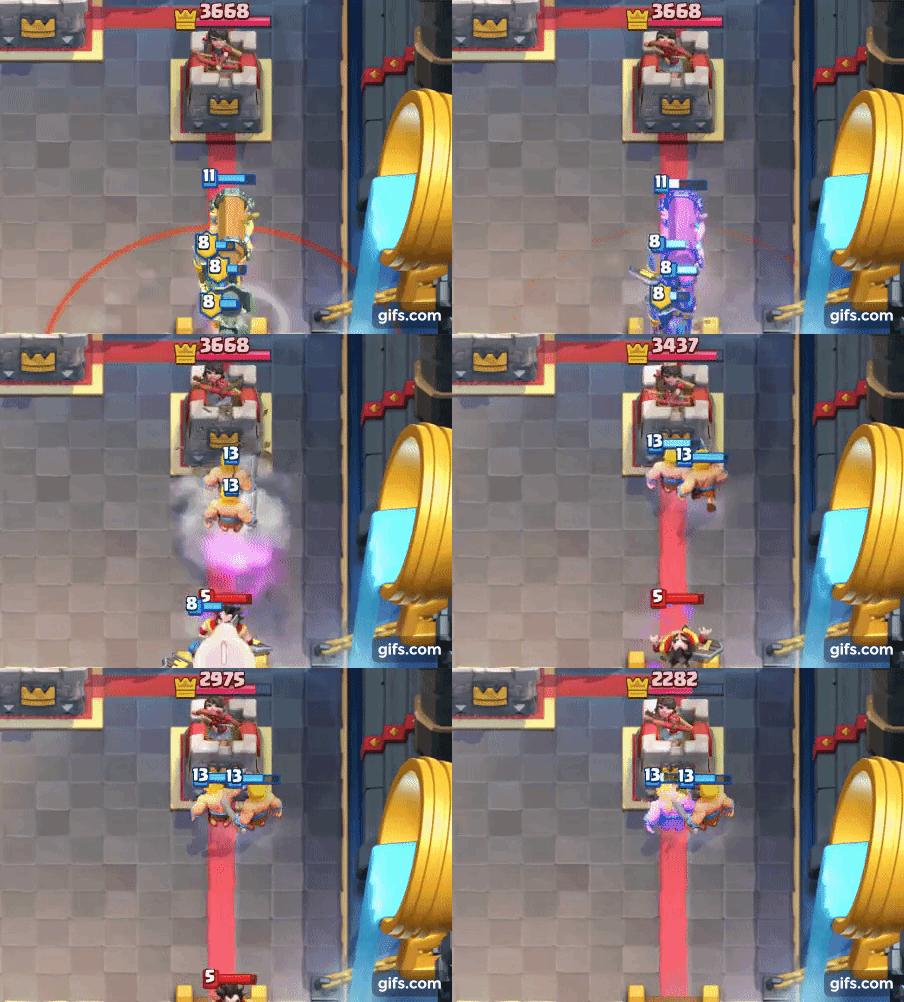
Battle Ram’s real strength is its charge-mechanic. While not charging its really weak and not much of a threat and can be countered very easily. This makes it weak against which can reset its charge.
If you have never played with the Battle Ram you may not know this, but against certain cards, the damage that kills the Ram also damages the Barbarians. This happens with cards like The Log, Bowler and Executioner as they deal linear damage. So the projectile after killing the Ram hits the barbarian which spawn behind.
Playing it like a lone win-condition is a bad idea as it only targets-buildings and even with strong support, after hitting a building the Barbarians aren’t good as a win-conditions. SO, its better to have another way to deal damage.
At first glance, the Battle Ram appears to be a force to be reckoned with, charging towards enemy structures with relentless determination. Yet, beneath this intimidating facade lies a glaring weakness—its susceptibility to reset mechanics. Without its charge, the Battle Ram loses much of its threat potential, becoming a mere shadow of its former self. Opponents can easily counter it with cards like Zap or Electro Wizard, nullifying its charge and rendering it ineffective.
However, the Battle Ram’s weaknesses extend beyond simple charge resets. Astute players may have observed a peculiar interaction with certain cards, such as The Log, Bowler, and Executioner. These cards, known for their linear damage output, possess the ability to deal damage not only to the Battle Ram but also to the Barbarians it spawns upon destruction. This nuanced interaction can catch unwary players off guard, leaving them vulnerable to unexpected counterattacks.
Furthermore, relying solely on the Battle Ram as a win condition is a risky strategy fraught with pitfalls. While it excels at targeting buildings and delivering swift blows, its accompanying Barbarians lack the resilience and longevity needed to sustain a prolonged assault. Even with robust support, the Barbarians are ill-suited to carry the weight of a win condition, necessitating alternative methods of dealing damage and securing victory.
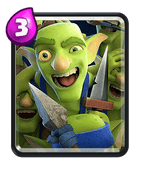
Perhaps the Battle Ram’s most glaring weakness lies in its vulnerability to swarms. Faced with a horde of agile troops, the Battle Ram and its Barbarian companions quickly find themselves overwhelmed and outmatched. Swarm cards such as Skeleton Army or Goblin Gang can swiftly dismantle the Battle Ram’s advance, leaving little room for retaliation.
It is extremely weak against swarms as they can kill the Ram and Barbarians very quickly.
Strong Battle Ram Synergies/Combos:
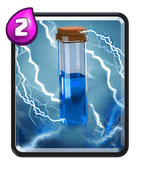
- Battle Ram + Poison: This combo is a strong because Poison clears out swarms very quickly clearing the way for the Ram to hit the Tower. This deadly combination capitalizes on the synergistic relationship between the Battle Ram and Poison spell. By casting Poison on the opponent’s defensive swarms, such as Skeleton Army or Goblin Gang, you swiftly clear the path for the Battle Ram to charge straight towards the enemy tower, dealing significant damage in the process.
- Battle Ram + P.E.K.K.A.: This combo is popular right now because the P.E.K.K.A. acts as a tank and a threat card. People use a lot of Elixir to defend her because even one swing can be devastating. This results in less Elixir to counter the Battle Ram which deals lot of damage. Opponents often commit substantial elixir to defend against the formidable P.E.K.K.A., leaving them vulnerable to the Battle Ram’s devastating charge. Even a single swing from the Battle Ram can inflict considerable damage, making this combo a force to be reckoned with.
- Battle Ram + Three Musketeers: This is the most popular combo in challenges right now. Battle Ram act as a tank for the 3M which can clear any troop that is used to counter the Ram. A staple in challenge matches, this synergy pairs the Battle Ram with the Three Musketeers to create a formidable offensive threat. Acting as a tank, the Battle Ram absorbs enemy fire while the Three Musketeers unleash their devastating firepower, obliterating any troop used to counter the Ram and paving the way for a successful assault on the enemy tower.
- Battle Ram + Knight: This is a basic combo. Not much to say about it, Knight just acts as a tank for the Battle Ram, but you will need support and spells for better damage. Simple yet effective, the Knight provides a sturdy tank for the Battle Ram to charge behind. While this combo may lack the flashiness of other synergies, its reliability makes it a popular choice for players seeking a solid offensive strategy. However, supplementing this combo with support troops and spells can enhance its overall effectiveness.
- Battle Ram + Ice Golem: Ice Golem is the cheapest tank and it works great because its Frost Nova can kill Skeletons and Bats and can damage Goblins(Goblin Gang) and Minions well enough that they die to Zap. The Ice Golem’s Frost Nova ability synergizes excellently with the Battle Ram, offering both tanking capabilities and crowd control. By slowing down enemy troops and damaging swarms, the Ice Golem creates space for the Battle Ram to reach its target, while also providing a cost-effective solution to swarm-based defenses.
- Battle Ram + Valkyrie: A rather pumped-up Ice Golem combo, the Valkyrie can quickly clear any ground swarms as well as tank for the Ram. Only weakness is air troops so be sure to use spells and support troops. An upgraded version of the Ice Golem combo, the Valkyrie excels at clearing ground swarms and acting as a robust tank for the Battle Ram. While vulnerable to air troops, strategic spell usage and support troops can mitigate this weakness, allowing the combo to shine in various matchups.
- Battle Ram + Lumberjack: This combo utilizes the Rage effect of Lumberjack. A raged charging Battle Ram is damn fast and quickly reach the Tower. Just be sure to take care of swarms. Harnessing the power of rage, the Lumberjack accelerates the Battle Ram’s charge to unparalleled speeds, catching opponents off guard and quickly reaching their towers. However, players must remain vigilant against swarm-based defenses, as the lack of crowd control inherent in this combo can leave it vulnerable to counterattacks.
- Battle Ram + Golem: Golem is the costliest and beefiest tank in the game. Making it great damage absorber for the Battle Ram. After the Golem dies, its death damage clears out all swarms and you still have the Golemites. For those favoring a more heavyweight approach, the Golem serves as an exceptional damage sponge for the Battle Ram, soaking up enemy fire and clearing swarms upon death. The resulting Golemites provide additional pressure, forcing opponents to divert resources away from defending against the Battle Ram’s relentless assault.
- Battle Ram + Lava Hound: Lava Hound is another strong tank in the game. It is a great damage absorber and after the hound dies, the Lava pups will support the Ram which will now act as a tank. This combo was popular few weeks ago but now not much seen as people prefer Balloon with the hound and other Ram combos. While less prevalent in the current meta, the combination of Battle Ram and Lava Hound offers a potent mix of tanking and air support. As the Lava Hound distracts enemy defenses, the Battle Ram charges towards the tower, supported by the ensuing Lava Pups. Though less common nowadays, this combo can catch opponents off guard with its unexpected synergy.
- Battle Ram + Miner: Another great combo, this was popular before the Bandit buff. The two win-condition combo and their synergy with Poison makes it strong. Miner acts as a tank for the Ram and the Barbarians. Previously popular before the Bandit’s buff, the Battle Ram and Miner combo remains a force to be reckoned with. With the Miner acting as a secondary tank for both the Battle Ram and the Barbarians it spawns, this synergy can apply relentless pressure on opponents, especially when paired with the disruptive effects of Poison.
- Battle Ram + Bandit + Night Witch: I like to call this ‘The Phantom’. This is the strongest and the deadliest combo with the Battle Ram at the moment. You will see this in a variety of decks in challenges and tournaments. The combined force of the 3 cards is devastating and with right support will be insane. Combining the charging power of the Battle Ram with the evasive strikes of the Bandit and the relentless swarm generation of the Night Witch, this combo is a force to be reckoned with. With proper support, it can overwhelm opponents and secure decisive victories in challenges and tournaments alike.
Counters to Battle Ram:
Note: Battle Ram can be countered by many cards but I am gonna state only the ones which give positive, neutral and -1 Elixir negative trade without receiving Tower damage. Among the multitude of cards that players encounter, the Battle Ram stands out as a formidable force on the battlefield. Its ability to charge towards enemy towers with incredible speed makes it a challenging card to deal with. However, with strategic card selection and precise timing, players can effectively neutralize the threat posed by the Battle Ram while maintaining a positive elixir trade. Here, we delve into some of the most effective counters to the Battle Ram that not only prevent tower damage but also offer favorable elixir exchanges.
Buildings: Battle Ram targets buildings only. So, technically any building can counter Battle Ram. One of the simplest and most effective ways to counter the Battle Ram is by deploying a building. Since the Battle Ram targets buildings exclusively, any structure placed strategically can divert its attention away from your towers. Whether it’s the trusty Cannon, the versatile Tesla, or the towering Inferno Tower, these buildings not only soak up damage but also provide an opportunity for counterplay.
Swarms (Skeleton Army, Minion Horde, Goblin Gang, Barbarians): These swarms have a high DPS so they quickly kill the Ram as well as the Barbarians. Swarms of troops, including the Skeleton Army, Minion Horde, Goblin Gang, and Barbarians, present a formidable obstacle for the Battle Ram. Their high damage per second (DPS) allows them to quickly dispatch both the Ram and the Barbarians it spawns upon destruction. By overwhelming the Battle Ram with sheer numbers, these swarm troops efficiently mitigate the threat posed by its charge.
Mini P.E.K.K.A.: Due to her (or his?) high damage she can one shot the Ram and the Barbarians along with the help of Crown Towers. Even without the help of Crown Tower, she is a hard counter to the Battle Ram. The Mini P.E.K.K.A. emerges as a potent counter to the Battle Ram due to its high damage output. With the ability to one-shot both the Ram and the Barbarians, the Mini P.E.K.K.A. swiftly dismantles this formidable offensive unit. Even without the support of Crown Towers, the Mini P.E.K.K.A. stands as a reliable hard counter to the Battle Ram, offering players a solid defensive option.
Night Witch: Night Witch takes two hits to kill the Ram and each barbarian. However, due to Crown Tower and the Bats she spawns, her work is easier. The Night Witch, with her ability to summon Bats upon attacking, presents a unique challenge for the Battle Ram. While it takes two hits for her to eliminate both the Ram and the ensuing Barbarians, the Bats she spawns provide additional support in dealing with these threats. With the assistance of Crown Towers, the Night Witch effectively manages the Battle Ram, showcasing her prowess as a defensive powerhouse.
Electro Wizard: This guy deals good damage and constantly stuns the Ram, resetting its charge again and again. And even after the Ram is destroyed, he can take care of the Barbarians too. He is the worst night mare of the Battle Ram. The Electro Wizard emerges as a nightmare for the Battle Ram, thanks to his ability to deal substantial damage and continuously stun his targets. By resetting the Ram’s charge with each attack, the Electro Wizard disrupts its momentum, allowing for ample time to eliminate both the Ram and the Barbarians it spawns. His versatile skill set makes him an invaluable asset in countering the Battle Ram and maintaining control over the battlefield.
Charge Reset + Any Troop: As I said above, without its charge, the Battle Ram is very weak. So if you reset its charge using Zap, Log, Ice Spirit or even Tornado, any troop will take care of it. A well-timed spell such as Zap, Log, Ice Spirit, or Tornado can reset the Battle Ram’s charge, rendering it vulnerable to any subsequent troop deployments. Without its charge, the Battle Ram becomes significantly weaker, allowing for easier elimination by ground or air troops. This combination of charge reset and troop deployment offers players a versatile and cost-effective solution to neutralize the Battle Ram threat.

Battle Ram in Different Archetypes:
Read more about deck archetypes at here.
Beatdown: A Battle Ram Beatdown Deck is generally constructed with another win-condition with high HP. Best examples are Golem and Lava Hound. The main tactic of any beatdown Deck is generally gaining Elixir advantage and then placing down all troops to build an seemingly unstoppable push. Battle Ram works in this Deck because it destroys any building trying to distract and kill the tank and also acts as a secondary tank for the support. After the Ram dies, the Barbarians still deal lot of damage behind the main tank of the Deck.
Control: This is the archetype in which Battle Ram is seen the most. Battle Ram is very versatile in this archetype. The Battle Ram control decks range from Solo Battle Ram Control, Battle Ram Miner, Battle Ram 3M, Battle Ram P.E.K.K.A. and Battle Ram Phantom decks. Battle Ram can be a devastating card if it makes contact with the Tower. Since Control decks manipulate the opponent and restrict its play, Battle Ram is one of the best cards to use in this archetype.
Siege: Battle Ram is really not a card to be used in a Siege Deck. Even if you try to build a hybrid-siege Deck with the Battle Ram, the Battle Ram won’t be a good choice. In contrast to its effectiveness in Beatdown and Control decks, the Battle Ram struggles to find relevance in Siege decks. The nature of Siege gameplay, which revolves around deploying long-range attackers to chip away at the opponent’s tower from a distance, does not synergize well with the Battle Ram’s close-quarters combat style. Attempting to incorporate the Battle Ram into a Siege deck is unlikely to yield favorable results and is generally discouraged.
Spell Bait: First of all, let me just say that I consider to be a different archetype while some of you don’t. However, the reason I consider it to be different is that it has a different playstyle than the Rock-Paper-Scissor (Beatdown-Control-Siege) archetypes. And even though it is currently played as a Control-type Deck, there are many other ways to play this archetype which are not seen much like Giant Sparky Spell Bait and Mortar Spell Bait, though they exist. Now, coming to Battle Ram, Battle Ram is a good card to use here because it is a good tank for the swarms and barrels as well as it can bait-out Zap and The Log because these two spells are used to reset its charge. Not seen much though, people prefer Miner and Hog Rider more in this archetype.
Best Battle Ram Decks:
Beatdown God with Battle Ram






3M Phantom Deck








P.E.K.K.A. Ram Control













Battle Ram Spell Bait







Understanding the Battle Ram:
The Battle Ram is a powerful offensive card available from Arena 3 onwards. It consists of two Barbarians carrying a wooden log, charging towards enemy buildings and troops. Once the Ram connects with its target, it deals significant damage, and upon destruction, the Barbarians emerge to continue the assault.
Key Stats:
- Elixir Cost: 4
- Hitpoints: 766
- Damage: 275 (per Barbarian)
- Targets: Buildings
Strategies and Tips:
- Pair with Tanky Troops: Utilize the Battle Ram alongside tanky troops like Giant, Golem, or Lava Hound to absorb damage and protect the Ram on its charge.
- Support with Spells: Spells like Zap, Log, or Fireball can clear the path for the Battle Ram, eliminating swarms or weakening defenses, ensuring a successful connection.
- Surprise Factor: Deploy the Battle Ram when your opponent least expects it, catching them off-guard and potentially overwhelming their defenses.
- Split Push: Use the Battle Ram to initiate a split push, applying pressure on both lanes simultaneously, forcing your opponent to divide their defenses.
- Baiting Defenses: Force your opponent to expend their defensive cards before deploying the Battle Ram, increasing its chances of reaching the target unscathed.
Advanced Strategies:
- Prediction Plays: Anticipate your opponent’s defensive placements and preemptively deploy the Battle Ram to evade their counters, securing a direct hit.
- Counterpushing: Utilize the surviving Barbarians from a defended Battle Ram push to form a counterpush, overwhelming your opponent with dual threats.
- Synergies with Tornado: Combine the Battle Ram with Tornado to disrupt enemy defenses, pulling units away and allowing the Ram a clear path to the tower.
- Chip Damage: Even if the Battle Ram doesn’t reach the tower, its initial impact deals significant damage, chipping away at the enemy’s defenses over time.
Deck Building:
When incorporating the Battle Ram into your deck, consider synergies with other cards, ensuring a balanced and cohesive strategy. Cards like Electro Wizard, Bandit, or Inferno Dragon can complement the Battle Ram’s strengths and cover its weaknesses.
That’s all folks! Hope you guys enjoyed reading the guide. Ask me about anything in the comments.
Sayonara!
By Blaze Stone

