Hi guys, Golem FTW aka Radius here with my first Ultimate Guide – Heavy Beatdown! It’s my tactic since Arena 6 and I love it! Hope you’ll like it too!
Without further ado, let’s go!
Heavy Beatdown 101
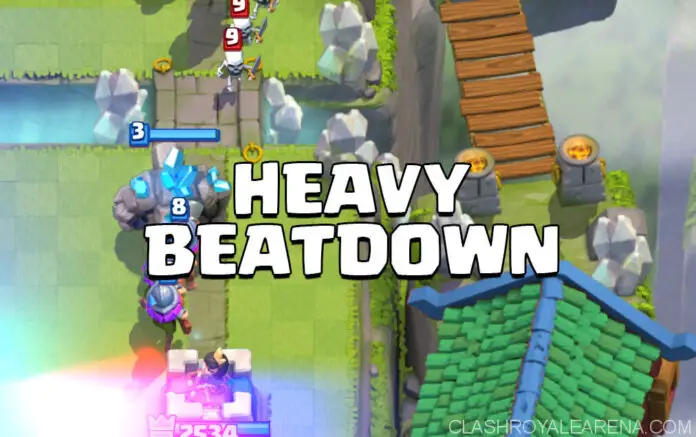
What is a Heavy Beatdown Deck?
A Heavy Beatdown deck typically has an average elixir cost ranging between 3.9 to 5.0, making it one of the more expensive deck archetypes in Clash Royale. These decks are characterized by their slow but powerful approach to overwhelming the opponent’s defenses. The core of a Heavy Beatdown deck consists of high hitpoint (HP) tanks supported by other units that enhance their offensive capabilities.
Key Characteristics
- High HP Tanks: The backbone of a Heavy Beatdown deck is its high HP tanks, such as the Golem, P.E.K.K.A., or Giant. These units can absorb a lot of damage, allowing them to reach the opponent’s towers even under heavy fire.
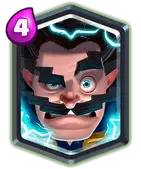
- Strong Offensive Support: To maximize the potential of the high HP tanks, Heavy Beatdown decks include supportive units like the Baby Dragon, Mega Minion, and Electro Wizard. These support troops help to clear out defensive units and spells, ensuring the tank can continue its march towards the enemy towers.
- Mediocre Defense: While the offensive capabilities of a Heavy Beatdown deck are robust, its defensive options are often more limited. Players must rely on efficient elixir management and careful placement of defensive units to mitigate incoming damage until they can mount their own push.
Tactics and Principles
The primary tactic of a Heavy Beatdown deck is to build up a powerful push that is difficult for the opponent to stop. Here’s a closer look at the strategy behind this approach:
1. Elixir Management
Managing elixir effectively is crucial when playing a Heavy Beatdown deck. Given the high cost of the core units, players must be patient and look for opportunities to build up their elixir reserves. This often means making small, cost-effective defensive plays while waiting for a significant elixir advantage to launch a massive push.
2. Building a Push
A successful Heavy Beatdown push typically starts from the back of the player’s side of the arena. Deploying a tank like the Golem or P.E.K.K.A. at the back allows the player to accumulate more elixir as the tank slowly moves forward. During this time, supportive units can be added behind the tank, creating a formidable force as they cross the bridge.
3. Timing and Placement
The timing and placement of units are critical in a Heavy Beatdown strategy. Players must be aware of their opponent’s elixir and key defensive cards. Deploying a tank too early or without adequate support can result in a failed push and a significant elixir deficit. Conversely, well-timed pushes can break through even the most robust defenses.
4. Punishing Overcommitment
Heavy Beatdown decks are particularly effective at punishing opponents who overcommit on offense. By withstanding the initial onslaught and countering with a strong push, players can turn the tide of the battle quickly. The ability to absorb damage and then retaliate with a powerful counter-push is a hallmark of this deck type.
5. Capitalizing on Spells
Spells play a vital role in supporting a Heavy Beatdown push. Cards like Lightning, Poison, or Fireball can eliminate key defensive units, clearing the path for your tank. Using spells strategically to disrupt the opponent’s defenses can often be the difference between a failed push and a successful tower takedown.
Heavy Beatdown is a beatdown deck with average elixir Cost between 3.9 to 5.0.
They’re usually slow and finish opponent’s decks by one/two pushes.
What principle/tactic this deck follow?
These decks generally follow the tactic of very offensive, slow beatdown!
Heavy Beatdown, also known as Slow Beatdown, means using huge HP tanks and his/her (Maybe you use P.E.K.K.A. :D) supports.
They usually have mediocre defense and very strong offense.
Example:
You face Hog Cycle deck. They easily take your Tower in first minute of match. You don’t feel really sad and pumps up.
You’re defending Hog Riders for next minute, and place Golem behind King’s Tower when 2x Elixir Starts.
You starts to spam behind Golem with troops like Mega Minion, Baby Dragon and Night Witch. Every cards which he use to stop this will be deleted in one-two seconds.
He starts spamming crying/raging emotes and you 3-crown him.
Ahh, a heavy beatdown ❤️
General Gameplan
3:00 – 2:00
Start pumping up, defending and making small pushes, probably without your main tank.
You have disadvantage vs any fast or cycle deck. Siege wouldn’t be really problem, because your tough guy with 3000 HP+ can take X-Bow/Mortar bullets for 1 minute+. Just keep your tank for their siege weapon and make counterpush with him.
At the start of the match, focus on building up Elixir and playing defensively. Deploy your Elixir Collector (if you have one) to pump up your Elixir reserves. Use small, strategic pushes to gauge your opponent’s deck and responses, but avoid using your main tank early on. This conservative strategy is particularly crucial when facing fast or cycle decks, which can quickly outpace you if you’re not careful.
Against siege decks, such as those featuring the X-Bow or Mortar, you have a significant advantage. Your main tank, with its robust 3000+ HP, can soak up damage from siege weapons for over a minute. Keep your tank ready to counter their siege weapon and leverage this defense into a counterpush.
2:00 – 2x Elixir
If you’re using 5-6 Elixir tank, try to make your first push, not overcommited, but hard to defend.
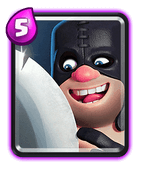
For example, Giant + Executioner + Miner would be great push for this time. Hog Cycle or Fast Control won’t surprise you, so you should defend them well.
Just try to not loose 2 Towers, because 1 minute aren’t enough to make 2 strong pushes, and you’ll be forced to 3-crown in one push, which is very hard.
As you approach the double Elixir period, it’s time to start planning your first major push. If your deck includes a 5-6 Elixir tank, such as a Giant, set up a strong but manageable push. A combination like Giant + Executioner + Miner can be effective, creating a push that’s hard to defend against without overcommitting your resources.
During this phase, you’re likely to face decks that rely on quick cycles or control strategies. These fast decks won’t catch you off guard if you maintain a solid defense. The key is to avoid losing two towers, as this will leave you in a desperate position, needing to mount a near-impossible three-crown push within a limited time frame.
For insights on different archetypes and your chances of victory, refer to KairosTime’s Two Triangle Theory Cheat Sheet. It’s a valuable resource for understanding matchups and refining your strategy.
If you want to know more about different archetypes and how much big are your chances to win, look at KairosTime’s Two Triangle Theory Cheat Sheet
2x Elixir – End
THIS IS YOUR TIME NOW.
You have to dominate him with big pushes!
In my deck, this is main push: Golem, Baby Dragon, Mega Minion, Night Witch, Arrows, Lightning, which cost 28 Elixir at all. This is huge, right? Stopping this is almost impossible.
You know what is even bigger? Second Golem on opposite lane! Yes, it’s totally normal to do it. It will make them panic, crying and raging.
It usually looks like:
- They’re defending your main push (You’re laughing, know it’s impossible)
- When they’re going to ragequit, place Golem on opposite lane
- Try to picture what is he/she haves to feel xD
This is your moment to shine. In the double Elixir period, unleash your powerful pushes and take control of the game. My recommended deck’s main push includes Golem, Baby Dragon, Mega Minion, Night Witch, Arrows, and Lightning, totaling a massive 28 Elixir. Such a formidable combination is nearly unstoppable.
To overwhelm your opponent, consider placing a second Golem on the opposite lane while they’re preoccupied with defending your main push. This strategy often leads to chaos, forcing your opponent into panic mode. Picture the frustration and desperation they must feel as their defenses crumble under your relentless assault.
Here’s a step-by-step breakdown of this endgame strategy:
- Main Push: Launch your primary attack with Golem, supported by Baby Dragon, Mega Minion, and Night Witch. Use Arrows and Lightning to clear out any defensive troops and structures.
- Second Golem: As your opponent struggles to manage your first push, drop a second Golem in the opposite lane. This dual-lane pressure can break their defenses and secure your victory.
Best Cards for Heavy Beatdown Decks
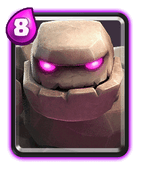
 Golem – The real king of heavy beatdown and my favourite!
Has biggest HP in whole game (4256 HP at Tournament Standards!), when destroyed takes splash damage and turns into 2 mini-tanks!
He’s probably slowest troop in CR, what allows to make huge pushes with him.
If your opponent don’t have any building in deck, this badboy placed on pocket, is guaranteed damage to Tower due to Death Damage.
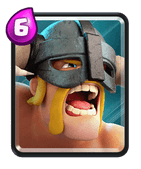
If you face P.E.K.K.A., Elite Barbarians or other troops targeted deck, Golem should be defensive-counterpush unit.
The Golem is, without a doubt, the undisputed king of heavy beatdown decks and a favorite among many players. Boasting the highest HP in the game at Tournament Standards (a staggering 4256 HP), the Golem is a powerhouse that demands respect. Upon destruction, it deals splash damage and splits into two Golemites, effectively becoming mini-tanks that continue to apply pressure.
Despite being the slowest troop in Clash Royale, this sluggishness is actually an advantage. It allows players to amass significant elixir and deploy supporting troops behind the Golem, creating formidable pushes. When placed in the pocket (the area right in front of the enemy’s tower), the Golem can almost guarantee damage due to its death damage, especially if the opponent lacks buildings to distract it.
However, the Golem’s true strength lies in its role as a defensive counter-push unit. Against decks featuring P.E.K.K.A., Elite Barbarians, or other troop-targeting cards, the Golem can soak up damage and provide a solid foundation for a devastating counterattack.
Supporting Cards for Heavy Beatdown Decks
To complement the Golem and maximize the effectiveness of a heavy beatdown strategy, consider these key supporting cards:
- Night Witch: Her ability to spawn bats continuously makes her an excellent companion for the Golem. The bats provide additional air and ground support, which can overwhelm opponents who are already dealing with the Golem’s massive presence.
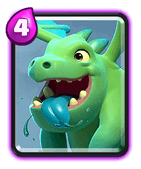
- Baby Dragon: This flying unit offers splash damage that is perfect for clearing out swarms and supporting the Golem. Its synergy with the Tornado spell can also provide excellent crowd control, ensuring the Golem remains on track to the enemy tower.
- Lumberjack: The Lumberjack’s high damage and Rage spell upon death can turn the tide of a battle. When paired with the Golem, the Rage effect can significantly boost the attack speed and damage of your push, making it even more formidable.
- Electro Dragon: Its chain lightning attack is effective for stunning and dealing with multiple troops at once. The Electro Dragon’s control capabilities are invaluable in maintaining the momentum of a beatdown push.
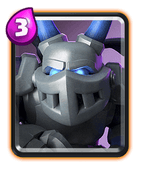
- Mega Minion: A reliable air troop that deals substantial damage and can support the Golem by taking out enemy air units or assisting in ground battles.
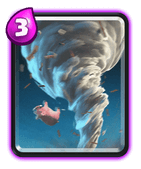
- Tornado: This spell is excellent for pulling enemy troops into the splash damage of the Baby Dragon or the death damage of the Golem. It provides crucial control over the battlefield, ensuring your beatdown push stays intact.
Strategy Tips
- Elixir Management: Heavy beatdown decks require careful elixir management. Start slow, focusing on building an elixir advantage through defense before committing to a full-scale push.
- Defensive Counters: Use the Golem defensively to soak up damage from high-threat units like P.E.K.K.A. and Elite Barbarians. Once these threats are neutralized, transition into a counter-push with your remaining elixir.
- Support Placement: Always place supporting troops behind the Golem to shield them from direct attacks. Utilize the Golem’s massive HP as a moving wall, allowing your support troops to deal damage safely.
- Building Pressure: If your opponent lacks a building card, capitalize on this by placing the Golem in the pocket during double elixir time. The resulting push is often overwhelming and can lead to substantial tower damage.
 Giant – 5 Elixir, less HP, strong tank. His weakness is lack of Death Effect.
He’s cheap for Heavy Beatdown standards, what allows to make even bigger pushes! (rip opponents)
Defensive Giant is very popular tactic.
Giant Beatdown is such dominating tactic on Arenas 1-5, especially Giant Witch.
At higher Arenas, you’ll see high risk-high reward Giant Three Musketeers decks.
The Giant, a 5-elixir card with substantial health and strong tanking capabilities, is a cornerstone of heavy beatdown decks in Clash Royale. Although lacking a death effect, the Giant’s affordability in the context of heavy beatdown strategies allows for massive and overwhelming pushes, much to the dismay of your opponents. This article explores the best cards to pair with the Giant for creating devastating beatdown decks.
1. Giant Witch Beatdown
Giant Witch Beatdown decks are exceptionally powerful in the lower Arenas (1-5). The combination of the Giant’s tankiness and the Witch’s ability to spawn Skeletons makes for a potent offensive strategy. The Witch provides both splash damage and a steady stream of Skeletons to support the Giant, clearing out swarms and adding extra pressure.
Key Cards:
- Witch: Summons Skeletons and deals splash damage, complementing the Giant perfectly.
- Mini P.E.K.K.A: Offers high single-target damage to take down opposing tanks or high-damage units.
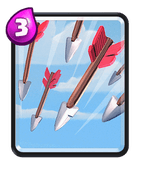
- Arrows or Zap: Essential for clearing swarms that could otherwise overwhelm your push.
2. Defensive Giant Strategy
Using the Giant defensively is a popular tactic that leverages his tankiness to absorb damage from powerful enemy troops. Placing the Giant to distract and soak up hits allows your defensive units to clear threats more effectively. Once the defense is stabilized, the Giant can transition into a counter-push, leading a strong offensive surge.
Key Cards:
- Musketeer: Provides consistent ranged damage to support the Giant.
- Baby Dragon: Deals splash damage from the air, effectively targeting ground units clustered around the Giant.
- Mega Minion: Adds additional air support, helping to clear both air and ground units.
3. Giant Three Musketeers Deck
At higher Arenas, the Giant Three Musketeers deck becomes a high risk-high reward strategy. This deck leverages the Giant’s ability to tank while the Three Musketeers dish out massive damage from behind. Splitting the Three Musketeers can also create dual-lane pressure, making it difficult for opponents to defend effectively.
Key Cards:
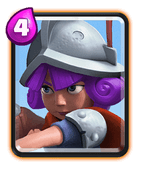
- Three Musketeers: Provides overwhelming firepower that, when protected by the Giant, can devastate enemy defenses.
- Elixir Collector: Ensures you have the elixir needed to deploy the Three Musketeers and support your pushes.
- Battle Ram: Adds another layer of pressure, often forcing the opponent to split their defense.
Supporting Cards and Spells
To maximize the effectiveness of your Giant beatdown deck, consider including these versatile support cards and spells:
- Fireball: Great for clearing medium-health troops and damaging support units behind the enemy’s tank.
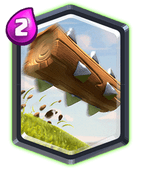
- Log: Provides a cheap and effective way to deal with swarm units and knock back troops.
- Ice Spirit: Offers freeze control, allowing your Giant and support units to deal more damage.
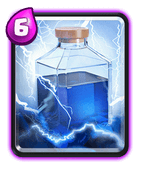
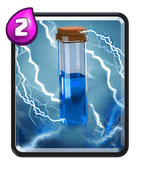
 Lightning – You’ll see this spell in 90% Golem/Giant/P.E.K.K.A.’s decks.
Why? Because strongest counter for this troops is Inferno Tower/Inferno Dragon. Lightning will crush them (Both will survive with 5-10% HP what makes them oneshots) and resets.
Also, to get more value (Because using Lightning for lone Inferno is negative Elixir Trade), try to shoot also troop like Wizard, Executioner, Witch, Sparky. Inferno Tower + Wizard is 11 Elixir for 6 Elixir Lightning + 350 HP less for Tower!
This is great, ya?
When it comes to heavy beatdown decks in Clash Royale, the Lightning spell is an indispensable asset, featured in about 90% of Golem, Giant, and P.E.K.K.A. decks. Its strategic utility cannot be overstated, particularly in countering key defensive units that threaten your heavy hitters.
Why Lightning is Essential
The primary reason Lightning is favored in heavy beatdown decks is its effectiveness against the Inferno Tower and Inferno Dragon. These defensive units are the strongest counters to high-health troops like Golem, Giant, and P.E.K.K.A. due to their ramping damage capabilities. Lightning can severely cripple these units, reducing their health to a mere 5-10% and making them easy to finish off with a follow-up attack or even a single hit from a supporting troop. Additionally, the Lightning spell resets the Inferno Dragon’s damage ramp-up, giving your tanky units a better chance to survive and reach the enemy tower.
Maximizing Value with Lightning
Using Lightning purely to eliminate an Inferno Tower or Inferno Dragon is often a negative Elixir trade, as you spend 6 Elixir to counter a unit that costs 5. To get the most value out of your Lightning spell, aim to hit multiple targets with it. For instance, if your opponent places a Wizard, Executioner, Witch, or Sparky near their Inferno Tower, you can deal substantial damage to both the defensive building and the supporting troop. This not only neutralizes the primary threat but also diminishes the effectiveness of their support units, paving the way for your heavy hitters.
An example scenario would be the opponent using an Inferno Tower and a Wizard to defend against your Golem. The Inferno Tower and Wizard together cost 11 Elixir. By using Lightning, you can take out the Wizard and severely damage the Inferno Tower, effectively trading 6 Elixir for 11 and also dealing about 350 damage to the opponent’s Crown Tower. This positive Elixir trade and the additional damage can be crucial in turning the tide of battle in your favor.
Practical Tips
- Timing and Placement: Wait for your opponent to deploy multiple units close together before using Lightning. Patience can ensure you hit maximum targets and get the most out of your spell.
- Predictive Play: Anticipate where your opponent might place their defensive units and support troops, positioning your Lightning to catch them off guard.
- Supporting Troops: Always back up your heavy tank with support troops that can quickly capitalize on the weakened defenses after you use Lightning. Troops like Electro Wizard, Baby Dragon, or Mega Minion can synergize well with the Lightning spell.
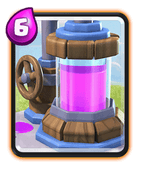
 Elixir Collector – Must be in every 4.2+ Elixir deck.
Players in Arenas 6-7 would say: “What is this?! What can change 1 Elixir?! And it’s so expensive!”
My first Golem deck was 4.4 without Pump xD
Down the road, you’ll say how this 1 Elixir can save lives and won matches.
When you face Golem deck, trust me, player with more Pumps will win. Always place Collector in front of King’s Tower, to don’t give Rocket value with Pump + Tower.
When you have 500 HP left on Tower, Hog Rider is running and here’s 10 Seconds left to end, don’t hesitate to use Pump defensively. It can save your live!
Sustained Elixir Advantage
The primary benefit of the Elixir Collector is its ability to generate additional elixir over time, providing a significant advantage in elixir-heavy battles. This sustained elixir generation allows players to deploy their high-cost cards more frequently, creating a continuous stream of powerful units that can overwhelm opponents.
Strategic Placement and Defense
Proper placement of the Elixir Collector is crucial. Placing it in front of the King’s Tower can prevent opponents from gaining extra value by hitting both the Collector and the Tower with a single Rocket. Additionally, in desperate situations where your Tower is low on health and time is running out, the Elixir Collector can serve as a last-ditch defensive measure. Its robust health can soak up crucial hits from incoming troops like the Hog Rider, potentially saving your game in the final seconds.
The Power of Elixir Management
My first Golem deck, which cost 4.4 elixir, lacked the Elixir Collector. Over time, I realized how this single card could be a game-changer. One extra elixir can be the difference between deploying a critical defense or mounting a decisive offense. When facing other Golem decks, for instance, the player with more Elixir Collectors usually comes out on top due to the continuous elixir advantage. This allows for the deployment of more Golems and supporting units, eventually overpowering the opponent.
Practical Tips for Using the Elixir Collector
- Early Game Focus: Aim to place your Elixir Collector early in the game to start building an elixir advantage as soon as possible. This sets you up for a strong mid-to-late game push.
- Protect Your Collector: Defend your Elixir Collector with units if necessary. Opponents will often target it with spells or troops to disrupt your elixir gain. Keeping it protected ensures you reap its full benefits.
- Timing is Everything: Deploy the Elixir Collector when you have a brief lull in the battle or when you can afford the temporary elixir deficit. Avoid placing it when you are low on elixir and vulnerable to a strong counter-push.
- Defensive Use: Don’t hesitate to use the Elixir Collector defensively. It can absorb damage and potentially change the outcome of close matches. This is particularly effective when you have a few seconds left and need to prevent a crucial hit on your tower.
 Royal Giant – Less HP, ranged Giant. Often paired with Lightning and Furnace.
Usually he’s just placed on bridge and doing his job, but placing him behind King’s Tower and supporting him with glass cannons also works well.
Best way to counter him is using swarms of course, so one or two light spells is a must.
Remember to overlevel him to at least Lvl 11, because lower lvl RG is weak.
Understanding the Royal Giant
Before delving into the best cards to complement a Royal Giant heavy beatdown deck, it’s crucial to understand the unique strengths and weaknesses of this formidable unit. Unlike his ground-based counterpart, the Giant, the Royal Giant boasts ranged capabilities, allowing him to target enemy buildings from a distance. This attribute grants him the ability to bypass frontline defenses and directly assault enemy towers.
However, the Royal Giant’s potency comes at a price – he possesses less HP compared to the Giant. This makes him susceptible to swarms of smaller troops and high-damage units. Consequently, strategic placement and support are essential to maximize his effectiveness on the battlefield.
| Buy Now |  | Microsoft | Prime | |
| Buy Now |  | FORTNITE | PrimeEligible | |
| Buy Now |  | LITTLE, BROWN | PrimeEligible | |
| Buy Now |  | FORTNITE | PrimeEligible |
The Ideal Deck Composition
Crafting a deck centered around the Royal Giant requires a careful selection of supporting cards that complement his strengths and mitigate his weaknesses. Here’s a breakdown of the best cards to include:
Royal Giant: The Backbone of Destruction
At the heart of the deck lies the Royal Giant himself. Whether placed directly on the bridge to pressure enemy towers or strategically positioned behind the King’s Tower for a more controlled assault, the Royal Giant serves as the primary win condition. However, to unleash his full potential, players must ensure that their Royal Giant is adequately leveled – preferably at least level 11 or higher to withstand enemy defenses.
Supporting Glass Cannons
To bolster the Royal Giant’s onslaught, incorporating glass cannons into the deck is crucial. Units like the Electro Wizard, Musketeer, or Baby Dragon provide invaluable ranged support, targeting enemy troops and structures from a safe distance. These units not only help clear the path for the Royal Giant but also provide defensive capabilities against enemy swarms.
Lightning Spell: Clearing the Path
In any heavy beatdown deck featuring the Royal Giant, the Lightning spell emerges as a vital inclusion. This powerful spell allows players to obliterate enemy defenses, clearing the path for the Royal Giant to lay waste to enemy towers. Additionally, Lightning provides a solution to troublesome defensive structures like Inferno Towers or Sparky, allowing the Royal Giant to continue his relentless advance.
Furnace: Controlling the Battlefield
The Furnace plays a dual role in a Royal Giant heavy beatdown deck – providing constant pressure on enemy towers while offering defensive support against swarms. By continuously spawning Fire Spirits, the Furnace forces opponents to divert their attention away from the Royal Giant, creating openings for devastating pushes. Furthermore, the Furnace acts as a reliable counter to swarm units, weakening enemy defenses and paving the way for the Royal Giant’s assault.
Countering the Counterplay
Despite the Royal Giant’s formidable presence on the battlefield, opponents will inevitably attempt to counter him using swarms and defensive structures. To mitigate these threats, players must be prepared to deploy countermeasures effectively. Including one or two light spells, such as Zap or Log, in the deck is essential for quickly dispatching enemy swarms and clearing the path for the Royal Giant’s advance. Additionally, maintaining a strategic advantage through efficient elixir management and timely deployment of supporting troops can turn the tide of battle in your favor.
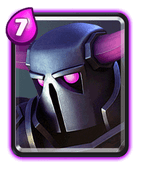
 P.E.K.K.A. – Since she haves only 1 sec deploy time and targets troops, P.E.K.K.A. is mainly defensive-counterpushing unit.
Destroys big pushes so easily due to huge Damage and HP.
Best counters to P.E.K.K.A. are: Inferno Tower, Goblin Gang, Barbarians, Skeleton Army and Guards, so Lightning and splash glass cannons like Wizard and Executioner are strongly reccomended.
If your P.E.K.K.A. will get 2 swings, you can definitely feel satisfied.
With her on deck, you shouldn’t have problem to win with another beatdown deck.
In the ever-evolving landscape of Clash Royale strategy, few cards command as much respect and fear as the formidable P.E.K.K.A. With her imposing presence, devastating damage, and lightning-fast deploy time, she stands as a stalwart defender and a potent force on the battlefield. For those who seek to harness her raw power in heavy beatdown decks, selecting the right cards to complement her strengths is paramount. Here, we delve into the optimal choices to maximize the potential of your P.E.K.K.A.-focused strategy.
The Defensive Powerhouse: P.E.K.K.A.
P.E.K.K.A. is not just a mere troop; she is a fortress on legs, capable of dismantling even the most imposing enemy pushes with ease. Her one-second deploy time ensures swift response to enemy threats, while her penchant for targeting enemy troops makes her an invaluable defensive asset.
Crushing Opposition: Key Strengths
- Devastating Damage: P.E.K.K.A. packs a punch like no other. Her high damage output can swiftly obliterate tanks, swarms, and high-hitpoint units alike, ensuring that enemy pushes crumble before they even gain momentum.
- Formidable HP: Beyond her offensive prowess, P.E.K.K.A. boasts an impressive pool of hit points, granting her remarkable survivability on the battlefield. This resilience allows her to withstand punishment while carving through enemy forces.
Countering the Counterplay: Best Choices
While P.E.K.K.A. reigns supreme on the battlefield, she is not without her vulnerabilities. Savvy opponents may deploy specific counters to neutralize her threat. To thwart such attempts and maintain your offensive momentum, consider integrating the following cards into your heavy beatdown deck:
- Inferno Tower: This towering inferno poses a significant threat to P.E.K.K.A., rapidly ramping up damage to melt through her formidable armor. Integrating cards that can deal with the Inferno Tower swiftly is crucial to keep your P.E.K.K.A. marching forward.
- Goblin Gang, Barbarians, Skeleton Army, and Guards: Swarms of smaller units can overwhelm P.E.K.K.A. and stall her advance. To mitigate this threat, incorporate splash damage or area-of-effect cards like Lightning, Wizard, or Executioner into your deck. These cards excel at clearing out pesky swarms, allowing your P.E.K.K.A. to focus on high-value targets.
Maximizing Impact: The Two-Swing Satisfaction
The mark of a successful P.E.K.K.A. deployment lies in her ability to land those devastating swings. With each swing, she carves away at the enemy’s defenses, inching closer to victory. Achieving two swings with your P.E.K.K.A. can often spell doom for your opponent, signaling the impending collapse of their defenses.
Sealing Victory: P.E.K.K.A. and Beatdown Decks
Incorporating P.E.K.K.A. into your heavy beatdown deck can elevate your strategy to new heights. Her unparalleled defensive capabilities, coupled with her ability to spearhead relentless offensive assaults, make her an indispensable asset on the battlefield. With P.E.K.K.A. at the helm, victory against even the most formidable opponents becomes within reach.
 Lava Hound – The only flying tank in game.
She (or he, but I think she’s women because Lava Pups are her childs) has huge HP and very low Damage.
When facing her, get prepared for Balloon and Inferno Dragon. She’s always a tank, not damage dealer, but never ignore her, even alone.
Her main advantage is the Lava Pups. They are 8 little Pups which can make huge Damage when ignored. Best ways to deal with them is using Arrows or Fireball, or placing Knight to take damage. Good supports for her are Minions, Minion Horde, Night Witch or Baby Dragon.
The Lava Hound is unique among Clash Royale cards. While her damage output is modest, her durability is unparalleled. When she crosses the bridge, opponents must brace themselves for the inevitable onslaught of her aerial companions: the Lava Pups. These fiery offspring, numbering eight in total, may seem harmless individually, but when ignored, they can chip away at towers with surprising efficiency.
To effectively harness the power of the Lava Hound and her fiery brood, savvy Clash Royale players must carefully consider their card selection. Here, we delve into the best cards to complement the Lava Hound in heavy beatdown decks, ensuring maximum devastation for your opponents.
- Balloon: The quintessential partner-in-crime for the Lava Hound, the Balloon swoops in behind its lava-born ally, targeting enemy towers with devastating bomb drops. Together, they form a lethal duo that demands immediate attention from opposing players.
- Inferno Dragon: As a formidable flying threat in its own right, the Inferno Dragon complements the Lava Hound beautifully. While the Hound distracts enemy defenses, the Inferno Dragon’s beam steadily ramps up in power, melting through even the sturdiest of tanks.
- Arrows/Fireball: These versatile spells serve as essential tools for dealing with swarms of Lava Pups. Whether it’s a timely Arrow volley or a well-placed Fireball, these spells ensure that the fiery offspring do not wreak havoc on your towers uncontested.
- Knight: Positioned strategically, the Knight serves as a reliable ground-based tank, soaking up damage from enemy troops while your towers focus on the aerial assault. His sturdy shield and respectable damage output make him an ideal counter to the Lava Hound’s relentless advance.
- Minions/Minion Horde: These airborne minions excel at swiftly disposing of enemy troops and providing air support for your Lava Hound push. Whether deployed to clear the skies of enemy threats or to bolster your offensive assault, Minions and Minion Horde are invaluable assets in any heavy beatdown deck.
- Night Witch/Baby Dragon: These versatile support units bring additional aerial firepower to your deck. The Night Witch’s summoned Bats provide supplemental damage and distraction, while the Baby Dragon’s splash damage ensures that enemy swarms are swiftly dealt with.
When constructing a heavy beatdown deck centered around the Lava Hound, synergy is key. Each card should complement the strengths of the Lava Hound while mitigating her weaknesses. By leveraging the power of aerial dominance and strategic card placement, players can unleash devastating pushes that leave their opponents reeling.
Examples Decks for Heavey Beatdown
Golem Night Witch Beatdown by G-MAN
Take a look at here for more details.


Giant Night Witch Beatdown by SparkyIsLife


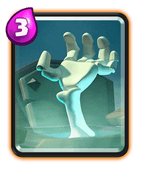


LavaLoon Night Witch by Lolman
Take a look at here for more details.
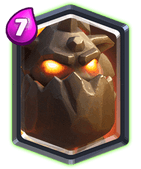



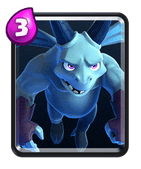


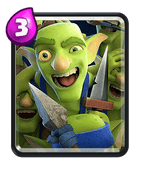
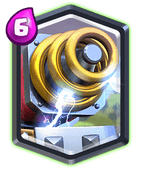
Elite RG Sparky deck by Salty Ladder FTW
Take a look at here for more details.




3-Crown farming P.E.K.K.A. Ram deck by B.W
Take a look at here for more details.



Buy Now 
Microsoft Prime Buy Now 
FORTNITE PrimeEligible Buy Now 
LITTLE, BROWN PrimeEligible Buy Now 
FORTNITE PrimeEligible
Prices pulled from the Amazon Product Advertising API on:
| Buy Now |  | Microsoft | Prime | |
| Buy Now |  | FORTNITE | PrimeEligible | |
| Buy Now |  | LITTLE, BROWN | PrimeEligible | |
| Buy Now |  | FORTNITE | PrimeEligible |
Wrap-up
Now, as you embark on your own heavy beatdown endeavors, remember the core principles that underpin this strategy:
- Unyielding Offense: Never relent in your assault. Keep the pressure on your opponents from start to finish, leaving them little room to breathe or counterattack.
- Strategic Maneuvering: While brute force is essential, don’t overlook the importance of strategy. Positioning, timing, and target selection can all significantly impact the effectiveness of your onslaught.
- Adaptability: Flexibility is key in any battle. Be prepared to adjust your approach based on your opponent’s actions and the evolving dynamics of the fight.
- Mental Fortitude: Heavy beatdown isn’t just about physical strength; it’s also about mental resilience. Stay focused, stay determined, and never let frustration or doubt cloud your judgment.
By embodying these principles, you’ll not only become a force to be reckoned with on the battlefield but also cultivate a mindset of relentless determination that can serve you well in all aspects of life.
As we part ways for now, I encourage each of you to embrace the heavy beatdown philosophy wholeheartedly. Whether you’re facing opponents in the digital realm of gaming or navigating the challenges of the real world, approach each challenge with the same ferocity and determination.
So that’s all for me! I hope everyone will get great effects by using heavy beatdown!
I’m sure you will all love this tactic, have a nice day and get happy, weekend is coming 😀
You rocks!
by Golem FTW aka Radius

