Home Blog Page 52

Barbarian Barrel with Graveyard + Poison Control Deck

0

Barbarian Barrel with Graveyard + Poison Control Deck

Hey guys! I hope you all are safe in these times and doing well. I’m Krux, I’m back again with some fresh air and a new deck guide. You wanna push 100 trophies more than the last season, I know.

We have seen some formidable challenges this season and some new cards like Fisherman, Zappies getting in the Clash Royale meta. But do you know what got popular recently? The graveyard win condition.

If you played the No Tilt 20-Win challenge till 15+ wins a few days ago, either you have played a GY deck, or you faced it multiple times. Many professional Clash Royale Players have used a GGY deck to complete the challenge. But what if you and the Skeleton Dragons are poles apart in friendship? Fret not, this Barb Hut GY deck if for you.

Barbarian Barrel with Graveyard + Poison Blast

deckdeckk
This deck is doing good on the ladder scene now. So it is our time to now to show some dominance with Graveyard and Barbarian Hut. 

Deck Cards

  • We have Knight in our deck as the versatile king even though he is a knight. The card can be played as an elixir investment, as a small rush attack or even bait. It is also good at lower levels, so Knight, here you go.
  • The little girl with the gun—Musketeer is here again after being in many good decks, our air defense and the damage card which stays behind baits.
  • The green Baby Dragon is another elixir investment card and also good against both air and ground swarms.
  • 400″>Barbarian Hut. You should know when and why to place. It is the major defensive building and investment on our side to be placed at the right times.
  • Poison in our deck can be both a defensive and offensive spell in our deck. But try to use it in offense mostly.
  • The Graveyard is our win condition in this deck. Timing is necessary to play this. It is also the card that will force the enemy to pour their elixir on the arena if they don’t have a counter in hand. 
  • The Barbarian Barrel is a good low elixir card to play against ground swarms and to cycle our deck for GY or Hut.
  • Royal Delivery is really good. It is a card which can be dropped at the bridge, works against any kind of swarms, and also defends.

Deck Strategy

This is a control deck, so if you are an impatient little Clasher, then I would say to you “Calm Down”. Wrong and hasty play will make you go out of the cycle and it might be very harmful to you. Alright, let’s start.

The game starts and if you have Barbarian Hut in your first cards, you will not place it right away. Yes. You will wait for your opponent to make a move for some time and if there is movement, then we can put it in its position. Its position is fixed. Between the towers, middle of the arena. Nowhere else at any point in the game.

If you start with other cards like Musketeer, Poison, Knight, Barb Barrel, roll your barbarian barrel on the bridge and get chip damage along with deck cycle. After that according to your opponent’s move, place the knight or the musketeer behind your princess tower as the defense.

When their troops are on their way to heaven and yours are still alive, drop your Baby Dragon to join the gang at the bridge and let it push. And if you are on elixir, use Graveyard. Be careful not to activate their king tower. This is the right time to play Graveyard in any match. Do not waste your win condition by placing the Graveyard randomly thinking that you can get some damage. That’s a costly and dumb mistake.

gy

If your opponent is playing Goblin Barrel or Skeleton Barrel, you will always save your Barbarian Barrel or Royal Delivery for these otherwise the game can be frustrating for you. Time your Barrels and Deliveries nicely and save that damage. 

Do not Poison their Goblins or Skelly barrels. Poison will be used as an offensive spell while we push their tower with Musketeer and Graveyard. It will clear out the push by killing their tiny defence troops like Princess, Dart Goblin, Musketeer along with damaging their tower.

Quick Revision: Start with Hut or respond to their first move with Knight/baby Dragon in the back. Join them with Musketeer at the bridge and use Graveyard when the push is about to just crosses the bridge. That’s the push strategy. Use Poison while they try to defend. Don’t send anything else and let the elixir build up again. Use Barb Barrel and Royal Delivery for defending against swarms, barrels etc. Repeat the cycle. 

Pushh


“Patience is a virtue” when you are playing with a control deck like this. So play relaxingly, and repeat the cycles. It will take more than three cycles to destroy the opponent’s tower. So do not play aggressive. 


I hope you get some good wins using the deck in the ladder. Best of luck for your session. Use the comment section to suggest or criticize but don’t forget to read out more articles by me. Clash On!

Mortar: The Definitive Guide

0
mortar tips

Clash Royale MortarHi guys, this is Excalibur back with a guide on one of the most underrated win-conditions in the game. Yep, we’ll be talking about the Clash Royale Mortar today.

I’ll tell you strategies to use the Mortar, and I’ll also highlight some of its special features. Finally, like always, we’ll have two decks with the Mortar as the win condition.

mortar 2v2

Mortar Summary

Mortar is a 4 Elixir Elixir Building unlocked from Builder’s Workshop.

Mortar is a card which fairly easy to play with. It combines well with mini tanks (Ice Golem, Knight) and tank killers (Mini PEKKA, Hunter) because of its unique blind spot mechanic.

However, using the Mortar is not everyone’s cup of tea.

It’s got an insanely high skill cap. That means you’ll take a lot of time to understand how to use this card. But let me tell you, it’s totally worth it.

How high is the skill cap, you ask?

Hmm. Go to Top Royales, and keep scrolling till you see a Mortar deck.

Almost no one uses Mortar now – because there are easier cards to push with.

The problem with using Mortar is that it doesn’t guarantee you a steady rate of trophies like 2.6 Hog Cycle or the 3.5 Icebow. Mortar players must rely on skill rather than card mechanics, and this is what makes using Mortar difficult.

Back in the day, it was one of the most sought-after cards. It used to cost 6 Elixir (yes!), and had higher health and damage. Supercell responded to its high win rate with a heavy 20% health nerf, increased deploy time, and less damage.

However, the ‘nerf’ which decreased its cost to 4 and lowered its HP was actually a buff – albeit a very slight one.

Mortar is much more viable as a win condition than many of the cards out there (lookin’ at the Mega Knight). It’s cheaper to play now, so you aren’t risking as much.

Mortar’s Pros and Cons

Pros Cons
  • Cheap price (4 Elixir): The last time I checked, heavier win conditions aren’t popular – except for the X-bow and the Royal Giant.
  • Fairly high damage : How does 290 damage per shot at max level sound?
  • A VERY long range: It’s a good thing because this is the pro which makes the Mortar a win condition.
  • Insanely slow reload speed. It fires one shot every four seconds.
  • Low on continuous damage. Hog Rider can take it out in ~5 swings, and the Mortar will barely tickle the Hog Rider (if the shots even hit, he’s so fast).
  • Mortar fails to make an impact against tanks like PEKKA, Royal Giant or Mega Knight because either they’ve got high damage that takes the Mortar out before it fires the second shot, or because they can evade damage (Bandit, Mega Knight).
  • Mortar is not a consistent defensive building because of its long projectile time and unpredictable target switching.
  • Blind Spot. There’s nothing you can do if something lands on your Mortar, it won’t be able to attack him and you’ll lose your building.

Strategies for Using Mortar

Blind Spot

mortar clash royale placements

I don’t think that the blind spot belongs in the cons, because it’s a very unique mechanic that provides returns well.

Consider that you’re playing a match against a Hog Rider. The opponent plops down a Hog at the river. Normally, you’d put a Tesla or a Cannon. But I’d use the Mortar. The Hog will enter its blind spot before it has even finished deploying – thus guaranteeing that the first hit will land on the tower. A 1-0 plant (1 tile directly below the bridge) will allow the tower to attack the Hog Rider and snipe the enemy tower. This gives you three hundred damage for free – because with the help of your tower, the Hog will die.

This technique is also handy for tank defense.

The Mortar cannot fire at close targets, so once the tank enters its blind spot it retargets to the troops behind the tank. This is a unique mechanic that allows you to destroy Golem pushes – the Mortar has got a good amount of damage that can clip Bomber, Wizard, Executioner, or any other support hiding behind the tank.

Swarm Countering

Mortar also comes in handy for defending 4-3 plant Furnaces and Goblin Huts.
It’s got a VERY long range, so you can do a deep plant (5-3) and still splash incoming troops with it. Unfortunately, Spear Goblins and Fire Spirits have a very fast movement speed. The boulder may not even hit them – at best, it’ll clip the Fire Spirit lagging at the back.

If you absolutely cannot afford tower damage, do a light plant at 4-2 and use the Ice Golem as a meatshield. This will coagulate the Spear Goblins and Barbarians as well, which allows you to pick them off all at once.

What about spell value?

Unfortunately, I see this in problem in two passive buildings – the Elixir Collector and the Mortar. They don’t have a large number of hitpoints – a single Fireball is enough to severely cripple both of them.
Most of the time, this is not a problem with the Mortar. You don’t actually put it down next to the tower.

Getting spell value on Mortar is incredibly easy.

You can completely counter a Mortar with an Ice Golem and Zap (if it’s locked onto your tower). Put the Ice Golem in the classic lure position – a 0-5 plant – and Zap the Mortar. It will retarget on the Ice Golem, which is slow enough to tank all the shots until the timer runs out.
So beware of Lightning and Poison, these 2 spells are the only ones that could give spell value to the opponent.

Mortar Placements

This is the best possible placement for Mortar because you can drop troops in front of it, it’s in the range of the Tower and ignores troops put in the opposite lane.

mortar clash royale placements

You can also put your Mortar directly below the bridge but that doesn’t allow you to put damage-soaking troops (Knight, Ice Golem, Mini PEKKA) in front of it.

Other Mortar Interactions

  1. If someone does a 0-5 Mortar plant, you can wait for ~2.5 seconds and place the Skeletons right in front of your King Tower. The Mortar will shoot at the Skeletons, which will walk away before the boulder’s splash hits the King Tower.
  2. A similar thing can be done with the Elixir Collector. If they’ve placed it in front of the King Tower parallel to the tower, it can be sniped by the Mortar. Each shot denies 1.66 Elixir.
  3. A 1-0 plant can completely counter the Royal Giant if it’s locked on to your tower. It pushes the RG back, forcing him to retarget while being in the blind spot. Thus you counter an RG for 4 Elixir and get +300 damage on your enemy tower.
  4. Mortar + Bomb Tower is a very good defensive combination as the Bomb Tower’s splash can protect the blind spot of the Mortar.
  5. When placing a Mortar, you can do a 1,-1 plant (1 tile away from the bridge but towards the vertical edge of the Arena). This prevents the Mortar from locking on to mini-tanks placed in the opposite lane.
  6. Mortar can be used as a building killer for Furnace, Goblin Hut, and Barbarian Hut. Tombstone has got a very high rate of spawning which will prevent the Mortar from attacking the Tombstone itself.
  7. Mortar is a very good anti-support card. It can splash troops in one tile proximity of the tower. Thus, countering enemy Princesses walking along the sides of the tower gets you one hit off the tower as well.
  8. Remember that Mortar boulders cannot hit Very Fast troops, or charging ones like Battle Ram, Prince, and Ram Rider.

Tips for Playing Mortar Like a Pro

Mortar Tips

  1. The mortar should regularly be placed 1 tile from the bridge, and 1 / 2 tiles from the side of the arena!
  2. When countering Hog Riders, the Mortar should be placed at the bridge, in the middle, closer to the side they’re pushing on. This way the Hog enters the Mortar’s blind zone, and the Mortar is switching on the Tower! It’s essential to use a cheap troop like skeletons or goblins to kill the Hog faster in case they support it.
  3. Against Three Musketeers, when they get closer to the bridge, Rocket the side with One, they’re most likely to Battle Ram or something else! You can easily counter the two with a Knight!
  4. This tip is the same for non-mortar users too: Never overcommit defending a Mortar! They might just plain Rocket the tower, and still be equal on elixir! Also, when someone spends more on defending your Mortar, and you have good defensive cards in cycle, just Rocket the tower!
  5. When playing against Bowler or Executioner, split up your Knight and Archers placement so they won’t get splashed together! Most likely they will place it closer to the middle.
  6. When playing against Graveyard Freeze, use your skeletons first to counter the Graveyard, then Archers if they react to your skeletons. You have the log to clear out a few of them if they get close.
  7. When playing against Hog Cycle with Knight and Archers, Rocket the Knight if it gets close to the Arena tower. The Archers and Goblins are easy to deal with, Mortar to defend hog.
  8. Never go opposite lane with Mortar. Mortar is designed for chip damage, while if he supports his Giant on the opposite lane, it will get extremely hard to defend. The biggest disadvantage is that if he takes down that tower, you will go for the 2-1 win. It’s extremely hard to Mortar on a side that is already taken down by your opponent, so he can just surround it with Barbarians and kill it no matter how hard you guard it.
  9. When playing against all kinds of Zap Bait, Always set up defensive Mortar at double elixir time, and start Rocket-cycling. Mortar gets significantly harder to pull off in double elixir, since they will always have elixir for that extra knight or ice spirit to keep the Mortar busy. Get damage in single elixir, then start rocket cycling.
  10. If you recognize a Mortar or Hog deck playing against you, always split Archers. Don’t let them get Log or Fireball value.
  11. Well known tip: always place Skeletons or Ice Spirit in front of a naked Mortar to discract counters such as Inferno Tower, Mega Minion, etc.
  12. When defending against Lava Hound, always place the Mortar into the Hog Spot, at the River, closer to the side they’re pushing.
  13. When your enemy is defending Mortar with Mortar, place a Knight at the River, closer to the opposite side. The enemy Mortar will shoot the Knight. Pro tip followup: Place a predictive Ice Spirit and Log in front of the Mortar to kill his archers!
  14. Very valuable tip: When countering Royal Giant, place the Mortar one tile BELOW the average placement. This way it’s 2 tiles in front of the King tower and 3 from the Arena tower! This way the RG enters the area where the Tower shoots him, the RG shoots the Mortar, and you can place it anytime! No outranging, stress, timing, like for the Inferno Tower or Cannon or anything else. You just place it there, and chill out.
  15. Most important aspect: When the match is not going your way, just go for the draw! Never give spell value on Archers, never place mortar close to the tower, and don’t let anything through! Always remember, there is no reason to go for the win against an RG Bowler deck, unless you get good damage on the first few Mortars. Just hope he has no high damage spells.

Anti–Mortar Tips

  1. Ice Spirit and Skeletons are great cards to distract the Mortar. It has a 30 sec lifetime, so take advantage of it!
  2. If you have a pump deck, always try to outcycle their rocket. It may sound impossible, but it might work out against an average player.
  3. If you have a tank like an Ice Golem, Knight, Giant, anything, just place them in the opposite lane, in the middle. By the time they die, the Mortar is already dead.
  4. A Mortar shoots 6 times during its lifetime. Remember that!
  5. Always remember the blind zone! If you’re attacking with hog and they mortar, put a knight on your side, preferably somewhere in the middle, to tank the shots!
  6. When defending Mortar vs Mortar, always count that they will tank your Mortar. Aim for countering tip 13. A Knight opposite lane is perfect.
  7. Maybe the only tip everyone knew, don’t give them rocket value.
  8. Don’t overcommit on countering his Archers or other troops, because he will rocket your tower for free.
  9. Cannon is a very good counter to Mortar. When you attack with Hog, place the Cannon predictively at the River, at the middle.
  10. Lastly, if you find it very hard countering Mortar, just put Bowler into your deck. Easy fix!

Best Mortar Decks

These 2 decks are just an example of what Mortar decks look like. There are many more decks that may be better than these, so feel free to build your own deck with the Mortar.

Hog EQ Mortar

Clash Royale Hog RiderClash Royale MortarClash Royale earthquakeClash Royale MusketeerClash Royale Goblin CageClash Royale Mini P.E.K.K.AClash Royale Barbarian BarrelClash Royale fireball

Mortar Pekka Bait

Clash Royale MortarClash Royale P.E.K.K.AClash Royale Goblin GangClash Royale Goblin BarrelClash Royale ArchersClash Royale BanditClash Royale PoisonClash Royale Princess

So that’s it guys, this is all for today. If you have any questions regarding the Mortar in Clash Royale, please ask them in the comments, and don’t forget to rate the post!

No Tilt World Championship Full Information

0

Hey Clashers! I’m Krux here, back again with some fresh air and also some awesome Clash Royale news regarding the No Tilt World Championship!

No Tilt World Championship Clash Royale

You must have already read something like No Tilt League, No Tilt Worlds etc. somewhere on the internet, on Clash Royale websites and Youtube. You are a casual Clash Royale player, and you don’t know what is the fuss about? Is it a new update or some CRL thingy? Don’t worry, Krux brings you everything about No Tilt that will make your life easier.

What is No Tilt?

No Tilt is an esports organisation based in Mexico City, Mexico. It is the largest city in Mexico and the most populous one in North America. No Tile runs competitive tournaments and leagues in some popular and amazing mobile games like Clash Royale, Brawl Stars, etc. Professional and semi-professional players play in these leagues and compete for glory and a prize pool. 

The No Tilt World Championship for Clash Royale is around the corner. Unlike Clash Royale League, which has professional players playing in it and we are just watching them on Youtube, this championship is open for all the players. 

No Tilt World Championship

The No Tilt World Championship will have four stages. It is an individual tournament, and one winner will emerge from the world of Clash Royale players. The championship will be a good floor for former pros as well as new talent to prove themselves.

Stages: 4
Winners: 3
Prize Pool: $ 50,000 (US)

EdfI9q9XkAYy6su

The prize pool is sponsored by Supercell. The distribution will be announced soon. It will be up to three positions in the championship.


Stage 1: No Tilt 20 Win Challenge

Players can start competing in the No Tilt tournament by directly participating in the “No Tilt 20 Win Challenge” inside Clash Royale.  It will be held between July 23 and 26 as an in-game challenge.

According to the Clash Royale website, players will be out on three losses. All the players will get three free entries and afterwards, each entry will cost 10 gems. Players who have the Pass Royale, on the other hand, will get unlimited attempts. The challenge progress will reset with each new entry (0 wins/0 losses). The players who manage to complete the challenge will proceed to the next stage of No Tilt. 

Stage 2: Qualifying Brackets

The No Tilt World Championship 2020 will have two divisions, namely, East and West. Each division will have eight brackets with 1024 players in each of them. These brackets will be played from July 30 to August 14. The winner of each bracket will be eligible for the next stage of the championship which is the group stage. The semi-finals and finals of these brackets will be streamed live on No Tilt’s Youtube channel.

Stage 3: Group Stage

The group stage of No Tilt World Championship will be held from August 16 to 22. The eight players from each of the division will compete against each other in a round-robin format. The four best players from each of the East and West division will move forward to the final stage of the tournament. 

Stage 4: Playoffs and the Grand Finale

This stage will see the playoffs between the eight winners of the bracket stage. The playoffs will be held on August 23.  The eight contestants from the group stage will face each other in a single-elimination bracket with quarterfinals, semifinals, and the grand finals. Players from both the divisions will play together in this stage. Western and Eastern players will compete against each other in this step to secure the No Tile crown for their own.
Each quarterfinal will have an East player facing a West player based on the Group Stage results (E1 vs W4, E3 vs W2, W1 vs E4 and W3 vs E2). There will also be a match for third place in the championship. 

Fair Play: Also, Supercell has released a post about fair play in the challenge. So please be careful about these guidelines. The most common thing is account sharing. Yes, it is not allowed. They will track you using your location and device. So don’t mess up with it.

At its simplest, account sharing is giving your account to another person to let them play for you (account pushing). Selling, buying, sharing or giving game accounts to other players is against Supercell’s Terms of Service. Anyone found sharing their accounts will see their own account banned alongside any others that they accessed.

If you have any questions or doubts, drop them down in the comments. The No Tilt 20-Win Challenge is already on in Clash Royale. So what are you waiting for? Bring your best decks in the battleground and climb your way up the wins. Stay tuned with me for more exciting info and guides on Clash Royale.

Amazing Ice X-Bow Bomb Tower Deck (Anti Meta)

0

Hey guys its Avesta with my first Clash World deck! Today I will be showing you my Ice X-Bow deck.

Right now the meta is Battle Healer EG, and the only hard counter is Bomb Tower. So, to counter the meta, we use a bomb tower deck! Simple!

This deck is an Ice Bow control deck, so you have to try to control your opponent. The elixir cost is small, only 3.6 elixir.

Ice Bow Bomb Tower Deck

avesta deck

Card Breakdown

Clash Royale Bomb TowerBomb Tower

Bomb Tower is one of the only 2 buildings to do splash damage, the other is Furnace. The reason Bomb Tower is good against the EG is because it can destroy the big boi, then it can hit the medium bois at the same time with its splash damage, then it one-shots 2 small bois, disabling battle healer’s healing.

You have to try to always try to have Bomb Tower down because you never know when they might start a push because of their low elixir cost.

Replacements: Clash Royale Tesla Clash Royale Furnace

Clash Royale Ice WizardIce Wizard

Ice Wizard is the backbone of this deck, being a very versatile card.

The Ice Wizard’s slow effect is really useful, and it has splash damage. This means that you can slow a full Royale Recruits and destroy it for +4 elixir.

Its only 2 drawbacks are its hitpoints and hit speed, which is 590 and 1.7 seconds.

Replacements:firecrackerClash Royale Archers

Clash Royale X-BowX-Bow

X-Bow. An extremely underrated card. X-bow is very good, with o.25 hit speed and 26 damage. An X-bow ignored is a tower lost.

If they place a tank at the back, play X-bow on the opposite lane. They usually cannot defend because they are dry, but you can. Place Ice Spirit or Ice Wizard then use Knight to finish him up.

Many might think this is wrong, but it works for me.

Replacements: Nothing.

Clash Royale KnightKnight

Knight is our main tank killer in this deck. It has 1452 health, 167 damage and 1.2 hit speed, and it is 3 elixir. Just 3 ELIXIR. Its also common, which makes him easy to uplevel.

Knight shines in both defence and offence. For defence, use it to kill tanks such as Golem. This is a +5 elixir trade. On offence, use it to attack the tower with Ice Wizard. It will clear out swarms, and also slowing them down.

Replacements: Clash Royale Dark PrinceClash Royale Bandit

Clash Royale Ice SpiritIce Spirit

Ice Spirit is a 1 elixir card which is mainly used to cycle, but it still can have other uses. It has seen many buffs and nerfs, but it still remains one of the top common cards.

Ice Spirit can be used to kite cards, but its freeze effect is just amazing value for 1 elixir, letting knight and the tower finish the tank off.

Replacements: Clash Royale Fire SpiritsClash Royale GoblinClash Royale Spear Goblins

Clash Royale RocketRocket

Rocket is the not the only spell in this deck, so listen up to find its use. You should use Rocket to counter their EG Battle Healer combo, as it usually kills them at most levels.

Use the Rocket to finish up big tanks, and only if you absolutely need to use it on buildings. You can use it to finish up towers, but I use Goblin Barrel usually. Don’t use it on cheap stuff, we have Tornado for that.

Replacements: Clash Royale fireballClash Royale Poison

Clash Royale Goblin BarrelGoblin Barrel

Goblin Barrel is our second win condition apart from X-bow. Use it for chip damage, but only on defence against Giants and Royale Giants if you are desperate.

You can also bait out other cards such as Log with it as well.

Replacements: Clash Royale Skeleton Balloon

Clash Royale TornadoTornado

Last of all, Tornado. Just use it to defend against swarms and King Tower activation and you should be fine.

Gameplay

3:00-1:30

Try to find out what deck your opponent is using. For example, if they place Musketeer and Ice spirit at the back, you know you need to keep that Tornado. If they place 3 Musketeers at the river and a Bandit in one lane and an Ice Golem in the other you know you should try to Rocket their pump. Other than that, try to deal chip damage every time you can so when it gets to double elixir you can make a big push and lose as much hit points as possible. Also, since this is a Control deck, try not to lose so much tower health, about 800 at maximum. Just keep placing those Bomb Towers so they can’t use the EG Battle Healer combo.

1:30-00:00 ( Not OT)

Place X-bow whenever it comes into your cycle. A few hundred tower health might cause the end of the game. Try to place many Ice Wizard Knight combos.

OT

Just defend. Attack with Goblin Barrel only. If they are dry on elixir is the only time you attack. Finish it up then. If it goes to Tiebreaker, hopefully, you placed enough Barrels!

Deck Matchups

Clash Royale GolemGolem NW:

Easy. Just Ice Wizard the NW and X-Bow and Knight against Golem for a neutral elixir trade. if they attack on the other side after, cycle to Knight and Ice Spirit, and also hopefully your Ice Wizard and Knight did a few hundred damage. And keep up with the Barrels and Bomb Towers.

battle healerEG Battle Healer:

Bomb Tower is the key. Try to put as many down. Ideally, when double elixir hits, you want to have a Bomb Tower down, ready for their push. After you defended, attack straight away. Ice Wizard Knight, then place X-bow if it comes in your cycle.

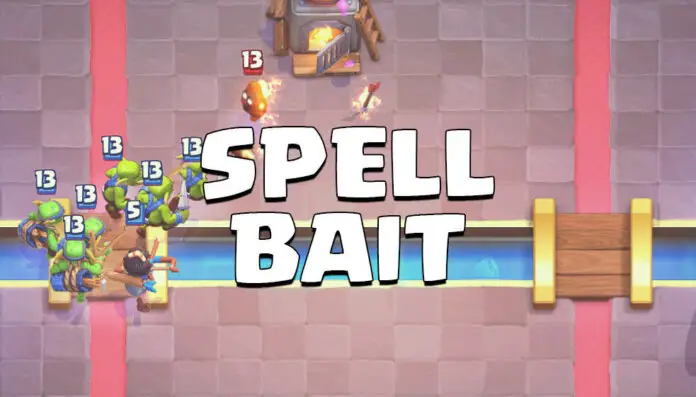
Clash Royale Goblin BarrelSpell Bait:

This is really hard to out cycle them, and the Inferno Tower always attacking your Knight. You have 3 spells, which is good, though. If they place a bunch of troops but you can’t Rocket them, first Tornado the troops then Rocket them. In attack, the only useful one is Goblin Barrel, but if you Goblin Barrel the Inferno Tower then you can freely place the Knight and Ice Wizard. Then you defend.

That’s all people! Avesta out 🙂

Meta RG Fisherman Deck

0

Hey guys, it’s Nebula back with another guide!

Today I want to show you a really fun deck that is currently very popular on Top 200 ladder and Grand Challenges too. It makes use of the new and improved Fisherman, who has seen a rise in use and success ever since the hook’s range buff. Despite the recent slight nerfs, the Fisherman is definitely a changed card from the obsolete fish-slapper of a few months back.

This new RG deck has been shaking up the meta!


rg 2


The Deck

rg deck

Pros Cons
High-pressuring deck Very weak against EGolem
Fast cycle Weak against Graveyard and Beatdown in general
Hard counters other cycle decks (like 2.6 Hog and 2.9 XBow) Relies on aggressive play, can be risky to use
Not too difficult to play


Cards:

Clash Royale Royal GiantRoyal Giant: 

The big boy is, of course, your main win condition. He is good played together with the Fisherman because the Fisherman can distract troops from the RG. A Hunter in the push can help quickly destroy the troops which the Fisherman pulled. Because this is more of a cycle deck than a control deck, don’t be afraid to play the RG at the bridge more often than if you were playing a deck like RG Furnace. You can cycle back to RG quickly with cards like Heal Spirit, Skeletons, and Log.

Unlike other cycle decks‘ main conditions, e.g. Balloon, Hog, XBow, the RG can easily counter XBow cycle.

fishher manFisherman:

The standout card here! The Fisherman can function as a Tornado in troop form, pulling Hogs, Giants, and Golems to the King. However, keep in mind that it is different from a Tornado because it can only pull troops as opposed to pulling cards within the Tornado’s range.

As I said before, it also synergises extremely well with the Hunter because the Hunter only deals its insane damage up close, so pair it with the Hunter as much as you can. This combo can kill many pushes combined with cycle cards. For example, if the opponent plays a Giant Sparky push, it is easy to isolate the Giant by pulling it to the King with the Fisherman, then killing the sparky with a combo like Skellies + Hunter.

The Fisherman’s relatively slow movement speed, low damage, and moderate health mean it is not very suitable for offensive pushes, however it can act as a distraction for the RG.

Clash Royale HunterHunter:

The Hunter is your main tank killer here, and can easily destroy Balloons and Hogs. For just 4 elixir, this card can provide so much value and is still underrated, with other air defences like Musketeer generally preferred.

It is much better played as a reactive card as opposed to an investment in the back, and should not be played on offence, similar to the Fisherman. He will be an absolute nightmare to deal with once he’s up close and personal with the opponent’s troops.

Try and cycle him as quickly as you can against Beatdown decks because this deck is generally weak against Beatdown, being a fast cycle deck without a building.

These three cards, RG, Fisherman, and Hunter, are the only ‘sturdy’ troops in this deck so you will need to gain as much value as you can with the cycle cards and not waste elixir so you can quickly cycle these stronger cards!

Clash Royale BatsBats:

Bats are your secondary anti-air unit. It is the cheapest defence against a Balloon in the game being a high DPS card (albeit fragile).

Bats can also provide a big offensive boost for just 2 elixir. Usually the opponent will have to take a negative elixir trade to counter them if they don’t have Bats, as the RG and other cycle troops (or Hunter/Fisherman) will be tanking/distracting.

Clash Royale SkeletonSkeletons

Good ol’ skeletons- the ever-present cycle card. It can distract cards like Prince, Sparky, and other high damage cards very well so you can spank them with the Hunter.

They sacrifice themselves so your other troops can do their work- so make sure to use them as often as possible!

Heal SpiritHeal Spirit

Ever since its release, the Heal Spirit has made a marked jump from the DEAD Heal card to the amazing utility card that it is now.

It can heal your defensive troops (which is important because Fisherman and Hunter don’t have the highest HP) almost instantly because your enemy won’t have the chance to react to it fast enough before it kamikazes straight into their troops.

It is also very good on offence and counter-pushes especially, being able to heal up your 1HP troops from the defence.

Clash Royale The LogClash Royale fireball

Log + Fireball

These two cards are very common in cycle decks so I’ll talk about them together.

In cases where your RG can’t get much damage, against defence-heavy decks like Graveyard, it is best to Fireball cycle. Make sure to make your mind up as early as possible so you don’t waste 6 elixir on your RG only for it to get obliterated, while you’re left with minimal Elixir to defend the counter-push.

The Log is an excellent small spell for cycle decks because cycle decks rely on chip damage, with the Log being able to provide more reliable and constant chip damage on the opponent’s tower when you Log back your opponent’s troops.

A maxed-out Fireball + Log deals 413 damage. Keep this in mind when you’re in overtime struggling to get that damage. You need to remember that it’s not always the right option to just chuck your Fireball at that Princess tower. You should always keep a general count on your opponent’s Elixir.

Handy tip: If they play something at the back they’re likely to have had 10 elixir. Check your elixir to see how much you’re down/up.

General gameplay:

Best starting moves: Heal Spirit at bridge, Skeletons at back, Log to cycle, RG at bridge if your opponent just played something like a PEKKA or Sparky in the other lane (try not to play Fisherman or Hunter first play.)

1xeblob e1594357416641Elixir:

You will want to be cycling RG as frequently as possible in order to figure out your opponent’s cards and how many/what counters your opponent has to the RG. Sometimes you don’t even need to play the RG with too much support, this isn’t an elixir-heavy deck. Often Bats + Heal Spirit can suffice. You should also try and get as much value out of Fireballs on the tower + card played in the back.

Defend with minimal elixir by making positive trades with the Hunter and the Fisherman but try and avoid as much damage as possible in 1x Elixir and take a good chunk off the opponent’s tower, because this deck does not have an extremely sturdy defence.

2xeblob e1594357416641Elixir:

In 2x, you should be putting the pressure on as much as possible, by making constant pushes. This is especially important against beatdown decks because you don’t want them building up lots of elixir to mount a massive push against you which you won’t be able to defend very easily. You need to know when to tower trade too. Because RG decks work so well in two-tower games (as the RG can just be played in the pocket) it is better to just let the Golem (or whatever card) go and then defend your King minimally with things like Fisherman and Bats while you pressure heavy in the pocket with RG.

Of course, this is the ideal situation (a 1-1 game) but this is the general gist of how you should approach the game in 2x.

Overtime:

In overtime, you should be pressuring with RG, but still being cautious and slowly chipping away the opponents’ tower with Logs and Fireballs. Keep cycling and cycling, often times you will have to risk your tower for all-out offence so don’t be afraid! It’s just one game, after all.

Matchups:

Clash Royale Golem

Clash Royale Night Witch

Golem:

This will be very difficult, as the lack of a building in such a cheap deck like this with 3 fragile cards and 2 spells is disadvantageous, but don’t despair!

You will need to keep up the pressure and stop them building massive Golem pushes because if they do, 9/10 times you’re toast. So stay on the offence!

Pull the Golem to the king the first time they use it to help you out massively, and if they play it again, use the Fisherman to pull the Golem within range of three towers.

Clash Royale GraveyardGraveyard:

This is also a tricky one because you don’t really have a high DPS range/splash card like Dart Goblin or Archers. You will need to block their tank at the bridge with a Hunter (best case scenario) and something else to distract for as long as possible so your Princess tower is shooting at the Graveyard’s skeletons. Use Bats + Log and whatever you have to avoid too much damage.

Clash Royale Hog RiderClash Royale Musketeer2.6 Hog:

This deck is almost like it was practically BUILT to hard counter 2.6 Hog! The good thing is, you can pretty much keep up with their cycle if you play cards as fast as them, while you can easily destroy their cannon with a Fireball so your RG has a clear path to their tower. In fact, the RG can demolish the Cannon by itself anyway, so focus on destroying the Musketeer first in most cases.

Hunter, Bats, and Fisherman are both excellent counters to the Hog.

Clash Royale X-BowClash Royale Tesla2.9 XBow:

The RG was made to destroy XBow! The average elixir of both these decks is both 2.9 but your win condition can easily counter their win condition. It will be basically impossible for them to get any damage if you keep up with their cycle, and they will have to save their Tesla for defending your RG instead of on offence protecting the XBow, making it even easier for you.

You really shouldn’t be losing THIS matchup…..

Here’s some top gameplay of this deck:

Well that’s it! I hope you enjoyed the guide and that I maaaaybe convinced you to try out this deck because after all, it’s incredibly fun to play.

Any remarks, questions, etc.? Drop it in the comments below.

Peace! <3


New Fisherman + Hog Rider Magic Deck

0

Hey Clashers! It’s Krux here again with a new great meta deck based on Fisherman and Hog Rider, which you can use to beat the enemies down in the ladder this season.

Beach Battle has started and we are into the season one week. And now it is time for us to jump into the battle and push the ladder. We want to end up beating our personal best this season. Ain’t we?

fisherman hog deck

As we got to know in the Season update that there are some unique balance changes this season in Clash Royale. Fisherman, the most underrated and niche legendary card in the game has been buffed. Zappies have also gotten a rework along with a Firecracker nerf. The Fisherman is not a new card but the blue-clothed guy never saw his golden days in Clash Royale. As it has been now buffed, the usage percentage of the card has been on the rise every day. We will look at some Fisherman decks that you should be mastering this season to make use of the buff. 

Fisherman + Hog Rider Magical Deck

11
12

Fisherman is back in the game with a strong fish in his hand. This deck is for the players who love hog cycles and can’t do without a hog deck in any season whatever the meta is. So if you are one of them, here is your treat Hog master. This deck has Hog and Fisherman both along with Bats and Log being the low elixir cycle cards.

Deck Cards:

  • The Hog rider is our win condition with this deck and we will try to cycle it as much as possible.
  • It is also our punishment card. What I mean by punishment is that it can be used to punish your opponent when they use a big-elixir card at the back of their king tower. Just drop the hog and take damage, this works in this deck as we don’t have any big-elixir card ourselves.
  • We have log and lightning as our spells. Lightning should be used as a pump response or destroy a group of troops gathering near their tower.
  • Then we have our Ice golem which I know that you know how to use. Ice golem is our bait to avoid all damages to our towers and also bait for saving the Magic Archer.
  • Mini Pekka in this deck is our tiny friend to finish off the enemy’s medium troops like Prince, Dark Prince, Valkyrie etc. It is a defense card as well as can counter push with Ice Golem.

Deck Strategy

Start with the magic archer as an investment in the back of the king tower. Or you can cycle the log on their tower.

Do not put the fisherman or the hog rider right away before knowing what cards your opponent is playing.

After they make a move, place the bats in support of the magic archer. When your opponent places a tank, let it come past the bridge.

You have to use the fisherman at the right time and the right place. Use it to pull their win conditions in the middle of the arena or near the king tower for an early activation.

After the investment, you have to use your mini Pekka as the defense. You can use it in combination with the fisherman. Fisherman pulls their giant skeleton in the middle and you place a mini Pekka to finish it off before it kills the fisherman.

Place Mini Pekka against Prince, Pekka, mega knights etc after pulling them. In between all this, count your opponent’s elixir and let the hog rider run into their tower with the hammer.

ssssss 1

Send your Ice golem ahead of the hog rider to build up an offence. Or with the Mini Pekka. Two cards that you won’t be using without mindfulness in this deck are the Fisherman and the Lightning.

Try to guard your magic archer as much as possible throughout the match, by placing mini Pekka to protect or send the Ice Golem in front in the battleground. This will make your foe spend more elixir into taking him out or using a spell against him.

As the match advances and you learn what deck the opponent is playing, you have to make predictions when to log their goblin gang or barrel.

Your magic archer is your main air defence also, so better keep him alive. If the opponent is using a heavy deck like Lavaloon, put pressure by using Magic Archer and Bats in the opposite lane so that he doesn’t build up elixir for those.

I hope you would win some good matches using the deck and also the fisherman earns some respect that was long due.

https://www.youtube.com/watch?v=8k0Kg3ju-u0

Be sure to keep checking Clash World for the new guides regularly. Till then, Clash on!

Best Arena 11 Decks: Electro Valley

0
clash royale arena 11 decks

It is now time to shock you with my collection of Best Arena 11 decks: Electro Valley!

best arena 11 decks in clash royale

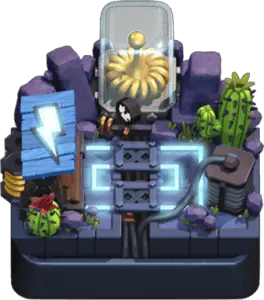
This is a great Arena – both graphic and gameplay-wise. It looks cool with all the Tesla coils and the batteries. The card unlocks are significant – Tesla, Elixir Golem, Electro Wizard, Sparky, and the Electro Dragon. Almost every card unlocked has very unique mechanics – the Tesla hides, the E-Wiz has a spawn zap, the Elixir Golem screams negative elixir trade and the Sparky unloads a shit ton of damage.

Let’s get into it right away.

Clash Royale Arena 11 Decks

You now have access to almost all of the Meta decks for Arena 11. Using Meta decks makes it easier to progress because they have great synergy, they use cards that are strong and they’re fairly skill-based. Choose one of the win-conditions from below and I’ll give you one deck for each.

Cheaper win conditions include:

elixir golemClash Royale Goblin BarrelClash Royale Hog RiderClash Royale GiantClash Royale Balloon

Heavier win-conditions:

Clash Royale Royal GiantClash Royale goblin giantClash Royale X-Bow

Best Electro Valley – Arena 11 Decks

E-Golem BH Night Witch Beatdown

elixir golemfirecrackerClash Royale Night WitchClash Royale Baby DragonClash Royale Electro Dragonbattle healerClash Royale PoisonClash Royale The Log

A very difficult deck to play against, and also quite tricky to play with. The key is knowing when to put down the Elixir Golem and when not to. Because the Elixir Golem is essentially a 7 elixir commitment (counting the +4 for the opponent), you’ll need to be prepared for a large push, while also supporting your E-Golem. Tricky, yes. Impossible? No.

Support your E-Golem with the Night Witch + Battle Healer and keep Poison ready.

One really great thing about this deck is that the Inferno Tower does not counter the Elixir Golem – which leaves you free to carry The Log as a Prince stopper and Barrel crusher.\

GobBarrel Heavy Bait

Clash Royale Goblin BarrelClash Royale Goblin GangClash Royale PrincessClash Royale MinerClash Royale Mini P.E.K.K.AClash Royale Inferno Towerroyal deliveryClash Royale Baby Dragon

An unusual deck that requires the Barrel to have a tank with it. There are three ‘bait’ cards here, but only two of them are to be used for actual baiting – Goblin Barrel should not be fired anywhere except the Tower. Use the Miner as a mini tank, or as a quick finisher. Mini PEKKA + Inferno is more than enough for defense.

Royal Delivery is used to counter support troops hiding behind big tanks while Baby Dragon is anti swarm.

Hog-Freeze Antiswarm

Clash Royale Hog RiderClash Royale PoisonClash Royale Baby DragonClash Royale FreezeClash Royale GuardsClash Royale ValkyrieClash Royale HunterClash Royale Bomb Tower

A great deck that relies on the power of the Freeze spell! Your basic push must be Hog-Poison. Don’t show the Freeze spell until you’ve got a decent push going along. Freeze adds a level of surprise to your attack. Hunter + Baby Dragon/Guards is pretty okay to defend. For Minions and Horde, you’ve got the Poison, Hunter, Baby Dragon and Freeze.

Don’t hesitate to use Freeze on defense, but only if you absolutely need to.

Giant Sparks

Clash Royale GiantClash Royale Flying ZappiesClash Royale TeslaClash Royale SparkyClash Royale BanditClash Royale WizardClash Royale PoisonClash Royale Zap

A cool and fun deck to play with. I’d recommend not to go with the Sparky at the back, as she provides spell value. Instead, place her in front of the King Tower. For quick damage, use Bandit. Tesla is your line of defense against Golem/Hog/E-Golem.

It’s actually better to use the Tesla and Wizard against E-Golem because of its split mechanic. In the best case scenario, Sparky needs a total of 12 seconds/3 shots to kill the E-Golem.

Your pushes should start with Giant and split Zappies at the back. Support the weaker side with Bandit, and the Giant with Poison.

Air Raid Bowl

Clash Royale BalloonClash Royale BowlerClash Royale Flying MachineClash Royale Mega MinionClash Royale CannonClash Royale LumberjackClash Royale ArrowsClash Royale Ice Golem

Heavily offensive deck. You’ve got only the Cannon and the Flying Machine for defense, everything else is to hit the Towers or tank for the Balloon. Your greatest weakness is PEKKA and Mega Knight decks in Arena 11, because only Flying Machine and Cannon provide that high DPS. Both of them are incredibly vulnerable to Fireball.

Bowler is simply not a reliable counter for PEKKA/Mega Knight. You’ll be using him to push Valkyrie/Hog/Battle Ram/Night Witch/Wizard off course, and maybe retarget them away from the Balloon.

Save your Arrows for the Minion Horde and Goblin Barrel, you can counter Bait pushes with Cannon-Lumberjack.

Royal Furnace Guards

Clash Royale Royal GiantClash Royale FurnaceClash Royale Electro WizardClash Royale LightningClash Royale Mega MinionClash Royale Mini P.E.K.K.AClash Royale Baby DragonClash Royale Guards

This deck is actually tough to play against. It’s got an absolutely scorching offense combined with a solid defense. Royal Giant shouldn’t be sent in alone, as you don’t have a small spell. Mega Minion, Mini Pekka and Guards are more than sufficient to counter pushes.

Use the Baby Dragon for swarm clearance and Furnace for bite-sized support. Furnace is also a great ‘threat’ card, because it deals over 1000 damage if ignored. Combine Lightning and RG for tower-taking pushes.

It gets easier to play after you’ve got one tower, because an RG placed in the pocket deals guaranteed damage on the tower (quick lock on, good range, high health).

GobGiant SparkNado

Clash Royale goblin giantClash Royale SparkyClash Royale ZapClash Royale Goblin GangClash Royale Flying ZappiesClash Royale HunterClash Royale ValkyrieClash Royale Tornado

Deck with high synergy. Zap + Goblin Giant is a Inferno-resistant swarm-clearing push. Sparky and Hunter as tank killers, with Tornado for that sweet area splash. Split Zappies can support the GobGiant very well, with a Valkyrie + Goblin Gang on the weaker side.

Use Goblin Gang as anti-Minions and cheap swarm. PEKKA and Mega Knight decks will be weak here, because of the Hunter, Sparky and Goblin Gang. Just make sure not to have all three of them on the map at once – try and keep one in your hand.

In a pinch, Valkyrie also works well against Mega Knight + support.

X-Bow SkellyBarrel Rocket

Clash Royale X-BowClash Royale RocketClash Royale Skeleton BalloonClash Royale Goblin GangClash Royale Mini P.E.K.K.AClash Royale PrincessClash Royale Ice GolemClash Royale Mega Minion

This is more of a “by-hook-or-crook” deck. It relies on your opponent being so infuriated that he fails to defend 🙂

Use the Goblin Gang and the Princess to bait out the Log. Don’t put down the X-Bow and Skeleton Barrel together, both of them play a pseudo-win-condition role here. You’ll want to put the Barrel right after baiting the Log. If they counter with Valkyrie/Dark Prince/Mega Knight, defend with Mini Pekka and Ice Golem. Then go to town with X-Bow.

Rocket is for last-ditch defending and tower finishing. Don’t cycle it too much or your opponent might throw his device away and go on a pilgrimage.

So that’s it guys, these are the 8 best Arena 11 decks: Electro Valley! Keep playing and keep getting better.

Cheers, Excalibur.

Elixir Collector: The Definitive Guide

0

Hi everyone, it’s Excalibur back with a guide on how to use the Elixir Collector in Clash Royale.

Clash Royale elixir collector

The Elixir Collector is a six Elixir card that is unlocked in Arena 8: Frozen Peak. It allows you to produce more Elixir. One Elixir Elixir is added to your Elixir bar every 8.5 seconds.

It can produce a maximum of 8 Elixir Elixir over its 70-second timer. That means it’ll give +2 Elixir Elixir (when you deduct its cost) when you plant it – provided it lives that long.

elixir advantage trick

Elixir Collector Summary

Pros

  • Gives you +2 Elixir, and is the only card in the game that produces Elixir passively.
  • It can be used to ‘store’ Elixir before a big push. Think of it as an investment – a place to put 6 Elixir and get +2 for your storage.
  • It can also be used to expand your storage by 1 Elixir. If you’re at 10 Elixir, and an Elixir Collector sitting on your map is full, it will not drop the Elixir it contains – thus giving you 11 Elixir. Each Elixir Collector can store 1 such Elixir, which will be added to your bar when you use a card.

Cons

  • It is very prone to spell value! A Fireball/Poison can deny 6 out of the possible 8 Elixir generated, and Fireball 2 levels higher will completely destroy the Elixir Collector. If it is timed properly, no Elixir is gained – you’ve lost out on 2 Elixir AND your tower is damaged.
  • It is a very-high-risk-but-low-reward card. You’re essentially spending 6 Elixir to get +2, and you may not have Elixir left for defense. If the opponent takes the tower behind which the Elixir Collector is hiding, you’ve lost the Collector too.
  • Miner is one of the greatest weaknesses of the Elixir Collector. He can completely destroy the Collector for a +3 trade, and then proceed to deal about a hundred damage to your tower.

Cons that turn into pros

  • Spell Value. As the Collector is often the victim of Rocket, Fireball, Lightning and Poison, you can use it to bait these spells out. Then you can deploy cards which are high-reward but prone to Fireball, like Three Musketeers or Royal Hogs.
  • Kidding. There’s only one con which turns to pro.

Spell Match-ups

The Elixir Collector is best used in certain decks that either rely on baiting spells, or on all-or-nothing pushes. To use this card, you have to be aware of the spells the enemy has.

Spell Used Position of Collector Resultant Production  Collateral Damage
Fireball Behind Tower 2 Elixir ~250
Front of King 2 Elixir
Poison Behind Tower 2 Elixir ~220
Front of King 2 Elixir
Lightning Behind Tower 0 Elixir ~320
Front of King 0 Elixir
Rocket Behind Tower 0 Elixir ~450
Front of King 0 Elixir None
Miner —- 0 Elixir ~120

Clash Royale fireball

Fireball

This is an okay match-up for you. There’s only one way that you’ll be able to retain your Collector long enough to actually get any benefits: use another card as bait. Give Fireball value away, but try to keep it under 2 Elixir – because that’s what you’re going to recover.

Clash Royale Rocket

Rocket

If you know the opponent has Rocket, do not place the Collector behind your Tower, as this will give him Rocket value. Place it directly in front of your King Tower. The Collector won’t survive, but at least your opponent will not get spell value.

Clash Royale Lightning

Lightning

This one is a bummer. Lightning has a large enough radius that it’s able to hit the Collector, the Tower AND another troop nearby. You’ll lose out on the six elixir, but don’t bait Lightning with anything else. It’s a tough match-up, possible worse than Fireball because Lightning does a great job of breaking up pushes.

Clash Royale Poison

Poison

This spell is actually the nightmare of 3M Bait decks, because unlike Fireball, Poison deals damage slowly in a larger radius. This closes the window to split the 3M behind the King.

Poison’s large area denial and long duration makes sure that swarms cannot protect the 3M on defense. Thus you cannot use Royal Recruits, Minion Horde or Goblin Gang to stall for the 3M’s long deploy time. Moreover, experienced players will note the position you play the 3M in and Poison the area when they push the next time.

8 Tips for Elixir Collector

  1. If you’re playing against a Miner Poison deck, plant the Collector on the furthest tile from the King tower to the left or right. This makes sure that they’ll Poison the Collector, but the radius isn’t big enough to kill the Split 3M. Also there’s less squares to put the Miner on – he cannot be played on an occupied square.
  2. The ideal time to plant the Collector is when the timer reads 1:30. The real benefits of the Collector start to show after 70 seconds, so you’ll get a boost of 2 Elixir roughly when Double Elixir is halfway.
  3. Against beatdown decks, play the Collector in front of the King’s Tower.
  4. Against Log/Zap bait, use the tile just below the tower. This prevents Tricky Barrel, as the Goblins will attack the Collector.
  5. For effective Elixir collection, pay attention to the visuals of the Collector. The Elixir is showed filling up in the container. When you see that it’s filled/about to fill completely, it’s time to make space in the Elixir Bar.
  6. Alternatively, you can deploy 2 or more Collectors to effectively increase your total Elixir Storage. If you’re sitting at 10 Elixir and the Collectors are full, they won’t leak that Elixir. You can then deploy a unit, like a PEKKA, and the Elixir from the Collectors will fill your bar again.
  7. Keep in mind that the ‘storing’ of Elixir doesn’t stop the Collector from slowly losing health, so you can do this for only ~15 seconds before you start losing on your Collector.
  8. In a pinch, the Elixir Collector can be used to completely stop a Ram Rider – at an even trade. Do a 5-2 placement just as the Ram jumps over the bridge. A jump stops the charge, so that will slow the Ram down while your Collector does its thing. The Ram will attack the Collector four times. With just a sliver of health remaining, the Collector will spit out 1 Elixir while the tower deals with the Ram.
  9. This should not be done for a charging Ram Rider.
  10. A VERY risky move is planting the Collector at a 5-2 placement and then quick-dropping a Dark Prince directly in front of it. This baits out ranged attackers like Wizard, Musketeer and Dart Goblin which will be killed by the Dark Prince. This should only be done if you want Balloon/Lavahound counters to be baited out.

So that’s it guys, hope this guide helped out on how to use Elixir Collector. See you in the Arena, Excalibur out.

Mirror’s Ultimate Guide (Updated)

75
clash royale mirror

In Clash Royale, Mirror is a card that is just shy of being an underrated card, being just barely underpowered yet still quite useful in many cases…

A guide by yojojo3000

clash royale mirror

Mirror Summary

Clash Royale mirror

The Mirror allows you to place the previous card you just played into the arena, allowing you to play 2 Hog Riders at once, 2 Skeleton Armies at once, etc.

The Mirror will cost the same amount of elixir as the previous card you played plus one more elixir, which means that if you were to Mirror a 4-elixir Hog Rider, the Mirror would cost 5 elixir to use, and if you were to Mirror a 1-elixir Ice Spirit, the Mirror would cost 2 elixir to use, etc.

The lowest the cost of the Mirror can currently go is 2 elixir, and the highest the cost of the Mirror can go is capped at 10 elixir.

On top of that, the card that your Mirror places will be one level higher than the Mirror’s level, meaning that a Level 9 Mirror will place a Level 10 card every single time, and a Level 13 Mirror will place a Level 14 card every single time, regardless of which card you use the Mirror on.

Strengths of the Mirror

Conceptually, having a Mirror in your deck can definitely be a lifesaver in some situations.

Against Bait decks (decks that revolve around forcing a certain card out of your opponent’s hand in order to allow another card in your deck to reach the tower without having to worry about said card), Mirror can counter their strategy pretty hard. Their goal is to force a specific card out of your hand in order to reach the tower, but with Mirror, you basically have two of said cards in your hand. This makes it really difficult for the Bait player to get to your tower.

Ironically, Mirror pairs quite well with Bait decks as well, though arguably less effective than using Mirror as a counter card due to the higher elixir cost of the Mirror. It basically gives you an extra card to bait cards with, or allows you to counter spells like Zap on your Skeleton Army.

Mirror can be particularly strong if used to Mirror powerful cards such as Sparky, Giant Skeleton, Battle Healer, etc.

However, due to the massive elixir cost of most of these powerful card, finding yourself in a situation that will allow you to Mirror said cards safely is, to put it quite frankly, niche. I wouldn’t rely solely on just that strategy to win, but you can sometimes squeeze it in your deck just in case the opportunity arises for you to make use of it.

Pairing the Mirror with win conditions such as Hog Rider and Giant is questionable and very risky, but if you can play the game just right, just so perfectly, you can get away with giving your opponent 9 elixir, 11 elixir, whatever in exchange for their tower.

But again, it’s very risky and not for beginners or even intermediate players.

Weaknesses of the Mirror

This one weakness alone is probably why the Mirror is so underpowered at the moment:

Mirror places the previous card played, and only the previous card played.

What does that mean? It means that it’s exploitable.

If you have a Mirror ready to Mirror a Mini Pekka for their Hog Rider, they could instead play Skeleton Army at the bridge and force you to play something else, like The Log. Because of that you lose the opportunity to Mirror your Mini Pekka because now the Mirror is set to Mirror the Log you just played, which means that they are free to play a Hog Rider and get damage on your tower.

Faster cycle decks can easily get around the Mirror by exploiting this. By using their cycle cards, they can easily force you to play something else before they get back to the card that you want to stop.

Even Bait decks can exploit this consistently. A simple Knight or any tank can force you to play something else and cause you to lose the opportunity to use the Mirror as it was intended to be used.

Against less knowledgeable players who don’t exploit it intentionally or unintentionally, you’ll probably be fine, but at higher Ladder, this exploit is gonna be abused a lot.

Another weakness is the +1 elixir cost of the Mirror.

You might think “oh it’s just one more elixir, how bad could it be?”

It’s actually pretty fatal.

Mirror is very prone to making negative elixir trades (based on my own experimentation) and I guess it’s just because it’s all so expensive. Even without the +1 elixir cost it would still be very prone to negative elixir trades. This makes Mirror quite difficult to use.

How to Use Mirror

Due to the limitations and weaknesses of the Mirror, the best way to use the Mirror is as a backup card (replacing what was destroyed) or a counter card (destroying what was replaced).

The downsides of the Mirror make taking risks unfavorable until you can guarantee that you’ll be safe when making a risky play with it, so you’ll mainly be using Mirror in non-risky ways, such as being a backup or a counter card.

Because of that, don’t expect to use your Mirror often during a match. Sometimes you’ll go an entire match without using the Mirror once, so don’t force yourself to use the Mirror.

Only use it when it becomes relevant.

A good way to practice your patience with the Mirror is to try to win the match while using Mirror as little as possible.

Once you work up a large enough elixir lead on the opponent, feel free to make risky plays with the Mirror, such as Mirroring win conditions or making offensive plays with the Mirror.

You’ll want to have strong synergies with your Mirror so that you can actually use Mirror to its fullest potential.

Having at least 3 cards that synergize with Mirror makes for a good deck.

Good synergies include strong units that easily die to spells like:

Clash Royale BatsClash Royale Skeleton ArmyClash Royale Magical ArcherClash Royale Dart Goblin

Any spell, strong counter cards like:

Clash Royale ValkyrieClash Royale Mini P.E.K.K.AClash Royale Bomb Tower

Strong counterpushing cards like:

Clash Royale BanditClash Royale Royal GhostClash Royale Giant Skeletonbattle healer

And cheap and/or strong win conditions.

You have a very wide selection to choose from, but make sure that it works for your deck.

You’ll also want to try making your deck just a tad on the cheaper side.

Without Mirror, your deck can have an upwards elixir cost average of around 4.2 elixir before becoming too heavy to be viable (unless you use Elixir Collector), but with Mirror, I’d say your deck can only have an upwards elixir cost average of around 3.8-ish Elixir elixir before becoming too heavy to be viable (unless you use Elixir Collector).

The +1 elixir cost of the Mirror can really hurt you, especially if the Mirror is likely to be sitting in your hand most of the game, because there may be times where you only have 2 elixir in hand stuck with a full hand of expensive cards, and then the opponent plays a Hog Rider at the bridge and gets 5 shots on your tower by the time you are finally able to place something.

That said, Mirror works pretty good in cheap decks as it allows you to use the Mirror more often and with far less punishment, though you run the risk of having a weak offense as well.

You gotta find the right balance between cheap and expensive.


Common Mirror Pairs

Clash Royale Goblin Barrel

Goblin Barrel — Goblin Barrel is a disgusting card to Mirror. With the combination of having very few counters and a cheap cost, the Goblin Barrel is the most common card you will see paired with Mirror as it allows you to be very aggressive on the offense.

Clash Royale Bats

Bats/Skeleton Army — A defensive competitor of the Goblin Barrel, Skeleton Army and Bats are also known to be common pairs with the Mirror. Both can do insane work on defense if left to do so, and spell counters such as Zap or Giant Snowball can be heavily negated with the Mirror spell. However, a Poison spell can absolutely hard-counter this strategy, so be careful when you face someone using Poison!

Clash Royale Valkyrie

Valkyrie — It’s no surprise that Valkyrie is commonly seen with the Mirror. This woman can absolutely nuke pushes. What if one Valkyrie isn’t enough? Have two Valkyries! What if two Valkyries aren’t enough? Well, you’re screwed.

Clash Royale Goblin Hut

Spawners — Probably the most irritating synergy of them all and unsurprisingly another common sight, spawners benefit a lot from the Mirror, most notably the Furnace. Though expensive, it can prove to be worth the extra cost if your opponent doesn’t have two answers to your spawners. This can force opponents to push into your spawners in order to prevent chip damage on their towers, which is exactly what you want them to do. Just be careful about spending too much elixir to get them.

Clash Royale fireball

Damage Spells — Probably up there with Goblin Barrel for understandable reasons, Damage Spells of any elixir cost are great pairs with the Mirror due to their extremely versatile nature, allowing you to chip down or even nuke pushes with ease, or even finish the opponent’s tower twice as fast. Need I say more?

How to Counter Mirror?

3 words: Abuse The Exploit.

Make them cycle cards they don’t want to cycle before playing your desired card. This directly counters their counter to your desired card.

In the case where the opponent uses Mirror as a backup card, Mirror can be a tough brick wall sometimes.

If brute force can’t break through the opponent’s Mirror, applying pressure in both lanes will.

If the opponent plays his backup card in the opposite lane in an attempt to stop both sides, clearing out one side will almost ensure that you will get good damage in.

If he doesn’t play his backup card in the opposite lane and decides to play his backup card in the same lane (stopping your push), the opposite lane will get good damage in.

For the opponent, the best he can do is to not use his Mirror and try to defend both lanes with other cards.

The most important thing to do against an opponent with Mirror is to not let the opponent get an elixir lead on you. If he gets an elixir lead on you, he will cash in that elixir lead with an offensive Mirror, which will likely prove to be fatal if you’re not prepared.


This guide has been brought to you by u/yojojo3000