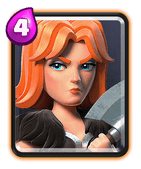
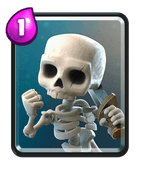
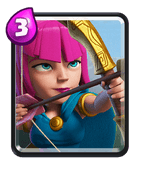
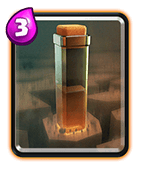
Home Blog Page 46

Splashyard: Top Meta Deck

0
knight graveyard

Hey guys, its Blaze back with another guide for you all! Today, I will be talking about one of the top meta decks, which will be none other than the mighty Splashyard.

It’s currently one of the best decks for Tournament Standard or Max level matches. As for non-max ladder, it works pretty well against the decks, but it’s very difficult upgrading the deck to higher levels as it extremely Epic and Legendary heavy.

Deck:

Clash Royale GraveyardClash Royale PoisonClash Royale KnightClash Royale Barbarian Barrel

Clash Royale TornadoClash Royale Ice WizardClash Royale Baby DragonClash Royale Bomb Tower

Deck Breakdown:

Clash Royale GraveyardGraveyard:

Graveyard is the win-condition of this deck. It’s one of the top 5 win-conditions in the current meta. It can deal a lot of damage very easily and it’s near impossible to completely defend against a Graveyard.

Clash Royale PoisonPoison:

Poison is GY’s best friend as well as it’s worst enemy when in the opponent’s hand. Even though GY and Poison form a strong pairing, try to use Poison when you can get good value out of it and not just for the sake of it, as an over-commitment can bite you back.

Clash Royale KnightKnight:

Knight is the main Mini-tank for your GY. For 3 elixir, Knight provides a lot of value and is an underrated card among casuals. As I said, use it to tank for GY, as an assassin to kill support troops (if barb barrel is not available/ isn’t enough) or just take care of win-condition and threat cards.

Clash Royale Barbarian BarrelBarbarian Barrel:

It’s the best cheap spell in the game. You can use it to clear swarms and take care of support troops at the same time. With GY however, you can also use it as a cheap tank with your GY, if you don’t have other cards available or you wanna apply some opposite lane pressure without losing your defensive cards.

Clash Royale TornadoTornado:

Tornado is the best card to use with the amount of splash available in this deck. You can also use it for King Tower activations. On offense, you can bring enemy troops from outside the Poison spell into it, or to clump all the enemy troops near the Princess Tower so that your splash troops can hit them as well as the tower simultaneously.

Clash Royale Ice WizardIce Wizard:

Ice Wizard is an amazing defending card with his slowing ability. Couple it with Tornado, and enemy troops are gonna have an extremely hard time reaching to your Princess Tower. It is also a decent tank for your GY, as even though its only Firebally, it only costs 3 elixir and his slowing ability effectively increases his survivability and thus his ability to tank.

Clash Royale Baby DragonBaby Dragon:

Baby drag can be considered to be a secondary mini-tank if this deck. It has quite good HP for a troop meant to be splash support. His fiery breaths can deal serious damage without seeming to be threatening. A lot of your matches would be dependent on getting a Baby drag lock on enemy towers and a good tornado.

Clash Royale Bomb TowerBomb Tower:

It is one of the strongest defensive buildings in the meta, or rather one of the only good defensive buildings in the meta. Bomb tower provides amazing ground defense with its splash and high health, and its death damage can come in clutch a lot of times, even working against air troops. Like the other splash cards, it has amazing synergy with tornado.

Gameplay:

Starting Hand:

The worst starting hand is:

Clash Royale GraveyardClash Royale PoisonClash Royale TornadoClash Royale Bomb Tower

Here, you can’t make any play without wasting elixir and putting you at a disadvantage. If you’re really desperate, then play Bomb Tower and hope that you can defend the enemy push.

In any other case, play anyone of the remaining four cards with the priority as follows:

Clash Royale Barbarian Barrel>Clash Royale Knight>Clash Royale Ice Wizard>Clash Royale Baby Dragon

Single Elixir:

Play passively and defend, don’t generally go for Graveyard pushes unless the opponent overcommits and you get a good counter push going or if the opponent places a heavy unit in the back and you need to pressure the opposite lane.

Double Elixir:

Start actively going for GY pushes and applying pressuring, yet always have enough elixir to defend against enemy pushes. This might seem confusing, so let me explain.

Usually, apply pressure with a GY push, opponents spend a decent chunk of elixir on defence, but often can send a something like say, a sneaky Hog rider on the opposite lane. Try to have enough elixir to defend stuff like that.

Triple Elixir:

In triple elixir, your deck becomes extremely strong. The reason being that you can get a lot of your splash troops on the arena and can repeatedly Tornado the enemy troops, so they won’t be getting near your towers anytime soon.

At the same time, you can also do a lot of GY Poison pushes and have a strong support/tankage with it and deal a lot of damage. Here again, Tornado can be used to clump all the enemy troops and kill them with your splash troops, regardless of the number of enemy troops, and get damage on the enemy tower at the same time.

You can also just spell cycle and get GY chip damage if you’re unable to do full-fledged pushes, and try to win the tie-breaker. This also works because you’ll most likely be using Poison and Tornado with your GY.

Matchups:

This deck performs against most decks with ease as it has a really strong defensive set-up. Only sort of tough match-ups could be Heavy Beatdown and other GY Decks.

Clash Royale GolemAgainst Heavy Beatdown:

Heavy Beatdown isn’t too difficult of a match-up as long as you keep up with opposite lane GY pressure when they used their tank, or start to prepare for a push by placing a 4 elixir or more card. Follow this with a Bomb Tower + splashnado push and you’ll be coming up at the better end of the trade almost always.

Don’t tower trade or let it escalate to a two-tower match. GY becomes significantly weak with two towers defending, while the enemy can start slowly taking down your tower by placing the tanks in the pocket.

Clash Royale GraveyardAgainst GY:

Against GY the issue that arises is that you’ll be saving your Poison for each other’s GY, which also means that you’ll be in an extremely weird stalemate situation, unless you can get a lucky GY in.

The result of the match will be dependent on the results of the numerous bridge battle that will take place. In order to win these bridge battles, you’ll need to fine tune your troop placements it’s timing, as well as the better and more effective use of Tornado.

The other way to win this is go for opposite lane instead of battling for the upper-hand in a single lane. However, you need to wait for the right moment to actually go for an attack or else the opponent can actually take out your tower while defending easily.


That’s all folks! Hope you guys enjoyed reading this guide and have fun with this deck! Clash On!

Sayonara,

Blaze Stone.

Bad Matchups: X-Bow 3.0

0
x-bow

What’s going on everyone, Its VJ here. Welcome to the Article 2 of the Bad Matchups Series. Today we are going to take a look at the Classic X-Bow 3.0 deck. Even after the X-Bow nerf, this deck has been super viable in the meta. So let’s get going…

DECK OVERVIEW:

Clash Royale X-BowX-Bow:

The Win-Condition of this deck is the siege card X-Bow. X-Bow has the longest range in the game just like Mortar. It is used as an Offensive siege card and also defensively by placing it in the centre or side and taking full use of its long range.

Clash Royale TeslaTesla:

Tesla is the second building of this deck. It is mainly used defensively to defend our side of the Arena and also to defens and support the X-Bow.

Clash Royale KnightKnight:

Knight is the main tank card of this deck. It has multiple jobs to do such as defense, offense supportive role etc. It synergizes insanely well with archers in defense and with X-Bow in offense.

Clash Royale ArchersArchers:

One of the 2 Air-Defenses of this deck is archers. They are super tanky just for 3 elixir. No small spell except arrows can kill them. They even can be played while splitting them at the back when there is not much happening in the Arena.

Clash Royale Ice SpiritIce Spirit:

This 1 elixir card can turn the whole game upside down using its defensive skills. It can freeze things for 1.5 seconds. It gives way more value when compared to Freeze Spell. Freeze Spell for 4 elixir freezes for 4 seconds whereas Ice Spirit for 1 elixir freezes for 1.5 seconds.

If converted to 4 elixir, the Ice Spirit can freeze things for 6 seconds. The cool thing is, its Freeze mechanic can also reset things.

Clash Royale SkeletonSkeletons:

These Skeletons play a super cheesy role in defense. They are very helpful to distract things and also support X-Bow especially against cards like Inferno Tower and Inferno Dragon.

Clash Royale The LogThe Log:

The duty of taking care of all chippy units has been assigned to The Log. The Log also plays the essential role of getting spell values with getting some chip damage on opponents’ towers.

Clash Royale fireballFireball:

And last but not the least comes the Big Boi Spell, Fireball. Whenever using the Fireball, try to get as much value as possible out of it. If situation permits, you can also Spell Cycle your opponent as this deck has a very fast cycle and its fastest cycle is just 6 elixir!

X-Bow Placements:

There are 2 types of Defensive X-Bow Placements:
1. Central

View post on imgur.com

Central Defensive X-Bow placement is used at the start of the match when not much damage has been taken by either of the players.

2. Side

View post on imgur.com


Side Defensive X-Bow placement is used on the opposite side of your most damaged tower or the tower on which the opponent is attacking.

When talking about Offensive X-Bow placements, there are multiple options like Centre of the Arena, 1 tile behind etc.

View post on imgur.com

View post on imgur.com

These placements need to be used according to the situation of the match.

Playing Style:

You can play this X-Bow Siege deck in different ways like: Defensive, Offensive and Medium.

In the Defensive style, you just get some chip damage with X-Bow, not applying much pressure and mainly spell cycle your opponent. You most of the time have a Defensive X-Bow place on your side, therefore, not allowing the opponent to attack or build a big push.

With the Offensive style, you play a lot of X-Bows and apply a lot pressure, also trying to outcycle your opponents’ X-Bow counters. And your way of defending things is smart which includes stacking Teslas.

If you choose the Medium Style, you play in a very balanced way and according to the situation. When attack is needed you need to continuously stack X-Bows alternatively switching lanes.

Bad Matchups:

Clash Royale GolemGolem Beatdown:

• Always remember the 4 elixir rule i.e. Whenever the opponent plays a four elixir card, go for X-Bow at the bridge because then, he won’t be able to play Golem in time before the X-Bow locks on the tower.
• Avoid giving Spell Values to the opponent.
• Defend big Golem pushes using Cycle Skills i.e. Cycle cards like Tesla, Archers and Knights.

Clash Royale Royal GiantRoyal Giant Cycle:

• In single elixir always try to keep a defensive X-Bow in the Arena.
• Don’t waste fireballs simply, use them to either defend if you can get value out of it or if it’s necessary or use it to get troops/buildings and tower damage.
• Never go for and Offensive X-Bow unless you see a good opportunity i.e. if you have outcyled your opponent or he is low on elixir.
• Try to stack Teslas and X-Bows to defend RG pushes and also to help build a good X-Bow push.
• Never place a Tesla at the bridge with X-Bow until if you are sure you can there itself defend the RG push defending against the X-Bow, always keep it ready and place it in the centre to defend RG pushes.

Clash Royale Lava HoundClash Royale BalloonLava Hound and Balloon:

• As these Lava-Loon decks most of the time don’t have much of ground troops, take good use of that by outcycling or baiting their ground units.
• Use Cycle skills to defend Lava-Loon pushes.
• You can trade towers if you find the situation favorable for you.

Clash Royale X-BowX-Bow:

• If you face a mirror matchup always try not to let the opponent stack buildings.
Spell cycle only when necessary and when there won’t be any harm if you use your spells.
• Against Ice-Bow matchups use your better cycle against them.
• Don’t let them Rocket Cycle you.

THANKS FOR READING!

Royal Hogs and Royal Recruits | Dual Lane Fireball Bait deck

0
royal hogs, royal recruits

Hey guys, its Blaze back with another guide for you all. Today, I will be breaking down the Royal Recruit and Hogs dual lane pressure deck.

Deck:

Clash Royale Royal HogsClash Royale Royal RecruitsClash Royale earthquakeClash Royale Barbarian Barrel

Clash Royale Flying ZappiesClash Royale Flying MachineClash Royale Goblin Cageelectro spirit

Royal hogs, royal recruits, earthquake, barb barrel, zappies, flying machine, gob cage, electro spirit

Card Breakdown:

Clash Royale Royal HogsRoyal Hogs:

Royal Hogs are the main win-condition of this deck. Even though they deal quite less damage per hit, their quick hit speed and 4x count makes up for it. You can place them at the bridge as quick spam attack or place them in the middle of the river and split them for dual lane pressure.

Clash Royale Royal RecruitsRoyal Recruits:

Although the piggies are the win-condition of the deck, IMO the Royal Recruits are the core of the deck. It is a low skill card, as even though they cost 7 elixir, you can plop them down and opponent can’t really punish you. You can perform a 3-3 split or a 4-2 split depending on your need and keep applying the dual lane pressure. They can act as tanks for your piggies and support troops as well as do a great deal of work on defence.

Clash Royale earthquakeEarthquake:

Earthquake is used to take out buildings which are used to distract your piggies. It can also act as your secondary win-condition due to its high Crown Tower damage to elixir cost ratio in case you cannot get your piggies to connect.

Clash Royale Barbarian BarrelBarbarian Barrel:

Easily the strongest cheap spell in the game at the moment. For 2 elixir, you can clear out ground swarms and have a barbarian to take out the higher health support troops. ‘Nuff said.

Clash Royale Flying ZappiesZappies:

Zappies are the main part of your defence. They can almost perma-stun enemy troops which can do wonders on defence. They can also be split 2-1 so you can again apply dual lane pressure. They can also bait our Fireball so that you can freely use your piggies or Flying machine. On defensive side of things, you can place them in the center so that they kite enemy troops like Prince, or place them towards the inner edge of your Princess towers so that they can get the maximum stun possible on cards like the Giant.

Clash Royale Flying MachineFlying Machine:

Flying machine is an amazing card to have in a deck as it can be extremely hard to take out due to its long range, without using a Fireball. This makes it an extremely strong card and a staple in fireball bait decks. It also has a weird shadow and does its often possible than the enemy misses their spell. It’s long range and sight enables to snipe buildings as well as lock on to crown towers when the opponent doesn’t expect it.

Clash Royale Goblin CageGoblin Cage:

One of two best buildings in the meta, completes the defensive trio with RR and Zappies. You can place in the center of the map to kite enemy troops while your Princess tower reduces their health, and once the cage is destroyed the spawned Goblin Brawler can finish them off. The Goblin Brawler can also put up a lot of pressure as it has a high damage potential, especially behind the Recruits and piggies.

electro spiritElectro Spirit:

The final card of the deck, eSpirit provides lot of cycling ability. It’s chain stun attack can be useful on defense, in conjunction with the stun by Zappies. On offence, it can clear out small swarms placed to counter your piggies while also allowing the piggies to get a few extra hits with its stun. Since, you’ll be doing dual lane pushes a lot, the opponents tend to use a lot of defensive troops which really give the eSpirit’s chain attack a lot of value.

Gameplay:

Starting Play:

For the starting play this deck has a lot of choices. You can either split Royal Hogs at the river or Zappies behind your King Tower, you can cycle your Barb Barrel at the bridge or just plop down your Goblin Cage. Heck, you can even split your Recruits in the back if you don’t have anything else in your hand or the enemy doesn’t give you a choice to play anything else.

Don’t cycle Electro Spirits at the bridge in the start, or even anytime during the match as it gives your opponent a chance to active their King Tower, which puts you at a disadvantage.

Synergies:

This deck has three main trios or components: The Dual Lane Pressure trio consisting of Royal Recruits, Royal Hogs and Zappies; The Fireball Bait trio of Royal Hogs, Zappies and Flying Machine; and The Defensive trio of Royal Recruits, Goblin Cage and Zappies.

As you can see, majority of the cards perform multiple roles as well as synergize extremely well with each other individually as well as the three Trios. This is the reason why this deck works so well, other than the strength of the cards in the current meta.

In Single Elixir:

Your game plan would be to apply passive dual lane pressure and focus on defending and counter pushing in general. Don’t be afraid to play your Royal Recruits in Single elixir time as it is the card that holds this deck together. This a mistake I see many players make: saving their Recruits for Double Elixir. Take advantage of Fireballs used by your opponent.

In Double Elixir:

You should start actively applying dual lane pressure with your hogs and getting creative with your spells and Flying machine. Flying machine should most often be placed in the centre at the river so it can attack both of the enemy lanes from that position, but can also be placed at the bridge on so that it can kill enemy troops place towards the edge of the arena.

In Triple Elixir:

Try to overwhelm your opponent with dual lane pressure. In case you can’t overwhelm your opponent, you can instead go super defensive and start cycling as many EQs as you can.

Matchups:

This deck works well against most decks in the meta. The only two weakness I can think of our Lava Hound and Splashyard.

Clash Royale Lava HoundAgainst Lava Hound:

You don’t have any card that can directly go aggro on the Balloon when it’s behind the Hound, and even if you can get your Zappies on the Balloon, the opponent can Fireball then. You can’t get a lot of value of EQs or Barb Barrels as well since these both are Ground only spells against an Aerial deck.

Clash Royale GraveyardAgainst Splashyard:

It’s difficult to connect your Hogs due to the high splash and Tornado activations. Your Recruits will most likely melt away as well and you can’t bait out Poison that well since the opponent can easily bring your troops together using Tornado.


That’s all folks! Hope you guys enjoyed reading this guide and have fun with deck. Clash on!

Sayonara,

Blaze Stone

Clash Royale Classes | Part 2

0
Clash Royale Cards

Hey guys, it’s Blaze back with Part 2 of the Classes in CR articles. This article duo will help you guys create better decks more efficiently. What I will be doing is explaining the different classes and their respective uses, followed by mentioning the cards which fall into the particular class. You can find the first part here.

Today, I will be dividing the troops according to their roles, irrelevant of their HP followed by Spells and Buildings.

Without further ado, let’s jump right in!

Clash Royale Classes:

Win-conditions:

Win-conditions are the core of your deck. They have high damage potential and are easier to connect with the enemy towers. They are generally the cards that determine the meta.

Clash Royale Skeleton BalloonClash Royale MortarClash Royale Royal Giantelixir golemClash Royale Hog RiderClash Royale Battle RamClash Royale GiantClash Royale Three MusketeersClash Royale Wall BreakersClash Royale BalloonClash Royale X-BowClash Royale goblin giantClash Royale GolemelectrogiantClash Royale MinerClash Royale Ram RiderClash Royale GraveyardClash Royale Lava Hound

Threat Cards:

Threat cards are cards which can create a lot of offensive pressure. They have high damage potential, but face difficulty to connect with the enemy towers. They are most often used simultaneously with a win-condition which results in powerful pushes.

Clash Royale Mini P.E.K.K.AClash Royale LumberjackClash Royale PrinceClash Royale Cannon CartClash Royale Elite BarbariansClash Royale Giant SkeletonClash Royale SparkyClash Royale P.E.K.K.AClash Royale Mega Knight

Splash-damage Troops:

These troops deal AoE damage i.e. they attack over an area instead of a single unit. They are generally used as support troops on both offence and defence to clear lot of troops simultaneously.

Clash Royale Ice SpiritClash Royale Fire SpiritsClash Royale BomberfirecrackerSkeleton DragonsHeal SpiritClash Royale ValkyrieClash Royale WizardClash Royale Baby DragonClash Royale Dark PrinceClash Royale HunterClash Royale WitchClash Royale BowlerClash Royale ExecutionerClash Royale Ice WizardClash Royale Princessfishher manClash Royale Magical ArcherClash Royale SparkyClash Royale Mega Knight

Multi-target Troops:

These troops can hit multiple targets at the same time, but they don’t have a splash attack, but instead multiple projectiles or chained attack.

electro spiritClash Royale Electro WizardClash Royale Electro Dragon

Point-damage Troops:

These troops target only a single unit but usually have a higher dps. The melee troops can be used to defend at close range and block troops, while the ranged once can be used to distract troops.

Clash Royale KnightClash Royale Mega MinionClash Royale Dart GoblinClash Royale Mini P.E.K.K.AClash Royale MusketeerClash Royale Flying Machinebattle healerClash Royale PrinceClash Royale Giant SkeletonClash Royale P.E.K.K.AClash Royale MinerClash Royale Banditfishher manClash Royale Night WitchClash Royale Inferno DragonClash Royale Lumberjackmotherwitch

Multi-unit troops:

These are troop cards which spawn multiple units at the same time. They are good for surrounding enemy troops or putting up dual lane pressure.

Clash Royale SkeletonClash Royale GoblinClash Royale Spear GoblinsClash Royale BatsClash Royale Fire SpiritsClash Royale ArchersClash Royale MinionsClash Royale Goblin GangSkeleton DragonsClash Royale BarbariansClash Royale Minion HordeClash Royale RascalsClash Royale Elite BarbariansClash Royale Royal RecruitsClash Royale Flying ZappiesClash Royale Royal HogsClash Royale Three MusketeersClash Royale Wall BreakersClash Royale Skeleton ArmyClash Royale Guards

Spawner Troops:

These cards spawn other units, either periodically and/or when they die, except Mother Witch who converts enemy troops into Cursed Hogs, still acting as a spawner.

Clash Royale Skeleton Balloonelixir golemClash Royale WitchClash Royale GolemClash Royale Night WitchmotherwitchClash Royale Lava Hound

Troops with Death damage:

These are troops who when killed, deal some amount of damage. They can be used on defense when you desperately need the damage, and also the distraction.

Clash Royale Skeleton BalloonClash Royale Ice GolemClash Royale BalloonClash Royale Giant SkeletonClash Royale Golem

Spells:

Cheap Spells:

These are spells which you can cycle easily, and generally deal relatively less damage.

Clash Royale ZapClash Royale Giant SnowballClash Royale Barbarian BarrelClash Royale Arrowsroyal deliveryClash Royale earthquakeClash Royale Tornado

Medium Spells:

These spells can’t be cycled extremely fast but at a good enough pace. They deal mediocre damage.

Clash Royale fireballClash Royale Poison

Heavy Spells:

These spells are difficult to cycle in a short amount of time, but they deal extremely high damage.

Clash Royale RocketClash Royale Lightning

Gimmick Spells:

These spells don’t deal damage (except freeze, which deals quite less damage). Instead they have special abilities or “Gimmicks” that make them useful.

Clash Royale mirrorClash Royale RageClash Royale Clone SpellClash Royale Freeze

Spawner Spells:

These spells spawn troops when deployed. Barbarian Barrel and Royal delivery spawn a single unit and deal damage, but can’t reach Crown Towers. Goblin Barrel and Graveyard on the other hand spawn multiple units, but don’t deal damage. However, they can deployed anywhere on the arena, and hence are use as win-conditions.

royal deliveryClash Royale Barbarian BarrelClash Royale Goblin BarrelClash Royale Graveyard

Buildings:

Offensive Buildings:

These buildings are used as win-conditions and can damage enemy crown towers. They can also be used as defensive buildings when needed.

Clash Royale MortarClash Royale X-Bow

Defensive Buildings:

These buildings are used as to defend against enemy pushes. They have quite short range so they can’t be used offensively. You place them in the center of your side of the arena, so that enemy troops are kited into the cross-fire region of your crown towers.

Clash Royale CannonClash Royale TeslaClash Royale Bomb TowerClash Royale Inferno Tower

Spawners:

These buildings don’t deal damage, but spawn troops which indirectly deal damage. They can be used to deal constant chip damage to enemy towers, or if you want to easily switch to a counter push after a good defence, as the spawned troops can snowball. They can be place either in the center like normal defensive buildings, or behind your princess towers to protect them from troops, or in front of your king tower.

Clash Royale TombstoneClash Royale Goblin CageClash Royale FurnaceClash Royale Goblin HutClash Royale Barbarian Hut

Elixir Collector:

Elixir collector is one of a kind card in the game. It spawns 1 elixr periodically so that after its life time, you gain more elixir than you spend. This card dominated the early years of the game but after a reword *cough* nerf *cough* , it fell out of the meta, and isn’t really seen a lot

Clash Royale elixir collector

That’s all folks! Hope you guys enjoyed reading this guide, and found it helpful. I will soon be posting another guide on deck building, where all the different classes mentioned in this article duo will help you understand it, and enable you to build better decks! Have fun and Clash on!

Sayonara,

Blaze Stone


Clash Royale Classes | Part 1

0
Clash Royale Cards

Hey guys, it’s Blaze back with another guide for you all. After the Win-condition post, I thought that we needed an article explaining the different “classes” in Clash Royale. Understanding these different classes will help you guys create better decks more efficiently. What I will be doing is explaining the different classes and their respective uses, followed by mentioning the cards which fall into the particular class.

I decided to divide this in 2 posts: The 1st one aka this post will cover the division of troops according to their roles due to their HP, the 2nd post will cover division of troops according to their roles irrelevant to HP, and division of spells and buildings.

Without further ado, let’s jump right in!

Note: All stats mentioned in this post are at Tournament Standard. It’s not necessary that a card belongs to only one category. The higher the number of classes the card falls in, the more versatile the card is, although in most cases the card will outperform in one class than the others.

Clash Royale Classes:

Tanks:

Tanks are the cards with extremely high HP. Their main job is to soak up a lot of damage, while the remaining troops are safe. Most tanks are win-conditions, the remaining are better used as threat cards than win-conditions. A card with HP above 2500 (as a single unit, all stages) can be considered to be a tank, the Royal Giant being the lowest HP tank with 2544 HP.

elixir golemClash Royale Royal GiantClash Royale goblin giantClash Royale Giant SkeletonClash Royale P.E.K.K.AClash Royale Lava HoundClash Royale GiantClash Royale Mega KnightelectrogiantClash Royale Golem

Mini Tanks:

Mini-tanks are the cards with moderately high HP. They aren’t as tanky as Tanks but they compared to the ranged support troops, they have a pretty good amount of HP. Now, the mini tank range is a bit vast, and IMO should be divided into the three sub-classes based on their interaction with Rocket and Lightning.

Pseudo Mini-Tanks:

These cards have HP above 700, which is decent but die to Lightning which deals 877 dmg. Cannon Cart and Battle Ram can be as good as the below-mentioned sub-class in most scenarios as they have multiple stages, but their base stage dies to lightning.

Clash Royale Cannon CartClash Royale Battle RamClash Royale BanditClash Royale Night WitchClash Royale Electro Dragonfisherman

Rocket-able Mini-Tanks:

These cards can survive can survive a Lightning hit and do their job as Mini Tanks extremely well. However, they still die to a Rocket which deals 1232 dmg.

Clash Royale Baby DragonClash Royale Ice GolemClash Royale MinerClash Royale Royal GhostClash Royale ExecutionerClash Royale LumberjackClash Royale Inferno DragonClash Royale Elite BarbariansClash Royale Mini P.E.K.K.AClash Royale Sparky

Rocket-immune Mini-Tanks:

These cards can survive a Rocket hit, which is the highest damaging spell in the game. They perform the role of a mini-tank the best in the game.

Clash Royale Dark PrinceClash Royale BalloonClash Royale Hog Riderbattle healerClash Royale KnightClash Royale Ram RiderClash Royale ValkyrieClash Royale PrinceClash Royale Bowler

Fireballies:

This consists of cards which are weak to cards like Fireball and Poison, hence the name Fireballies. Now, this class ranges from troops which survive arrows which deals 303 dmg to troops who survive poison, but die to lightning and are below 700 HP. So, similar to mini-tanks, I will divide this class into three sub-classes based on the interaction with Fireball and Poison.

Die to Fireball:

These cards die to Fireball straight away. They can bait put a Fireball more often than the below mentioned sub-classes, as those cards require another a spell or a troop to take them out which might be a bad trade.

Clash Royale BomberClash Royale Skeleton BalloonSkeleton DragonsClash Royale Magical ArcherClash Royale Flying ZappiesClash Royale Flying MachineClash Royale Barbariansmotherwitch

Die to Poison:

These cards survive a Fireball with a sliver of health, but die to Poison. They are better at baiting out Poison than Fireball, but the difference isn’t a lot.

Clash Royale Ice WizardClash Royale Electro WizardClash Royale MusketeerClash Royale Three MusketeersClash Royale Wizard

Survive Poison:

These cards survive both Fireball as well as Poison, but can bait out the spells better than the remaining cards in the game.

Clash Royale Mega MinionClash Royale WitchClash Royale HunterClash Royale Royal Hogs

Cheap Troops:

These are cards which cost 3 elixir or less and can’t survive arrows. Again, will be dividing into 4 sub-classes based on their interaction with Zap/Snowball, Barbarian Barrel, The Log and Arrows.

Die to Zap/Snowball:

Zap and Snowball are the lowest damaging spells in the game at 169 dmg, excluding Freeze and Tornado, but they have a different use.

Clash Royale SkeletonClash Royale BatsClash Royale Skeleton ArmyClash Royale Fire SpiritsClash Royale Spear Goblins

Die to Barb Barrel:

These troops die to Barb Barrel i.e. 200 dmg.

Clash Royale GoblinClash Royale Goblin GangClash Royale Ice Spiritelectro spiritHeal Spirit

Die to The Log:

The Log deals 240 dmg which is helps it kill the following cards.

Clash Royale Dart GoblinClash Royale Princess

Die to Arrows:

These cards die to Arrows which deals 303 dmg. Minions and Minions hoard are air troop so they are immune to Barb Barrel and Log, and hence are included here.

Clash Royale MinionsClash Royale Minion HordeClash Royale ArchersfirecrackerClash Royale Wall Breakers

That’s all folks! Hope you guys enjoyed reading this guide. Part 2 will come out soon! Have fun and clash on!

Sayonara,

Blaze Stone

Top 10 Synergies in Clash Royale (Seaon 20)

0
synergies

What’s going on everyone, its Vinay (VJ) here with another thrilling Clash Royale Article! In this article we are going to take a look at the top 10 synergies in Clash Royale. So let’s get going…

What is a Synergy?

A synergy is a combo of two people or things (in this case it is cards) that works insanely well.

Importance of Synergies in Clash Royale:

Synergies play a very important in Deck – making and Deck – choosing in Clash Royale. It is essential to know Synergies of your decks as well as other decks. Benefits of owning the knowledge of Synergies is that you can use the synergies of your deck and play with your decks more effectively and also knowing in general all the powerful synergies helps in countering the synergies of your opponents as you will be knowing their strengths as well as weaknesses.

Here I present to you the Top 10 Synergies in Clash Royale currently…

#10 – Lava Hound + Miner

Clash Royale Lava HoundClash Royale Miner

Yes it is very true that the 7 elixir big flying beast Lava Hound pairs outstandingly with the mini 3 elixir Miner. They synergize with each other so well because, as Miner can be directly placed anywhere in the Arena, it is quite useful to counter all the Lava Hound Counters. For example, if the opponent places archers to counter the Lava Hound, you can easily drop a Miner on them and counter them.

Miner also helps to distract all the enemy troops, buildings and towers when the Lava Hound destroys and spawns Lava Pups, while the lava pups deal an insane amount of damage to the enemy towers as well as troops. And if they ignore the Miner and focus only on defending Lava Hound, even the tiny digger can deal a lot of damage to the enemy.

#9 – Sparky + Goblin Giant

Clash Royale SparkyClash Royale goblin giant

The most advanced and dangerous machine of Clash Royale i.e. Sparky when played with the Goblin Giant becomes OP. The reason why this his combo is so strong is that Sparky takes care of all the big units that includes tanks and tank killers and buildings and Goblin Giant takes care of all the swarmies (both air and ground) due to the 2 little spear goblins that he carries at his back.

Even after the goblin giant dies all the enemy troops, buildings and towers target our other units (if any) and the spear gobs might get some descent amount of chip damage on the tower.

#8 – Royal Giant + Lightning

Clash Royale Royal GiantClash Royale Lightning

Royal Giant is such a card that has a good range as well as DPS. The best counters to it are swarmies but as they can be easily countered with spells like log etc. players 99% of the time use either buildings or heavy tanks and tank killers.

The lightning spell helps in a great way to counter all such counters. And as the Lightning has a very large radius it is very difficult for players to avoid giving spell values when countering RG. And mainly all the troops can be killed with the damage of lightning and all the buildings can be destroyed with lightning and one or two of shots from RG.

#7 – Hog Rider + Earthquake

Clash Royale Hog RiderClash Royale earthquake

This epic combo of Hog Rider + EQ works fantastically in Hog Cycle decks. Its full power is triggered during 2x and 3x elixir times as at that time you can continuously cycle it at an insanely fast speed and players pretty much won’t always have enough elixir in hand to defend this. Even if to defend this push players have enough elixir to place a building, it won’t be enough as EQ with the help of a some chip damage from the Hog takes out all the buildings and you are pretty much guaranteed some Hog damage on the Tower.

#6 – Miner + Earthquake

Clash Royale MinerClash Royale earthquake

Just like Hog Rider Earthquake pairs well enough with Miner as well these days. Before the August 2020 Season, Miner + Poison was a great synergy, but after the Poison and Miner nerf it is no longer was viable.

But nowadays Miner + EQ is a brilliant combo, where EQ is a replacement of Poison. The reason for this is that EQ just like Poison takes care of a lot of ground swarms and unlike Poison deals more damage to buildings and towers and even slows down all the ground troops by 35%. Not denying the fact that it deals less troop damage, but we get all this foe 1 elixir less than Poison i.e. 3 elixir.

#5 – Lumberjack + Balloon

Clash Royale LumberjackClash Royale Balloon

Lumber – Loon is a very old synergy but works in today’s meta as well. If played properly, it is almost impossible to counter it without creating facing a negative elixir trade as the Lumberjack takes care of all the ground units and buildings and makes way for the Balloon. You might need a small spell to counter the swarms, so keep it ready.

#4 – Giant Skeleton + Clone

Clash Royale Giant SkeletonClash Royale Clone Spell

This is a very powerful defensive as well as offensive synergy. It can used in the defensive because only for 9 elixir it can counter even 20 elixir pushes. Also while attacking it is quite helpful as if the Giant Skele reaches near the tower (not to enough for its bomb to connect) the clone will push it ahead and u will get great amount of damage from the bomb explosions and even if it is completely defended the double bomb explosion kill everything on the other side itself and won’t allow the opponent to counter attack.

#3 – Golem + Night Witch

Clash Royale GolemClash Royale Night Witch

This aged – old synergy works even in today’s time and meta. The Golem alone itself is the tankiest card in the game. But when paired with Night Witch it creates a lot of trouble for the opponent as the Night Witch, if left alone continuously spawns bats and if we spend some elixir to counter it, then we won’t be having enough to defend the Golem. And the Killer Shot is even after she dies she spawns 4 bats, forcing the opponent to Rage Quit.

#2 – Miner + Wall Breakers

Clash Royale MinerClash Royale Wall Breakers

A lot of troops synergize good with Miner, but the best out of it is Wall Breakers because they are the most difficult out of all to counter and they deal about 800 – 900 damage instantly. It specially helps to punish the opponent when he either overspent or is low on elixir as neither of these cards can be left ignore and you cannot counter both without spending good amount of elixir. You can make a lot of Positive Elixir trades using this synergy.

#1 – Fisherman + Hunter

fishher manClash Royale Hunter

Our No.1 synergy currently is Fisherman + Hunter. Hunter deals as more damage as he is close to things, but that is not possible everytime. Fisherman does the job of bringing units close to hunter even from a faraway distance, so that Hunter can easily counter them. Be careful because players will try to distract the fisherman.

THANKS FOR READING!

By VJ.

Bad Matchups: Miner Wall Breakers 2.8

0

What’s going on everyone, its VJ here. Today we’re going to start a new article series: ‘Bad Matchups’. In this we’re going to be looking at some in-meta, anti-meta and off-meta decks, and we will be learning how to play them generally and against the bad matchups. So let’s get going.

There are going to be multiple articles in this and as our series opener we have taken the Miner WB 2.8 Deck that has been pretty popular these days.

Deck:

Clash Royale MinerClash Royale KnightClash Royale Wall BreakersClash Royale Spear Goblins

Clash Royale BatsClash Royale fireballClash Royale The LogClash Royale Bomb Tower

There are a lot of variations not only in this deck but in the whole of Miner WB synergy, that are quite in the Meta, but I felt this one is the superior out of all of them, because in this deck we’ve got good amount of offensive troops such as Miner, wall breakers, spear goblins, bats and knight and spells like fireball and the log. The most amazing thing is that all of these can also be used defensively. That’s the beauty of this deck, All-Rounding Performance.

Deck Explanation:

Clash Royale MinerMiner:

The main element i.e. the root of this deck is this magical card ‘Miner’. This 3 elixir card can be used anywhere in the arena. It can be used offensively for some chip damage and it will also synergize extremely well with cards like wall breakers, bats and spear goblins.

Clash Royale KnightKnight:

Knight is the main tank card of this deck. He helps extremely well in defense due to his high DPS and hit points. He also is great at offense and even can be played at the bridge when opponent is low on elixir and just like Miner, he synergizes amazingly with chip cards i.e. wall breakers, bats and spear gobs.

Clash Royale Wall BreakersWall Breakers:

This 2 elixir card ‘Wall Breakers’ is a total game changing card, just one connection of both the wbs and it will deal about 800 – 900 damage. It can be played on the bridge while splitting it or even both can be played together at the bridge when opponent has spent a lot of elixir either at the back or the other side, or can be synergized with Miner or Knight. It is a great counter to X-bows and Mortars.

Clash Royale Spear GoblinsSpear Goblins:

Spear goblins are a 2 elixir card and can pretty much defend against all the air and most of the ground units. It also can be used as a bait card for small spells like snowball, the log, arrows, zap etc.

Clash Royale BatsBats:

At the cost of just 2 elixir spawn these 5 naught flying babies that are super cheesy when synergized with either Knight or Miner. Due to their fast attack speed and high dps they help insanely well in defense, especially when paired with spear gobs as both are bait cards for mini spells, but try not to use them together until there is no other option just because if you use two of your bait cards, you will lack in offense.

Clash Royale fireballFireball:

The main big spell of this deck is fireball. It’s a 4 elixir spell that deals about 150 – 200 damage and can be used to spell cycle the opponent and defensively. Always try to get as much more as spell values when using spells.

Clash Royale The LogThe Log:

After the big spell comes the 2 elixir small spell. The Log has the job of taking care of all tiny ground troops like skeles and gobs and even barrels.

Clash Royale Bomb TowerBomb Tower:

Last but not the least comes the main defensive card, which is a building. Although Bomb Tower targets only ground still it is in my opinion the best defensive building due to its death bomb. We need to use the bomb tower in different ways depending upon the situation. Sometimes it’s placed in the centre to distract all the troops into the centre so that both the princess towers and the king tower(if activated) can help in defending, while sometimes it is placed at the bridge so that most of the troops suffer the death bomb explosion.

Now let’s have a look on how to play this deck against bad matchups.

Bad Matchups:

Clash Royale GolemGolem Beat down:

• Against Beat down decks like Golem a 2 tower situation is always favorable.
• Try to get as much damage as possible in single elixir.
• Don’t allow the opponents to build big Golem Night Witch pushes.
• In double elixir to defend big Golem pushes try to play a bomb tower at the centre and cycle back to another bomb tower and place it somewhere else situationally.
• Always switch lanes.

Clash Royale Lava HoundLava Hound:

• 2 tower situations are extremely favorable.
• Place the bomb tower in front of the princess tower or at the bridge to defend lava hound and loon pushes.
• Don’t defend an alone Lava Hound by spending too much elixir.

Clash Royale GraveyardGraveyard:

• Use spear gobs and bats in a distant form while defending graveyard pushes to avoid giving spell value.
• Never let pushes like knight-baby dragon-goblin brawler come to your side. Try to kill them before they reach your side of the arena, because if they do it will be big graveyard push and will be a lot difficult to defend it.
• Always switch lanes.

Clash Royale Royal GiantRoyal Giant:

• Always try to save your bomb tower and try to defend royal giants without using it, so that if they cycle another RG or do different troops push now you can use it.
• Switching lanes and duel lane pressure is essential.
• Try to get a tower or almost a tower in single elixir.

THANKS FOR READING!

By VJ.

Mega Knight Log Bait Deck

0
log bait deck

Hello, fellow Clashers! I’m back again with a new Mega Knight Log bait deck, this one is gaining popularity since early Season 19 Stay Cool. It has a good win rate and unique playstyle. So, let’s get started!

Mega Knight Log Bait Deck

Clash Royale Mega KnightClash Royale Inferno DragonClash Royale BatsClash Royale Skeleton Balloon

Clash Royale Goblin GangClash Royale Spear GoblinsClash Royale ZapClash Royale Miner

copy deck

Deck Cards

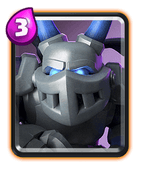
  • Mega Knight: The only costly card in this log bait deck, with the huge flail-ball stuck in its hand, he splashes the enemies apart! His role is to be a heavy-hitting splasher in this deck.
  • Inferno Dragon: What to say about this mighty beast? Annihilates the tanks with his lava beam. Used as a tank killer for this log bait deck.
  • Bats: In this deck to provide more airy firepower with the inferno dragon, Bats have high DPS and they also act as a bait for the opponent’s spells.
  • Skeleton Barrel: Another bait card that is hard to tackle, the opponent has to be perfect with their spell timing every time for the skeletons that drop from it. Also when the barrel bursts, it chips the building/princess tower.
  • Miner: A tank card used in this deck to tank for fragile chip damaging troops like Skeletons and Goblins. Can be used defensively in extreme cases.
  • Goblin Gang: These goblins provide high DPS together, best for defence and counter-attack when paired with the Miner. They also are bait cards.
  • Spear Goblins: Again, bait cards providing chip damage and air defence
  • Zap: You gotta have a spell right? For the swarms and the goblin barrel, to zap the Inferno Tower locked on your Mega Knight.

Deck Strategy

log bait deck

Opening: Play Spear Goblins/Goblin Gang at the start to chip their tower also, it is very unpredictable and difficult to react to these at the starting of the game so you might get some damage that puts you in lead. Skeleton barrel is a good starting card too if your opponent has a bad hand, they have to spend more elixir, hence, giving you positive trades. If they make the starting move by rushing aggressively, defend by playing Mega Knight if needed, or use Goblins to counter-attack with the miner. If they make a passive start by playing something at the back, rush the other lane by Spear Goblins/Skeleton Barrel/Goblin gang. NEVER play Mega Knight defensively at the start as it gives chance to your opponent to rush the other lane and you won’t have anything to stop it.

Mid-game: Chip your opponent constantly, don’t let them build elixir up, apply pressure, the play style of this log bait deck is somewhat similar to the classic log bait deck defend tanks with Inferno Dragon, and if they have Electro Wizard or Electro Dragon, do not let it target your Inferno Dragon by obstructing their way by your swarms. Play the Mega Knight on their supporting troops when your inferno is locked on to their tank. Mega knight provides splash and good damage plus acts as a tank for Inferno Dragon. Bats do a great job of defence and counter-attack when paired with the Miner. Also, play the Miner with the Skeleton Barrel, so when the barrel bursts, the princess tower focuses on your miner which will force the opponent to react to it.Screenshot 2021 01 18 22 37 48 813 com.supercell.clashroyale

Endgame: Keep chipping the tower constantly this deck doesn’t have a heavy spell, you have to keep rushing and, after getting a tower, it is not very difficult to defend with Mega knight and Inferno dragon plus the other swarms. Don’t let the opponent build a large push against you because we have some feeble goblins at defence.

Weaknesses:

1.Splashyard: If you don’t know what’s splash yard, it’s Graveyard + splashing troops, you must be wondering how graveyard is strong against this deck if this MK Log Bait deck has swarms, that is because the Graveyard is not played alone, it is paired with poison/freeze, and both are bad for swarms as it forces you to spend more elixir, what you can do against these decks is don’t let their tanks like Knight or Bowler (which are usually paired with Graveyard) get targeted by your princess tower, predict their Graveyard and block their tank on the bridge itself so that your tower targets the Skeletons hence preventing damage.

I hope that this deck helped you with your trophy conquest. Thanks to Shreyas K for submitting this guide. Stay tuned with us for more articles and guides. Until next time! 

Top 5 Win-Conditions in Clash Royale

0

Hey guys! Its Blaze back with another article for you all! Today, I will be talking about what I believe are the top 5 win-conditions in Clash Royale in the current meta, which should last for Season 19-21!

What is a Win-Condition?

Before, I start talking about what are the best win-conditions in the game, it’s a good idea to define what i mean by a “win-condition”, as I have found that it’s a somewhat vague and misleading term for new and casual players alike.

For a card to be considered as a win-condition, it should possess the following two attributes:

  1. It should have a lot of damage potential. That is if the card connects with a crown tower, it should be able to deal a serious amount of damage to it (proportional to its Elixir Cost). Thus it should create offensive pressure whenever you play the card.
  2. It should connect with the crown towers with relative ease. This means compared to other cards in the game, they should be distracted less often or should have a way to connect with crown towers different from the other cards.

The 2nd point, what most people don’t realize is the more important characteristic of a win-condition. Let’s take a few examples:

  1. Cards like PEKKA, Mega Knight, Prince, eBarbs shouldn’t be considered as win-conditions because even though have a lot of damage potential, they can be easily distracted by other troops, especially the cheap ones. In most high trophy matches, they would rarely connect with enemy towers.
  2. Cards like Giant, Hog Rider, Golem are win-conditions because they are oblivious to other troops. A counter-argument exists that they can be distracted by buildings, but so can be the cards mentioned in the above point. The ability of these building-targetting cards of ignoring other troops is the thing that makes it easier for them to connect with crown towers.
  3. Building cards like X-bow and Mortar are win-conditions because they can connect with crown towers from the opposite side of the arena. So even though they can be distracted by enemy buildings or troops, in order to destroy these buildings the enemy has to cross the river and fight on your side of the arena, which puts you at an advantage. This ability makes X-bow and Mortar to be considered as win-conditions.
  4. Princess is another card that can directly damage crown towers from your side of the arena, but her low health prevents her from being a win-condition as it greatly reduces her damage potential.
  5. Spell cards like Goblin Barrel and Graveyard are win-conditions because well like most spells they can be dropped directly on the crown towers.
  6. Miner is another card who can be dropped directly at crown towers but with his crown tower damage nerfs, he no longer has a high damage potential. IMO he should be considered to be a “pseudo win-condition”.
  7. Spells are in a opposite category that the troops mentioned in the 1st point i.e Spells have can connect with towers easily but they don’t have a lot of damage potentials. A counter-argument is that spells are cycled a lot in the last minute of the game, but that’s the point of having spells in the game: to get instant damage whenever needed, and as such shouldn’t be considered as win-conditions.
  8. Earthquake is the only exception and the main reason is that it has the highest Crown Tower Damage per elixir cost. But to use it as a sole win-condition, you need high defensive and cycling skills. It can be used in conjunction with other win-conditions, but it a spell shouldn’t have such a role in the game. It’s an unbalanced card and should be nerfed/reworked soon.

Now, that we have understood what is a win-condition, here are my top 5 picks for the best win-conditions in the game.

Best Win-conditions:

Note: This list isn’t in order of their strength, so the position in this list doesn’t relate to the cards strength in the game.

Clash Royale GraveyardGraveyard:

Graveyard can be placed directly on enemy tower and the RNG of the spawning skeletons makes it almost impossible to completely counter a GY, and many times a GY might end up dealing a lot more damage than you may expect. This ability to the annoyance of most of player base, makes GY an extremely powerful win-condition.

Poison and Tornado, usually seen in GY decks can take out most GY-counters easily, make it even difficult to defend against a GY push. The only true counter is ironically GY’s best friend, Poison itself. However, reserving your Poison for enemy GY prevents you from going heavy on the offensive side, which a sticky situation to be in. GY Freeze is also a cheesy way to win-matches, although not so dependable.

Clash Royale Lava HoundLava Hound:

Lava Hound has slowly crept up and become the best tank in the game. As the one of the few aerial win-conditions in the game and the sole aerial tank, it is the queen of the skies. As Bomb Tower and Goblin Cage, the top two defensive buildings in the current meta, can only distract the LH and not damage it, while the two buildings i.e. Inferno Tower and Tesla who can damage it being used in a few niche decks, LH can freely roam.

Coupled with Balloon and/or Miner, it becomes and amazing card. Balloon has the high damage threat while Miner can take out enemy defensive troops while LH tanks, and both these cards can then in-turn be tanks for the Lava Pups that spawn after LH dies. It also has amazing synergy with aerial cards like Flying Machine and all the different dragons, allowing you to form strong decks with ease.

Clash Royale Royal GiantRoyal Giant:

What makes RG different from other tanks in the game, is its range attack. RG can be considered to be a sort-off siege card similar to X-bow and Mortar as it can attack from afar, but the battles are fought on the opposite side instead. Nonetheless, it makes it extremely easy for the RG to connect to the crown towers.

Since, its a common card it is extremely easy to level up, and also over-level. It’s range makes it so that opponent has to react to it quicker than other tanks, as the RG can lock-on and each RG hits deals a decent chunk of damage. You can also support it easily by dropping cards directly at the bridge and letting them do their work from your side, instead of waiting for them to go the enemy side, wherein the enemy can kill them easily.

Clash Royale Royal HogsRoyal Hogs:

Although not seen as much on ladder, Royal Hogs are a strong win-condition because of two reasons: Fireball Bait and Royal Recruits. When combined, they make a formidable combo.

The strongest support cards in the game at the moment are Fireballies like Hunter, Flying Machine and Zappies. These cards can bait out Fireball which is the one of the best counter to the Hogs. Royal Recruits on the other hand are easy to use and can create a dual lane pressure by just plopping them down. In fact, you can plop down this 7 elixir card in the back right in the start, and in most scenarios the opponent would be unable to punish you.

Clash Royale Wall BreakersWall Breakers:

With only a 2 elixir cost, Wall Breakers take out 1/4th of a Princess Towers HP and can also be cycled very easily, enabling them to create a lot of pressure. Also the fact that cycle decks are thriving more and more as Clash Royale evolves, Wall Breakers are becoming a dominant win-condition.

They have two downsides: to use a wall-breakers deck, you need to learn the “Art of Cycle” and Kiting techniques & you it’s difficult to win-against bad match-ups compared to other decks. As such, the current meta wall-breaker decks can’t do well against heavy beatdown, especially Lava Hound and decks which have Arrows are an instant loss. The only way to win against them is if opponent makes a mistake in the start and you can capitalize on it, else you’re doomed.

Despite this, it fairs well against the remaining decks, and perform amazing as long as the match-making doesn’t give you problems.

That’s all folks! Hope you guys enjoyed reading this article. Have fun and Clash on!

Sayonara,

Blaze Stone