Home Blog Page 51

Clan Wars II Guide, Decks & Tips

0
clash royale clan wars 2

Hey guys! Today, I will be providing you with the best tips for building decks and to succeed in the new Clash Royale Clan Wars II system!

clash royale clan wars 2

I will be discussing the following:

Before we start, I know that the Clan Wars II is unfair to F2P players right now. But I believe that Supercell will definitely improve the matchmaking algorithm as well as making it more F2P friendly in future updates.

However this update will also take a while, so till then, these tips will definitely improve your chances of succeeding in the game!

Now, with all that being said, let’s get started!

How to build decks for Clan Wars II?

Unlike Clan Wars I, Clan Wars II require 4 decks, where each deck is unique.

That means in order to succeed, you must have 32 max cards! As a F2P player, it’s not possible to have 32 max cards.

So how can you build 4 viable decks?

The first step, make up a skeletal deck, not a deck with skeletons, but the basic structure for each of them.

For this, we’ll ignore the fact that you need 32 unique cards, and take care of it later on.

Let’s go through the decks one by one.

Note: I won’t be explaining how to create a good deck in the general sense, but how to modify and craft decks which are already good, so that perform well within the constraints of Clan War II.

Deck 1:

Deck 1 should be your ladder deck.

It’s most likely to be your highest level deck as well as the deck you are most experienced with, so it makes sense to make this one your primary deck.

As simple as that.

Deck 2 & 3:

These 2 decks are taken together as they are going to be a bit similar to each other, as in they both will be your secondary decks.

  1. Choose a win-condition and deck archetype. You need to take into consideration the level of the win-condition as well as your skill of playing decks of that particular archetype. Also, it’s a good idea to choose different archetypes and dissimilar win-conditions.
  2. Create a deck that works well with the win condition. You can also choose the best decks that have a good reputation. Keep in mind that these decks don’t become too similar to each other.

Deck 4

Reserve the 4th deck for Boat Battles.

The reasoning behind is that the first three decks will focus on PvP battles and will need higher-level cards, as they are harder than the PvE battles and you can win with lower-level cards.

This deck can also double as a deck for PvP battles (if you have many high level cards), but saving it for PvE makes it so that you have 1 Great deck, 2 Good decks, and 1 Bad deck instead of 1 Great deck and 3 Mediocre decks.

The most important thing is that you should remember that Boat Battles are PvE and not PvP!

So some rules about building decks will be thrown out of the window!

Take the following points into consideration:

  1. The cards spawn in a fixed order where the 1st card is spawned, followed by 2nd, 3rd, and 4th and the cycle repeats again. Thus it is extremely predictable. Also, cards always spawn in the same position so be aware of that and use it to your advantage.
  2. The towers only spawn cards when you damage them, so target one tower at a time. Also, you get +60 seconds after destroying the first tower, so take it down as quickly as possible.
  3. The time is less than normal battles. Thus, unlike usual decks, make these decks more offensive than defensive. Beatdown decks really shine in this mode.
  4. Spells and building are rarely seen in Boat defenses, so add Swarm units as well as building targeting units. Use swarms after you take down the swarm killer present in the both defense.

If you are against reserving a deck for Boat Battles, treat it similar to Deck 2 & 3 above.

Example Clash Royale Clan Wars II Decks

  • My Deck 1 is my ladder deck, which is a Clash Royale P.E.K.K.AClash Royale Battle Ram P.E.K.K.A. Battle Ram Bridge Spam deck.
  • My Deck 2 is a Clash Royale MortarClash Royale Miner Mortar Miner Zap Bait deck.
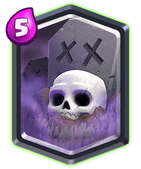
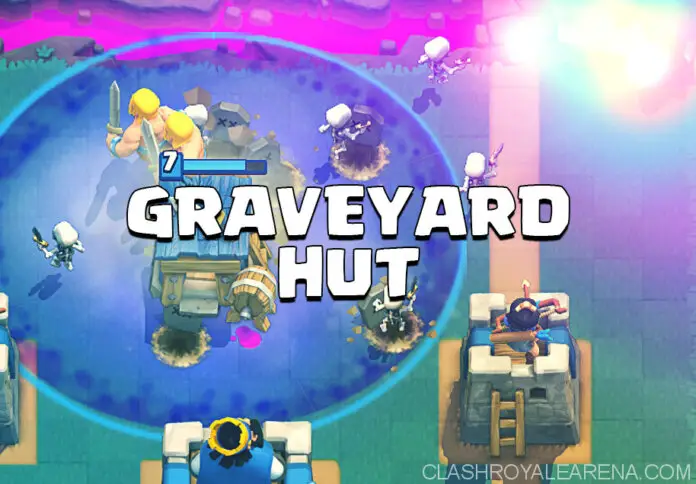
  • Deck 3 is a Clash Royale Graveyard Graveyard Freeze deck
  • Deck 4 is a Clash Royale Giant Giant Beatdown deck.

As you can see, each deck is very different from the others.

Choosing decks like these give you a lot of wiggle-room while modifying them to fit them within the Clan Wars II constraints.

Also, it is a good idea to choose cards/decks which have different counters as it will give your decks more variety and not easy to defeat.

Modifying decks

Once, you have decided which decks you want to use, it’s time to modify them.

What do I mean my modifying decks?

In simple terms, we will be switching cards with other cards that are close in function to them.

The reason behind this is if you have the same card in two decks, you change it in one of the decks, or if the card is lower in level (and you are short on gold/ have other cards more deserving of the upgrade) but its replacement is at a higher level (or can be upgraded it too).

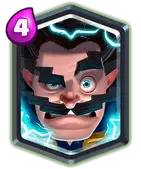
An example of this is Electro Wizard and Musketeer.

Clash Royale Electro WizardClash Royale Musketeer

They have similar roles in most decks, but eWiz is more geared towards being a utility card with its stun while Musk is more geared towards dealing damage.

Use eWiz when you require the stun (like P.E.K.K.A. decks) while Musk when you need a more damaging support card (like Giant decks).

Choose which spells are better suited for each deck.

Expanding on the above example, Zap would work well with the Musk while The Log would work well with the eWiz, instead of the other way around.

Finally, take into consideration the synergy of all cards.

As an example, in a Fireball bait deck, if you need to use a Splash card, Skeleton Dragons would work better than Baby Dragon, freeing the Baby Dragon to be used in another deck.

Note: In most cases you should not modify Deck 1. But sometimes, you might need to modify Deck 1 in order to increase the average card level of the other decks.

Which is the best mode for winning more battles in Clan Wars II?

In Clan Wars II, the best mode for winning battles is by far the Duel, a.k.a Bo3 (Best of 3) mode.

This mode requires more skill than the standard 1v1 battles, but it is in fact more fair to F2P players than 1v1.

duel match clan wars 2 clash royale
New Bo3 mode

When you get matched up in a Duel, there is a good chance that the opponent, like you also has only 1 Great deck (with max cards) and 2/3 Good decks (with lower cards). This means that you have a more equal and fair chance of defeating them.

On the other hand in 1v1 battles, you can be matched up against a player with a max deck while you are running your non-max deck making it an unfair matchup.

The only time you want to be playing 1v1 battles is if you have 4 max decks (giving you a fair matchup) or you win the Duel 2-0 and other Clan Boats have an active shield.

Now that we have established that Duel is the best mode for winning and earning more fame in Clan Wars II, let’s see how we can increase your chance of winning the Duel.

How to succeed in the new Duel Mode?

Clan Wars II introduced the Duel mode, which unlike any other mode, is Best of 3 (Bo3).

This makes it the best way to find the better player among two in the game, and as established above, is in fact the best way to earn fame for your clan in Clan Wars II.

I will be talking about how you can maximize your chances of winning a Duel. Let’s break it down battle by battle.

Battle 1:

The first battle is the most important battle of the duel!

The results of this battle determine which player will be in control for the rest of the match.

It also has a major effect on your state of mind during the next two matches, because if you lose, you will be under a lot of pressure to win two consecutive matches, while if you win you will be playing more calmly as you know you have one more chance left.

Always start off with Deck 1 aka the ladder deck. There’s a high chance your opponent will also use their best deck (especially since they might be also reading this :p), and you need to be prepared with your best deck.

Play this battle as safely as possible, making sure that the opponent doesn’t gain an advantage and look for opportunities to seal your win.

Battle 2:

Once you are done with battle 1, you should have a vague idea about your opponent’s play style and tendencies.

Use these to your advantage!

Depending on the result of the last battle, you may be in a stressed position.

Try and calm yourself down (remember that it is just a silly game after all, and you are playing it to have fun).

Choosing the right deck is important for this battle.

Go with a deck which is quite different from the previous deck as the opponent will have to adjust themselves for this deck.

If possible, go for a deck whose counters were present in the opponent’s previous deck.

For example, if the opponent has already used Poison in their first deck, going with a Graveyard deck is a pretty good bet.

Battle 3:

I hope that y’all don’t have to reach this stage, but you do have to prepare for it.

This might be your easiest battle or your hardest battle.

At this point, ideally you should have a good idea about the opponent’s playstyle, and since you already know what cards he has used, you have the ability choose a good deck.

But this is true for the opponent as well.

This battle will be based on a combination of luck, skill and your ability to adapt. The best tip I can give you is play smart and safe, try to stay cool and play the best Clash you have ever played in your life XD.

That’s it folks! Hope you guys enjoyed reading this guide, found it helpful and have success and most importantly, fun while playing Clash Royale Clan Wars II!

Sayonara,

Blaze Stone.

Clash Royale Clan Wars 2 Basic Information

Guide by Krux

It has been four years of Clash Royale now. There are people who have been playing this game from the start and still grinding every day.

A bit more than one and half years ago, Clan Wars started in Clash Royale.

Clans have grown well in this time and Clan Wars are a good feature. Clashers were waiting for something new to come in the game. It was really needed too to spice things up. So here we are, friends.

The big update is scheduled next week—Clash Royale Clan Wars 2.

CW2

This is the most anticipated updates of this year in Clash Royale, or call it the last two years.

Clan Wars 2 completely revamps how clans compete against each other in the game. It will replace the existing Clan Wars. A new experience for the players awaits.

Let’s dive in and see what Clash Royale Clan Wars 2 is all about!

Introduction

  • Whenever you will join a clan now, you will be one of the crew members on the Clan Boat.
  • Each clan will have a clan boat and the members will be on the boat most of the time.
  • Your clan boat will be sailing down the river along with other clan boats in the River Race.
  • There will be different River tasks that you can complete along the journey down the river. These tasks will earn you Fame and rewards for yourself and your clan.

download 2

River Tasks

There are four types of River Tasks that you can complete.

Completion of the river tasks will gain your clan Fame along with pushing your clan boat further down the river.

The four distinct river tasks are One-versus-one battles, Duels, Boat Battles, and Boatyard.

Let’s take a look at these, one by one.

One-versus-one battles

These are the normal battles that we play on the ladder. You will play against other players. The winner collects Fame for their clan boat.

Duels

This will be a new game mode in Clash Royale. Players will play against each other in a best-of-three mode.

The one with two wins will win the Duel and earn the rewards.

You will get a chance to choose your deck before each battle in the Duel.

download 3

Boat Battles

This is another new model in Clash Royale.

This is also a first experience for the Clashers as it introduces Player vs Environment gameplay in the game for the first time. In this, players can attack other clan boats in the River Race.

The clan boats will have a cannon as the defence which shoots elixir balls from the elixir tank beneath it.

You have to successfully take out all the defences to wreck the clan boat. This will slow down the attacked clan boat’s progress in the race and they need to repair it.

Same for you, if your clan boat got attacked, your clan will have to repair it to keep going.

download 4

Boatyard

The boatyard has to be used by clans with damaged boats.

Boats get wrecked after an attack by another clan boat’s crew and need repair.

You and your clanmates can repair your clan boat by completing tasks.

download 5

What is Fame?

In Clash War II, You can earn fame for your clan by completing the river tasks. The more fame you gain, the more you advance in the river race.

Losing a task will also give your clan fame, but it will be significantly lower than what you get when you win it.

After gaining a certain amount of fame, you complete the river race in Clash Royale Clan Wars 2.

War Gate

Your clan boat will reach the War Gate after the river race is completed. The clan to reach the War gate first will win the race and will get the best chest with the best rewards.

The chests will be floating on a wooden slate at the War Gate.

clan wars 2 colosseum

Clan War Leagues

Each war season will consist of several river races.

At the end of the journey, the clan boats will reach the Clan War Colosseum.

The colosseum is a huge arena packed with spectators from the Clash Royale world. This is the place where the Clan War Leagues will take place.

Huge rewards await the clans in the Clan Wars 2 colosseum.

clan war decks

Clan Wars 2 Decks

No Collection Day! No War Day! You will be using your own decks in Clan Wars 2.

The decks will use your own card levels. Now this has been done to avoid forcing players into cards they don’t play but also everyone doesn’t have many cards levelled up.

You will be making four war decks from your cards in Clan Wars 2. And one deck can be used only once in a day.

After using a deck, the deck will be gone into cooldown and you will be able to use it the next day.

This method makes it clear that you would require 32 unique cards to make the four decks.

This also justifies the in-game challenges which made us practice the different type of deck archetypes.

It’s a different story that the stubborn clashers played Hog cycle in those also.

trader

The Trader

The trader is a familiar face in Clash of Clans.

He will be coming to the Clash Royale world or say we will be passing by the Clash of Clan islands in our boats.

The latter is more accurate in my opinion. You will meet the trader on the riverbank. He will offer you to exchange your cards.

You can use your trade tokens to exchange your cards with the brown businessman.

Hey Clashers! It’s Krux here, back again with some fresh breeze and another write-up on Clash Royale. We are continuing on the Clan Wars 2 topic in this article as there are some things that really needed to be talked about. Clash Royale Clan Wars 2 is the most awaited update in the game right now and also for more than a year as we saw nothing but only changing seasons. So it is obvious that the Clash Royale community is waiting for this new update anxiously.

We covered in the last article everything that one needs to know about Clan Wars 2 to start battling in the game when the update drops. But still, there are questions and doubts that people want to be solved. There were many questions in the comments. So here are the Clash Royale Clan Wars 2 FAQs to make your life easier. Let’s start!

CW2 faqs

Clan Wars 2 FAQs

by Krux

What is Clan Wars 2?

Clan Wars 2 completely reconstructs how clans compete against each other in the game. It will replace the existing Clan Wars. The old Clan Wars will be overhauled and new game modes will be introduced with new reward mechanism and other stuff.

When is the update coming to Clash Royale?

Clan Wars 2 is dropping on August 31 in the game. Be ready with your phones and wi-fi to update the app and see what is it all about.

What is in Clan Wars 2? Tell me more.

Ok, this question is tricky. Clan Wars 2 has a lot of new things included in it and it can’t be explained in two sentences. To get a clear idea what it is read the Clan Wars 2 Full Information section above!

How does the matchmaking work?

Each clan will have a clan boat in the new Clan Wars 2. And your clan will be matched with 4 other clans in a River Race. You and your clanmates will have to complete different River Tasks to get the lead in the race. You will be matched with clans which are in your league only. If your clan is in Gold II, then the other 4 clans will be Gold II only.
Then, the question arises what if there are 6,000 trophy semi-pros in a bronze league clan? That can happen but then that clan will win the River tasks and it won’t be in Bronze after the next two races. This way, they will go ahead.

How many tasks are there? Which can I complete?

There are four types of River Tasks in Clan Wars 2. And all the boat crew can do all the tasks. You can do any task as per your choice. They are 1v1, Duels, Boat battles, and Boatyard. All the tasks will require unique decks, and one deck can’t be used again on the day. You can use the decks again after the cooldown ends, i.e, the next day.

How many players in a River Race in Clan Wars 2?

There is no cap in the participation in Clan Wars 2 and all your clan members can play if they are eligible (King Tower 6, yes it has been reduced from 8). This is the same as the old Clan Wars where anyone could take part too. So an active clan will get an advantage over clans with only 20 out of 50 people playing daily.

What do we get from these tasks? Gems, gold?

You will earn your clan Fame upon completing the River Tasks. This is new in Clan Wars 2. Fame will push your boat further in the River Race. After the race ends, you will get a Clan Chest.

Ok, I got Clan Wars 2. But what about my Clan Wars stats? We played so hard to make our clan legendary!

Relax, your Clan War stats are not going anywhere. They will be on your profile. You can still show-off that you collected 142000 cards in OG Clan Wars but that number won’t increase. Also, the clan trophies will be there. It will get a reset and drop to one step lower in the league when Clan Wars 2 start, but not gone.

So No War day? What about War Deck?

There is no War deck. You can play with your four decks in the River Tasks. No collection day either. Your own cards will be used for Clan Wars 2. That means your own card levels will be there and using a level 7 Electro Dragon will cost you a win. This feature of Clan Wars 2 has mixed reviews as people are calling it Pay to win. But it also removes the burden of playing a forced deck in Clan Wars. You can practice your four decks and get better. While it is also true that we don’t have 32 maxed out cards and this is probably a bit Pay to win strategy.

Clan Wars 2 Decks

What else is coming with Clan Wars 2?

There are many other changes coming to Clash Royale in near time. The quests and daily gifts are getting removed, instead, there will be one daily gift. The rewards will be increased. The show will be changed. Also, there will be a new Videos tab beside the News tab, so you can watch CR videos right from the game.

Conclusion

So this was all about Clash Royale Clan Wars 2. I hope you understood all the features and game modes that are being introduced with this big Clan Wars 2 update.

Let’s see what fancy features it brings. Till then, stay tuned with Clash.World for more articles and guides. Clash On!

Clash Royale Season 15: Set Sail for War (September 2020)

0

Hey Clashers! I’m Krux back again bringing you some refreshing air and the latest info about Clash Royale’s new season. Clash Royale Season 15 is starting on September 7 and here is all you need to know so that you don’t lag behind in deciding what deck to use and what emote to buy. Let’s start!

Clash Royale’s last season was Prepare for War as Clan Wars 2 was coming. Clash Royale Season 15 is Set Sail for War, it is again centred around Clan Wars 2 to promote the update further and get players’ attention towards it. We hope it turns out better and makes the game more fun and popular.

Clash Royale Season 15 Pass Royale

The in-app purchase of Pass Royale gives you some cool emotes and tower skin which is exclusive to Pass Royale users and can’t be obtained otherwise. Let’s have a look what this season’s Pass got for us.

tower colossal castleTower Skin: Colossal Castle
The new tower skin that comes with the pass royale in Set Sail For War (Season 15) is called Colossal Castle. It has a grey stone texture with a blue banner on the King Tower. Looks elegant and there is also water flowing out of the Princess Towers. It is designed to be in sync with the latest update—Clan Wars 2 in which clan boats are there.

tower clan boat

Free Tower Skin: Clan Boat Bastion

Here is some good thing for those who aren’t considering to buy a Pass Royale. Everyone will get this free tower skin at Tier 10 of the Season rewards.

goblin thumbsup emote 1Exclusive Emote: He’ll be back
The goblin somehow fell from the boat and drowned in the river. This emote is his last sight in which he tries to breathe his last breath.


Other Emotes:

golem boat fs8Golem Smashing Boat: This is the first Golem emote in Clash Royale. The Golem with blazing violet eyes smashes a boat with his hand in this animation. Looks like a monster to me, haha


goblin dance fs8Goblin Hat Dance: The archer rubs her arrow with a handkerchief while giving you a don’t-mess-with-me look. She blows away the dust later with a swag filled shine. Good archer emotes this season. This will also be a shop offer.

guard crown fs8Free Emote: Guard with Crown
Clash Royale Season 15 also brings a free emote which everybody will get in the shop. This emote is to celebrate the first short animation film based in Clash Universe coming out this September. The skeleton rubs the crown to make sure it doesn’t lose its shine.

Clash Royale Season 15 ArenaArena: Boat Arena
Sail Set for War will take us to the Fisherman Float Arena. It is a big floating arena with a boat underneath the towers and troops. There is a big anchor in the boat arena and some benches on the side form where the audience can watch the matches. This Season’s arena looks cool to me. Make sure your rocket doesn’t sink the ship!

Balance Changes

If a card gets dominating in the game and its usage rate goes up unusually, you know what happens. Clash Royale team is vigilant and they introduce some balance changes every season. Let’s take a look at Clash Royale Season 15’s balance changes.

  • Heal Spirit (Nerf)
    We all know how it was getting annoying seeing our tiny yellow friend in ladder and challenges. Heal Spirit was getting dominating in the game. Healing radius for the spirit has been reduced by 23% and it will heal lesser troops around it now.
  • Zappies  (Buff)
    Zappies were buffed in Season 13 also but that doesn’t increase its usage rate among the players. Their first hit speed has been increased and they will take only 0.9 seconds now to hit for the first time. 
  • Fire Spirits (Buff)
    There are always some players, especially in the mid-ladder who use over-leveled Furnace or Fire spirits but the usage rate is not great for the fiery friends. The damage area radius for Fire Spirits has been increased by 28%. Buffing Fire Spirits means that Furnace is also getting a buff indirectly in Clash Royale Season 15.
  • Bomber (Buff)
    We see the little skeleton throwing bombs behind a tank such as  Golem but the overall usage is low for our friend. So the hit speed has been increased by 5% for the Bomber from 1.9 seconds to 1.8 seconds. 

Boosted Card: Guards will be boosted to your king tower level in Clash Royale Season 15.

This was all about Clash Royale Season 15 Set Sail for War. Let’s see how far our boats sail in this season. Stay tuned with us for the best deck guides and tips to ace this season. Clash On!

Graveyard – The Ultimate Guide

183

Hello guys, the new Clash Royale Legendary card, Graveyard, is going to be released in just next a few hours. I strongly recommend you take a look at this guide to see every all of the important information about this incredible Legendary card. A big thanks to Orange Juice for sharing the incredible information and the video as always!

Clash Royale Graveyard Spell

Clash Royale Graveyard

Summary

  • The Graveyard is unlocked from the Arena 5 (Spell Valley).
  • It has a 5 tile radius and spawns up to 20 Skeletons during its 10s lifetime.
  • Similar to Goblin Barrel, Miner, Fireball… It can be placed anywhere on the map.
  • Skeletons spawns randomly within the spell area.
  • The Graveyard is easy to counter itself but it’s incredible when coupled with the right cards. A lone Graveyard can almost kill an unprotected Tower so consider casting it when you have a huge Elixir advantage.
Cost Radius Target Duration Count Spawn Speed Type
5 4 Ground 10 sec x20 0.5 sec Spell
Spell Level Skeleton Level
1 9
2 10
3 11
4 12
5 13

Some Special Tips on using Graveyard

  • It has to be supported. Again, don’t play the Graveyard alone otherwise it will be a five Elixir donation!
  • Don’t throw it at a Tower without supporting it, unless you like negative trades.
  • The Graveyard has a pretty slow load time, 1.5 seconds. This must be taken into consideration while using it.
  • As the Skeletons spawn differently each time played, the Graveyard usually deals between 1800-2300 damage to a Tower which can 1 shot Skeleton.

If you want to have success with the Graveyard, you need to understand its best placements. Below are the safest positions to play the Graveyard without worrying about the King’s Tower. The second one is better because all of the Skeletons don’t clump up near the all, making it harder to counter.

graveyard placements

Strategy

Hello guys,

This is going to be the basic guide on using the very lucrative and unique Legendary card in Clash Royale, the Graveyard! This guide will also show you how to counter the Graveyard and what to watch out for while dealing with it.

How to Counter Graveyards, Common Counters and How to Counter the Counters

Common counters and how to counter the counters

  • Valkyrie is one of the hardest counters to the Graveyard. You can use Rocket + Zap to deal with her but it would be a HUGE negative Elixir Trade! Luckily we don’t see Valkyrie too much in the current meta game. Freeze is also a great counter to her!
  • Baby Dragon: Another very hard counter to the Graveyard. Only Rocket and Freeze can stop him from hurting our Skeletons. Try to bait him out by using swarm troops before using your Graveyard.
  • Skeleton Army is a very effective counter If you don’t have Arrows, Zap, Fireball or The Log to deal with it.
  • Minion Horde/Minions: Use Arrows/Fireball.
  • Barbarians: Use Fireball to weaken them and the Tower. Great trade!
  • Ice Wizard/Musketeer/Witch/Electro Wizard etc: Fireball!
  • Spear Goblins/Goblins: Zap!
  • Guards: Work very well against Graveyard but luckily people don’t use Guards a lot these days. If you see Guards, Arrows the Shield and Zap the Guards (not a good trade).
  • Three Musketeers: Fireball says Hello.
  • Archers: Great counter to the Graveyard. People usually place them at the very behind so have your Fireball ready there!

So basically Valkyrie and Baby Dragon are the hardest counters to the Graveyard. If you don’t have Freeze in your hand, there is nothing can stop them!

Archetypes and Synergy

Next, let’s see what archetypes work well with our Graveyard!

BEATDOWN-TANK

Clash Royale GiantClash Royale GraveyardClash Royale ZapClash Royale Tombstone
Clash Royale MinionsClash Royale Mega MinionClash Royale Skeleton ArmyClash Royale fireball

This deck archetype especially shines with the Graveyard. As we all know, the goal of the beatdown archetype is to take out the opponent’s Tower in a huge push, and the Graveyard is not different. If you use a big tank such as P.E.K.K.A, Giant, Golem etc, you will make the most of the Graveyard because the tank soaks all of the damage while the Skeletons accumulate quickly on the Tower, taking out the Tower in the blink of an eye.

It seems pretty hard to counter this one but it is actually not! If your opponent goes all in with the Graveyard + Giant Combo, which Is 10 Elixir, you can use Tombstone + Guards to counter their push, gaining the +4 positive Elixir trade.  Then, you can use a 4 Elixir card such as the Hog Rider on the counter push when the Guards are about to cross the river.

The downside of this combo is that it is very expensive.

Above is a great Beatdown-Tank deck for you, which was shared by Chief Pat!

BEATDOWN-BLITZ

Clash Royale GraveyardClash Royale Hog RiderClash Royale Ice GolemClash Royale Zap
Clash Royale ArchersClash Royale TombstoneClash Royale Mega MinionClash Royale fireball

This archetype uses a very fast card like Prince, Elite Barbarians or Hog Rider. These very fast cards pair extremely well with the Graveyard as they can catch your opponent very off-guard, especially when they are low on Elixir.

You can beat this archetype by placing a building in the middle and a counter to the Graveyard at the Tower.

The downside of this archetype is again, it is very expensive and hard to get the blitz card to the Tower.

Above is the super-mega-ultra-famous Hog Graveyard shared by Ash before on Clash.World:

CONTROL DECK

Clash Royale BowlerClash Royale GraveyardClash Royale Inferno TowerClash Royale Mega Minion
Clash Royale Ice GolemClash Royale ZapClash Royale ArchersClash Royale fireball

Since the main goal of this archetype is to get positive Elixir trades and using them on the counterpush that your opponent can’t stop, it fits perfectly with the Graveyard.

Since the Graveyard is a win condition, all other cards are usually defensive cards and Graveyard is always used on the counterpush during the x2 Elixir time. Grave Bowler Control Deck is a very popular deck you will want to use.

To counter this kind of deck, you should play passively against it and try to overwhelm them during the x2 Elixir time with a huge push. Otherwise you can constantly chip away their Towers with Miner.

Above is the insane Graveyard Control Deck shared by Coltonw83 before on Clash.World!

CYCLE DECK

Clash Royale MinerClash Royale GraveyardClash Royale ZapClash Royale Ice Golem
Clash Royale fireballClash Royale Inferno TowerClash Royale MinionsClash Royale Goblin

Currently Cycle Decks are flourishing with the Graveyard. Basically, your main goal while using Cycle Deck is to keep cycing your tank and the Graveyard. Cheap mini tanks like Miner or Ice Golem work very well in this deck. Miner Graveyard combo is an amazing strategy which can easily catch your opponent off-guard.

To counter this playstyle, try to keep up your opponent’s cards and be sure you have the right counter in your hand.

Above is the Graveyard Miner Deck shared by icantthinkofnamehelp before on Clash.World!

Clash Royale Ice GolemClash Royale KnightClash Royale Mega MinionClash Royale ValkyrieClash Royale Giant

Some Specific Cards which synergize with the Graveyard: Most cards which have above 500HP can work pretty well with the Graveyard. The best ones you want to try are: Ice Golem, Knight, Valkyrie, Giant, Mega Minion and some other Mini-Tanks!

When to use the Graveyard?

The Graveyard is the card which needs a very precise timing. Knowing when to use it is very crucial.

Usually, you want to use Graveyard when you have supporting troops which left over from a defense to counterpush with it on offense.

In beatdown decks, usually in the x2 Elixir, you start launching a huge push from the back and start adding support troops and the Graveyard when the tank reaches the bridge.

The optimal time to use Graveyard is usually the double Elixir time as Graveyard is a fairly expensive card.

Click here to read the old Graveyard Strategy Guide

The Graveyard is the new Legendary Spell which can be cast anywhere on the map. It has a pretty slow load time so the first Skeleton spawns 1.5s after the spell is placed. Then a Skeleton spawns every 0.5s up to 20 Skeletons over a period of 10s.

The Skeletons spawn randomly within the affected area so the output damage will usually be different.

Similar to the Rage Spell, Graveyard has a 5-tile radius so be careful because it can trigger the King’s Tower anytime If the King’s Tower is inside the spell’s ring. Even If you place the spell 1 tile away from the King’s Tower, there is still a small chance your Skeleton can activate the King’s Tower.

The Graveyard “CAN” counter the Princess but it’s not reliable. Take a look at the gif below for more details!

If you use a tanker (or even Mini Tank) to soak damage and protect the Skeletons, the damage ramps up very quickly. Without the right card in hands, your opponent will find it extremely hard to deal with this spell. Miner + Graveyard can deal an incredible amount of damage. Even with a good defensive combination, you can easily deal at least 1000 damage to the Tower.

Freeze + Graveyard would work very well too, as long as you use the Freeze after your opponent uses his/her counter.

If the Elixir Collector is placed behind the Tower, drop the Graveyard spell to deal damage on both Pump and the Tower nearby.

This spell also works very well as the support card for the Giant. Skeletons will distract the Inferno Tower and the opposing tanker killer (Mini P.E.K.K.A…).

It works very well on defense too. Inferno + Graveyard is enough to deal with the huge P.E.K.K.A Double Prince push. It’s harder to counter than the Skeleton Army and Guards.

Troops with fast attack speed are very useful at dealing with the Graveyard (Musketeer, Archers, Lumberjack, Minions, Goblins, Guards…). If you don’t have any defensive card in your hand, use a tank to distract the Skeletons. Guards are probably the best melee counter due to their “very short attack range” and shields.

Swarms (Barbarians, Spear Goblins, Barbarians, Skeleton Army…) are also very good at dealing with the Graveyard.


Chucky’s Opinion about the Graveyard Spell

Hey guys – Chucky here. So today they have released the Graveyard and with it will come a rush of opinions on how to best use it and which combinations it will slot into nicely. After careful analysis, my own review would suggest that the Graveyard is the worst Legendary card we’ve seen to date. This video shows some gameplay using the Graveyard and whilst the outcome is positive, it highlights some of the issues with the card:

Positives:

I can think of two positives – the first is that the Graveyard is fun to play with and it looks cool. I like how the units spawn out of the ground for a few seconds and crawl all around the place – it’s one of Clash Royale’s better cards in terms of aesthetics. It’s also fun to play with as you can use it with just about any unit that is on the enemy tower.

The second positive is that in terms of actual gameplay it does have a use and that is when you are on the offensive and you find your opponent on the back foot – if you pop the graveyard up at that moment then it is pretty much game over. However, that’s hardly a positive as in the situation you’re probably already in a position where you’re going to win the game so any new card would be a bonus.

Negatives:

There are several negatives with this card so I’ll list them in bullet point form.

  • The biggest problem is that it costs 5 Elixir. For what it does this is just too much and it is very hard indeed to justify spending that amount of elixir on a card which at best acts as an easy to defend support unit. By having it at this cost you are putting it on equal footing with the likes of a Giant & Wizard and it just doesn’t measure up to those cards in its capabilities.
  • It’s extremely easy to defend against. Most cards in the game defend against it because the skeletons come up a couple at a time. The Valkyrie, wizard, witch, musketeer, goblins, etc. all very easily dispatch the skeletons as they rise meaning that the majority of the time using this card you’ll find you’ve wasted 5 elixir with little to no gain. Likewise most spells severely hamper its abilities.
  • You need to get one tower down before you can utilise it properly over a tower. If you place the spell centrally over a tower, some of the skeletons will go onto the King Tower, activating it early. This is obviously not something you want so you have to place the skeletons to the side of the tower (see the video above) and this hampers the amount of damage they are able to do to the tower plus makes them easier to defend against.
  • It’s too similar to Skeleton Army. This card, whilst aesthetically different, is essentially a skeleton army you can place anywhere on the field. The difference is: one costs 3 elixir and the other costs 5 but the difference between them is very slim. On the one hand the Graveyard has some utilisation in attack by popping up where you need it, but in defence it is too slow and fails to save your own tower. The skeleton army doesn’t quite have the same utility but it defends much better and can be devastating in attack too. For two elixir less, it’s a no brainer which one would be better to use.

Gameplay Decks:

If you do really want to incorporate this card into your deck, I’d suggest the two follow decks to try out:

Split push: Graveyard, Knight, Miner, Zap, Goblins, Minions, Fire Spirits, Musketeer/Tombstone

With the split push deck, the idea is to get the knight going down one side first and then the miner and Graveyard to go on the other tower, often they’ll pick the knight to defend against and their other tower will take some serious damage.

Offensive push: Giant/Golem, Graveyard, Ice Wizard, Zap, Arrows, Minions/Mega Minion, Tesla, Hog Rider

The idea here is to build up units and pressure your opponent on one tower. You can then use the Graveyard when the opponent is lower on elixir or on the back foot to really press your advantage.

Shared by Summer4president


What do you think about this new card my friends? Please share your opinions. Also, If you are lucky enough to pull out this card from chests, feel free to share your screenshots here xD.

A Comprehensive Guide to 2.6 Hog Cycle

0

Hello everyone, today I will be taking you on a tour through the Clash Royale’s oldest deck that is still viable today – 2.6 hog cycle deck.

I call this “The Evergreen Deck” because of how consistently viable it has been over the last almost 3 years. It’s one of the most difficult decks to master but it performs very well once you have done so and has the capability to win any matchup if played right.

There is no one way to play this deck, when you watch top players playing this deck, you’ll notice they all play it in slightly different ways. You will have to figure out your playstyle for yourself, but in this article I will try to line out some of the general tips and tricks as well as some input from professional players!

header

A Comprehensive Guide to Hog Cycle

Clash Royale Hog RiderClash Royale MusketeerClash Royale Ice GolemClash Royale fireball
Clash Royale CannonClash Royale The LogClash Royale SkeletonClash Royale Ice Spirit

2.6 Hog cycle is a deck that relies mostly on player skill rather than card strength. Individually, none of the cards is strong, but together, you can win many matchups with ease once you have mastered it.

2.6 Hog Cycle Basics

To put it simply, this is a chip deck, where you defend as much as possible while playing hog riders with minimal support for damage. Minimal support includes cards like ice spirit, ice golem, and later into the game, prediction spells.

The whole point of ice golem, ice spirit, and skeletons in this deck is to buy time for your cannon and/or musketeer to shoot them down at range.

Cannon, musketeer, and fireball are primarily the cards that you will want to be saving in response to your opponent.

The other 5 cards can be played somewhat-unprovoked.

With some exceptions, you generally do not want to play ice golem (necessary against X-bow) or log (necessary against logbait) unprovoked unless you know that your opponent’s deck allows you to.

Generally, you will not be supporting your Hog Riders to brute force its way past defences, but you will be trying to place Hog Riders when they are vulnerable (without elixir or the proper defences in hand) by either out-cycling or waiting for the right moment (for when they overcommit their elixir or if they use their defensive card elsewhere).

This deck is very cheap, and this allows you to get back to the same cards very quickly, which is important for defence and offence, like getting to a second musketeer on defence, or getting to a second hog before the opponent gets to their defence again, for example.

Starting Plays 

Generally, it is ok to wait and leak 1-2 elixir at the beginning of the game if you have cannon in hand, but you should not wait any more than that, since you are playing a cycle deck.

Try to play Hog Rider, or your cycle cards to start the game. Try to save log and ice golem, but if you don’t have any other plays, it’s alright to use them.

Cannon Placements

Knowledge of building placements is key in Hog Cycle 2.6, not only for your own Cannon but also for knowing how to take advantage of your opponent’s building placements.

Notes

  • For the following images, assume a unit is coming into the LEFT lane.
  • The numbers refer the number of tiles between the cannon and the river, and the number of tiles from the cannon and the left princess tower respectively.

4-2 placement. This is the STANDARD placement for most win conditions. If you are not sure about placements, this is the main placement that will work most of the time.

cannon placement

The only exceptions are Balloons placed in the bypass position, and Lava Hounds placed at the edge. This is the standard placement to use against Lumberjack loon if the balloon is not placed in the bypass position.

This placement should be used against Giant/Gob Giant Sparky decks since this placement prevents the tanks from bypassing the cannon. Same with Giant Prince. Same with elixir golem placed in the back (a second elixir golem can be placed at the bridge). Same with golem placed in Hog’s auto-pig-push position. Same with golem placed in the corner, being pushed by another unit.

Note: This placement will usually pull all ranged units and melee units in the left lane. On the right lane, it will only distract magic archer, dart goblin, princess, and firecracker. This cannon placement does activate king tower for firecrackers in the left lane.

4-3 placement

This is the maximum pull position for any big tank. You just have to know when it is safe to use.

cannon placement

It is safe to use for Golems placed behind the king tower, Giants that aren’t being pushed away, Hog/Ram Riders that aren’t placed in the bypass position.

3-3 placement

This an anti-fireball position for big tank decks that use Fireball, which includes Giant and Goblin Giant.

cannon placement

This also can be used against 2.9 X-bow to tank the X-bow for a short duration.

This is also good against any misplaced Hog Riders / Ram Riders.

This placement also pulls melee units from both lanes.

0-3 placement

This is the anti-lightning or anti-earthquake placement. Generally used against big tanks placed at the bridge that have lightning, or royal hogs that has earthquake.

cannon 0-3 placement

0-2 Placement

Used almost exclusively to pull Balloons against Lavaloon and Miner Balloon decks.

cannon placement 4

This placement pulls Balloon placed anywhere, except when the Balloon + Bats/Minions trick is involved. (use a 0-1 placement if you see them use the trick, one tile closer sideways, or fireball the edge of the arena to push the balloon closer to the cannon)

Note: The 1-2 placement still pulls Balloon. This is used in case the opponent might send flying units to kill cannon, so that you can place units in front of the cannon to protect it.

4-1 placement

This is only for pulling Balloon placed in the bypass position. This does not pull Lava Hounds placed in the corner.

cannon placement 5

cannon placement 6

This is the main placement used for the double Cannon Balloon pull to the king tower. The second cannon’s image is shown next to it. It is directly in front of the king tower, 3 tiles from the left princess tower, a 7-3 placement.

WARNING: Do NOT use 4-1 against hog rider, since it is very famous for bypassing this placement.

3-1 placement

This placement not only pulls Balloon, but it also pulls Lava Hounds.

cannon placement 7

This placement also works with the double cannon pull (second cannon goes in the same spot). However, this placement isn’t used very often because the cannon is vulnerable to a fireball, which will kill it if the lava hound is attacking it as well.

5-0 placement

This is generally used against graveyard. It will also pull any units in this lane as well.

cannon placement 8

This placement is also useful if you need to play a late cannon against any hog riders or ram riders.

Musketeer Placements

Musketeer has a few placements that you will be commonly using.

In front of King Tower

This placement is generally used against small pushes in single elixir time, or when your opponent isn’t able to play their spell on the Musketeer.

It is great against dual lane pressure, but it risks spell value if you need to place Cannon in the center as well.

musketeer placements

Behind King Tower

This is nearly the same as the placement in front of the king tower, except it is delayed a little.

In particular, this can be used against Lava Miner decks, since the Musketeer is in range of the second princess tower, as opposed to placing the musk at the side of the arena.

Side of Arena

This placement is used when you think you will possibly also play cannon during a defence. Generally used against any push with a big ground tank.

musketeer placements

Corner

This placement serves the same purpose as the side of arena placement, except delayed. Generally used as the starting response against golem in the back.

Center Building Snipe

For sniping any buildings 3 tiles or fewer from the river.

X-Bow Snipe

This one is necessary to know in order to beat X-bow.

musketeer placements for xbow

It is out of range of any Tesla’s that the opponent might support the X-bow with.

Important Concepts for Beginner Players

Play cautiously in single elixir time, unless you really know what you are doing.

This includes:

  • Mostly using unsupported Hog Riders.
  • Not playing Hog in front of a surviving Musketeer if you aren’t close to 10 elixir.
    • This is another common mistake I see.
  • Using Cannon without knowing the opponent’s deck.
    • This is alright if you really have to, but it is still risky.

Protect your DPS!

In order of prioritization, you need to protect your Musketeer and your Cannon (and in some cases, your Skeletons).

Usually, failing to protect these damage dealers will result in a botched defense that just ruins the rest of the game.

Use all of your cycle cards to their utmost potential in order to protect (in most matchups, this also includes log).

Outcycle buildings!

Most of the time, you will not be able to brute force your way past a building, because hog rider just isn’t strong enough for that.

Instead, you need to get to a second hog rider while destroying the building, and make sure that SECOND hog rider gets the damage.

Play Musketeer/Cannon before other cards to get to another

Against decks that can potentially get rid of your Musketeer or Cannons with spells, it is important to play them early as a setup, so that in case they get rid of them, you can quickly get to another one.

Important Concepts for Experienced Players

Save Ice Golem for offense

rather than using it on defense.

Against many decks, Ice Golem + Hog is the default push you will be making, so if you end up using your Ice Golem on defense, your offence potential will be severely weakened for a while.

Go opposite lane!

Experienced opponents will just stack units to deny the lane you are attacking, so you need to make sure you can threaten to win on both lanes.

Sometimes, you have to stop playing Hog Rider. This is especially the case when you are at a disadvantaged state.

Guide by David Song: https://docs.google.com/document/d/1zX0ZxkwfWdwybWr5fGfbVCgwEic-pMbLFVine5tBe_8/edit#heading=h.faudl5ndh3iy

Advanced Guide by zigge, a bit outdated but most are still great

Cards Breakdown


I think it’s only proper to begin with a quick rundown of the cards and the role they play.

Clash Royale Hog RiderHog Rider

Primary win condition. Always a good starting move, play him with or without either of your 1 elixir cards (personal preference). Due to the lack of high health cards in this deck, it’s not an entirely bad idea to use him as a defensive unit to kite opponent’s troops or delay them a little bit, allowing you to cycle to another card.

When you’ve figured out what deck you’re up against, you will generally want to pair him with the ice golem, unless you need it for defense against cards like royal ghost or pekka.

Clash Royale Musketeer

Musketeer

The most essential card in this deck. She is your main source of DPS and your only reliable air counter, so use her cautiously; never, ever, ever do you want to throw her away. Identify, based on your opponent’s deck, which card(s) you have to save her for, examples are baby dragon, mega knight and minion horde. Most of the time you should try to protect her with skeletons, ice spirit, the log... whatever the situation calls for, against incoming miners or barbarian Barrels. Don’t just let your opponent take her out and get rid of your main source of damage.

Don’t play her by herself in the back unless you’re responding to something your opponent put in the back. The only situation when I would play her in the back is behind an ice golem. The reason for that is because it poses a threat to your opponent without you having to expend you hog. A fireball or poison won’t be enough to take your little push, and a lightning or rocket puts them down too much elixir to risk you attacking with your hog. An important note when facing beatdown decks is that you shouldn’t immediately respond to their tank with with musketeer. The ideal play is obviously to push your hog in the opposite lane, but if that’s not an option you should wait a couple seconds so that your musketeer doesn’t cross the bridge, and instead sits safely on your side of the arena, poking away at their tank.

Clash Royale Ice Golem

Ice Golem

The second most essential card. Since the day of it’s release, hog rider and ice golem have been a staple 1-2 punch, providing the hog with a meat shield and a splash effect potent enough to eliminate skeletons and bats, slowing all units and dealing just enough damage to allow a fireball to take out medium health units like musketeers and electro wizards. Once again, it’s critical not to throw it away, since it’s your only cheap tank.

It’s not just a tank for your hog though, it can be a distraction against all sorts of units: royal ghost, bandit, minion horde, electro wizard etc. I could go on and on, ice golem probably counters more than half the units in the game. Not only that, it has a great synergy with the musketeer, shielding her from incoming attacks, protecting your main damage source on defense. How you want to use your ice golem is up to you; where you see JACK often save it for offense, Lucas uses it on defense quite a bit.

Clash Royale fireball

Fireball

Your second win condition, in times where your hog rider just can’t get through, or when you need to finish off that 600 health tower.

A prediction fireball can allow your hog multiple additional hits, taking a chunk off buildings like cannon and furnace, knocking back units such as electro wizard and mini pekka, and completely taking out barbarians and minions.

Clash Royale Cannon

Cannon

A cheap and all around great defensive building. It has countless uses that you couldn’t even think of, such as leading a balloon to activate your king tower or to quickly disperse a graveyard (another common play you will see by top players). In a matchup where you opponent doesn’t have a unit that only targets buildings, newer players will just let it sit in their without even thinking about it.

This is a huge mistake. At the cost of 1 less elixir it can counter any ground card almost as well as a musketeer, and some even better because of it’s fast hit speed (skeleton army, royal recruits). Especially when you’re up against a bait deck, when you don’t need that musketeer for defense, you can use your cannon, not only for a cheaper cycle but also to save your musketeer to snipe an inferno tower across the river. Cannon also performs well versus x-bow and mortar, two generally tough match ups for hog decks.

Clash Royale The Log

The Log

Historically one of the, if not the most popular card, although you could consider this meta its worst, with a mere 15% usage rate and a 35% win rate (RoyaleAPI) at the time of writing this. This however, doesn’t prevent it from being the go to small spell in hog decks. Just like with fireball, a prediction log can often win you the game, but don’t go overboard and try to predict a goblin gang when you know they’ve got a better counter in hand, or before you even know what their deck is. It can become quite a mind game.

For example: if your opponent has inferno tower and skeleton Army and they know you’re gonna try to predict their skeleton army, they will instead use the more expensive, but more reliable inferno tower, and vice versa, they know that you think they’re gonna play inferno tower and not even bother with throwing a log down. Then there also are the most basic tips such as saving your log for their swarm cards and to always try and hit their princess tower with it when possible.

If your log is not high enough level to one hit princesses and dart goblins at your trophy range I would suggest replacing it with either snowball or zap.

Clash Royale Skeleton

Skeletons

Delay, Damage and Diffuse – the three D’s of using Skeletons. ‘Delay’ represents the cyclability and distraction that the doots are capable of. ‘Damage’ is the simplest of the three; left unattended the lil’ skellies can dish out a surprising amount of damage. In combination with a Cannon they work very well against all sorts of ground tanks. ‘Diffuse’ stands for the amount of cards that can be countered by surrounding them with skeletons, wizard, sparky, executioner, bowler…

Clash Royale Ice Spirit

Ice Spirit

Countless nerfs later, we arrive at the frosty boy we have today. With half the freeze duration and only 85% of its original health, I wonder how powerful the original ice spirit would have been by today’s standards, with micro plays at a whole new level. Despite the numerous hits to the card, the ice spirit still remains in the original hog cycle deck. Although it has the least consequential role out of the 8 cards, its primary use being cycling the deck, it does a great job at it and is an essential part of the deck.

General Tips & Tricks


Spells

It’s commonly said that you should always know the combined crown tower damage of your spells. This is especially true when playing a cycle deck like 2.6, where you will often resort to spell cycling at the end of the game. Due to the fast cycle, you should keep in mind not only the tower damage of one round of spells, but two. For example, at tournament standard one fireball deals 201 damage to towers, and a log deals 84, combined they deal 285 damage. This is the magic number for when you can (in most cases) completely abandon your defense and throw your spells at their tower. For two rounds of spells, that’s 570. Keep in mind that you might still have to defend in some fashion if you have to use two rounds of spells to finish them off.

Another thing to note when using spells against towers is their travel time. Spells that travel from your king tower (exceptions being lightning, poison and zap) have to travel the arena before they deal damage. That’s why it’s important to aim for the inner corners of your opponent’s tower, since they are the closest to you.

fbt

Switching Lanes

Something I learned from watching the 2.6 pros is that they’re not afraid to switch lanes, or at least not afraid to send a hog in the opposite lane just to apply pressure when a tank is placed in the back, in the lane they’re attacking. You don’t have to completely switch lanes however, sometimes it’s just a distraction to make your opponent split up their troops. You can also place a hog with a surviving musketeer or ice golem forming a counterpush, even if you have more damage in the other lane. This is something you’re gonna have to judge in the moment; how high health does the surviving unit have? How much damage have I dealt to the other tower? Am I facing a deck that I can afford to play same lane against? The more you play the deck (and the game in general), the better you’re gonna get at making these judgements in the moment.

So, when should you switch lanes entirely?

It’s a good time to switch lanes when you know your opponent is gonna be able to build an unstoppable counterpush if you continue going same lane as them. Perhaps the best example is against a Giant deck; It’s x2 elixir time. They defend your hog rider and ice golem push with a prince and a mega minion. You’re up 2 elixir, but they have a full health prince and mega minion, and they place a giant in front. You have 7 elixir to defend this push, and you can count on your opponent adding in spells and a Miner when they have the elixir to do so.

When thinking back to what went wrong, you try to come up with a better defensive strategy, better card placements and better timing, but the mistake happened way earlier, when you allowed them to build up all these units in the first place. What you should’ve done is pushed the other lane, where they’re not gonna commit to this big of a push, and even if they do, your tower has more health and is more likely to survive the attack.

Decks you should consider switching lanes against are: golem, lava hound, graveyard, miner control and especially giant.

Facing Buildings

Facing spawner buildings can be tricky – they have high health, they produce defensive units and they’re constantly annoying you with chip damage. That’s why it’s important to know when you can place a musketeer at the river to snipe the spawner, when you should fireball it and when you are able to bypass it with your hog. There are mainly 3 relevant placements when it comes to spawner buildings. The high placement, 3 tiles from the river, which will pull your hog in from either lane. Then there’s the low left placement and the low right placement, which will pull in your hog from the left and right lanes respectively. When it comes to the high placement, you can easily snipe their spawner with a musketeer at the river, but be ready to fireball any troops they may place to defend their furnace.

furn
IMG 1334

If the spawner is placed low in the other lane, you can bypass it.

IMG 1336

The only situation where you should really fireball a spawner if it’s placed low in the lane you’re attacking, unless of course, you’re just trying to get spell damage on their tower.

IMG 1335

If your timing is precise, you can even hit a deep spawner and a troop placed in the corner.

giphy

Defensive buildings are also tricky. You’re not gonna have to deal with incoming units every couple seconds, but they’re a lot more threatening to your hog. For the more expensive buildings like inferno tower and bomb tower, you’re most of the time gonna be able to out cycle them if not in regular time, at least in x2 elixir. The real challenge is when it comes to the cheaper buildings – cannon and tesla. They’re cheap and typically paired with cheap decks, making out cycling them not an option. They are numerous strategies you can employ in this scenario, placing a musketeer at the river to snipe the building, using a prediction fireball to help your hog get through them, or going in when they don’t have enough elixir to defend.

Pocket Plays & All-in Attacks

This section is about when you should completely abandon defense and go all in with an attack. But how do you do that? And when should you?

It’s overtime and you’re 1-1 in terms of towers. Neither you or you opponent has a play they immediately need to make, and you’re just waiting for each other to make a play while you’re collecting elixir. This is when you should consider making an all in attack. Placing a hog rider and a musketeer in the pocket in quick succession can be a surprisingly effective strategy. It’s also a good play to make if your opponent places an expensive card.

giphy

Mitigating Damage

When playing a cheap cycle deck like 2.6 it’s crucial to mitigate as much damage or possible, even if it means sacrificing your ice golem to deny a mega minion or barbarian hit. This is not something you’re gonna decide for yourself whether you wanna do. If you have a cheap card in hand and there are some units approaching that are gonna deal over 100 damage, play it! One of the most important parts of using this deck is learning how to use the 1 elixir cards efficiently. When played correctly they can counter cards in a way you had no idea was possible. Here’s a clip of me discovering a way to counter a valkyrie with only two elixir, giving me an elixir lead, cycling my deck and setting me up for an attack.

giphy

Using either one or both of the 1 elixir cards can deny all or almost all damage for a positive elixir trade. Note that the timing and placement is critical for each of these interactions to work out.

giphy giphy giphy

Spacing

One of the most underrated and overlooked skills in the game. Spacing out your units out and avoiding spell value will win you the game more times than you can count. This skill mostly applies to defense but there are some situations where you can use this on offense to your advantage. We’ll start off with the defensive tips.

Against an incoming push you should almost always place you cannon in the center, attracting enemy tanks, and your musketeer on the outer side of the princess tower, allowing her to take out enemy support troops. Also make sure to protect her by any means necessary, even if it means using a panic fireball. Against giant, royal giant and golem, the 4-3 Cannon placement is ideal, 4 tiles from the river, 3 tiles from the defending tower. The tank (excluding RG) will get targeted by both princess towers and will go down in time for your defending tower to re-target onto the supporting units.

giphy

Lava hound is no doubt the most difficult match up for 2.6, but it’s not impossible. Having only one air counter forces you to come up with some interesting ways to defend, such as pulling the balloon to your king tower with cannons and cycling back to another musketeer after having used your first one. Immediately when you realize they’re running Lava Hound, look at your elixir. If you’re at full or to it, place a musketeer at the back in the lane their lava hound is in, then go in with a hog in the other lane. If you’re low on elixir, instead of playing the musketeer at the back, play a cannon in the spot shown below, followed by a hog in the other lane.

IMG 1364

When their push approaches, play a musketeer to snipe the balloon (it will divert from the lava hound and go for the cannon). Then play another cannon in the spot shown below to pull the balloon to your king tower, making future defenses easier. The musketeer will then go on to pop the lava hound and you can use an ice golem or skeletons to sponge the lava pups.

Against graveyard decks you don’t have use to cannon to distract any buildings attackers. Instead, it’s your best defense against a graveyard. You can place it behind the tower to take pepper down the larries without risk of being destroyed, or you can place it on the inner side of the tower to also help take out a ground tank. It’s up to the situation, really.

gy
IMG 13681

The best cannon spot against hog riders is the 4-2 placement, 4 tiles from the river, 2 tiles from the defending tower.

IMG 1369

Gameplan for Hog Circle

I will be going through what you’re trying to do throughout the match. From the beginning of the game to the very last seconds of overtime.

Getting Into the Match

For the first few seconds, look at your starting hand. What do you do if your opponent just waits? What will you use to defend if they rush you immediately? While doing this you should also keep watch of your opponent’s side of the arena, not to miss anything they do. Your ideal starting to play is either cycling a 1 elixir card (split skeletons in the back, ice spirit at the bridge) or going aggressive with a hog rider (either paired on not skeletons or ice Spirit, personal preference).

If you had to prioritize, I would say hog > skeletons > ice spirit. If none of those are an option, you can log the bridge for chip damage. If that’s not an option, I would either wait or play an ice golem a couple tiles in front of your king tower. The reason for that is because your opponent might attack with an x-bow which you will have no chance against without ice golem. Personally though, I’d rather just wait than use the second most important card in the deck. If you got to your hog by cycling cheap cards and your opponent still hasn’t made a play it’s okay to go aggressive with a hog. A big no-no is playing your musketeer unprovoked.

The First Few Plays

If you played your cheap cards and now are stuck with musketeer, cannon, ice golem and fireball and you haven’t gotten a response from your opponent, you can play ice golem at the bridge, followed by the hog you’ve just cycled to.

If you went aggressive the game is gonna keep flowing pretty nicely. Their defending units will wander onto your side and you’ll shut them down with your cycle cards, having also gotten a hit on their tower. They’re gonna be ahead in elixir at this point, so you have to be ready to respond to whatever they play, either in the back or at the bridge. If they invest a card in the back, cycle back to, and rush your hog in the other lane, forcing them to split their elixir into both lanes. If they rush at the bridge you ideally want to shut their push down for a positive elixir trading, meanwhile not allowing them to deal more damage than you did.

If they defend with something heavy like a pekka and then counterpush, you can easily shut it down and be at an elixir lead, with surviving troops and with the hog rider in your hand, ready for another push. Rinse and repeat.

If they defend with a building (or tornado) you’ll be at roughly equal elixir, and you want to either cycle some cheap cards (except ice golem) and waiting for them to make a move, or cycling to another hog if they don’t make a move.

If you’re playing against another cheap deck (especially x-bow) you may find yourself in a back and forth situation where nobody wants to make the first move. If you know that it’s a bad matchup you should go aggressive, giving you a small edge and making the game happen in x1 elixir time, where their advantage is not as considerable.

Early Game

Of course, this is the point where you’re trying to figure out what deck your opponent is running, if you haven’t already. Studying the meta can help if you’re playing at  above 6000 trophies or in a Grand Challenge, but if not, it’s likely that they’re running a self-made deck, that you’re unaware of. There are still some cards you should look out for, since they’re frequently paired with one specific win condition, and usually not used outside that deck. Examples of these being night witch (golem), furnace (royal giant), pekka (bridge spam), elixir pump (three musketeers), tesla (x-bow).

You also want to identify whether you have the advantage or disadvantage in this specific match up, and how you’re going to play it (more on match ups later).

Push with hog and ice golem, chip away with spells and defend whatever they throw at you.

Mid Game

By this point you should’ve identified what deck you’re facing, and maybe you’ve even defended a push. This is the least complicated phase, but often the one where you deal the most damage.

Late Game

Double elixir time. Your opponent is building up a huge push in the back, and you’re wondering how you’re gonna defend it. You have your musketeer and cannon on the board, hovering your fireball waiting for them to clump up all their units. All of a sudden lightning strikes your musketeer and cannon and they’re gone, the golem is wandering towards your tower and the fireball didn’t do enough damage kill anything. What went wrong? You think you’ve done everything perfectly but here you are, getting three crowned.

There are several points where thing could’ve gone bad. We will ignore ones out of your control: lag, under-leveled cards, Did you push the same lane as your opponent, allowing them to build an even stronger push? Did you not space out your units correctly? Or did you defend inefficiently earlier, setting you back a ton of elixir. Every match is winnable, and watching your replays to see what mistake you did is maybe the best tool to help you improve, not just at a deck but at the game in general.

Post Late Game

Deep into overtime. The pressure is high. Will you get that 12th win or will you be one of countless people who end up at a mere 11?

The post late game may be the hardest part of the game. First of all you rarely even play games this long, then there’s the high pressure to account for and you’re probably not playing at your best this late in the game. As you can see in the GIF below, you can surprise your opponent with an all in attack in the pocket. Most of the time however, this will not be an option as they will be expecting something on that nature and preemptively place cards to block your attack.

giphy

Usually you want to be more on the aggressive side in this phase; it doesn’t matter if your opponent has a 10 elixir lead when the game is over. There’s not much advise I can give you due to the limited experience I have, the limited information about it on the internet and because of the vastly varying circumstances at this stage.

Match-Ups


No deck guide would be complete without a section about how to counter every type of deck. I will outline the basic strategy in terms of winning every matchup, but note that there will always be people who outplay you and certain situations where you can’t adopt these exact strategies, whether it depends on the circumstances of the match or a variation in their deck list.

Clash Royale Giant

Giant Miner

We’ll start off with an easier matchup, being classic giant beatdown. You want to go opposite lane from them, not allowing them to build up a counterpush off of your push. The exception is if you’ve gotten a lot of damage on one tower in the beginning of the game, in which case you should continue pressuring with hogs in regular time and spell cycle them out in x2 elixir time.

Defend with the typical center placed cannon and outer placed musketeer. Protect her from miners, spells and incoming units at all cost, delaying the push while your cannon and towers are taking out the giant. A common mistake I see when defending a giant push is placing the musketeer in the center, behind the cannon. This gives you opponent spell value on not only your musketeer, but it also allowed them to hit the cannon, allowing their giant to march for the tower. Utilize the skeletons to get as much damage on the giant as possible, forcing them to waste a spell.

If you opponent makes the mistake of placing the miner on the corner tile of the princess tower near your king tower, you can use a log to push it onto your king, activating him and adding extra DPS to your defense.

giphy

Clash Royale Golem

Golem

As yarn once said, the best way to stop a big golem push is to never let it happen. That’s not always possible, but it does paint a picture for how you should approach this match up. In regular time you want to get as much damage as possible, always pushing with an ice golem in front to prevent them from activating their king tower. Ideally you should also try to identify what kind of spells they have; poison, barbarian barrel, tornado, lightning

Most golem decks will run barbarian barrel, accompanied by tornado and sometimes lightning. If they do run lightning, you have to space out your troops and be very cautious when it comes to stacking musketeers on defense. If they’re not running a removal spell (lightning, poison, fireball), you can, depending on the placements of your opponent’s supporting units, place the musketeer behind the cannon and kite the supporting units into the other lane, allowing both towers and the musketeer to decimate them. This also sets you up for a nice counterattack if you’re focusing on the opposite lane as them (which you usually should).

Be very aggressive and try to deny as much damage as possible from their leftover defending troops (you’re gonna need that extra tower health for when their big push comes), and take advantage of any situations when they’re low on elixir or have invested something in the back.

Clash Royale Graveyard

Graveyard

Keep up the pressure. Pressure, pressure, pressure with hogs. Never allow them to build up a death ball push with two tanks, graveyard and poison. Even if it’s just a hog and a log it still interrupts their plan and forces them to react. Defend the graveyard with cannons as shown earlier, take out the tank as quickly as possible so your tower can pick off the skeletons one by one. It helps a great deal if you have a log ready for when they push, but prioritize using it on offense to get rid of tombstones.

Never push right into their build up of troops, which will just allow them an even stronger attack. If the game goes into overtime and you’ve gotten a few hogs through to the tower, you can start spell cycling to get any value possible, even going so far as to fireball bowlers and baby dragons. This will force them to play their units further forward, limiting the size of their push.

Clash Royale Lava Hound

Lava Hound

I kind of touched on this match up earlier, but I will explain in more detail here.

As you saw in the video earlier, ideally you should activate the king tower via a balloon pull, but this isn’t always a safe option. If you opponent fireballs your cannon it’s important to have a backup plan. If they fireball your first cannon before the balloon is even pulled by it, place another one down in the same spot, place a musketeer so that it shoots the lava hound, then when the hound pops, fireball all the pups and knock back the balloon, preventing almost all damage. You could also do the trick where you cycle a musketeer, then push with your hog and cycle back to another one, giving you way higher DPS.

As for offense, just like against any beatdown deck you should keep up the pressure. Using ice golems with your hogs is not as important in this match up however, instead always save your log for them tombstone and sometimes you can go in for a predictive fireball against minions or a mega minion.

Clash Royale Three Musketeers

Three Musketeers

This is a pretty simple matchup if you don’t make any mistakes. Fireball pumps, attack when they invest and pull everything towards the middle of your arena on defense. Save your cannon for the battle ram and get value from your fireballs. Often times you’ll find yourself using a fireball and log against their two musketeers, then cycling back to another one for their minion horde on defense.

With the new deploy time, don’t be scared to fireball all three of them behind the king tower (only in situations where you’ve gotten a tower low enough that you can spell cycle). Keep in mind that a pump only gets its value back after 51 seconds, so don’t fireball any pumps after the one minute mark.

Just like against any other beatdown deck, your musketeer is very important on defense, so keep her alive. I like to put her in the center behind my cannon since 3m decks typically don’t run a big spell.

Clash Royale Battle Ram

Bridge Spam

This matchup is kind of similar to three musketeers, since they run similar cards, the main difference being pekka and poison, where 3m runs pump and obviously, the three musketeers.

You have to space out your cards in this match up, but you won’t have to deal with as much dual lane pressure. The ice golem and musketeer are gonna be your most important cards against bridge spam. Kite around your opponent’s units as much as possible and save the cannon for their battle ram. Keep in mind some easy interactions, such as an ice golem just being able to counter a bandit with the help of one princess tower, and a cannon just being able to shut down a battle ram.

Going on offense can be difficult though, since their pekka or mega knight can shut down your hog after only getting one hit. Try to as often as possible use ice golem with your hog, allowing him to get 2-3 swings. You could also try to out cycle their pekka, but this is a risky strategy since it puts you down elixir and opens your opponent up for a counterpush.

Clash Royale Goblin Barrel

Log Bait

First you wanna figure out what kind of bait deck they’re running. Is it the classic with inferno tower and knight or is it one of the newer variations running rascals and prince? You’ll have a better match up vs variations without buildings, since it’s easier for you to go on offense and get down to spell cycling range, which, speaking of spell cycling, is a big part of this match. Always fireball princesses if you can also clip a tower so you don’t have to deal with them later. Save your log for the goblin barrel and kite the prince and rascals around.

If they’re running classic bait, you’re in for a long game. You’re gonna have to play pretty much flawlessly, since one tiny mistake can lead to you losing your tower, such as missing a juke goblin barrel or throwing away your log somewhere else. Be careful about when you fireball inferno towers, since it puts you down so much elixir for just one (if any) hog swings. If they play a high inferno tower you could also snipe it with a musketeer across the river.

Watch out for bridge placed princesses, they can be very tricky to counter if you have no musketeer or cannon in hand.

Clash Royale X-Bow

X-Bow

Typically seen as a hard counter to hog decks, you may be surprised at how well 2.6 hog does against x-bow decks. You can keep up their quick cycle, you have high damage spells and musketeer is phenomenal against an x-bow when she’s protected. In the worst case scenario you can use a hog against the x-bow.

There are a few different strategies you can employ when facing x-bow. You should switch up how you counter it as much as possible to remain unpredictable. Some of my favorite ways to defend against an x-bow are:

  • Going on offense with a hog when they drop their x-bow and then shutting it down for cheap with a cannon
  • Tank the x-bow with an ice golem and snipe it down with a musketeer
  • Taking it down with spells while tanking with ice golems and center placed cannons

Center placed cannons are a great way to get rid of your opponent’s troops while delaying the danger of the x-bow. Simply place the cannon in the center like you would if there as a hog approaching. It’s gonna tank the x-bow and take our the enemy units. Then you can use a musketeer or hog to take down the x-bow.

The spell cycle strategy is something I reserve for the end game, if they go same lane as you.

Going on offense when they x-bow is one of my favorite strategies. It forces them to choose between defending their tower or their x-bow, and since the hog is a more immediate threat than their x-bow, you can often get away with a standing tower even if they choose to ignore your hog.

You could also try to out cycle their tesla. Many cycle players aren’t used to playing against other cheap decks, so they don’t ever feel the need to cycle back to their defensive building. This can catch them off guard the first time you do it.

Clash Royale Mortar

Mortar

Another siege deck. This one is even harder than x-bow from my experience. You don’t see many pure mortar cycle decks anymore so I’ll go over those ones quickly, then we’ll move on to the infamous mortar bait.

The reason this is a harder match up is because mortar cheaper than x-bow and they have tornado and rocket. They’re gonna win the spell cycle game, they can counter your hog even if it’s locked on to the tower and there’s no opening to go on offense when they drop their mortar. All I can say for this is be hyper aggressive and good luck.

Mortar bait is manageable but not easy, they can beat you in the chip game since they have a miner added to their direct damage arsenal. You have to be aggressive and force them to use their mortar on defense, severely weakening their offense. Save your log for their dart goblin (rascals if they don’t have it) and don’t be afraid to use your cannon against miners. It’s strong enough to survive a fireball and has pretty formidable DPS.

Clash Royale Royal Hogs

Fireball Bait

Fireball bait isn’t really meta right now, but you gotta be prepared for when it is. Just like against any bait deck you have to prioritize what you’re gonna fireball. I would recommend either barbarians or flying machine, Barbarians will completely shut down your hog and flying machine is extremely annoying to counter without musketeer.

There are multiple variations of fireball bait, there’s the ones running mega knight, the more expensive ones with barb hut and there’s those running pump. Any of them should be fairly straightforward but just one mistake will lose you the game. Pull the hogs into the center with your cannon and try to get as much damage as possible in single elixir time; it’s gonna get more and more difficult to deal damage the further the game progresses, and you can’t resort to fireball cycling this one.

Clash Royale Balloon

Balloon

This can be a very hard match up if your opponent knows what they’re doing. There are two main balloon decks going around right now, the cheap cycle ones with inferno tower and miner, and the more expensive ones running freeze, pekka and tornado, both equally unpleasant.

Against the pekka ones you can at least out cycle their pekka, but they will also have tornado and lumberjack as back up counters. The cheaper variants you can’t out cycle as easily but it’s gonna be even harder to break through an inferno tower.

The miner doesn’t make it any better either, seeing as them can zap your skellies letting the miner eliminate your musketeer. Your best bet against both decks is to pull the balloon to the king tower, since neither deck runs a big spell. Once you’ve done that defense against both miner and balloon is gonna be easier, but it’s still gonna be difficult to break through. Try to get as much log and fireball chip as possible on their towers and look for an opening either through out cycling, catching them when they’re low on elixir or making your pushes so strong that they can’t shut them down completely.

Clash Royale Royal Giant

Royal Giant

First off: are they running fireball or lightning? If they’re running fireball you’re a lot more free to use your musketeer since they have to way to take it out unless she’s close to the river. Against both spells you obviously have to space out your musketeer. Just like against the regular giant, use the skeletons to get damage on the royal giant. The 4-3 cannon placement works against the RG too.

A lone royal giant is no problem, just use the cannon and musketeer (or skeletons), but if they manage to stack up two royal giants, along with supporting troops and spells, you’re doomed. So how do you deny that? You obviously want to pressure the opposite lane to split up their units, but that doesn’t help you defend. Similar to how you play a lava hound game, you should match their royal giant with a musketeer, so that once he reaches your side of the map he’s already at half health.

tracker for chest cycle

That’s it for me! I hope you learned something new about this deck or the game in general.

I highly suggest trying the Hog 2.6 deck, it’s one of the most fun decks to play in my opinion.

Have a good day everyone!

RG Fisherman Best Clash Royale Deck for Global Tournament

0

Hey Royale Clashers! I’m Krux here, back again with some fresh air and a new deck guide for Clash Royale. We are almost in the mid of the Season 14 Prepare for War and the Global Tournament has just started. We all want to climb up the tournament with as much as possible wins. There are also win rewards, we don’t want to miss those. Here is a Clash Royale deck strategy which you can use to grind in the tournament.

Balloon Fisherman Clash Royale Deck for Global Tournament

Clash Royale Royal GiantClash Royale HunterClash Royale Electro WizardClash Royale fireball

Heal SpiritfishermanClash Royale Barbarian BarrelClash Royale Skeleton

This Clash Royale deck with an average elixir cost of 3.1 is one of the best decks which can be used to dominate the Season 14 Global tournament. Let’s get started.

Deck Cards

  • Royal Giant: This common card is the only heavy elixir card in the deck. Royal Giant is our win condition.
  • Hunter: Hunter is our defence for air attacks mainly and also for ground troops if it gets overwhelming.
  • Electro Wizard: Our another defence card in the Clash Royale Deck. Will be played to defend air attacks and electrocute enemies while the tower takes them out.
  • Fireball: The pump response in the deck and splash defence or offence depending on the opponent’s deck.
  • Heal Spirit: The yellow friend will be used to cycle and wisely to keep our defence alive.
  • Fisherman: Our troop which will stay behind all the game. Major defence along with Hunter.
  • Barbarian Barrel: We will use the Barrel to clear ground splashes used by the opponent on our offence and pushes.
  • Skeletons: Easy bait and cycle card. Also goes well with Fisherman to take out tanks.

Deck Strategy

Start: The first thing that we should do is wait for the opponent to make a move. We all know this but more emphasizing in this deck as we have some cards which are not meant to be placed as the first placement or investment of elixir. Do not use Hunter or Fisherman in the back if they are in your starting hand. Hunter is our main air defence and Fisherman is used in what he does best. You can get punished for such tomfoolery. If the arena is quiet for more than five seconds, you can start with the Heal Spirit. Let it go and jump into their tower. Or just place Electro Wizard at the back.

Defending: After this, when you opponent tries to attack, use the Fisherman in the middle of the arena. The Fisherman right in front of your King tower pulls the main tank of your opponent’s offence. Put the Electro Wizard on the other side of the attack to slow them down and keep the Fisherman alive. Electro Wizard is recommended when the push is mostly ground-based like a Prince or Valkyrie. Alternatively, put the Hunter if you are under air attack with Balloon or Lava Hound. Both these are synergy cards for Fisherman and defends well. Keep the Barbarian Barrel under your finger in case they try to send some green Goblins or Princess as the support to their attack. This is the defend cycle of this Clash Royale deck.

Capture

Mid-game Counter Push: Watch your Fisherman and Hunter take the enemies out while you build on elixir. As soon as you hit 6 on the elixir scale, drop the heavy guy with the cannon on the arena. Place the Royal Giant at the bridge. The Electro Wizard or Hunter will be the support for our Counter Push. When the Royal Giant starts cannoning their tower, your opponent will place their defence. Keep your Barrel handy in case of Skeleton Army or any other ground swarm and if they place any other card, Fireball at the right place which damages their tower too. Keep in mind that it should be at least a neutral Elixir trade. At the end of this fast-paced gameplay, you should end up with a good deal of damage on the opponent’s tower.

Capture2

Post-attack cycle game: The attack cycle ends and you should be ready again with your Fisherman or Electro Wizard to defend a push. The Heal Spirit comes in use to cycle the deck and also use it while defending to make your Electro Wizard and Fisherman regain the lost health to keep fighting. That is the right time to send that yellow friend jumping on the arena. It can be used to keep the Counter Push alive for a little longer too if the opponent fails to defend. One more Royal Giant cannon on their tower is pretty good damage.
The Heal spirit can be replaced with Zap if you are not good at using it at the right times or don’t know when to cycle.

One or two cycles of this Clash Royale Deck should be good to take out the opponent’s tower. Do not greedily place the Royal Giant again on the other tower. This makes our deck out of the cycle and can be very harmful. So just focus on defending until the time runs out.

This was all about the Clash Royale Deck for Season 14 Global Tournament. I hope you get some good wins using this deck. Use the comment section to tell which Clash Royale Deck is working for you in the Tournament. Stay tuned with Clash World for new guides. Join our Discord for latest news and article pings. Clash On!

Mega Knight Magic Archer New Meta Deck

0

Hey Guys! It’s Krux here, back again with some fresh air and new meta deck guide. I hope you all are safe and doing well at your homes. We are more than a week into the new season now, which is Prepare for War. The season has been going good and there are also special challenges to prepare for the War. We all are excited about the update but let’s not forget that the time is here to push ladder. We want to break our personal bests this season, ain’t we?

This season’s balance changes are one of the most disliked as I see people ranting every other day about it. For me too, the nerf for Royal Delivery and Bats hit hard. I used them all the time last season. It is time for us to learn some new meta decks. Let’s start!

Mega Knight Magic Archer New Meta Deck

Clash Royale BanditHeal SpiritClash Royale Goblin CageClash Royale The Log

Clash Royale Mega KnightClash Royale Royal HogsClash Royale Electro WizardClash Royale Magical Archer

There is no way people will break through our legendary-heavy deck with Hogs and Mega Knight. It is time to show some dominance on the ladder.

Deck Cards

  • Bandit: The Bandit is one of our defensive cards and also an investment of elixir to make a move.
  • Heal Spirit: The tiny yellow baby spirit is our one elixir card to cycle the deck. not limited to cycle, it has a versatile use. We will see.
  • Goblin Cage: The only building card. Our main defence and investment of elixir at the right times.
  • Log: Another low elixir card. Can be used to cycle the deck, to take out ground splashes and defence.
  • Mega Knight: Mega Knight is a threat in this deck. Needs no intro; you know the deal.
  • Royal Hogs: The pink creatures are our win condition. Also, spell bait for Fireball. Then MK is the condition.
  • Electro Wizard: Our main defence. Will be played to defend air attacks and build a counter push.
  • Magic Archer: Magic Archer is another defence along with E-Wiz. It will also annoy the opponents from this side of the bridge.

Deck Strategy

Just like we do every time, wait a few seconds for your opponent to make a move. Not much needed, after five seconds you can start. This deck is not the one which will get you punished, so it is safe to play first. You need to play the right card though. Do not put your Mega Knight at the bridge. That is a dumb and fast way to lose a tower. It will result in a big counter push which is not in our Archer’s hands to defend.

According to what cards you have, you can send the Log rolling first on their tower. If you have Heal Spirit, you can send the yellow friend and it will jump happily into their tower. If your opponent is adamant and doesn’t make a move even after taking these, you can use the Royal Hogs at the bridge and wait. This is to see the opponent’s deck and defence. Do they have an Inferno Tower or Tesla?
If you played hogs, and your Hogs survived and connected to their tower. Maybe because they couldn’t put a building and rather put a Valkyrie or something. Then place your Magic Archer on the bridge. It will align with the tower and their defence, taking arrow by arrow a delicious amount of damage.

Push 3

In Mid-game, you will put the Goblin Cage at the right times whenever they send a Hog Rider, Ram Rider, or building chaser. If it is a big tank like Giant or Royal Giant then, use the Electro Wizard with the Goblin Cage to finish it off without taking any damage. Both your troops survive and when they reach the bridge, call your Royal Hogs to the arena. Send them running free to their tower while the Electro Wizard protects them. Your opponent will place a building to save them. This is the time to use our yellow friend again. Place the Heal Spirit and it heals your Hogs and Wizard and they connect to the opponent’s tower. You will see a Log or Fireball coming from the enemy as a last attempt. Just enjoy the show.

Magic Archer New Meta Deck

If you are matched up with a fast cycle like Wall Breakers or X-Bow. Then you will have to play dual-lane aggression in the game. Start with the Mega Knight in the back of your king tower. Send Electro Wizard behind it to nullify any Inferno Dragon or Tower. Your opponent will place their building to stop this. Let you Mega Knight jump and take it out slowly. Your elixir builds up and you send the Royal Hogs in the other lane. This will make your opponent pour elixir like a waterfall. Place the Magic Archer to get some delicious arrow damage while they try to defend. This thrilling episode should end with you getting some good amount of damage to their tower and relaxing again to build up the elixir.

Your opponent’s defence will counter push, not too strong though. If they try to add more to the push, just play your game, i.e, Goblin Cage with E-Wiz or Bandit. Then Hogs or Mega Knight with the Heal Spirit catching up behind. Mega Knight is preferred here because Hogs are building chaser and they should be used to put pressure in the other lane.

I hope you get some good wins using this new meta deck in the ladder. Best of luck for your grinding session. Use the comment section to tell what deck are you using this season. Clash On!

Comprehensive Guide to 2.9 X-Bow

0
x bow

Xbow 2.9 is one of the oldest, best, and most viable Xbow decks. The deck has a fast cycle and can be used after Electro Valley.

The deck has a solid winrate and can win against everything if played correctly (the only exception is RG Cycle). It is said to be one of the highest skill cap decks in the game, but certainly one of the most F2P friendly decks. This means that if you pick it up and take the time to master/upgrade it, you will have lots of success.

An Image of the deck is seen below.

Clash Royale SkeletonClash Royale Ice SpiritClash Royale ArchersClash Royale Tesla
Clash Royale Ice GolemClash Royale fireballClash Royale X-BowClash Royale The Log

What Cards Can I Replace?

Clash Royale Ice Golemekf9WOpClash Royale Knight

Clash Royale Archersekf9WOpClash Royale Musketeer

Clash Royale fireballekf9WOpClash Royale Rocket

Basics

Picking this deck up is difficult, but not very difficult. Practice with your friends and clanmates. Once you get good, you can enter CC’s and Tourneys with it. After that you can take it to ladder and to GC’s.

We will start with the basics:

Starting a Match:

Starting a match with 2.9 is fairly simple, but depends on your opponent’s plays.

In general, you never want to leak elixir. This means that you never want to reach 10 elixir without playing something. You have many cheap cards to play.

You can cycle ice spirit at the back or at the bridge for some chip damage.

You can cycle skeletons at the back.

You can split archers in the back. Splitting archers in the back is one of the safest moves ever.

Cards that could be played to cycle but are not recommended to cycle are (ones that should never ever be played are written in Bold):

  • Log: You never know if you are facing log bait.
  • Fireball: Why would you cycle a fireball with no reason?
  • Xbow: X-bow first play is not a very good idea. Your opponent can counter it hard.
  • Ice Golem: This icy guy is the only tank in your deck, use him wisely.
  • Tesla: Tesla is an important air attacker and counter to building targeters that shouldn’t be wasted.

In general, you want to cycle cheap cards, and wait for your opponent to make the real move so that you can respond well.

What if my opponent doesn’t play anything?

In that case, the chip damage you will get will become severe and your opponent will have to play or they will lose.

Properties of This Deck That You Should Exploit

With this cheap cycle, you can get to a card you just played quickly. If your opponent rocketed your Xbow, you could quickly get back to another one before then.

With these cheap cards, you should be able to make lots of positive trades.

Some buildings will survive (tesla goes down and is unaffected by most spells and Xbow has a ton of health), use them as support!

This quick cycle allows to place cards before the time they are needed so that when your opponent uses spells, you can play another one.

Card Placements

As a 2.9 player, you should know the optimal placements for your buildings.

Let’s start with the Xbow:

Offensive Xbow Placements:

Standard Xbow Placement: One tile below the bridge, and one tile to the side of the arena. This placement is an offensive one. It is good for three reasons:

  1. This gives you some space to place troops such as ice golem in front of the Xbow.
  2. This increases the chances of your opponent failing to distract your Xbow with opposite lane tanks.
  3. Most of the time, you can use the tip of the log push these tanks away from the Xbow’s range allowing it to lock on the tower.
Standard Xbow Placement
Standard X-bow Placement

Opposite Lane Punish Xbow Placement: One tile from the bridge, one tile to the opposite side from the bridge’s center. This one is mainly used for punishing plays against Giant, Golem, and Balloon on the opposite lane.

The reason is that you can put down a tesla in the middle to pull the Giant, Golem, and Balloon to the opposite lane, effectively splitting their win condition form the support making your time much easier.

Opposite Lane Xbow Punish Placement

Middle Xbow Placement: At the middle 0 tiles from the river and the Xbow’s range is barely touching the tower you are attacking. You want to use this placement when:

  1. Your tower is down but you still need to attack the same lane. This is because they can attack the Xbow from 2 sides as opposed to 4.
  2. Playing against Giant Double Prince and they have just used a ranged attacker (like Ewiz). This will make the Giant and the support walk a farther distance which gives you time to kill everything and get a lock.
Middle Xbow Placement

This covers pretty much all the offensive Xbow placements, so let’s start with the defensive ones:

Defensive Xbow Placements:

First, why do we need defensive Xbow’s?

  1. Defensive Xbow’s can snipe buildings from your side of the river.
  2. They can add a second layer of defense.
  3. If your opponent doesn’t use a spell on it, you can cycle back to another Xbow and overwhelm them.

Anti-Fireball/Rocket placement: 6/7 tiles from the king (or 4/5 from the bridge) and one tile away from the weak tower. This placement prevents damage from the fireball your Xbow and the weak tower. It also prevents damage from the rocket on your tower.

DOES NOT WORK AGAINST POISON, EQ, OR LIGHTNING.

Anti Fireball Rocket Position
Anti-Fireball/Rocket Position

Anti-Fireball/Poison/EQ/Lightning placement: Basically, one corner of the Xbow is touching the opposite tower’s outer corner.

DOES NOT WORK AGAINST ROCKET.

It is my goto placements since it gives you space in the middle to place a tesla.

Anti-Poison/Lightning/Fireball/EQ

NOTE: For all these Xbow placements, the Xbow can be placed higher to snipe buildings/troops.

Defensive Teslas

Classic Placement: 3 tiles from the bridge. Should be used against ranged/melee troops, hogs, and fast win cons as well as most other units.
An image is seen below.

Tesla Classic Placement

Anti-Tank: 4 Tiles from the bridge, should ONLY be used against SINGLE tanks because it can be bypassed easily by ranged support.

Anti-Tank Placement
Anti-Tank Placement
  • Anti-Fireball: One tile higher than the classic placement.
  • Anti-Poison/Lightning/EQ: Straight at the bridge. (Correct me if I’m wrong).

Defensive tesla’s are done, now time for offensive tesla’s.

Offensive Teslas

These Teslas are to be used to support an offensive Xbow.

Anti Hog/Balloon/Ranged Troops (Excluding Musketeer)/Small Units: As close as possible to the Xbow. Used when you have an elixir advantage or when you are sure you can breakthrough.

Anti-Small Units Placement

Anti Tanks: 1 tile away from the Xbow. Should be used against melee tanks that you can kill. You SHOULD NEVER USE THIS AGAINST GOLEM SINCE GOLEM CAN DESTROY BOTH THAT XBOW AND YOUR TESLA.

“Imma Cycle to Another Xbow” /Anti Lavaloon Tesla: A tile or two closer to your Xbow than the classic defensive one. Basically, you wanna use this tesla when you are facing lavaloon or when you can’t breakthrough. If you Xbow and your opponent golem’s same lane, use this tesla as nothing will stop that golem from destroying that Xbow. If you are lucky and the tesla survives, cycle to another Xbow and counter push.

Anti Lavaloon Tesla
Anti Lavaloon Tesla

That covers all positions you need to know as a beginner 2.9 player.

Other Cards Role Breakdown

  • Skeletons: A walking positive trade, use them to DPS down tanks and tank hits from single attackers such as prince and PEKKA. Use it to cycle to another card if needed.
  • Ice Spirit: Another walking positive trade, make sure to place it far to jump on everything and freeze the cards. Use it to cycle and get chip damage.
  • Ice Golem: Your tank. Use hits to tank hits from troops and to kite units to the other lane.
  • Archers: Your main air attackers, make sure to protect them as much as possible on defense.

Main Techniques For Success with 2.9

The 2 main techniques for success with 2.9 are card counting and elixir counting.

Card Counting:

This is based on one easy principle: A card that you played is back to your hand after playing 4 more cards.

Example: if your opponent played rocket, Valk, then wizard, then he is not back to a rocket and you can Xbow. After one more card, he will be back to that card though.

This is a big way in which 2.9 gets an Xbow on the tower, outcycling. Since your deck cycles very fast. you can play your Xbow, have it get countered, then get back to another Xbow before they get back to their Xbow counter.

Elixir Counting

Counting elixir is key to success. Al what you need is to know how much elixir you have spent, how much your opponent has spent, find the difference, the subtract it from your current elixir count.

For Example, if my opponent played valk + log and and I played ice golem + archers, I am up 1 elixir and if I am on 4 elixir right now, my opponent is at 3.

This is another way 2.9 gets an Xbow lock, elixir management. Basically, you want to make positive trades and Xbow when you have an advantage. Remember that by the time the Xbow is deployed, the opponent will get 2 elixir.

For example, if I am up 4 elixir against a golem player, I can play an Xbow because he will not have enough elixir to play golem.

Main X-bow Mistakes

There are many popular Xbow mistakes a person can make.

  • This means spending a lot of elixir than you should. For example, you could use tesla to defend a valk, but you can use an Ice Golem for a +2 trade.
  • Overdefending Xbow’s: Defending your Xbow too much. It is better to leave the Xbow die if the only choice is to spend a lot of elixir.
  • Not switching lanes. Against decks with Poison or EQ, you want to switch lanes to balance the poison damage on the towers.
  • Playing too defensively. 2.9 is not pure defense. You need to be aggressive to win.

Popular Matchups

You will face tons of decks when playing 2.9, and for each deck the plan is different so let us start with the most popular ones.

PEKKA Bridge Spam:

This match you should win as you have the advantage.

Single Elixir

You want to play passively as you can easily overcommit against this deck. However, if you see PEKKA in the back, Xbow the other lane. They won’t have much to defend.

Defend the spam cards cheaply. You can cycle log because against this deck it doesn’t provide much use. Skeletons or Ice Golem are vital cards that should never be cycled. They should be used to defend Ghosts and Bandits.

You can place a tesla 3 tiles from the river accompanied with cheap cards to defend their spams.

Here are some useful interactions to know:

  • Skeletons placed 2 tiles next to the tower will fully counter a Bandit. Be careful, because they can Zap the Skeletons and you’ll take a full dash plus multiple hits.
  • An Ice Golem kite will fully counter a Bandit.
  • Archers placed within walking range will kill a Bandit.
  • A Royal Ghost can be killed by playing Archers in the middle once it’s around one-third of the way from the bridge to your tower. The Archers will split, and the Ghost will have to go through them one at a time.
  • With a Tesla alive, either a Bandit or a Royal Ghost can be killed with only Skeletons (surround the Ghost), an Ice Golem, or an Ice Spirit (the Ghost will hit the Tesla, but it’s fine). ‎

Double Elixir:

Now that you’re in Double Elixir, you can start playing more aggressively. The main idea of the matchup is that the PEKKA player won’t be able to efficiently deal with your Xbow’s, and they’ll just eventually run out of elixir.

You can use preplaced Teslas by placing an Xbow on the inner tile at the bridge, which means the Tesla will support the Xbow after already getting the aforementioned value.

Don’t overdefend an Xbow, if it is not going to do significant damage, let it die and cycle to another one. If they keep playing cards to kill your Xbow, you can defend easily and play an Xbow on offense that they will have little elixir to defend.

Be prepared to block a Bandit dash on the Xbow, and if you have a healthy Xbow locked on, predict their EWiz or Magic Archer so they can’t easily reset the Xbow or get a ton of tower chip. ‎

Triple Elixir:

By this point, it’s just time to spell cycle. You should be significantly up in damage, but even if you aren’t, you can just cycle a few Fireballs and Logs to get enough of a lead to win in Tiebreaker. 2.9 has solid enough defenses that you can defend any spam they throw at you, even if they’re trying to punish a straight -4 Elixir Fireball, but if you’re not confident in your ability to defend, you can wait to have a Tesla down before you spell cycle.

Unless you’re majorly down in damage, you don’t want to keep trying for a lock, because they can get Poison value and you won’t be able to break through.

BEWARE OF MAGIC ARCHER. HE CAN STEALTHILY SNIPE YOUR TOWER AND LOSE THE DAMAGE ADVANTAGE.

It’s generally fine to take a shot or two from a naked Magic Archer on the tower in exchange for an Elixir advantage, so a Log or Ice Spirit is an adequate defense if the only alternative is to overspend. ‎

Also, once in Double Elixir, you can Xbow in the opposite lane when they play an EWiz or Magic Archer in the back because of how easy it is to defend them on your side for a positive trade. They’re effectively down 4 elixir and you can easily outcycle their PEKKA and get a major lock if you do this. ‎

Golem Beatdown:

Golem beatdown is a nightmare for underleveled and newer Xbow players alike. But it is definitely winnable.

Single Elixir:

Be careful in single as a simple mistake will cost you the game. Play Xbow on the opposite lane as soon as you see a 4 elixir card in the back. They will not have elixir to play golem and block your Xbow. When they golem, place a tesla, then play archers and prepare to protect your archers at all costs. Make sure to never fireball their tower in single because you will need it on defense.

If you see Golem first play (which is a horrible move) place down a tesla in the classic position. Cycle archers in the corner, get ready with log and fireball to take out Night Witch and Support. Use Ice Golem to tank for archers (if there is a baby dragon or mega minion) or you can kite the support away. If they use lightning or a spell, you will be back to a tesla that you can place after your original tesla dies. After that, if the opponent has no golem in cycle or if he is down 4 elixir or more Xbow the opposite lane immediately.

Double Elixir:

You should have about equal damage or you should have more than the opponent. If not, be very careful. You will lots of golem pushes. Try to not tower trade as you will lose if you do. When you see golem in the back (if it is golem lightning and not clone) you can Xbow the other lane if really you need damage.

A better play is the same defensive procedure in single, but instead of offensive Xbow’s (if you are up) use defensive Xbow’s.

Triple Elixir:

Same story goes for triple as with double, but you can spell cycle if their tower is about 1k health (if you are maxed) or 700 (if you are playing in tournament standard) when they prepare to make a golem push in the back. Just make sure you can defend for long enough.

3M Piggies (Fireball Bait)

Single Elixir:

In single elixir you want to get most of your damage. You need to identify when you can get aggressive and when you need to play passively. Cycle along with your opponent and react to their assaults.

You should go on offense when:

  • They used their distraction troops
  • You defended their win condition, here being the piggies.

When you are up 3 elixir, offensive Xbow.

When you see 3M behind the king, react quickly and fireball all of them. It is ok to activate their king tower because it doesn’t matter.

Defend their piggies with a tesla. Should you not have it in cycle it is okay to fireball them,if you don’t have skellys and log in cycle or you are afraid that they might prelog you. But be aware that they might place their 3m after you have used your fireball.

There will be two situations to be aware of when that happens (meaning you don’t have fireball in cycle):

Situation a)

This might be a good opportunity to push them. You will most probably get a lot of damage if they place their 3m right when you go offensively. Make sure to push in the one musky lane while not defending the X-Bow so that you save elixir for their impending push.

You will be fine defensively, if you really pay attention on what they play. They might get some damage as well but probably not as much as you, when you make sure to defend wisely while being careful what to fireball. Don’t rush your fireball on the 2m but wait them out otherwise you will probably lose a tower. Instead of fireballing the 2m you can also defend them by placing ice golem, skellys and log to save the fireball for their next 3m

Situation aa)

They defend you with distraction units and spells, which probably gives you the opportunity to push them again.

Situation b)

Don’t go offensively when you are down in elixir and they have an ice golem in cycle because they will be able to distract your X-Bow long enough while you struggle to get back to a fireball. Log their 2 muskys, ice golem the one musketeer lane and yet again fireball what will be the most threatening push.

Double Elixir:

You will have a hard time getting damage. If you are in the lead, play defensively. Fireball their 3M and tesla their pigs as usual. Stay offensive when you are even, or worse, your opponent has the damage advantage. The gameplan on how you go aggressive does not change. Don’t play an offensive X-Bow until your opponent plays their pigs or when he uses all of his tanky distraction units. If they start fireball cycling you, go aggressive immediately. They will probably play hunter right on your X-Bow so be prepared to fireball or to distract and kill him .

Triple Elixir:

Depending on how well you’ve done until now, you should be defending on hardcore mode and making sure to still be in the damage lead. Your X-Bows will probably not connect anymore. You should still pressure when up in elixir to distract them from getting damage on your weak tower but don’t expect to get any damage. But it is in the realm of possibility that you might get lucky. Make sure to also spellcycle to victory.

General tips:
-Know what they will kill your Xbow with by keeping track of their cycle.

To give you an example: Should they have used hunter and ice golem in the other lane, you will know that they can only defend with piggies and vice versa.

-Remember their pattern of defense: They might always split royal hogs when you go offensively. Make sure to know how to deal with it. For example by holding the tesla while you are pushing, fireballing the 3 pigs that go toward the Xbow and so on. Get creative in your defense and try to be two steps ahead of your opponent.

-Always be ready to fireball their 3m

-Let the healspirit jump away from troops that could get healed. Place any cycle unit as far away from your opponents push to nullify the healing. Or log the healspirit if you can get value by hitting any other troop from your opponent

-Save your spells as best as you can, only spell if you get a lot of value

Splashyard

Single Elixir:

This is when you should get most of your damage. You have to be super aggressive. As soon as you realize they are using splashyard (usually signified by cycling an ice wizard and a baby dragon), immediately Xbow opposite lane of those troops. However, do NOT defend your first Xbow (greatly) because they will do 3 things:

In all situations no matter how much you defend your first Xbow, you will not get significant damage. Keep in mind though, it’s ok to defend lightly to have your opponent spend more elixir trying to defend the Xbow.

After your first Xbow dies, you should try to cycle to another Xbow as fast as you can, but don’t just throw all your cycle cards away (It is fine to ice spirit or split skeletons if you want). If there are surviving troops from the opponent, you can use your cycle cards to defend those troops, an example being using an ice golem to defend a Baby Dragon or Knight.

Once you are back to your second Xbow and hit 10 elixir, Xbow at the Bridge. After 1 second, Tesla next to it. The reason for doing this is to catch a bomb tower or any troops they may play near your Xbow since you didn’t play Tesla Immediately. This is the Xbow you want to defend because the opponent will likely not have enough elixir to defend it properly. If you get significant damage on their tower, then you can begin spell cycling in double elixir.

Double Elixir:

If your towers are even on damage, then do not defensive Xbow until you know which tower your opponent is going for. If your opponent plays a card next to the tower that you are going for, then you can fireball it. After you fireball, the opponent will most likely go in for a graveyard push. Use a tesla to defend what he plays at the bridge and archers to defend the graveyard. Be sure to be switching up your archer placements so they can get more value (because the opponent will take longer to react to poison them).

If you notice that the opponent overcommits on trying to take your tower down (such as a late poison), you can Xbow offensively and fireball what they place near their tower to get a lock. If you defend your Xbow, you will always get a lock being up elixir in double elixir and they don’t have poison in hand. If the opponent has significant damage on one tower then play a defensive Xbow on the other tower (anti poison placement) when double elixir starts. If they poison it, fireball their tower because if they go in for a graveyard you will be able to easily defend it.

Triple Elixir:

If the match gets to this point you most likely will lose because the opponent can easily poison cycle you and keep up with your cycle. You will have to be continuously cycling archers in the back to defend their graveyard pushes and fireball cycling their tower.

You CANNOT go the same lane Xbow because that gives them poison value. If you want to stop them from getting chip damage on your tower, offensive Xbow opposite lane and defend it as much as you can without giving the opponent damage on your other tower.

If you cycle to another Xbow while they are still defending your first Xbow you can play another Xbow in the middle towards the same tower the other Xbow is defending and tesla right next to it (1 second delay) so you can kill their bomb tower/ baby dragon that they will use to snipe the Xbow. This play has to be done on the tower that is the opposite lane of your tower that the opponent is going for if the opponent is up in damage.

Overview :

  • Lane: Opposite
  • When to get most damage: Single Elixir
  • Fireball their troops next to tower in double
  • Use Tesla + Archers + Log to defend GY pushes

This strategy can be used for similar GY decks, such as the variant with Musketeer and Skeletons and the variant with Goblin Cage/ Tombstone

Mega Knight (MK)

MK decks vary a lot so I will talk generally:

Single Elixir:

Never let the MK jump on your troops. Use Ice Golem + Archers/tesla to kill it. After you outcycle the MK, Xbow opposite lane to get damage as soon as possible. Defend their win condition (which is usually miner or hog) then Xbow when you are up 5 elixir.

Double Elixir:

Against MK decks with no big spell, a defensive Xbow will get infinite value. You can stack tesla’s too.

If you are down in damage, use log for chip damage (unless they are playing bait) and fireball if their tower is very low.

If you consistently have troubles against MK, I suggest swapping Ice Golem for Knight.

LavaLoon:

So against lavaloon what you will always do is never go with a Xbow, you will always save the Xbow until they use lavahound in the back and you go same lane with the Xbow, reason why you have to do this is because they will have to push into it in a awkward way and it evades them from using their balloon because if they do so then the balloon will go in front of the lavahound which makes it so your princess tower targets the balloon first and THEN is that you go with a tesla at the side and archer to the other side of your tower, always do that placement to avoid giving them too much fireball value or else you will lose.

Now lets say they lavahound, you go with Xbow same lane but they decide to go with minions or mega minion to defend that, what you have to do is always go with a tesla at the side to eliminate them (and since mega minion now no matter what gets in range of your princess tower then its easier to defend it).

Now here comes a really cooll trick you can do that will definitely be really good and its that after all that offensive and defensive sequence, you should already have their tower down by a lot but an intelligent lavaloon player would go opposite lane with a new Lavahound and if you Xbow the opposite side then they will just trade towers unless….you do a sneaky little trick that will totally win you the game and basically its just placing your Xbow closer to the center opposite side from that lavahound, what that does is that if they go with a balloon with the lavahound opposite side then you can place a high tesla and the balloon will go for the tesla AND THEN it will go for the Xbow opposite side so what you have done is that you separated the balloon from the lavahound and now you only need to focus on the lavahound with the support troops (cause when the balloon goes opposite lane it will barely get only the death damage on the opposite tower) .

Low/Mid Ladder General Guide

People in low to mid ladder are almost always higher level than you, so at the start of the game, you should be playing defensively.

Cycle cards in the back (behind king tower) to feel them out. This is for you to be able to learn what kind of deck your opponent is playing.

If you have archers, you can split them in the back, which is the safest play to make. You should save your skeletons in case your opponent rushes bridge unexpectedly

If your starting hand is Xbow, fireball, ice golem, and tesla, don’t immediately cycle ice golem in the back. You should wait a bit until your opponent makes the first move because your opponent is likely to rush you unexpectedly.

SAVE YOUR SPELL. Don’t just cycle spells without purpose. You should know when using a spell is necessary. You should try using troops to kill their spam if possible.

People in lower trophy regions typically aren’t skilled enough to tank your Xbow properly. They may also use squishy units. They may even skarmy directly into your offensive Xbow rather than splitting it to gain more time by distracting or to avoid giving you value. Same with minion horde. So always have your spells ready if you go for an offensive Xbow

Know your building placements. There are specific anti-spell placements to avoid giving your opponent value. Also, there are specific placements you should do in certain situations. You can see a video for this in a link at the end of this guide. – You should know where to place your cards in order to get the most value. ‎‎

Know your numbers: When you are going to spell cycle your opponent’s tower at the end of the game, make sure you know how much damage your spells will do. It will make finishing the game much more easier and less stressful if you know when you are able to win. This could also ensure that you don’t accidentally miscalculate and leave the opponent’s tower with 20 hp after you use a valuable fireball on the tower. –

Another version of the tip above is to know how much damage 2 fireballs and 2 logs can do. Or even just 1 fireball and 1 log. Knowing the amount of damage can help with decision making as you would know whether to continue to defend and gain more chip or to use the spells to immediately end the match.

Single elixir

Many people in low to mid ladder aren’t patient enough to wait around, so they will normally start the game early, allowing for many opportunities to punish in single elixir. You should take calculated shots when they commit.

Use offensive Xbow’s when they use a 4-6 elixir card in the back and see how they react to your Xbow. Be prepared to use spells on their troops

You should almost NEVER use defensive Xbow’s in SINGLE elixir. This is because most of the time, it doesn’t get value. You should only play defensive Xbow’s in single elixir against barbhuts. And maybe goblin huts, but you should normally fireball them

DON’T OVERCOMMIT. If you know you can’t defend your Xbow well enough to get a good lock, just let it die and defend against their troops. By the time you defended them, you should be back to another xbow or close to another Xbow. If your opponent plays into your Xbow making you unable to defend, chances are they overextended (or have too high level cards), so you have the opportunity to go offensive again after defending and cycling.

Double elixir

In double elixir, it is very unlikely that you will be able to get an Xbow lock if you use the same tactics as single elixir, so you should play more defensively. What you should do is…

Use defensive Xbow’s. They can help break through your opponent’s defense after a transition from defending to going on the offensive

Use the proper defensive Xbow placements to avoid them from getting spell value

Play aggressively when you have a defensive Xbow with at least a quarter (1/4th) of its health left. Otherwise, start another defensive Xbow

Triple elixir/overtime

Here you should seal the deal.

Be sure to be in the damage lead. If you have a considerate lead on their tower just defend them as well as you can since tiebreaker will let you win If you are losing in damage, you should spellcycle your opponent. You don’t have to worry about saving your spells that much in triple elixir because you can easily cycle back to your spells. However, be sure that they can’t punish you with anything before you spell cycle. It is advised to have a defensive structure before spell cycling.

Master the Deck… Bridge Spam Challenge

0

The current challenge in Clash Royale is Master the Deck…Bridge Spam. So if you are a bridge spammer already, this is for you

Not the P.E.K.K.A. Bridge Spammers, you don’t have PEKKA in the cards in this challenge.

Master the Deck... Bridge Spam Challenge

Hey guys! Krux is back again with some fresh air and another guide on Clash Royale. The new season called Prepare for War has started and we are four days into it now.

It is the 14th season in the game and it brings some new features to it.

As the name says, Prepare for War, there are special challenges in the game every four days to make us learn some typical decks of the game.

Clan Wars II is coming this month and all this learning will help in it. So let’s start.

Master the Deck… Bridge Spam Challenge Deck

Clash Royale Ram RiderClash Royale Barbarian HutClash Royale fireballClash Royale Musketeer
Clash Royale Barbarian BarrelClash Royale SkeletonClash Royale Baby DragonClash Royale Lumberjack

The current challenge in Clash Royale is Master the Deck…Bridge Spam. So if you are a bridge spammer already, this is for you

Not the Pekka Bridge Spammers, you don’t have PEKKA in the cards in this challenge.

Cards

  • Ram Rider: We have our ram riding girl with us which is our win condition. It damages your opponent’s tower hugely if connected. It is also a punishment for them if they played a stupid big tank first. On top of this, it will make them use their Zap or Snowball if they didn’t stop it in time. Bait for small spells like this.
  • Barbarian Hut: Barb Hut is an investment of elixir card for us. Also, bait for their Fireball or Lightening. It comes as a strong Defense in bridge spam games.
  • Fireball: Response to their army of troops near the tower. The only splash spell in our deck.
  • Musketeer: Our defence play who will support our pushes and troops fighting with the enemy. Also our air-defence for Balloons, Dragons etc.
  • Barbarian Barrel: Barb Barrel is a low-damage as well as low elixir card. The second spell in the deck. A cycle card and also good for defending against ground swarms.
  • Skeletons: The three tiny friends are the lowest elixir card to cycle our deck fast and amazing defence when used properly.
  • Baby Dragon: A versatile winged threat. Counter for air and ground swarms. Used for defending against opponent’s bridge spams.
  • Lumberjack: Our second Bridge Spam card. Deal very good damage if gets connected to tower. We will try to do this to the maximum.

Strategy

The game starts. You wait. Five seconds pass. You wait for your opponent to make the first move. This will be the strategy most of the time.

We will wait for the first 5 to 10 seconds because as the name says, this is the Bridge Spam Challenge. And if you placed a troop in the back as you do always chillingly, they can punish you with a running building chasing irritator.

After the wait, if they don’t make a move, but the skeletons as a cycle.

You can also start with the Musketeer in the back of your Princess tower if you don’t have skeletons in the cycle.

Don’t play the Lumberjack or the Ram Rider as the first card. Never think that you will make them sad with a Ram Rider charging to their tower. They will defend it easily and also counter push making you pour out elixir. It also makes our bridge spam cards go out of the cycle. We need them at the right time.

If your opponent starts with a spam card like Ram Rider or Battle Ram, place the Barbarian Hut in the middle of the arena.

Accordingly, place your Baby Dragon or Musketeer if they send some air attack or mini-tank behind.

This will stop their attack as well as push with the barbarians spawning from the Barbarian Hut.

Defence 1

At this point of the game when your spawned Barbarians are pushing with your Dragon or Musketeer as support, send the brown girl on a sheep near the bridge ahead of the support troops. This is our attack on their tower.

After placing your bridge spam card, you should have your Barbarian Barrel in the cycle.

Be ready to drop it on time when your opponent tries to stop the Ram Rider with Skeleton Army or Witch. The barrel will take care of this and your spam connects.

If your opponent sends a fast ground spam-like Battle Ram, use your Lumberjack to get rid of it with the Hut standing in the middle.

When your lumberjack counter pushes, send your Dragon to keep it alive and make it connect to the opponent’s tower. This is how we will keep on defending and counter pushing. Our Fireball will come handy at this time when your opponent will place troops at once to stop your counter push. Just burn them with that red ball.

counter push

Also, if your opponent sends a Ram Rider and you don’t have the hut or your elixir is low, place your Ram Rider. Yes, Ram Rider vs Ram Rider and it will negate their Ram Rider. If you did not know this, Ram Rider is a counter to itself.

We need one or maximum two successful cycles of this bridge spam to take the opponent’s tower.

Once you do it, just play defensive by cycling the Barb Hut again and again till the time runs out.

Do not over-commit or try to spam their other tower greedily. It may cost you a tower and the game goes into Overtime which we want to avoid.

I hope you get some good wins using the deck in the challenge. Use the comment section to tell if this deck made you win or some another deck which you used to get the 9 wins in the Bridge Spam Challenge. Clash On!

Clash Royale Season 14: Prepare for War (August 2020)

0

Hey Clashers! I’m Krux back again bringing you the latest info about Clash Royale’s new season. The Season 14 update is starting on August 3 and here is all about it so that you do not lag behind in planning your decks and other stuff. Let’s start this right away!

Clash Royale Season 14: Prepare for War Update (August 2020)

Season 14

Pass Royale

Like every new season, Pass Royale brings some cool new emotes and an exclusive tower skin which can be obtained only with a Pass Royale.

s14 tower iconTower Skin: Mega Knight
The new tower skin that comes with the pass royale in Prepare For War (Season 14) is called Mega Knight. The name sounds good to me. And it is not simply a name, the king tower cannon sits on a giant Mega Knight’s helmet. It is made of boulders with a yellow crown in the front sticking out. The Princess towers are blue in colour with a blue feather ornamenting them. Solid steel we got here. This skin design looks and feels strong to me. What do you say?

archer slowmo fs8Exclusive Emote: Slowmotion Archer
The archer which we all forgot is back in the game and not normally. She is back with a new emote in which you can see her shooting an arrow in slow-motion with the wind blowing through her hair. She also winks in the end. Ah! Such a fresh emote; I liked it. I know that arrow will pierce right through your heart.

Other Emotes:

archer hood fs8
Archer with Hood: The archer puts on a smooth blue hoodie made of fine thick fabric to shield herself from the cool wind that blows swishing past her. Some brown dry leaves swirl with the wind. Really chillin’ breeze. The emote will be available in the shop to buy.

archer clean fs8Archer cleaning arrow: The archer rubs her arrow with a handkerchief while giving you a don’t-mess-with-me look. She blows away the dust later with a swag filled shine. Good archer emotes this season. This will also be a shop offer.

Arena: Legendary Arena
Legendary ArenaThis season we will not be visiting any out of the continent place. Players will be back at the Legendary Arena (Arena 13) to Prepare For War. The arena has a good competitive vibe with the enormous trophy on one side with water falling from it. The two king statues oversee the arena matches for any foul play. The Arena matches with the tower skins in colour and feeling. It is also a revisit as Clan Wars II will start in this season and we need to practice our game. Legendary Arena is the start of serious gameplay for a new player.

Balance Changes

To keep the game fair and enjoyable, Clash Royale team is vigilant about a card dominating or falling into the dark. They buff or nerf cards every season and this time there are a lot of changes to make us prepare for Clan Wars II in a kind way. The changes which we will see in Season 14 are here.

  • Royal Recruits (Buff)
    The Royal Recruits is not a card which you see very much in Clash Royale meta or in challenges. The battalion of spear troops is getting a slight increase in damage with it going 110 from 101.
  • Bowler (Rework)
    I hope you have not forgotten our purple giant with a boulder in his hands. Bowler is getting a rework in this season with his projectile range increasing from 6 to 7.5 (25% increase). His hitpoints are also increasing a bit, i.e, 8%. This makes his offence better than before. Sight range for the troop has been decreased, so he will wait for enemies to come closer before attacking.
  • Miner (Nerf)
    Miner is a card which is used in many decks with low average elixir cost. Miner will see a nerf in Crown Tower Damage this season with it decreasing a bit. Miner also saw a nerf with spell cards in Season 9. Season 14 (Prepare for War) is also getting spell nerfs. Looks like he is being treated as a potion and not a human.
  • Spell Cards (Nerf)
    Spells have been the cards which are compulsorily used in every deck. You cannot do without a spell in your deck. It is good to use them effectively. Clash Royale is seeing a nerf in the spells as there are decks which use spell cycles to kill enemy troops grouping near towers and also damaging the tower. To make it balanced, the crown tower damage of spells have been reduced by 14%. The spells which are nerfed are Arrows, Giant Snowball, Fireball, Freeze, Lightning, Poison, Rocket, The Log, and Zap. Earthquake and Tornado are the same as they were.
  • Royal Delivery (Rework)
    Royal Delivery is an amazing card if you know how to use it. It hits both air and ground troops, killing swarms instantly. It knocked back the enemies in the arena when fell and then starts defending with the spear. Really this takes a lot of effort from that lean man. It is getting a damage buff from 101 to 110 and its knockback removed. So it won’t be the case to drop delivery on everyone to save your tower now. I did it in my Miner Wall Breakers deck. Looks like I need a new deck now.
  • Bats (Nerf)
    Another card from my decks. I used bats in almost all decks as they are so good for 2 elixir. Or they were. Bats will see a slower hit speed (hit time or time between each hit) in Season 14 with it increasing from 1.1 seconds to 1.3 seconds. This means low damage per second.
  • The Log (Nerf)
    Another omnipresent card is getting a nerf. The Log has high usage rates in ladder and challenges alike. They did not make it unusable but a balance change to increase its skill-cap. The log will have its projectile range reduced by 9%, i.e, one tile for level 9. We will need to deploy The Log at the very top row of tiles in order to knock at the opponent’s tower now.

New Game Modes

To Prepare us for War, Clash Royale team is bringing 5 special challenges based around archetypes like Beatdown, Bridge Spam, Air Attack etc. Players can win Legendaries in the challenges (As we will be in Legendary Arena) and these will also help them in preparing for Clan Wars II. We will the details of these in another post soon.

This was all about Clash Royale Season 14 (August 2020). We are excited for the season as well as Clan Wars II. Stay tuned for more articles by me on the topics. Clash On!