Home Blog Page 65

Clash Royale Card Drop Rates – Legendary Card Drop Rates (Updated)

83

Hello guys, as people have been asking for Clash Royale card drop rates a lot, today I am going to show you how the drop system works in game!

After reading this page, you will also know what is your odd of getting Legendary cards!

Clash Royale Card Drop Rates

Basic Information

  • Silver Chests, Golden Chests, Giant Chests, Magical Chests and Super Magical Chests and Epic Chest which are given from battles, are based on your Arena when you get them. Some players said that they could save them and opened later at higher Arenas for better rewards, this is not true at all.
  • Higher Arenas = better chest rewards.
  • Chests in higher Arenas still contain cards from lower ones. For example, Arena 4 Magical Chest still contains Witch, Prince etc from Training Camp.
  • You can get Epic card from any chest except the Legendary Chest.
  • You can get Legendary cards from Arena 4 chests upwards.
  • The Legendary Chests contains all Legendary cards regardless of your current Arena.
  • You can’t get locked cards from the Clan Chest. For example, If you are in Arena 4, you can’t get the Mega Minion (available from Arena 7) from the Clan Chest.
  • Draft Chests are given once every season, it’s when the season resets (1 month/season).

For more details about “Chests”, please take a look at here.

Legendary Card Drop Rate

A big thanks to dkjay (legendaryoddscr.github.io) for sharing this!

How are the Legendary odds calculated?

The for calculating legendary odds we use here was shared by Yarn from Orange Juice in this video.

% Chance = ((Cards in Chest * # Legendary)/# Commons)/Legendary Factor

We have 14 Legendary cards in game. Also, assuming that the Royal Ghost is already released.

Arena 12Arena 11Arena 10Arena 9Arena 8Arena 7Arena 6Arena 5Arena 4
Type of Chest Legendary Factor # of Cards Legendary Droprate
Free 4000 14 0.23%
Crown 4000 88 1.47%
Silver 10000 14 0.09%
Gold 5700 44 0.51%
Giant 10000 308 2.05%
Magical 600 123 14.67%
Super Magical 600 792 88.00%
Type of Chest Legendary Factor # of Cards Legendary Droprate
Free 4000 13 0.22%
Crown 4000 82 1.37%
Silver 10000 13 0.09%
Gold 5700 41 0.48%
Giant 10000 287 1.91%
Magical 600 123 13.67%
Super Magical 600 738 82.0%
Type of Chest Legendary Factor # of Cards Legendary Droprate
Free 4000 12 0.18%
Crown 4000 76 1.14%
Silver 10000 12 0.07%
Gold 5700 38 0.40%
Giant 10000 304 1.82%
Magical 600 114 11.40%
Super Magical 600 684 68.40%
Type of Chest Legendary Factor # of Cards Legendary Droprate
Free 4000 11 0.17%
Crown 4000 70 1.05%
Silver 10000 11 0.07%
Gold 5700 35 0.37%
Giant 10000 280 1.68%
Magical 600 105 10.50%
Super Magical 600 630 63.00%
Type of Chest Legendary Factor # of Cards Legendary Droprate
Free 4000 10 0.14%
Crown 4000 64 0.93%
Silver 10000 10 0.06%
Gold 5700 32 0.33%
Giant 10000 256 1.48%
Magical 600 96 9.26%
Super Magical 600 576 55.58%
Type of Chest Legendary Factor # of Cards Legendary Droprate
Free 4000 9 0.12%
Crown 4000 58 0.77%
Silver 10000 9 0.05%
Gold 5700 29 0.27%
Giant 10000 232 1.23%
Magical 600 87 7.68%
Super Magical 600 522 46.06%
Type of Chest Legendary Factor # of Cards Legendary Droprate
Free 4000 8 0.09%
Crown 4000 52 0.61%
Silver 10000 8 0.04%
Gold 5700 26 0.21%
Giant 10000 208 0.97%
Magical 600 78 6.07%
Super Magical 600 468 36.40%
Type of Chest Legendary Factor # of Cards Legendary Droprate
Free 4000 7 0.05%
Crown 4000 46 0.33%
Silver 10000 7 0.02%
Gold 5700 23 0.12%
Giant 10000 184 0.53%
Magical 600 69 3.29%
Super Magical 600 414 19.71%
Type of Chest Legendary Factor # of Cards Legendary Droprate
Free 4000 6 0.03%
Crown 4000 40 0.17%
Silver 10000 6 0.01%
Gold 5700 20 0.06%
Giant 10000 160 0.27%
Magical 600 60 1.67%
Super Magical 600 360 10.00%

Clan Chest Card Drop Rates

Arena 12Arena 11Arena 10Arena 9Arena 8Arena 7Arena 6Arena 5Arena 4
Chest Tier # of Cards Droprate
1 18 0.6%
2 38 1.27%
3 60 2.0%
4 84 2.8%
5 110 3.67%
6 138 4.6%
7 168 5.6%
8 200 6.67%
9 234 7.8%
10 270 9.0%
Chest Tier # of Cards Droprate
1 18 0.6%
2 38 1.27%
3 60 2.0%
4 84 2.8%
5 110 3.67%
6 138 4.6%
7 168 5.6%
8 200 6.67%
9 234 7.8%
10 270 9.0%
Chest Tier # of Cards Droprate
1 18 0.6%
2 38 1.27%
3 60 2.0%
4 84 2.8%
5 110 3.67%
6 138 4.6%
7 168 5.6%
8 200 6.67%
9 234 7.8%
10 270 9.0%
Chest Tier # of Cards Droprate
1 18 0.51%
2 38 1.09%
3 60 1.71%
4 84 2.4%
5 110 3.14%
6 138 3.94%
7 168 4.8%
8 200 5.71%
9 234 6.69%
10 270 7.71%
Chest Tier # of Cards Droprate
1 18 0.5%
2 38 1.05%
3 60 1.65%
4 84 2.31%
5 110 3.03%
6 138 3.8%
7 168 4.62%
8 200 5.5%
9 234 6.44%
10 270 7.43%
Chest Tier # of Cards Droprate
1 18 0.45%
2 38 0.95%
3 60 1.5%
4 84 2.1%
5 110 2.75%
6 138 3.45%
7 168 4.2%
8 200 5.0%
9 234 5.85%
10 270 6.75%
Chest Tier # of Cards Droprate
1 18 0.39%
2 38 0.83%
3 60 1.31%
4 84 1.84%
5 110 2.41%
6 138 3.02%
7 168 3.68%
8 200 4.38%
9 234 5.12%
10 270 5.91%
Chest Tier # of Cards Droprate
1 18 0.26%
2 38 0.54%
3 60 0.86%
4 84 1.20%
5 110 1.57%
6 138 1.97%
7 168 2.40%
8 200 2.86%
9 234 3.34%
10 270 3.86%
Chest Tier # of Cards Droprate
1 18 0.15%
2 38 0.32%
3 60 0.50%
4 84 0.70%
5 110 0.92%
6 138 1.15%
7 168 1.40%
8 200 1.67%
9 234 1.95%
10 270 2.25%

Please take a look at here to read more about the Clan Chest.

Legendary Card Drop Rates of Draft Chest

You can visit Draft Chest page to read more about Draft Chest rewards and card droprates.

League # of Cards Droprate
challenger I Challenger I 101 33.67%
challenger II Challenger II 171 57.0%
challenger III Challenger III 201 67.0%
Master I Master I 251 83.67%
Master II Master II 301 100.33%
Master III Master III 351 117.0%
Champion Champion 401 133.67%
Grand Champion Grand Champio 451 150.33%
Ultimate Champion Ultimate Champion 501 167.0%

Legendary Card Drop Rates of Challenge Chests

Arena 12Arena 11Arena 10Arena 9Arena 8Arena 7Arena 6Arena 5Arena 4
% of Wins Grand Challenge Classic Challenge
# of Cards Legendary Drop Rate # of Cards Legendary Drop Rate
0 20 0.67% 2 0.07%
1 30 1.0% 3 0.1%
2 50 1.67% 5 0.17%
3 85 2.83% 8 0.27%
4 130 4.33% 12 0.4%
5 185 6.17% 17 0.57%
6 250 8.33% 23 0.77%
7 330 11.0% 30 1.0%
8 420 14.0% 38 1.27%
9 530 17.67% 48 1.6%
10 670 23.33% 61 2.03%
11 860 28.67% 78 2.6%
12 1100 36.67% 100 3.33%
% of Wins Grand Challenge Classic Challenge
# of Cards Legendary Drop Rate # of Cards Legendary Drop Rate
0 20 0.67% 2 0.07%
1 30 1.0% 3 0.1%
2 50 1.67% 5 0.17%
3 85 2.83% 8 0.27%
4 130 4.33% 12 0.4%
5 185 6.17% 17 0.57%
6 250 8.33% 23 0.77%
7 330 11.0% 30 1.0%
8 420 14.0% 38 1.27%
9 530 17.67% 48 1.6%
10 670 22.33% 61 2.03%
11 860 28.67% 78 2.6%
12 1100 36.67% 100 3.33%
% of Wins Grand Challenge Classic Challenge
# of Cards Legendary Drop Rate # of Cards Legendary Drop Rate
0 20 0.60% 2 0.06%
1 30 0.90% 3 0.09%
2 50 1.50% 5 0.15%
3 85 2.55% 8 0.24%
4 130 3.90% 12 0.36%
5 185 5.55% 17 0.51%
6 250 7.50% 23 0.69%
7 330 9.90% 30 0.90%
8 420 12.60% 38 1.14%
9 530 15.90% 48 1.44%
10 670 20.10% 61 1.83%
11 860 25.80% 78 2.34%
12 1100 33.00% 100 3.00%
% of Wins Grand Challenge Classic Challenge
# of Cards Legendary Drop Rate # of Cards Legendary Drop Rate
0 20 0.58% 2 0.06%
1 30 0.87% 3 0.09%
2 50 1.45% 5 0.14%
3 85 2.46% 8 0.23%
4 130 3.76% 12 0.35%
5 185 5.36% 17 0.49%
6 250 7.24% 23 0.67%
7 330 9.55% 30 0.87%
8 420 12.16% 38 1.10%
9 530 15.34% 48 1.39%
10 670 19.39% 61 1.77%
11 860 24.89% 78 2.26%
12 1100 31.84% 100 2.89%
% of Wins Grand Challenge Classic Challenge
# of Cards Legendary Drop Rate # of Cards Legendary Drop Rate
0 20 0.53% 2 0.05%
1 30 0.79% 3 0.08%
2 50 1.32% 5 0.13%
3 85 2.25% 8 0.21%
4 130 3.44% 12 0.32%
5 185 4.90% 17 0.45%
6 250 6.62% 23 0.61%
7 330 8.74% 30 0.79%
8 420 11.12% 38 1.01%
9 530 14.03% 48 1.27%
10 670 17.74% 61 1.61%
11 860 22.76% 78 2.06%
12 1100 29.12% 100 2.65%
% of Wins Grand Challenge Classic Challenge
# of Cards Legendary Drop Rate # of Cards Legendary Drop Rate
0 20 0.47% 2 0.05%
1 30 0.70% 3 0.07%
2 50 1.17% 5 0.12%
3 85 1.98% 8 0.19%
4 130 3.03% 12 0.28%
5 185 4.32% 17 0.40%
6 250 5.83% 23 0.54%
7 330 7.70% 30 0.70%
8 420 9.80% 38 0.89%
9 530 12.37% 48 1.12%
10 670 15.63% 61 1.42%
11 860 20.07% 78 1.82%
12 1100 25.67% 100 2.33%
% of Wins Grand Challenge Classic Challenge
# of Cards Legendary Drop Rate # of Cards Legendary Drop Rate
0 20 0.29% 2 0.03%
1 30 0.43% 3 0.04%
2 50 0.71% 5 0.07%
3 85 1.21% 8 0.11%
4 130 1.86% 12 0.17%
5 185 2.64% 17 0.24%
6 250 3.57% 23 0.33%
7 330 4.71% 30 0.43%
8 420 6.00% 38 0.54%
9 530 7.57% 48 0.69%
10 670 9.57% 61 0.87%
11 860 12.29% 78 1.11%
12 1100 15.71% 100 1.43%
% of Wins Grand Challenge Classic Challenge
# of Cards Legendary Drop Rate # of Cards Legendary Drop Rate
0 20 0.17% 2 0.02%
1 30 0.25% 3 0.03%
2 50 0.42% 5 0.04%
3 85 0.71% 8 0.07%
4 130 1.08% 12 0.10%
5 185 1.54% 17 0.14%
6 250 2.08% 23 0.19%
7 330 2.75% 30 0.25%
8 420 3.50% 38 0.32%
9 530 4.42% 48 0.40%
10 670 5.58% 61 0.51%
11 860 7.17% 78 0.65%
12 1100 9.17% 100 0.83%

Clash Royale Card Drop-rates

wooden-chest

Free Chest
Arena Gold Total cards Guaranteed cards 
Goblin Stadium 21-24 3 No Rare or Epic cards guaranteed.
Bone Pit 28-32 4
Barbarian Bowl 35-40 5
P.E.K.K.A’s Playhouse 42-48 6
Spell Valley 49-56 7
Builder’s Workshop 56-64 8
Royal Arena 63-72 9
Frozen Peak 70-80 10 1 Rare
Jungle Arena 77-88 11
Hog Mountain 84-96 12
Electro Valley 91-104 13
Legendary Arena 98-112 14

silver-chest

Silver Chest
Arena Gold Total cards Guaranteed cards 
Goblin Stadium 15-21 3 No Rare or Epic cards guaranteed.
Bone Pit 20-28 4
Barbarian Bowl 25-35 5
P.E.K.K.A’s Playhouse 30-42 6
Spell Valley 35-49 7
Builder’s Workshop 40-56 8
Royal Arena 45-63 9
Frozen Peak 50-70 10
Jungle Arena 55-77 11
Hog Mountain 60-84 12 1 Rare
Electro Valley 65-91 13
Legendary Arena 70-98 14

golden-chest

Gold Chest
Arena Gold Total cards Guaranteed cards 
Goblin Stadium 50-70 10 1 Rare
Bone Pit 70-98 14
Barbarian Bowl 85-119 17
P.E.K.K.A’s Playhouse 100-140 20 2 Rares
Spell Valley 115-161 23
Builder’s Workshop 130-182 26
Royal Arena 145-203 29
Frozen Peak 160-224 32 3 Rares
Jungle Arena 175-245 35
Hog Mountain 190-266 38
Electro Valley 205-287 41 4 Rares
Legendary Arena 220-308 44

crown-chest

Crown Chest
Arena Gold Total cards Guaranteed cards 
Goblin Stadium 140-160 20 2 Rares
Bone Pit 189-216 27
Barbarian Bowl 238-272 34 3 Rares
P.E.K.K.A’s Playhouse 280-320 40 4 Rares
Spell Valley 322-368 46
Builder’s Workshop 364-416 52 5 Rares
Royal Arena 406-464 58
Frozen Peak 448-512 64 6 Rares
Jungle Arena 490-560 70 7 Rares
Hog Mountain 532-608 76
Electro Valley 574-656 82 8 Rares
Legendary Arena 616-704 88

magical-chest

Magical Chest
Arena Gold Total cards Guaranteed cards 
Goblin Stadium 300 30 1 Epic + 6 Rares
Bone Pit 410 41 1 Epic + 8 Rares
Barbarian Bowl 510 51 1 Epic + 10 Rares
P.E.K.K.A’s Playhouse 600 60 2 Epics + 12 Rares
Spell Valley 690 69 2 Epics + 13 Rares
Builder’s Workshop 780 78 2 Epics + 15 Rares
Royal Arena 870 87 2 Epics + 17 Rares
Frozen Peak 960 96 3 Epics + 19 Rares
Jungle Arena 1,050 105 3 Epics + 21 Rares
Hog Mountain 1,140 114 3 Epics + 22 Rares
Electro Valley 1,230 123 4 Epics + 24 Rares
Legendary Arena 1,320 132 4 Epics + 26 Rares

giant-chest

Giant Chest
Arena Gold Total cards Guaranteed cards 
Goblin Stadium 210 70 14 Rares
Bone Pit 285 95 19 Rares
Barbarian Bowl 357 119 23 Rares
P.E.K.K.A’s Playhouse 420 140 28 Rares
Spell Valley 483 161 32 Rares
Builder’s Workshop 546 182 36 Rares
Royal Arena 609 203 40 Rares
Frozen Peak 672 224 44 Rares
Jungle Arena 735 245 49 Rares
Hog Mountain 798 266 53 Rares
Electro Valley 861 287 57 Rares
Legendary Arena 924 308 61 Rares

super-magical-chest

Super Magical Chest
Arena Gold Total cards Guaranteed cards 
Goblin Stadium 1,620 180 6 Epics + 36 Rares
Bone Pit 2,187 243 8 Epics + 48 Rares
Barbarian Bowl 2,754 306 10 Epics + 61 Rares
P.E.K.K.A’s Playhouse 3,240 360 12 Epics + 72 Rares
Spell Valley 3,726 414 13 Epics + 82 Rares
Builder’s Workshop 4,212 468 15 Epics + 93 Rares
Royal Arena 4,698 522 17 Epics + 104 Rares
Frozen Peak 5,184 576 19 Epics + 115 Rares
Jungle Arena 5,670 630 21 Epics + 126 Rares
Hog Mountain 6,156 684 22 Epics + 136 Rares
Electro Valley 6,642 738 24 Epics + 147 Rares
Legendary Arena 7,128 792 26 Epics + 158 Rares

epic chest

Epic Chest
Arena Gold Total cards Guaranteed cards 
Goblin Stadium 0 6 All cards are Epics.
Bone Pit 8
Barbarian Bowl 10
P.E.K.K.A’s Playhouse 12
Spell Valley 13
Builder’s Workshop 15
Royal Arena 17
Frozen Peak 19
Jungle Arena 20
Hog Mountain
Electro Valley
Legendary Arena

lightning chest

Lightning Chest
Arena Gold Total cards Guaranteed cards 
Goblin Stadium 410 81 1 Epic + 13 Rares
Bone Pit 430 85 1 Epic + 14 Rares
Barbarian Bowl 450 89 1 Epic + 14 Rares
P.E.K.K.A’s Playhouse 470 93 1 Epic + 15 Rares
Spell Valley 490 97 1 Epic + 16 Rares
Builder’s Workshop 510 101 2 Epics + 16 Rares
Royal Arena 530 105 2 Epics + 17 Rares
Frozen Peak 550 109 2 Epics + 18 Rares
Jungle Arena 570 113 2 Epics + 18 Rares
Hog Mountain 590 117 2 Epics + 19 Rares
Electro Valley 610 121 2 Epics + 20 Rares
Legendary Arena 630 125 2 Epics + 20 Rares

fortune chest

Fortune Chest
Arena Gold Total cards Guaranteed cards 
Goblin Stadium 1,100 162 5 Epics + 32 Rares
Bone Pit 1,200 170 5 Epics + 34 Rares
Barbarian Bowl 1,200 178 5 Epics + 35 Rares
P.E.K.K.A’s Playhouse 1,300 186 6 Epics + 37 Rares
Spell Valley 1,400 194 6 Epics + 38 Rares
Builder’s Workshop 1,400 202 6 Epics + 40 Rares
Royal Arena 1,500 210 7 Epics + 42 Rares
Frozen Peak 1,500 218 7 Epics + 43 Rares
Jungle Arena 1,600 226 7 Epics + 45 Rares
Hog Mountain 1,600 234 7 Epics + 46 Rares
Electro Valley 1,700 242 8 Epics + 48 Rares
Legendary Arena 1,800 250 8 Epics + 50 Rares

king chest

King’s Chest
Arena Gold Total cards Guaranteed cards 
Goblin Stadium 2,900 240 16 Epics + 48 Rares
Bone Pit 3,000 250 16 Epics + 50 Rares
Barbarian Bowl 3,100 260 17 Epics + 52 Rares
P.E.K.K.A’s Playhouse 3,200 270 18 Epics + 54 Rares
Spell Valley 3,400 280 18 Epics + 56 Rares
Builder’s Workshop 3,500 290 19 Epics + 58 Rares

legendary king chest

Legendary King’s Chest
Arena Gold Total cards Guaranteed cards 
Royal Arena 3,600 300 1 Legendary + 20 Epics + 60 Rares
Frozen Peak 3,700 310 1 Legendary + 20 Epics + 62 Rares
Jungle Arena 3,800 320 1 Legendary + 21 Epics + 64 Rares
Hog Mountain 4,000 330 1 Legendary + 22 Epics + 66 Rares
Electro Valley 4,100 340 1 Legendary + 22 Epics + 68 Rares
Legendary Arena 4,200 350 1 Legendary + 23 Epics + 70 Rares

Hopefully you have found this Clash Royale Card Drop Rates page helpful.

If you have any suggestion, please comment and help us improve this page.

Thank you very much guys!

Best Tips for Zappies vs Hunter Challenge

144

clash royale draft challenge

New Cards Overview

Clash Royale HunterHunter

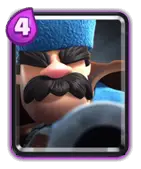
The Hunter is a 4 elixir Epic Troop card unlocked from Arena 9: Jungle Arena.

Hunter is basically a new glass cannon in the game.

He has a special type of weapon which hits both ground and air has unique attacking feature never seen before in the game.

The weapon fires 10 bullets. Each bullet does individual damage. Thus, the closer the enemy is, the more damage Hunter can deal.

https://youtube.com/shorts/oUxrNRJdd3c

Hunter can deal a high amount of damage (690 at lvl4) to an enemy right next to him as all 10 bullets hit it. This makes Hunter a very powerful card on defence against a lot of variety of troops.

On offense, he also helps but not much since he is a ranged troop. But, Hunter is rather a Pseudo Splash Damager and can defend himself pretty well up close,  making your push a lot stronger.

Hunter can survive Fireball and Poison but dies to Lightning and Rocket.

Lightning and Rocket are a good counter to him but for -2 elixir trade so make sure you hit something else so that you don’t get the elixir disadvantage.

Range troops and swarms are the best counters to Hunter.  Also, Zappies can also counter him for a neutral trade!

Don’t try to counter Hunter with melee troops as he can damage them critically.

Clash Royale Flying ZappiesZappies

Zappies is a 4 elixir Rare card unlocked from the new Arena 11: Electro Valley (3400+ trophies).

This cards spawns 3 Zappies on the map.

They move with the same speed as a Sparky however they attack a lot quicker without any need of charge (like a Tesla). That makes me think of them as ‘Moving Tesla’ with the ability to stun.

Each Zappy fires a zap of electricity from its coil (similar to Tesla’s attack) which deals low damage but stuns the target for 0.5 seconds. Together, they can stun for 1.5 seconds giving them great value on defence.

Individually, they lack in damage, only being able to one shot Skeletons and Bats. However, the three of them together can take care of many troops.


Zappies spawn in a triangular manner, exactly similar to 3M, so you can split them 2:1 in same manner as 3M.

Splitting them gives you a wide variety of options to play making them very versatile on offense as well as well as defence.

They can help to kill tanks like Giant with a medium damage card like Knight or Minions.

They can even help against RG and deny him many hits and take care of him easily with another troop with medium damage.

Zappies are fragile troops. They can be killed by Poison and Fireball for a neutral trade. They can be killed by Valkyrie or Knight like troops easily, especially on your side of the map.

However, using an Ice spirit is recommended if you wanna do the job quickly without letting your troop being damaged a lot.

They can’t hit air troops. So, air troops can quickly take care of them. Ground swarms also can take care of them very well. Ranged troops are generally not recommended as first priority as a counter as these troops can’t take a hit.

Challenge Tips

Pick a Win-Condition:

Clash Royale GolemClash Royale Hog RiderClash Royale GiantClash Royale BalloonClash Royale Battle RamClash Royale Lava Hound

Hunter and Zappies are not Win-conditions so always pick a win-condition, the one you have practice with if possible.

You need a reliable source of damage to destroy the Crown Towers.

Best Win-conditions for this challenge are: Golem, Hog Rider, Giant, Lava Hound, Balloon, Battle Ram.

Choose at least two spells

Clash Royale RocketClash Royale LightningClash Royale PoisonClash Royale ArrowsClash Royale The LogClash Royale Zap

You might not lucky enough to have a win-condition in your deck and thus you will have to depend on spell cycle to win.

Spell Cycle is a weaker after today’s balance changes nerfing their tower damage by 5%. However, with the duration of 6 minutes in a battle, you can still win by Spell-cycling.

Choose cards which counter your opponent’s cards

This is a very important thing to remember. This tip can actually decide the outcome of the battle!

Doing this can give you a slight edge against your opponent.

However, if you already have a dependable counter, look for cards to balance out your deck as much as you can.

Pick cards which require specific counters:

Clash Royale Goblin BarrelClash Royale PrincessClash Royale Inferno DragonClash Royale Goblin HutClash Royale Barbarian HutClash Royale elixir collectorClash Royale BalloonClash Royale Graveyard

Your opponent may not always get a card which can counter your cards.

So, try to use cards which require specific counters.

For e.g. Goblin barrel needs a specific counter to absolutely deny any damage.

However, don’t chose Sparky in this challenge as Zappies wreck her and you never be sure to have them with you if you don’t get the option to choose them.

Choose a pocket card

Clash Royale GraveyardClash Royale BalloonClash Royale FreezeClash Royale HealClash Royale Rocket

A pocket card is basically a surprise card which can change the outcome of the game.

Keep such cards in your hand and use them only when your sure that your opponent doesn’t expect them.

A well-time pocket card may easily secure your win and make your opponents wondering where the heck did that come from.

Pick Dart Goblin!

Clash Royale Dart GoblinDart Goblin is one of the most over-powered cards in the Draft Mode.

While being under-powered in normal battles, this card rocks in this game mode.

The reason is that it can wreck towers with its chip damage. In draft, you may not always get a win-condition, not even a dependable damage spell.

Here, Dart Goblin is your solution, due to his insane movement speed and attack speed, he can lock on the tower before your opponent can react and deal a good amount of chip damage.

Many times, when you have a tank in front of the Dart Goblin, he can kill opponent’s defenses and lock on the tower while opponent is late to drop another card. The opponent will 100% of time go on to defend the tank but the locked-on Dart Goblin just wrecks the tower while opponent is unable to do anything.

Some Other Crucial Tips 

Shared by XxxThe_Demon_KanexxX

  • Always try to pick Hunter, he is excellent at tank killing. If well placed and well timed, he can 5 shot the hound and end the pups. Make sure to give the opponent the Hound if you have him.
  • Try to have Fireball and Lightning. In case you don’t get the hunter, you can destroy him with these spells and fireball Zappies.
  • Choose E-wiz if your opponent may have Zappies. Just like with the sparky, E-wiz can shutdown Zappies and prevent them from attacking.
  • Choose splash cards. Executioner and wiz are must haves. Bowler is also good but can die to the hunter.
  • Choose the counter. If you have to choose between horde and arrows, choose arrows! Same with other cards and their counters.
  • Zap can also reset the Zappies but take the log over zap. Log can severely damage the Zappies! Log is is general a great card to have to kill barrels and princesses.
  • Improve. Adapt. Overcome. Adapt to your deck and make sure to get them positive trades, sometimes the only way is to spell cycle so do so with caution and with positive trades.
  • Don’t plant anything next to the hunter! The hunter will do massive damage!
  • Golem, and Giant are great to have! Make sure to prepare for an enemy Hunter!
  • If you think you can’t handle a certain card on the enemy team then choose it! Since i have trouble with 3M i choose them over other cards if given the choice.

Clash Royale December Update Recap: New Cards, New Arena and More!

245
clash royale update

Okay my friends, the Clash Royale December Update is here! This is going to be a extremely huge update so I want to sum things up so you guys can easily follow the new update!

Okay, let’s go!

december update clash royale

Clash Royale December Update Recap

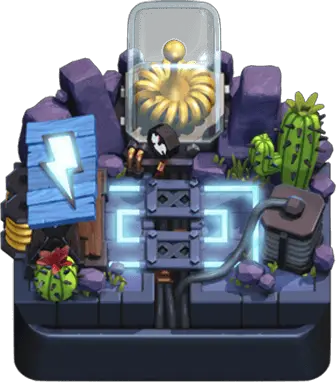
New Arena: Electro Valley

The New Arena 11 unlocks at 3400 trophies. So now the gap between Hog Mountain and Legendary Arena is no longer a nightmare.

Legendary Arena (Arena 12) now has better rewards increased accordingly.

New Cards: Zappies and Hunter

  • Zappies: Spawns plenty of Zap machines into the Arena.
  • Hunter: The closer the target is, the more damage he can deal. He is kinda Shelly or Bull in Brawl Stars If you have played the game.

new cards clash royale

Three New Chests

Some big boys have already landed in the Arena!

  • Lightning ChestReplace card stacks of your choice with up to 5 “Strikes
  • Fortune Chest: Get a glimpse of the future and see what your chest might contain…
  • King’s Chest / Legendary King’s Chest: Huge chests with only Epic and Legendary Cards

You can easily pick up these new chests from the Shop or from the Quests menu.

new chests clash royale

New Events coming

Gold Rush, Gem Rush, Special Challenges and Boosts are coming!

New Improvements

The “Daily Gifts” Quest is always active now.

Players above 4,000 trophies now can more often see the Epic and Legendary Cards offers in shop.

Cards maxed are now less likely to appear in Fortune Chest and the Shop.

iPhone X, Samsung Galaxy S8/S8+ and Note 8 are now fully supported.

Balance Changes

Read more about the Balance Changes at here.

Updating…

The Best Mega Knight Hog Deck – Perfect for Ladder and Challenges!

229

Hey guys, it’s Desert Chicken bringing you a deck that has won me countless challenges and has let me reach a personal best on ladder!

Its fairly free-to-play friendly and it has very few counters.

So, without further ado, here’s the deck:

mega knight hog rider

Clash Royale Hog RiderClash Royale Mega KnightClash Royale Ice GolemClash Royale Zap
Clash Royale GoblinClash Royale PoisonClash Royale Inferno DragonClash Royale Minions

copy deck

miner graveyard analytics

Overview

It’s very similar to some of the other Mega Knight Hog decks, but out of all the variations I’ve tried, this one works the best by far.

It’s a good balance of offence and defense, and it’s not too hard to learn how to play.

It also matches well against almost all the other archetypes, as I’ll talk about below. It’s pretty cheap and has good counters to basically all of the META win conditions.

With practice, it’s an easy 12 wins in a grand or classic challenge.

Card Roles:

Clash Royale Mega KnightMega Knight

This heavyweight boxer smashes down with the power of 1,000 mustaches.

His main role in this deck is defending pushes and then counterattacking with minions or a hog rider.

In single elixir I only use him 1-3 times because he’s so expensive. His main problem is DPS, so paring him with minions is a perfectly devastating push for only 10 elixir.

I rarely would deploy him in the back because you need to save his landing damage for defending hogs and other attacks.

In double elixir you can easily defend a big push and then throw everything behind him for a massive unstoppable push!

Clash Royale Hog RiderHog Rider

This perfectly tanned bacon-riding menace is your main win condition.

He pairs well with the ice golem, as the ice golem can distract the tower and defending troops while the hog rider slaps the tower.

The zap also works well with the hog because it can take out the swarm troops that your opponent uses to defend the hog.

He can also add to your mega knight push and deal damage to the tower while the mega knight distracts the tower and smashes defending troops.

In double elixir, you can go highly offensive with hog and poison.

Clash Royale Inferno DragonInferno Dragon

This mean green dragon melts tanks easily.

His big role is to take out tanks and mini tanks coming for your tower.

He works well with the mega knight on both defense and offence, as he can take out tanks while the mega knight jumps on support troops and shields for the weaker dragon.

He’s pretty easy to learn and pretty useful too.

Clash Royale PoisonPoison

This toxin is your main spell.

It’s your main counter to princesses and elixir collectors. I generally try to not use it until double elixir, but sometimes the situation calls for it.

Try to figure out how they defend your hog rider during single elixir, and if they keep countering hogs with squishy troops, then throw poison down around your hog.

Surprising them with this tactic can get you a tower and sometimes even the game!

Clash Royale MinionsMinions

Their DPS is insane for only 3 elixir!

Their main role is to defend smaller pushes and to get an elixir advantage.

If your opponent ignores full health minions, they can deal 500+ damage to a tower!

They are also the perfect combo behind the mega knight because if your opponent doesn’t have arrows then the minions are extremely hard to stop before they wreck the tower.

Clash Royale Ice GolemIce Golem

This snowman has very high HP for only two elixir.

He is a great cycle card and is a pro at kiting units all around the arena.

If you drop him right in front of a hog rider, then the hog will push him all the way to the tower while the ice golem is soaking damage.

He’s also a last resort to try to slow a massive enemy push.

Clash Royale GoblinGoblins

These high DPS cycle cards can really go anywhere in this deck.

They are decent behind a hog, mega knight, or an ice golem.

They can chip a tower alone on offence, or they can defend and distract units on defense.

Clash Royale ZapZap

Pretty self-explanatory.

Use it with a hog or against infernos that are targeted on your mega knight.

The short stun can give a hog an extra hit too.

Overall a great utility spell and cycle card.

Matchups

Now that I have covered the individual cards, I’ll talk a little bit about specific match ups.

This deck can beat most other archetypes if played right.

Clash Royale GolemBeat-down

Try to get value poisons on elixir collectors and punish with hog.

The most important thing is to not let them build up a huge push.

Save the Mega Knight and inferno dragon for that massive push. Let the inferno dragon target the tank while the mega knight crushes the support.

Try to take a tower before overtime and then just defend it out.

If played right, this deck can overtake most beat-down decks.

Clash Royale Three MusketeersThree Musketeers

Similar to the beat-down strategy, only its even easier.

Try to deal as much damage as you can without over committing, and then poison or mega knight their musketeer pushes in double elixir.

Overall it’s a pretty easy match up.

Clash Royale MinerMiner Control

Make sure to always stay ahead in tower damage, and keep zap handy for pesky units shielded by miner. Just don’t take too much early damage and then build up a bigger push in double elixir. Mainly use goblins to defend a miner, but be careful if the miner is combined with poison. Overall it’s not too hard as long as they don’t get really far ahead in elixir.

Clash Royale GraveyardGraveyard

A pretty easy match up.

You’ll have plenty of counters for the graveyard as long as you don’t over commit or fall behind in elixir.

Clash Royale Hog RiderHog Rider

A pretty even match up. Use Mega Knight in hogs if you have enough elixir, or if not then use high DPS troops to take out the hog.

Just don’t let them get too many hog swings and get positive trades on defense and then you can send in your own hog rider to take a tower.

It’s an even match up, so just practice a lot and get better than the other hog users out there and you should be good.

Clash Royale X-BowSiege

This is a super easy one to defeat. just use the ice golem to distract siege cards and burn them up with inferno dragon.

The mega knight is also tanky enough to distract siege.

Basically just don’t be stupid and you’ll win.

Clash Royale Goblin GangBait

This is going to be the hardest match up by far, because bait is pretty much the counter to this deck.

Never ignore a goblin barrel or you’ll basically lose, and always send a hog behind an ice golem so that they can’t tornado it to the king tower.

In double elixir the best way to take a tower is to try to build up a huge mega knight push, but be careful of inferno towers.

If they try to rocket cycle, punish with your hog.

With practice, this deck is a challenge-farming machine and will also boost you through the leagues.

One last thing to note is that the most important cards in the deck to level up in my opinion are poison, minions, and hog rider.

The mega knight is also an important one because he’s the backbone of this deck.

I hope this guide helped you guys!

Clash Royale December Balance Changes Update

200
december balance changes

Supercell is releasing the the December Balance Changs supdate for Clash Royale on December 11th.

december balance changes

Clash Royale December Balance Changes

Please note that these changes are not live yet. They are coming on December 11th 2017.

Clash Royale Hog RiderHog Rider

Hit speed to 1.6sec (from 1.5sec), first attack comes 0.1sec slower

Clash Royale KnightKnight

Hit speed to 1.2sec (from 1.1sec)

Clash Royale PrincePrince:

Hitpoints +5%, hit speed to 1.4sec (from 1.5sec)

Clash Royale fireballDamage Spells (Fireball, Lightning, Zap, Log, Poison, Rocket, Arrows)

Damage -5% to Crown Towers

Clash Royale Ice GolemIce Golem

Death Damage slow effect duration to 1sec (from 2sec)

Clash Royale Goblin BarrelSkeleton Barrel

Added Death Damage

Clash Royale Giant SkeletonGiant Skeleton

Hitpoints +5%

Clash Royale GuardsGuards

Damage +5%, hitpoints +5%, hit speed to 1.1sec (from 1.2sec)

Clash Royale GoblinGoblins (affects Goblins, Goblin Gang, Goblin Barrel)

Damage -6%

Clash Royale elixir collectorElixir Collector

Hitpoints -13%

Fixes:

  • Mortar – FIXED: Minimum range bug
  • Inferno Dragon, Inferno Tower – FIXED: Damage not resetting after breaking through a shield (e.g. Guards, Dark Prince, Cannon Cart)

What do you think about these balance changes?

Don’t hesitate to share your thoughts guys!

Best Tips for Sudden Death Challenge

68
sudden death challenge

sudden death challenge

The opponent plays tank at the back or Elixir Collector?

Use these cards (combos)

Clash Royale Battle RamClash Royale BanditdotClash Royale MinerClash Royale BanditdotClash Royale Minion HordedotClash Royale Hog RiderClash Royale BanditdotClash Royale Mega KnightClash Royale Bats

In this challenge, it is recommended playing a deck that can punish and is unlikely to get punished.

Contain one of the troop/combos above in your deck to deal especially with 3M decks etc.You will want to capitalize on your opponent’s mistakes and misplays to dish out as much damage as possible.

How to for defense after playing a high Elixir card?

Lets say you decide to play beatdown and drop a Giant in the back, you will ideally need cards to defend your other lane if your opponent rushes with something like Battle Ram + Bandit combo above.

Ultimately, you will have to stick with the deck type you are good at. So try to use the deck built with the mind-set above, that you will always get a punishment push after playing a heavy card.

For example, use Minions to bait out Arrows then use Minion Horde! This allows you to form a counterpush with a Giant and still marching down your lane.

How to counter the meta Decks?

Consider using some of these cards in your deck

Clash Royale Inferno DragonClash Royale Mega KnightClash Royale MinerClash Royale BanditClash Royale P.E.K.K.AClash Royale Hog RiderClash Royale BalloonClash Royale BatsClash Royale Goblin BarrelClash Royale fireball

Hog, Balloon and Mega Knight decks will be very popular in this Challenge, for sure.

Now you will need answers for these Meta cards.

For an example, you should carry an Inferno Dragon as an answer for these tanks. Along with a Fireball/Poison for the E-wiz, which is used reset your Inferno Dragon.

Use decks with an awareness for cards you will face. Below I will list out some cards you ought to keep in mind when including cards in your deck.

1 Win Condition is not enough! Use at least 1 more!

Clash Royale fireballClash Royale RocketClash Royale LightningClash Royale Miner

Remember that, even If you get your opponent’s Tower to 200 HP, you could still lose the game because you don’t have a direct damage spell. If you have Zap, you need 4 Zaps to take that Tower out!

This is why you should use at least 1 more win condition.

Use Spell Cycling when needed. If you use 3 Musketeers deck, you could use Miner as the 2nd win condition (Miner + Zap usually can do a few hundreds of damage). Rocket is also great choice in this challenge.

Are Expensive Decks Okay?

Control and Chip decks would work better than Beatdown decks in this Challenge.

Why?

This is simply because beatdown requires large commitments and using Tower HP as a resource, which is not an ideal mind-set to go into the sudden-death game!

Decks like Log bait in my eye will dominate with the pocket Rocket, allowing them to bottle up and defend after a certain point.

Best Decks for the Sudden Death Challenge

Hurricane Log Bait

Clash Royale KnightClash Royale PrincessClash Royale Goblin BarrelClash Royale Goblin Gang
Clash Royale Ice SpiritClash Royale The LogClash Royale RocketClash Royale Tornado

Spell Cycle

Clash Royale KnightClash Royale TornadoClash Royale Ice SpiritClash Royale Poison
Clash Royale Ice WizardClash Royale RocketClash Royale The LogClash Royale Skeleton

Lumberloon

Clash Royale LumberjackClash Royale BalloonClash Royale Ice SpiritClash Royale Zap
Clash Royale Ice GolemClash Royale GoblinClash Royale FreezeClash Royale Bats

Miner Balloon

Clash Royale MinerClash Royale Mega KnightClash Royale BalloonClash Royale Zap
Clash Royale Ice SpiritClash Royale Ice GolemClash Royale GoblinClash Royale Minion Horde

Lumberloon Clone

Clash Royale Ice SpiritClash Royale LumberjackClash Royale Mega MinionClash Royale Freeze
Clash Royale ArrowsClash Royale Clone SpellClash Royale BalloonClash Royale Ice Golem

Graveyard Freeze

Clash Royale Ice GolemClash Royale Ice SpiritClash Royale FreezeClash Royale Graveyard
Clash Royale BatsClash Royale ZapClash Royale The LogClash Royale Minions

Hog Rocket

Clash Royale Hog RiderClash Royale RocketClash Royale TornadoClash Royale Mini P.E.K.K.A
Clash Royale BatsClash Royale PrincessClash Royale The LogClash Royale Ice Golem

Some More Battle Tips for the Challenge!

Here are some things you must know before playing the challenge!

Do not let any Tower down!

Quite literally you can’t afford more than 6 Rockets on a Tower.

Be aware of your opponent’s cycle when making plays

For an example, take a note of your opponent’s Fireball/Rocket whenever you play Wizards/Executioner/Witches. This allows you to know whether you should play thecard behind a Tower or simply in front so they can’t spell them at the Tower it once.

Elixir advantages are really the key in this Challenge.

You can respond with something really cheap while tanking a bit of damage.  This will also allow you to punish more efficiently.

For example, use Bats on the Wizard after your tower tanks 2 hits from the Wizard rather than dropping say a Knight for only a +2 trade.

Always have the specific counters in our hand

Maybe a Goblin Barrel in your opponent’s deck? Just keep that card in mind and then count cards. They drop 4 cards and they will be back at the Goblin Barrel! Hold your counters to the Barrel until they play it.

With the help of Blaze Stone

Crazy Giant Musketeers Deck – Hybrid Horrors #2

72
giant 3m

Hey kiddos! Trainer Lay here with an amazing Giant Musketeers deck to show you guys today! JUST KIDDING!!! XD. It’s not Trainer Lay, it’s actually Supermarine here today!

But, I actually am showing you guys a Giant Musketeers Deck (made by HeroCow), the second deck in my Hybrid Horrors series!

So, enough with the joke (that hopefully wasn’t insulting to Radius/Trainer Lay)! Let’s get to the guide!

giant 3m

Clash Royale GiantClash Royale Night WitchClash Royale Three MusketeersClash Royale Minion Horde
Clash Royale Ice SpiritClash Royale ZapClash Royale GoblinClash Royale elixir collector

copy deck

zap bait analytics

Giant Musketeers Deck (by HeroCow)

Clash Royale GiantGiant

Giant is the main tank of your deck.

He lumbers toward the Arena Tower and does everything else from there. He works great as a tank for your Night Witch or Musketeers. He even does decent damage on his own!

Overall, not much to say about this under appreciated card!

Clash Royale Night WitchNight Witch

A smaller tank for the Musketeers, and also a big threat if put behind Giant.

The spawned Bats are also helpful if you want to distract just about anything, ranging from Infernos to opposing Musketeers.

Her battle staff allows you to do huge damage to tanks and mini tanks as well. This makes her a very good threat card and high DPS mini tank, and if you can somehow manage to counterpush with her, her threat level will be even bigger!

Clash Royale Three MusketeersThree Musketeers

They love to pop Balloons, ground Baby Dragons, shoot at every single Minion imaginable, and do just about everything, even ripping the Arena Tower to shreds!

That’s right, they’re your main win condition! Be careful of spells like Fireball or Lightning, as they are quickly eliminated by these spells! If you can get them to use their Rocket or Lightning on a Pump prior to placing, your opponent will be screwed!

Clash Royale Minion HordeMinion Horde

Of course! It’s not a 3M SkillHorde without Minion Horde!

These sinful six are great at shredding the health of tanks whenever you cannot afford to use the Three Musketeers.

Their nickname is Punish Horde, and for good reason. If the opponent can’t counter Horde on offense and leaves it to the Arena Tower, you can place a tank in front of the Horde to create a really deadly punish!

Overall, due to their insane DPS and threat potential, the Minion Horde is a perfect fit in this deck!

Clash Royale Ice SpiritIce Spirit

This one lively little Ice Spirit does it all: He resets Infernos, weakens swarms, make positive Elixir trades, supports troops, and cheap cycles.

Do I really need to say more?

Ok, just one more thing: Stay frosty.

Clash Royale ZapZap

Zap stuns Infernos briefly, reducing their threat level, and combined with a preemptive Minion Horde (and possibly 3M), can cripple all threats to the tanks and Muskets!

Clash Royale GoblinGoblins

Small, fast, green and mean, and also your definitive ground swarm on defense.

Since the nerf to those poor little doots (RIP Doots) they have been a mainstay card in many Beatdown decks.

They are not one-shot by a non-dashing Bandit, hold their own against light Hog pushes, and even do very well against threats like Executioner and Wizard, as they can simply surround them to make their splash useless!

On offense, they work great as distractions, especially when counterpushing.

Glass cannons and Infernos are stuck on them for quite some time before they die!

Clash Royale elixir collectorElixir Collector

Why not? We have Giant, Night Witch, and Minion Horde, not to mention Three Musketeers! No doubt that makes for an expensive deck!

So, that’s why we need Pump, to help us gather more Elixir for offensive or defensive purposes!

It can also pose as Rocket or Lightning bait as well so your Muskets won’t die.

General Gameplay:

3:00-1:00

Keep in mind that you can play this deck in two ways: You can use the Giant, Night Witch, Ice Spirit and Minion Horde to make a deadly Beatdown push, or you can split Muskets and use Giant and Night Witch to tank.

So, when Pumping during Single Elixir, doing Giant based pushes is a good idea, as it helps to divert attention away from your Pump(s).

If it does get targeted by a Miner or Goblin Barrel, use the Goblins to block the troops.

If it gets spelled at, just continue pushing with Giant and Night Witch to keep other things away.

1:00-End

Now is when you can use your Muskets.

Place Giant to tank for two and Night Witch to tank for one.

Be sure to keep on Pumping to cycle Giants, Night Witches and Muskets, not to mention defend!

Continue to do Musket based pushes until you win or until the game ends.

Matchups

Clash Royale GiantGiant

Minion Horde and the Night Witch work extremely well against him.

If possible, counter push with a Giant. Use Ice Spirit to freeze if necessary.

Clash Royale GolemGolem

Night Witch and Minion Horde will definitely be your best option.

Treat it like a Giant, but also make sure you use Goblins on the Golemites, as they will survive the death damage of both, and prevent any unnecessary damage on your Arena Tower.

Use your Ice Spirit to freeze things if necessary.

Clash Royale P.E.K.K.AP.E.K.K.A

Take full advantage of your Goblins, Minion Horde, and Muskets.

Use the Goblins to distract P.E.K.K.A so Minion Horde or the Three Musketeers can shred through her.

Use Night Witch on support, and Ice Spirit to freeze if necessary.

Also, if you can manage a Musket counter push, your opponent will be in BIG trouble!

Clash Royale Lava HoundLava Hound

Like other tanks, use Minion Horde or the Musketeers to shred through the tank.

However you may need to use extra cards to defeat anything behind Hound, like an Inferno Dragon or Balloon.

Clash Royale Royal GiantRoyal Giant

Fight cancer with cancer!

The Three Musketeers are great at taking this guy down.

Elite Retards won’t save him either; you can use Night Witch+Ice Spirit combined with the Musketeers to take them both out.

Be sure to counter push with Giant whenever possible.

If splitting Musketeers without a Night Witch to tank for the solo Musketeer (possibly due to rushing with other cancer cards), simply use Ice Spirit to increase the survivability of the lone Musket.

Clash Royale Hog RiderHog Rider:

Be very careful of Log and Ice Golem if using Goblins.

Against Hog users with these cards, Night Witch is the better option, as you can counter push with it, and it will force the opponent to overshove on defense if a Giant is tanking for it.

If the Hog users are only using Zap, then the Goblins are safe to use. Use Ice Spirit or the Horde wherever necessary, especially against Knight, P.E.K.K.A, and Elite Barbs.

Clash Royale Three MusketeersThree Musketeers

Easy!

Three Musketeers! If they Log your Muskets in hopes of theirs surviving, Zap theirs!

Did they just place an Elixir Collector? Place a Pump of your own!

Mini tank? Night Witch! You have all of the counters, so you should be fine!

Clash Royale GraveyardGraveyard

Night Witch is a very good counter to the Graveyard. Goblins and the Horde, however, are much riskier counters because they can be cleared out by popular Graveyard accompaniments like Poison, Fireball or even Arrows!

Only use them if the opponent used such a spell on defense.

Or, you can split Three Musketeers in front of the King Tower out of Spell range and counter push afterward!

Clash Royale X-BowSiege

Giant and Minion Horde work well against both Siege structures.

With X-Bow, you typically want to use Giant+Ice Spirit to freeze any tank killers so the Giant can finish it off.

Mortar, however, is tricky because of several reasons: The dead zone allows Mortar to get chip damage on the Arena Tower, and there are many variations of Mortar Hybrid decks such as RG Mortar to watch out for too, so watch for alternate win conditions.

Against these alternate win conditions, if any, use Night Witch.

Clash Royale MinerMiner Poison

Against lone Miners that may be after your Pump, use Goblins (if you mess up it’s OK, just use Ice Spirit to force him to retarget to the Gobs).

Against Miner Poison pushes, use Night Witch.

Now, most Miner Poison decks have a bigger tank, so kill it (since they probably used their Poison on offense) with Minion Horde.

Keep your cards in cycle, and you should be OK!

Clash Royale Goblin GangSpell Bait

Unlike most other Zap-using Beatdowns, you want to use the Zap on the opposing Inferno Tower most of the time, and use Goblins on the Barrel.

Note that you may need to use an Ice Spirit to freeze any Goblins that lock on to the Arena Tower.

Most importantly, though, be very careful of Rocket when using Musketeer based pushes, and just before Double Elixir hits, try to bait out the Rocket with a Pump so the Musketeers can come in unhindered.

Clash Royale Mega KnightMega Knight

Your best options are definitely going to be Night Witch and the Horde.

However, sometimes they may not be available, so if you have no Night Witch or Horde, kite the MK using Giant, then use whatever tools you have to finish him off.

Use Ice Spirit to freeze if necessary.

Also be sure to keep your Muskets away from him as much as possible, as he absolutely destroys them!


So that’s all for this amazing second deck in the series! Leave a comment if you enjoyed, or have anything to suggest!

See you next time!

9 Stunning Tips for Players Above 4,000 Trophies

161
clash royale tips

Hello guys, This is Bull3t$t0rm coming at you with tips to get better in Clash Royale…

This one is new!

clash royale tips

Tip #1 – Posture

Yup, You read it right. Does posture affect our gameplay? A BIG YES.

Wanna know how?

When we slouch, our head juts forward and tilts down, flexing anterior neck muscles and over stretching trapezius, splenius, and longissimus. Nerves in our neck, collarbones, torso, between the ribs, and through our core can become impinged, lessening their ability to relay signal between our brain and body… OMG I guess I went a bit too overboard.

Long thing short, A straight neck posture will get you better results than a slouchy one cause what you are exactly doing when you slouch is something similar to stepping on a hose pipe while water is passing through. The result is the slower speed with which water gets through.

The same can be said for nerves.

The magnitude of the issue in the latter case may be less than that of the former, but this might be the difference as to whether you stop a charging Bandit or not (if she ever charges again :/ I feel the so-called FIX was too much. Another topic for it later).

You just play with different postures, and you will know better as to why I recommend a straight neck.

posture

Tip #2: The importance of Soliloquy

Soliloquy refers to an act of talking to oneself

Not like this^ tho. Lemme tell you what I do and why I do to get a better understanding.

I will ask three questions consciously every game to myself and will ask it in regular interval, let’s say 10-15 seconds once till I get the answer.They are

What is the opponent’s deck?

And am I able to decipher it 100% having seen few cards on his deck? Sometimes you will be able to get an answer to this question having seen two cards, say, Knight and Princess...

CONGRATS!!! You are right.

For someone, it will take time to get the answer for the question and others it will be relatively easy and is based on how much you play and the volatility/diversity of the meta.

What are his counters to your win-conditions?

Assume I am a Graveyard player (I am actually) and I am playing an off meta GY control deck.

It’s imperative that I know his counters to my win condition whether it be a squishy troop that can be Arrowed or Valk/Archers which must be out-cycled before I play my win-condition.

It not only applies to GY but any other win-condition.

What are the spells your opponent has? 

Why spells and why not other cards?

It’s simple, spells provide so much value, and once I came to know his spell, I can consciously avoid or at least try to avoid giving value to my opponent.

And now as to why I ask this question consciously to myself every game in the form of a soliloquy.

Its simple, cause we are humans.

It can be better explained regarding other game and relating it to this game. Lets take CS:GO where after playing that game for a while, shooting becomes muscle memory (can do it sub consciously).

Since we get a pervasive feel-good effect after getting 1-2 kills we let our sub-conscious memory take over forgetting that its the shooting that became muscle memory and we still have to think and strategise as to where to go? Should I fall back or hold? And many more.

The same applies to this game.

That’s the reason why we get a feel that we are playing better after giving a long gap because we tend to play consciously. That’s the reason why I consciously implemented those questions every game so that I tend to be more consistent.

Try this out, and you will find a huge difference in your consistency.

Tip #3 – Play defensively first

Do not attack first unless you see an advantage. Don’t use your troops unless there is something to be gained.

Some decks are based on constant chip damage while others based on heavy pushes. Even tho their approaches are different; the substratum are the same.

For example, gaining Elixir Advantage.

Elixir being the substratum of the game. It’s imperative that we use the additional resource provided in game to gain Elixir advantage aka Princess Tower. For that to happen, we need to engage opponents troops in our side rather than the other side.

Do you want another reason to play defense? Well, once upon a time, a wise man said:

“To secure ourselves against defeat lies in our own hands, but the opportunity of defeating the enemy is provided by the enemy himself.” 

If we extrapolate the same here, It means to defend your virginity till your opponent makes a mistake.

Tip #4: Learn micro plays on a daily basis

For those who don’t know what is the difference between macro and micro, I suggest you guys watching this video.

I would say success in pro scene is based on 10% micro and 90% macro.

In pro scene, micro plays have very less inference as most of the micro plays are deep rooted into those players, and they tend to make no mistake or the chances of making the same are pretty less as it became muscle memory for them.

Then how one guy is winning over the other? Yup, you guessed it right. The macro play has more inference in pro games.

If you take any game in current CCGS, matches are won in 3 ways

  1. Having a counter deck and playing right
  2. Getting 1 step ahead of an opponent by giving importance to macro, i.e., by knowing opponent cycle or elixer count and his possible counter to our current move and making a predictive move to reduce the options opponent has or counter the opponent’s action.
  3. The opponent making blunder(I thought it would be rare to see those in BIG STAGE like CCGS but I was wrong.Well, who am I to judge…Pressure might be a reason as well)

So to become a pro player, the 1st step is to learn all or most of the micro plays inside of the game and make it our muscle memory. Which makes us ready 10%.

If we gained mastery over that 10%, the remaining 90% of-of our success is a cake walk as it gives us time inside the game to think about macro plays without worrying how to defend as micro play became out muscle memory.

For that to happen to learn all possible micro plays with your deck.

This is one of the reasons as to why I suggest people stick with one deck and play it over and over.

Tip #5: Watching Replays

This tip is for those who are like me…

Who feel it’s pathetic to cry for the same thing twice i.e. Losing a battle ’cause you made that frucking mistake again. Losing is fine, It is.. to err is human. Losing cause of that err once? Fine . Twice? Not bad.

Again and again? There is a serious problem.

Let it be game or life, I refrain myself doing same stuff which failed me before.

How could I do that? It’s simple.

The first step is realization.

“Realisation is a matter of becoming conscious of that which is already realized”

Let’s spot our own err and be critical while doing so.Watch our replay is the only way we can stop this pitiful occurrence.

Tip #6 – Aim Higher

Whenever you are nearing your target, say 4600, and you are around 4550 or 4500, immediately change your target to 4900 and dream how cool it would be to reach that one.

Think about it over and over again about that cool Master I Draft Chat.

Why should it be done? There are two different answers for this:

How our emotion affects our gameplay

For example: We all will be excited when we are near the goal… is that it?

Nah most of the time (always?) our goal will be greater than our Personal best. Our goal there will be excitement along with the fear.

The most precise word I could think of is exhilarationThat will pump in more adrenaline along with shaky hands, sweaty palms, etc.

By changing our goal, this can be avoided as achieving our goal is nothing but achieving what we thought we are capable of doing.

Change your thought, change your Clash Royale life.

Well, there was only 1 in my mind…Since I stated 2, here we go..

There is a good ol’ saying that if you achieve your target, your target is WRONG! :p

Tip #7 – Plan Ahead

This is just a combination of knowing opponents cycle (not all cards, just try to remember his win conditions and his hard counters to your win-condition), a rough estimate of opponents Elixir (+ or – 1 is just fine) and prediction.

Prediction is the ultimate goal as it keeps us one step ahead of our opponent

Prediction is a ChildsPlay when we master the first two.

At first, it might feel a bit too much to have a note of but believe me, keep these in mind and when time progresses, it will become natural phenomena.

Try predicting every move of the opponent.

Think what you would do if you have those cards in your cycle with the Elixir you have for which as i said we must master the first two. The answer will be obvious when we can keep track of the first two.

The next step is simple… how are we going to counter his potential move.

It might sound a bit too much but it will be easy 🙂

Tip #8 – Deck and Time

This is an important concept and worth mentioning.

It’s all about knowing which deck has the advantage when time progresses.

For example, a full Lavaloon push with Lightning and supports is so hard to counter unless you have certain cards in your deck.

You might ask ”What I have to do with time?”

To pull out such a combination, we need so much Elixir which is not possible to gain in the first 2 minutes.

Ones deck’s power is directly proportional to time progression than the opponent.

It’s important to find which side you are i.e will it be detrimental to us when we hit double Elixir or it will be favourable for us?

Based on the answer to the above question our play style differs.

For example: If we are going to gain during double Elixir , its better for us to defend completely during the first 2 minutes and vice versa.

Tip #9 – The Ultimate Learning

The above 8 tips or so is just nothing compared to this.

This is the ultimate learning I learnt a few days back which has a huge impact on my life.I would love to share it!

We must always count on any battle to take lots of unexpected twists and turns.

To respond properly and in time we must free our mind of all other thoughts.

To have confidence is one thing but over-confidence can cause us to become careless and we tend to miss things that we normally would not.

For those who are wondering about the difference between confidence and over-confidence. I will define this.

Confidence is “No matter what I will do my best”, where I am thinking of something which is within my control.

Whereas over-confidence is “Bring it on NooBBBB…I will trash you!!”, where I am thinking of something which is beyond my control i.e framing that I am better than my opponents.

Only the one who can erase all idle thoughts and concentrate completely will control the battle.

If you are a BMing guy STOP. Just stop for your betterment.

If you start thinking how opponent feels you are just wasting your capacity while you could have thought of a better strategy. No hard feelings tho.

– Adios

Ultimate Guide to Lavaloon Beatdown

85

Hey y’all, WhiteLlama67 back at it with an in-depth guide on a specific deck style today: Lavaloon.

The combination of the Lava Hound and the Balloon was once strong enough to be called a cancer, however, with the rise of cards such as the Executioner and the Electro Wizard, the legend went from dominating to dead… Or is it?

This guide is specifically on the Lavaloon Beatdown strategy, and I will be covering on how best you can utilize its strengths, while learning to adapt to it’s weaknesses.

In past days, some called it a no-skill deck, but now in a meta full of Elite Barbarians, Mega Knights, P.E.K.K.A.s, and so on, I say this deck style requires more skill than many other decks.

Even still, I assure you that this deck still has great potential, so keep reading and you’ll believe me!

lava hound 1

The Ultimate Guide to Lavaloon Beatdown

Background

On my main account, the Lava Hound was my first legendary I unlocked while in Arena 7, and my first level 3 legendary as well.

I quickly determined the best strategy with the Lava Hound was Lavaloon.

After some practice, I quickly landed myself in Hog Mountain, but then after facing the repetitive Elite Barbarian spam decks, I decided I couldn’t do an air-focused deck.

But even with messing around with some other decks and still not finding any success, I bounced back to Lavaloon.

It took some time, but with more practice, I have learned that it still shines as an unanticipated deck.

I still use it today as my main deck in Legendary Arena, and I hope to be able to help y’all out as well.

The Basics

Lavaloon Beatdown, let’s break that down:

Beatdown

Now what is beatdown? Beatdown is the archetype that focuses on accruing an Elixir lead, and spending it all in 1 or 2 massive pushes toward the end of the match.

Beatdown decks carry a slow, heavy tank that can soak up damage, and so Golem, Lava Hound, Giant, and P.E.K.K.A. decks typically all fall under beatdown.

Though they all fall under the same category, they are all played differently at the end of the day.

Lava Hound

Ah, the star of the show. 7 Elixir, with a hefty 3000 HP at tourney standard.

She is the only flying tank in the game and targets only buildings, and therefore has great synergy with the Balloon.

Dealing very little damage, the Lava Hound is not much of a threat alone, until she pops, that is.

She spawns 6 Lava Pups, who deal the same damage, but combined, that’s a whoppin’ 270 DPS! More about the Lava Hound here!

Balloon

Just a little skelly in a Balloon who’s been takin’ down towers since Arena 2.

As said earlier, the Balloon and the Lava Hound synergize incredibly, for these 3 reasons:

  • Both target buildings
  • Both are air troops
  • Lava Hound has high HP, low DPS, Balloon has low HP, but high DPS

Never ever use the Balloon unsupported, and only drop it behind something other than a Hound if your opponent has used their counter.

Once destroyed, the Balloon with drop a bomb with a 3 sec timer, that does around 300 damage, give or take.

Your main goal of the push is to get the Balloon to connect to the Tower, where it can deal massive damage.

More info on Balloon here!

Card Breakdown

Since this isn’t a guide on a specific deck, I’m just including cards that are found in most Lavaloon decks.

Clash Royale MinionsMinions

A trio of flying Goblins, basically.

Cheap, and great at countering swarms on defense, these guys are very good at also supporting your push.

Use them predictively to distract Inferno Towers!

Also, my favorite part, their Zap-resistance is invaluable in a Zap filled meta!

Clash Royale Mega MinionMega Minion

What a legend.

Good luck finding another card that offers this much value for 3 Elixir.

On defense, he shuts down tanks, glass cannons, swarms even.

Fireball proof, he can support your push by striking down Musketeers, Wizards, and Executioners with ease.

His ability to one-shot Minions comes in quite handy as well!

Clash Royale Baby DragonBaby Dragon

Another air troop that does a solid job for 4 Elixir.

A solid counter to Minion Horde, which is an enemy to anything air-related.

After the Hound pops, your Baby Dragon has the HP to tank for the pups, making the push all the more deadlier.

His only weakness is glass cannons such as Wizards and Musketeers, so watch out for those!

Clash Royale BatsBats

This cute little Gang of flying critters has definitely found it’s place in the meta.

In Lavaloon, they replace Minions most of the time, because they have same role, just for a cheaper price!

Unfortunately, they tend to get zapped away quite often.

Use them to cycle or just a simple Hound + Bats push can be quie threatening!

Clash Royale Inferno DragonInferno Dragon

Very common, because this guy provides the defensive capabilities that many Lavaloon decks lack.

On offense, he is like the Balloon, where once he gets on the Tower, consider it destroyed!

Clash Royale BanditBandit

Instantly after her release, I threw her into my Lavaloon deck, and she fits perfectly!

In a primarily air deck, a lot of your opponents won’t notice her dashing around under the Hound, knocking out glass cannons.

Similar to the Baby D, she can tank for the pups as well once the Hound pops.

Clash Royale TombstoneTombstone

Whoever first put this in a Lavaloon deck, they’re a genius.

Cheap building, skeleton swarm, or distractor, this card provides all 3!

In the event that you get rushed with a Hog or E-Barbarians after placing your Hound, this is your answer!

Clash Royale elixir collectorElixir Collector

A card found in many beatdown decks, because of it’s ability to give you an Elixir advantage.

Every Pump that you get the full value of is a free 2 Elixir you can use in your pushes!

Place in front of the King Tower to avoid giving Rocket value.

Clash Royale fireballFireball

A staple in Lavaloon decks, IMO.

A few of the hardest counters to Lavaloon can easily be taken care of with a quick Fireball.

Even if your Fireball can’t instantly kill Wizards, Musketeers, etc, do it anyways because your Pups or other support can then easily kill them.

Clash Royale PoisonPoison

A lot of players end up being indecisive whether to go Poison or Fireball in their decks, because they deal similar damage for the same cost.

Poison has a larger radius, and deals DOT (damage over time). Fireball is more instantaneous, but with a smaller radius.

Both will accomplish the same tasks, just it’s your preference whether you want value, or time.

Clash Royale LightningLightning

I was a little sad when they nerfed it, because Lightning was the hardest counter to Infernos, which are the hardest counter to Lavaloon.

Nonetheless, you can use Lighting to shut-down IT’s and ID’s pretty well.

Also works well to knock out those glass cannons, but since it is 6 Elixir, you might not always have it when you need it.

Clash Royale ArrowsArrows

Arrows have one job, and that’s to take out Minions and Minion Hordes in a cheap and effective way.

Simple as that

Clash Royale ZapZap

The most popular spell in the game at the moment, and in Lavaloon it has 2 main jobs.

Numero uno, to Zap away those pesky Bats. More importantly, to reset Infernos, so that your push has more time to overwhelm their ID’s or IT’s.

Clash Royale Goblin GangSkeleton Army/Goblin Gang:

You typically see one of these in a Lavaloon deck, to make up for the lack of ground troops.

Goblin Gang is Zap resistant, but Skeleton Army has greater DPS, so it’s your choice.

Use them to tear down Giants, Golems, Hogs, etc, or just to cycle.

Gameplan

In a nutshell, you will defend with your cards until you have a sufficient Elixir advantage, or until your opponent plays their win condition, which then you will place a Hound in the back.

Continue to support the Hound, or place a Balloon behind, and have your spells ready.

Opening Moves

Your best opening moves will be as follows:

  • Place Elixir Collector in-between the Princess towers, if you are using it
  • Place Tombstone in the middle, 3 tiles from the river
  • If you don’t have either of these, cycle Minions, Bats, Mega Minion, etc, in the back

Never start off by placing a Balloon or a Lava Hound, because they can likely shut it down for a positive Elixir trade

Opponent’s Opening Moves

Buuuuuuut, your opponent may do any of the following 4 moves before you do:

  • Rush attack (Hog, E-Barbarians, Miner, Mortar/X-Bow)
  • Place a support card in the back (Wizard, Mega Minion, etc)
  • Drop a heavy tank in the back (Giant, Golem, Lava Hound)
  • Place a building (Pump, Spawner, Etc)

If they rush you with any of the following, use Tombstone or Skeleton Army/Gang, but be ready for them to be spelled off.

If this happens, use your other air support, and then after defending, place a Hound in the back.

If they place a support card, drop your Tombstone, or if not in your hand, place one of your support as well in the back, i.e. Mega Minion.

If they drop their tank in the back, do the same with your Lava Hound, and defend accordingly.

If they place a Pump, or a Spawner, Fireball/Lightning/Poison it, unless it’s a Tombstone

When to Place Lava Hound

The Lava Hound is nowhere near cheap, at 7 Elixir.

Yet, she isn’t as expensive as Golem, fortunately, which gives you a bit more freedom in playing her.

If using the variation with the Elixir Collector, placing down those is more priority than your Hound until Double Elixir.

However, if you know cycling back to another Pump won’t be worth it, i.e. your opponent will just generate an Elixir lead from all your cycling, then don’t.

If not playing with a Pump, then their are 3 situations I would drop a Hound before double-Elixir:

  1. Your opponent just rushed with Hog, E-Barbarians, Miner, etc. In this situation, defend as best you can without giving them a large Elixir lead. Then, place the Hound in the back corner of the side with the damaged Tower.
  2. Your opponent places a tank in the back. Do the same with your Hound on the same side. Spend Elixir on defending, not on say a Balloon behind the Hound
  3. You just defended a push with less Elixir than your opponent spent, and now have a large Elixir lead. Example: your opponent attacks with Giant + Musketeer, and you defended with Mega Minion + Tombstone. Congrats, you now have 3 more Elixir than your opponent!

When to Commit

When it comes to committing with Lavaloon, it basically means whether or not to place a Balloon behind the Hound.

My first push with a Hound I generally don’t use a Balloon, usually only with one of my support cards, just to find out how they defend. Later, I would only drop the Balloon if I know how they’re going to defend, and I can shut down their defense. Examples:

  • They’re going to use Inferno, but I have Zap and Minions ready or Lightning
  • They’re going to use Wizard + Tornado, but I have a Mega Minion down and Fireball ready
  • They’re going to drop Minion Horde on the Balloon, but I have Arrows in my hand

Things like that. Remember these things also in deciding what support to use in a push.

In Double-Elixir, don’t hesitate to throw everything all in, this is Beatdown remember!

It’s Okay to Take Damage!

Most decks you face, you will take damage, especially against Hog or Elite Barbarians!

Before you become good with Lavaloon, you must be OK with this.

You drop down your Hound, but then you take 4 Hog hits, whatever.

You have a bad hand and your opponent rushes with E-Barbarians and you lose a Tower, suck it up.

In the event that you get rushed the same lane as your Hound, wait to defend until you know that all your cards will end up behind the Hound for the counterpush.

Also, recognize when a Tower is lost. Don’t spend Elixir on defending a Tower that’s around 500 HP when they have Rocket!

Hard Counter Matchups

These decks and cards are the reason Lavaloon has fallen out of the meta, but with the right practice and know-how, this deck style can still be very successful!

Just to clarify, I will be using the Classic Lavaloon deck to give examples.

Clash Royale Elite BarbariansElite Barbarians

Alright, this section is for all of you in Hog Mountain, where it feels like every other match is against overleveled E-Barb spam decks.

Trust me, I’ve been there, and it’s rough.

Unfortunately yes, typical Lavaloon decks only have 2 distracting cards, Tombstone and Skeleton Army/Gang. I will be creating situations (going from best to worst) and how best to defend in each one.

vs elite barbariansStart of the match, they rush with E-Barbarians and you luckily have Tombstone, Goblin Gang, Minions, and Mega Minion in your hand. Which do you choose?

Keep in mind, they likely have Zap or the Log ready!

I would place down the Gang in the middle, and also the Mega Minion, for a couple of reasons:

  • Vs E-Barbarians, you want to always use your Gang or Tombstone, because you have to have a card to distract! I pick Gang over Tombstone, just because a lot of E-Barb decks also have Hog, and you want to save the Tombstone for him.
  • Also, I would use Mega Minion over Minions, because in the event that they use their Zap. If you had used Minions and they had Zapped them, then they could ignore them after that. A Zapped Mega Minion however, still needs to be dealt with, or else they suffer 200+ damage!

In the situation that they rush you and you only have one of those 4 cards, or are too low on Elixir to use more than one card, this is what you do.

Place down the card, and hope it doesn’t get spelled away. If it does get spelled away, leave it! Take the damage.

Save up until 10 Elixir again and play a Hound behind the damaged Tower. Congrats! You will now have 5+ more Elixir than them for a push, and they can’t punish you for dropping the Hound!

In the quite unlucky event that you happen to have 2 spells, a Hound and a Balloon in hand, and you get rushed, it will take some quick decision-making.

Determine whether or not it will be worth it by Fireballing them, and save your Tower, or to save your Fireball for later.

Choose to save your Fireball and lose the Tower if you know they have Minion Horde, 3 Musketeers, or something that will shred your push.

Start a push then and use your spells accordingly, and you’ll likely take their Tower.

Clash Royale TornadoSplashnado

Hardest matchup by far, IMO.

Even if you use Fireball or Lightning in your deck, it will be quite difficult, especially if your Fireball can’t one-shot those Wizards.

Splashnado is the combination of AOE cards, and Tornado, most commonly with the Executioner. The Tornado can group together the Balloon, Hound, and your support, and their AOE cards can nail them all at once.

For now, I’ll give you two different strategies.

vs tornadoStrategy 1: Out cycle.

Now I don’t literally mean to out-cycle them, because that’s not going to happen.

I mean catch them when they have either their Tornado or their Executioner out of cycle, and punish them hard for it.

This is less likely to happen with more experience players, but it’s still possible.

I use Minions or Goblin Gang to try to bait out one of those cards, and once they use it, I drop a Hound at the bridge on the opposite side, and a few seconds later a Balloon. It’s risky to commit like that, but it’s quite effective I’ve learned.

Strategy 2: Split-Push

This time, you will force them to choose where to use their Executioner.

Start by playing the Hound in the back, and continue to add to the push with Mega Minion, Goblin Gang, etc, until you have a formidable push coming.

Then, once you have Elixir, rush the opposite lane with Balloon + Support.

As said earlier, your opponent then has to defend against two threatening pushes.

Clash Royale Inferno DragonInferno Towers/Inferno Dragons

These two cards are just such a pain in the butt, honestly.

Any of you Beatdown players out there can relate. And with the Lightning nerf, they’re all the more common.

Most Lavaloon decks should carry either Zap or Lightning, just to reset either of these cards.

I’ll be covering how to use both, against ID and IT.

vs infernoAgainst Inferno Tower

When your Hound gets to the bridge, drop a preemptive Minions to distract it. If they happen to die, or they place the IT in a different spot, keep Zap ready.

When you Zap the IT, it should buy enough time for your Balloon to destroy it.

If using Lightning, make sure to have 6 Elixir ready when your Hound reaches the Bridge. Try to nail the IT + Tower + enemy troop.

Against Inferno Dragon

Don’t bother placing preemptive Minions, they won’t do anything.

Make sure you have Mega Minion part of your push though!

Once you Zap it, and you will have to Zap it, that should buy enough time for the Mega Minion to tear it apart.

When using Lightning, same as IT.

Powerful Lavaloon Decks

Classic Lavaloon

Clash Royale MinionsClash Royale Mega MinionClash Royale BalloonClash Royale Lava Hound
Clash Royale ZapClash Royale fireballClash Royale TombstoneClash Royale Goblin Gang

Lavaloon Baby Dragon Pump

Clash Royale Lava HoundClash Royale BalloonClash Royale MinionsClash Royale Baby Dragon
Clash Royale elixir collectorClash Royale SkeletonClash Royale LightningClash Royale Arrows

Lavaloon Night Witch

Clash Royale Lava HoundClash Royale BalloonClash Royale Night WitchClash Royale Mega Minion
Clash Royale MinionsClash Royale Goblin GangClash Royale ArrowsClash Royale Lightning

Bandit Lavaloon

Clash Royale Lava HoundClash Royale BalloonClash Royale BanditClash Royale Minions
Clash Royale TombstoneClash Royale fireballClash Royale ArrowsClash Royale Skeleton Army

Conclusion

Thanks for reading to everyone that actually made it to the bottom xD

I hope that you all feel a little more confident to play my favorite deck style, Lavaloon (duh).

Feel free to comment on anything I missed, and I’ll see you in the arena!