Home Blog Page 25

How to Figure Out Your Opponent’s Strategy After The First Moves

43

In Clash Royale, one of the most important skills is figuring out what your opponent’s win condition is, after the first moves. If you can determine your opponent’s strategy early, you will have such a huge advantage.

The tips I am going to show you in this guide can be only applied If your opponent makes the first move (If you place your cards down first, your opponent will likely respond your cards and not reveal his strategy.

reveal-decks

How to figure out your opponent’s strategy after the first moves

First off, this is the TL;DR version of this guide, In case you don’t want to read the entire wall of text. Cards which are marked with * are overlaps between the cards and the strategy they indicate.

Hog Cycle
Hog Rider, Mini P.E.K.K.A*, Goblins (dropped in the back), Ice Spirit*, Skeletons*
Miner Cycle

Giant Beatdown
Giant Sparky
Royal Giant Beatdown
Royal Giant, Valkyrie*, Mini P.E.K.K.A*, Ice WizardGolem Beatdown
Siege Decks

Deck Cards
Trifecta Hog Rider, Valkyrie (dropped in the back and followed by Musketeer), Musketeer (supporting Valkyrie), Skeletons*
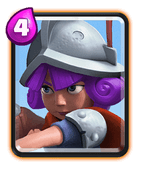
Miner, Mini P.E.K.K.A, Spear Goblins, Goblins*, Ice Wizard*, Poison*, Furnace, Ice Spirit*, Guards*
Payfecta Miner, Princess, Ice Wizard, Furnace, Guards*
P.E.K.K.A Double Prince P.E.K.K.A, Prince, Dark Prince, Fire Spirits*, Elixir Collector*
Giant (placed in the back), Musketeer*, Bomber, Poison*, 3 Musketeers, Fire Spirits*
Giant (placed in the back), Fire Spirits*, Elixir Collector*, Bomber*, Wizard*, Furnace
Giant Balloon Giant (placed at the bridge), Balloon, Elixir Collector*
Golem, Elixir Collector*, Minions, Poison*, Fire Spirits*, Wizard*
Spawner Huts, Tombstone*, Spear Goblins, Goblins*
Defensive building at the rider, X-Bow, Mortar, Elixir Collector*, Tombstone*
Extremely bad starting hands Arrows, Lightning, Fireball, Rage, Zap, Freeze, Poison, The Log

training-camp

Arrows: Your opponents at here are likely very new players so this rarely happens. Also, it doesn’t give any information on their strategies.

Bomber: Bomber is often placed behind the Giant push or Prince Push. Not many players use Bomber in Hog Decks because of its Elixir cost (comparing to other support cards). Sometimes, we can see Bomber in Royal and P.E.K.K.A decks. Truly this guy’s userate is not really high at this time.

Archers are often used to support tankers such as Giant, Golem, Royal Giant, … and to defend. Archers are very common support troops and they can reveal nearly nothing about your opponent. However, they are a part of the super popular “Jason Deck“.

Knight is the mini-rank which can be placed in almost any deck. He works very well in decks which use mini pushes to get chip damage on Towers. Just don’t ignore him in any way. A lone Knight can deal hundreds of damage on your Tower and it is even worse If there are a couple of troops supporting him.

Fireball: Usually, only inexperienced players use Fireball at the first moves. Also, this reveals nothing about their strategies, as this card can be placed in almost any deck. You can read everything about strategies with Fireball at here.

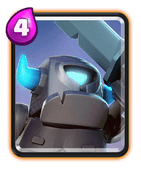
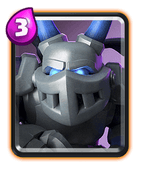
Mini P.E.K.K.A is extremely versatile and can be placed in almost any deck. At this time, we can usually face Mini P.E.K.K.A in Trifecta Deck and Miner Cycle Deck. It truly doesn’t give much information about your opponent’s deck.

Musketeer can be used in loads of decks such as Giant Decks, Royal Giant Decks, Hog Rider Decks, … Many players like using this card in conjunction with the 3 Musketeers card so please beware. Your opponent will always try to protect her with a tank.

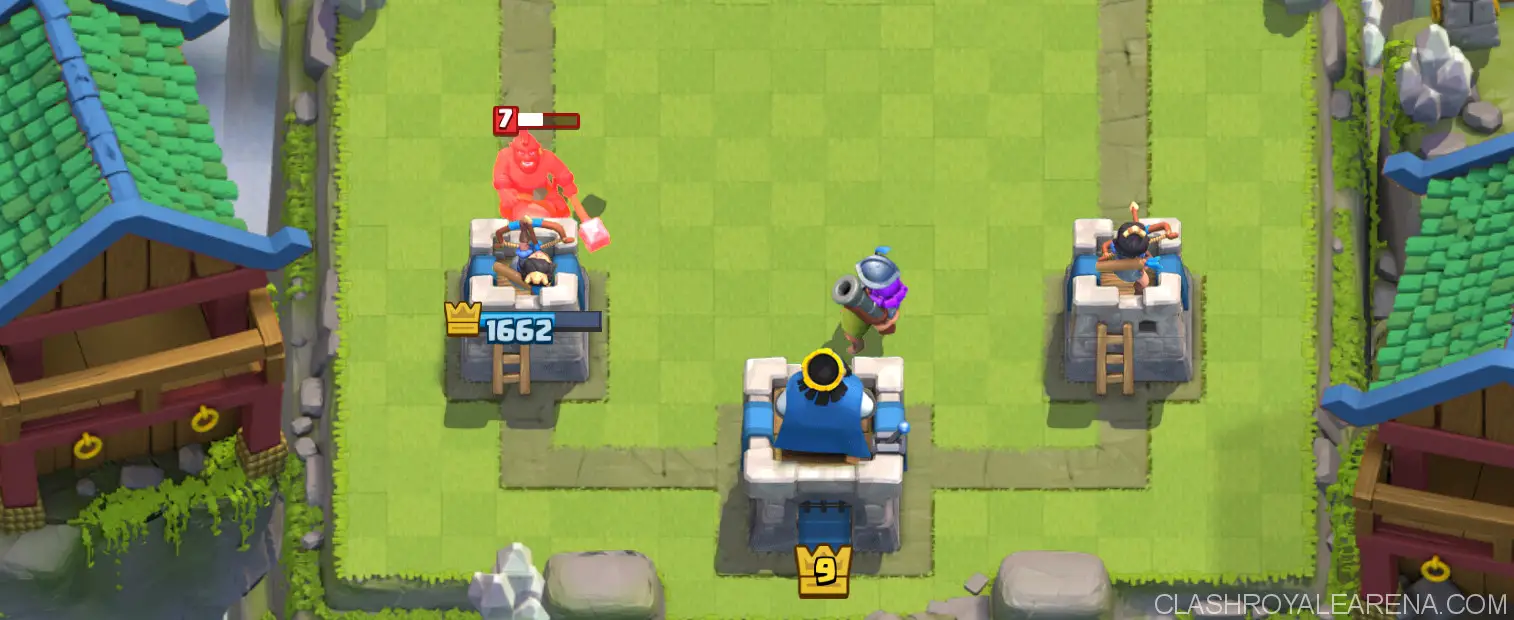
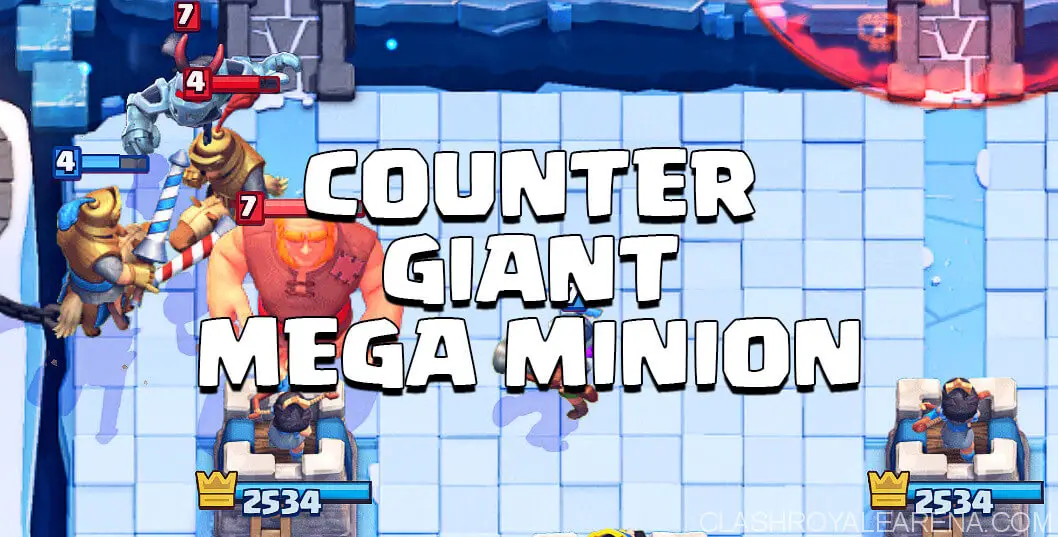
Giant is one of the best tankers in Clash Royale because of his damage, HP and Elixir cost. He will protect high DPS troops behind while dealing tons of damage to opponent’s Tower. Players usually use Giant in Jason’s Deck, Spawner Decks, 3 Musketeer Decks, Giant Balloon Deck, Spark Deck and one of the most popular deck at this time is the Giant Poison Deck. If your opponent places his Giant right at the bridge, he will be most likely throwing a Balloon right after that. If Giant is placed in the far back, it will be either 3 Musketeer, Sparky or Musketeer behind him.

Prince can do tons of damage while charging and can solo kill your Tower very quickly If you don’t pay enough attention. He is usually protected by a splash damage support troop, which can remove all distractions.  Prince is usually used in P.E.K.K.A Double Prince Deck and Hog Prince Deck.

Baby Dragon is another versatile card which can be used on both offense and defense. It’s pretty hard to find out what strategy your opponent based on the Baby Dragon. At high Arenas, it could be Lava Hound deck.

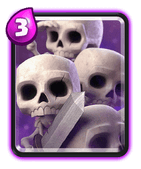
Skeleton Army is mainly used on offense to deal with Prince, Hog Rider, Royal Giant, P.E.K.K.A, … People rarely use it on offense because it can be easily countered. If your opponent use SA on offense, he is likely a newbie. In high Arena, some players use Skeleton Army in Arrows-bait decks, which force you to defend with Arrows/Zap first then they will throw Goblin Barrel on your Tower.

Witch is mostly placed after a tank because of her low HP and high DPS coming from her Skeletons. People usually use her in Hut Decks, Giant Decks and Royal Giant Decks.

goblin-stadium

Spear Goblins: Cheap supports which can be placed behind tanks in almost any deck. This card can’t reveal anything about your opponent’s strategy.

Goblins: Same as above. Goblins are usually used in Hog Rider Decks and Miner Decks.

Goblin Hut: This card is usually used in Spawner Decks and some Royal Giant Decks.

Valkyrie is very popular these days and can be placed in loads of decks. In high Arenas, you can usually see her in Trifecta Deck, Royal Giant Decks and Mini P.E.K.K.A Valkyrie Deck.

Lightning: Truly, most players who start with Lightning are inexperienced players. This indicates that your opponent doesn’t know how to play his deck properly.

Goblin Barrel is usually used to bait out Arrows or Zap in high Arenas. This card can deal tons of damage If ignored. In some decks, your opponent drops his Giant/Giant Skeleton right at the bridge to soak damage and distract your Tower, then throw the Barrel right on top of your Tower.

bone-pit

Skeletons:  This card is mainly used on defense and can be placed in almost any deck, from low cost Deck to high cost Deck. However, people often use it in cheap Hog Rider Decks and cheap Miner Decks.

Minions: Same as above. This card doesn’t reveal much about your opponent’s deck.

Tombstone sometimes can be used as a part of the Spawner Decks. Since it’s essentially a defensive building, it doesn’t reveal much about your opponent’s strategy.

Bomb Tower is essentially a defensive building. It doesn’t reveal anything about your opponent’s strategy.

Giant Skeleton can be used on both offense and defense. It is pretty hard to figure out your opponent’s strategy based on this card. But, after I posted

Balloon is a slow card which has very high damage, just behind the Sparky. At this time, most Balloons are used in Giant Balloon Decks and Lavaloon Decks.

barbarian-bowl

Cannon is essentially a defensive building card which reveals nearly nothing about your opponent’s strategy.

Barbarians are usually used on defense due to their slow movement speed. Same as above, it reveals nearly nothing about your opponent’s deck.

Rocket is usually used in Rocket Decks and it is usually the main damage dealer of the deck.

Barbarian Hut is used in Spawner Decks most of the time. Sometimes people use it in Royal Giant Decks too.

Rage is usually used in 3 Musketeer Decks, Giant/Musketeer Decks and Giant Witch Deck. It is literally one of the worst opening cards. If your opponent drops it first, that would be a mistake. Otherwise, he is trying to give you free trophies.

X-Bow is usually used in X-Bow Decks. I rarely see people using it as the REAL defensive building. Your opponent will try to place it right at the bridge and protect it with other defensive buildings.

pekka-playhouse

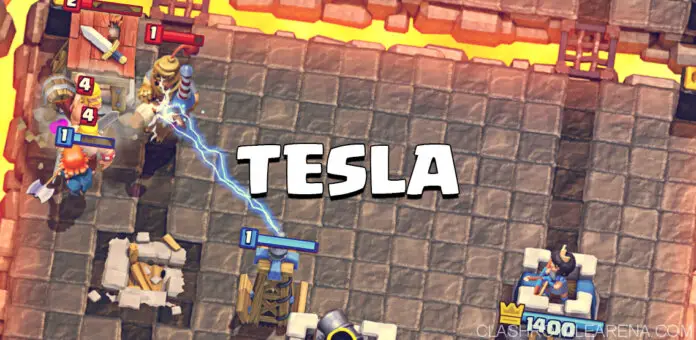
Tesla, Inferno Tower: They are defensive buildings and of course it can’t reveal anything about the deck it is placed in.

Minion Horde is sometimes used to bait out Arrows. Be careful If your opponent plays this card first at the first moves.

Hog Rider can be used in either Hog Decks or Royal Giant Hog Rider Deck.

Freeze is not used a lot as before. You can see Freeze in Hog Rider Freeze Deck and  Goblin Barrel Freeze Deck.

P.E.K.K.A is usually coupled with double Prince. Otherwise, P.E.K.K.K.A Poison with the support from Wizard is also pretty popular these days.

Lava Hound is used in Lava Hound Decks of course.

spell-valley

Zap is very common. It can be seen in almost any deck and it can’t reveal anything about your opponent’s strategy. Also, If your opponent starts the battle with the Zap, trust me, we don’t know what he is thinking about.

Fire Spirits: This card is used a lot these days as it can 1 hit Goblins and Minions. I agree that it can be placed in all decks but at this time I usually see people using it in Hog Rider Decks, Miner Decks, Mini P.E.K.K.A Decks and Royal Giant Decks. Anyway it’s still very hard to find out your opponent’s deck based on Fire Spirits.

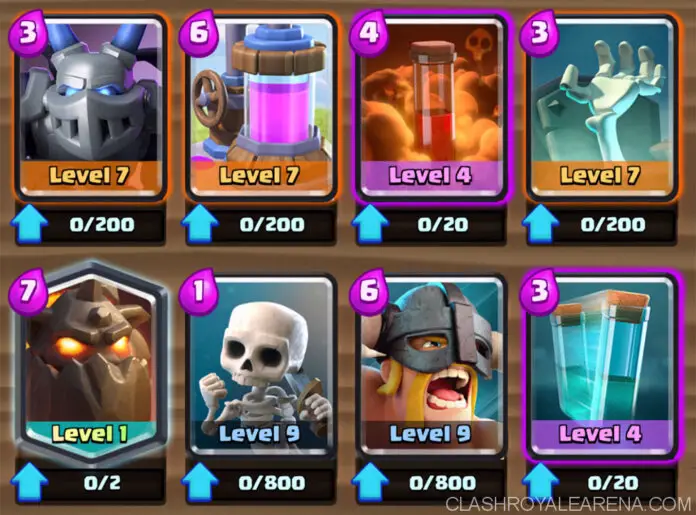
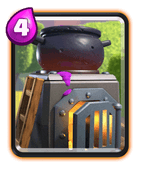
Furnace is very popular these days in Arena 9. People are using it in Miner Cycle Decks, Hog Rider Decks and Giant Poison Decks.

Wizard is usually used to support Giant, Golem, Royal Giant and Sparky.

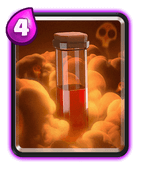
Poison is now used in lots of decks: Hog Rider Decks, Mini P.E.K.K.A and Valkyrie Decks, Miner Cycle Decks and Giant Poison Decks.

Mirror: This card can’t be played as an opening card so I am going to skip this.

Ice Wizard is super useful can can be used in almost any deck. He reveal nearly nothing about your opponent.

builder-workshop

Mortar: If your opponent places it down right at the bridge, he is running a Siege deck. If he places in front of the King’s Tower, He will likely place a Royal Giant right after that (The Mortar will protect the Royal Giant).

Elixir Collector: Truly this card can’t reveal much about your opponent’s strategy. We can use it in both high Elixir and low Elixir cost deck.

Golem: Your opponent is running Golem deck, of course. Prepare to deal with tons of cheap troops behind him. If you have Hog Rider or Prince in your hand, consider placing it as soon as possible to force your opponent to defend.

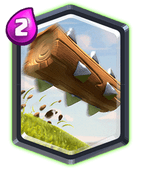
The Log: It can’t reveal anything about your opponent’s deck.

Sparky: Your opponent is running a Sparky Deck and he will be about to place a Giant/Royal Giant right in front of the Sparky. There are also some Siege Decks out there which use Sparky to protect X-Bow/Mortar.

Miner: Your opponent is using Payfecta/Miner Decks.

royal-arena

Royal Giant: Your opponent is running a Royal Giant Deck, of course. It’s better to take a look at these Royal Giant Decks to figure out the best ways to deal with them.

3 Musketeers: If your opponent split them up, he is likely running a Giant Musketeers Deck. Otherwise, he will be trying to put a P.E.K.K.A/Golem in front of them. Usually people don’t place it down first due to the very high Elixir cost. This is also an surprising card which is usually used at the x2 Elixir time.

Dark Prince is almost always running with the Prince in the P.E.K.K.A Double Prince or Double Prince Deck. I rarely see people using this guy without the Prince.

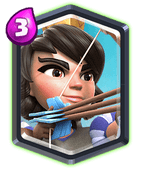
Guards and Princess can’t reveal anything about your opponent’s deck since they are essentially support cards.

frozen-peak-arena

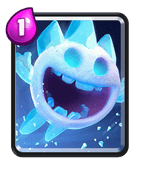
Ice Spirit is usually used in Hog Rider Cycle Deck and Sparky Decks these days. Anyway it still can’t say a lot about your opponent’s deck as it is very versatile and can be placed in loads of decks.

Bowler is usually used to protect Giant, Sparky, P.E.K.K.A and Golem. I posted a great Bowler deck a few days ago, you can take a look at here for more details.

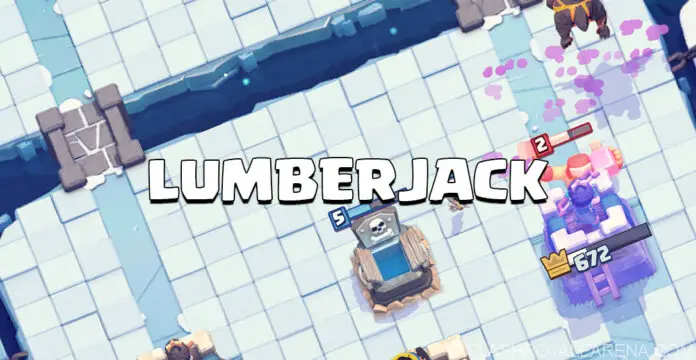
Lumberjack’s use is pretty similar to the Rage Spell. People usually couple him with Giant, Witch and 3 Musketeers.

Shared by MWolverine63.

Ultimate Guide to Using Every Card Defensively

22

Hello guys, T-Rex here and today I’m here to share my guide to using EVERY CARD IN CLASH ROYALE DEFENSIVELY. I’m not the best player in the world, I’m only sitting at 3100, but I thought I’d share this guide with players on Clash Royale Arena. I will try my best to answer all your queries. Also Legendaries are in their own category.

use cards defensively

How to use every card in Clash Royale Defensively

Training Camp

Clash Royale ArrowsArrows: Using Arrows defensively is pretty simple. You want to use this card to take out hordes of troops like Minion Horde, Skeleton Army, Goblin Barrel, or essentially any troop that has Low Hp and has relatively high damage when in a group. Be careful, some decks want to bait out your Arrows, so that they can send in another horde of troops that can absolutely demolish your tower. You want to use another AOE Troop or Spell to counter this.


Clash Royale BomberBomber: Bomber is an underused AOE Troop that I believe has massive potential. You want to use Bomber to clear groups of medium health troops, especially Barbarians. If your opponent uses a Tank+Support Deck, Bomber does exceptionally well at clearing the Support, even if the Support is behind the Tank, Bomber’s Splash can easily kill them off. You can clear a Hog+Goblin push with Bomber, just placing him next to your Crown Tower can easily take out the Goblins and do decent damage against the Hog Rider.

Clash Royale ArchersArchers: Archers are quite slow so when defending, it’s best to drop them reactively, so that they can do decent amount of damage to a certain troop. However, they can take quite a bit of damage, it takes 3 shots from a Crown Tower the same level as it, which is pretty impressive considering that they are only 3 elixir. Use Archers to defend against Balloons, Baby Dragons, Barbarians, Mini Pekkas, mainly anything that has moderate health and is slow-moving, but in some cases you can use Archers for fast-moving targets. I usually drop Archers in the middle, so that I can maximize their defensive potential.

Clash Royale KnightKnight: An underused and cheap tank that can do decent damage to a tower and other troops. Use him to kill medium-hp units, and tank up damage. You can use him as a shield for your tower, like if there is an incoming Sparky, he can take 2 shots from it, at tourney levels. You can also use him to snipe backline units behind a Tank. Knight+Archers is an extremely efficient defensive combo, but many players find Valkyrie and Musketeer as a more effective version.


Clash Royale fireballFireball: Possibly one of the best cards in the game, and makes an extremely good accompaniment to Zap. Poison becomes the better choice when it comes to a high-level playing field. Use Fireball to kill off support troops, medium health troops, and kill off groups of hordes if required. Fireball+Zap can easily pick off strong support units behind a Tank. Fireball’s knockback makes it good at pushing units away from your tower and make them re-target. However, you do lose quite a bit of elixir doing this.


Clash Royale Mini P.E.K.K.AMini Pekka: Really good in the current meta, does exceptionally well at taking care of high-hitpoint troops. This glass-cannon can wipe out both Support and Tank, which makes it so strong on defense. Use Mini Pekka in conjunction with Zap, Ice Wizard, Ice Spirit or Freeze to deal massive damage to your opponent’s push. She eats Royal Giants for Breakfast, Hogs for Lunch, and Giants for Dinner. She also counters Trifecta beautifully, Mini Pekka will snipe the Musketeer, then move on to the Hog and Valkyrie. Mini Pekka is a staple in all my decks now.

Clash Royale MusketeerMusketeer: Glass-Cannon, that is absolutely beast at taking out high-hitpoint air troops. Use her to counter Baby Dragons, Balloons, Lavahounds, Wizards, Knights, Valkyrie, Mini Pekka or anything that is out of range of her. She is one of the best ranged troops in the game. Drop her behind a tower to defend your tower or in the middle, in front of your King Tower. Fireball and Poison do mess her up, so try to bait those spells out.


Clash Royale GiantGiant: One of the best tanks in the meta right now, he’s very good on offense but people don’t explore his defensive purposes. Put him in front of a Crown Tower to tank damage from a push, he can be an improvised shield for your tower. At tourney standards, he can survive 3 Sparky Shots. Since he only targets buildings, he can push units out of range of the tower, so that they re-target and attack him. Giant can also serve as a shield for defending troops, e.g I have a Musketeer blasting away at an Enemy Giant, but I know the Mini Pekka behind the Giant will be able to snipe my Musketeer, so I drop my Giant so that my Musketeer is safe from the Mini Pekka.

Clash Royale PrincePrince: A very powerful card at low-level but loses popularity when you go to higher arenas. His charge is extremely powerful, and unique. How do you use him defensively? Drop him at the back, so that he can start a charge, then drop other troops to assist him in taking out a Ground Push. You can use him to snipe support troops as well. Another cool thing is using his charge to push a troop forward into an enemy troop, so that the enemy troop is distracted, and the Prince can do insane damage to it. I’ve personally done this with the Giant, the Prince has a 2 tile range, so he can essentially attack enemy troops behind your own Giant.

Clash Royale Baby DragonBaby Dragon: Very weak at high level, but is not bad at low level. Don’t expect it to do too much damage to enemy troops, so it’s best to pair it with a defending troop like Musketeer, or Wizard for a double AOE defense. You can use Baby Dragon to take some damage for other troops, because it does have a decent amount of health. In a sense, use Baby Dragon to tank for better damage-dealing defensive troops.


Clash Royale Skeleton ArmySkeleton Army: DOOT DOOT DOOT DOOT DOOT, The Skeleton Army Train has arrived. It does really well against Tanks, does insane damage to towers if left alone, but gets destroyed by AOE troops and spells. This card is extremely weak at high level. Use this card to take out lone enemy tanks, or groups of medium health troops. I don’t suggest using this card at all, except in Arrow-Bait Decks. You can use Skeleton Army to distract as well.


Clash Royale WitchWitch: Use can use her to clear swarms and mini-tanks, as her skeletons can do a decent amount of damage to them. Drop her at the back, so that 2 waves of skeletons can generate. Very good against troop-targeting enemies, as they will constantly be faced with waves of skeletons. Use her to stall mini-pushes and do moderate damage to medium-hp troops. Her skeletons can distract troops as well.


Goblin Stadium

Clash Royale Spear GoblinsSpear Goblins: Very cheap troop that is very versatile but has lost some popularity in higher arenas. Use these guys to kill low health troops, and medium health troops. In conjunction with Mini Pekka, it can be a very strong defensive combo. Dropping a mini-tank in front of it can basically counter most pushes in the game. Spear Goblins make extremely good distracting units, drop them in the middle to lure troops. Ice Wizard+Spear Goblins can kill off strong air pushes.


Clash Royale GoblinGoblins: High DPS but vulnerable to Zap. Left unchecked, these guys will decimate high hp troops. How to use these guys defensively? Bait out your opponent’s zap or arrows, then take out the Support behind the Tank, then drop this grubs to shank the Tank. This guys works extremely well with the Ice Wizard, Mini Pekka, and Knight.


Goblin HutGoblin Hut: You can use Goblin Hut defensively by simply just dropping it. The stream of Spear Goblins can stall pushes and provide air coverage when needed. You can also drop it in the center, so that you can lure Hogs or Giants to it. Not really anything else to say.


Clash Royale ValkyrieValkyrie: She has very good 360 degree AOE, and very high-hitpoints. She’s part of the Trifecta, which is why she is quite popular. Use her to clear backline troops and do decent damage to the tank. She can easily kill off a Hog+Goblin push, and also clear out support troops in a Miner Push. She can take 2 Sparky shots, so dropping her behind a Giant Sparky Push will kill the Support Troop and Sparky.


Clash Royale LightningLightning: This card is anti-building, you can use this card to take out Mortars and X-Bows efficiently. You can use Lightning to wipe out Trifecta, as the Lightning will hit the Musketeer, Hog and Valkyrie. I don’t suggest using Lightning to clear Support units as the Lightning could always target the tank and only 2 Supports. Use Lightning to clear 3 medium health troops. It’s not that great on defense, but can work in a pinch.


Goblin BarrelGoblin Barrel: Goblin Barrel can be dropped over on to a Sparky, so that Goblins surround the Sparky. This is a very accurate efficient way to take down Sparky, but it won’t work if a Support troop accompanies the Sparky. You can also use Goblin Barrel to distract a Prince or Mini Pekka, or use Goblin Barrel to kill of a Support Unit ( Surround it). Goblin Barrel is better then Goblins when it comes to defense, as Goblin Barrel has a more accurate placement then Goblins. You can also Goblin Barrel Miner, so that the Miner gets shanked by the Goblins.

Bone Pit:

Clash Royale SkeletonSkeletons:1 elixir Skeletons are not often used, but can be very powerful if used effectively. They are essentially used for only 1 purpose: to distract troops away from the tower. When playing 1 elixir skeletons, you should almost always do so on defense in the middle of your side of the arena. Watch out for splash damage from Wizards, Bombers, and Baby Dragons as they will one-shot your skeletons. Skeletons are also a great counter for Prince if played in the right place as they will distract him for a while and deal enough damage for your tower to take him out quickly. They can also be used in a pinch to deal damage to a Hog Rider.

Clash Royale MinionsMinions: Basically the Aerial Version of Spear Goblins. You can use Minions to wipe out Medium-High Hp Units that don’t target air. Things like Valkyrie, Hog, Mini Pekka, Knights and Balloons can easily be wiped out by Minions. Minions are really good in defense, since they survive Zap and they equally trade with Arrows.


Clash Royale TombstoneTombstone: Tombstone is a very unpopular card, but if pulled off right, it can be extremely good on defense. It is a terrific counter to Princes and Hogs, and if placed correctly, you can take out the Prince or Hog with just 1 Tombstone. The stream of skeletons will never make it to your opponent’s Crown Tower, so Tombstone should be played reactively.

Clash Royale Bomb TowerBomb Tower: High Hitpoints, extremely good AOE. Simply drop it in the middle, and it will do work to Barbarians, or groups of ground troops. It’s weak to air troops, so always be ready to Zap or Arrows or an air-targeting troop to kill the air troops to protect the Bomb Tower.


Clash Royale Giant SkeletonGiant Skeleton: It’s never the Giant Skeleton itself that is scary, its the bomb that is scary! You can plop him right him behind a Tank, and literally anything behind it will die. If you have to, you might want to Zap the troops to stall them so that the Bomb can kill them. Once again, you can also let him tank for your tower and once he dies, his bomb will blow up… and you know what will happen to his/her push. If the troops are too far away from the Giant Skeleton bomb, you can do 2 things:

Clash Royale BalloonBalloon: Quite hard to use defensively, but it is possible. Drop the Balloon to distract air-targeting troops, and when it dies, the Balloon will drop a bomb on to the troop. The problem is that Balloon’s death damage is very low, so it’s quite hard to use Balloon defensively.


Barbarian Bowl

CannonCannon: Simply just drop in the middle to lure Hogs, Royal Giants, Giants,etc. For Royal Giant you need to put it closer to the river, but it comes at the cost of support troops being able to target the cannon while your troops can’t target theirs.


Clash Royale BarbariansBarbarians: These guys have extreme versatility, you can use these guys to counter most ground troops, including Hog and Giant. You should never use these guys on offense, only on defense, they are simply too easy to counter if they cross to the opponent’s side. Barbarians should be played reactively, but if Barbarians are the only card you have, it’s best to plop at the back where they will split up. To defend, just drop them down on to the push and they will do their job.


RocketRocket: The highest damage spell in the game, the Rocket is the cornerstone of a Defensive siege deck. To use Rocket defensively, you need time it correctly. Rocket takes around 5-6 seconds to hit it’s target so it’s best that you plop your Rocket 2-3 tiles away from the actual troop so that it will hit it. Rocket can demolish Sparky and it’s Supporting troops, but you need to time it. Rocket does leave you low on elixir, so always be ready for your opponent to make a counter-push before rocketing.


Clash Royale Barbarian HutBarbarian Hut: Dropping Barbarian Hut in the middle or back should make a great defensive strategy. Hogs and Tanks will have a hard time getting to your tower with streams of Barbarians coming out to take them out, and the fact that Barbarian Hut has very high hitpoints. It’s best to save up to 10 elixir to play this card proactively.


Clash Royale X-BowX-Bow: To use this card defensively, dropping it in the middle can make it hard for your opponent to drop cards proactively, as the X-Bow will snipe it. X-Bow also has decent health, so it can survive quite a bit of Hog Hits and Royal Giant Hits. Don’t expect X-Bow to take care of everything; air troops can easily wipe it out. I’ve heard dropping X-Bow behind a Crown Tower acts as a second Crown Tower, but it’s vulnerable to spells.


Clash Royale RageRage: I couldn’t really find out a way to use Rage defensively, but I did find 1 defensive use. You can use Rage to make all your defending troops attack faster, so essentially, the push gets shutdown faster. e.g, Musketeer and Mini Pekka are attacking a Giant. You can drop Rage, and the Giant will die out quicker. Although I find this unnecessary to use defensively, you can use if your tower is on low-hp and you want your opponent’s push not to make it to the tower.

P.E.K.K.A’s Playhouse

Clash Royale TeslaTesla: A unique defense that can not be targeted when underground. You simply just drop this off in the center, and you’re good. You can’t piggy-push a Tesla if it is placed correctly, it has to be dead center. Royal Giant also has to come into range of Tesla, so it makes it good Royal Giant counter.


Clash Royale Minion HordeMinion Horde: High DPS Swarm, that can wipe out tanks in a few seconds. You want to use this guys to kill High-Hp Units, or fast-moving high damage units. If your opponent is split-pushing, you can drop Minion Horde in the middle, and they will split up, heading to each push. You do want to bait out their Arrows or Zap before using these guys, and be wary of AOE troops behind a Tank. Don’t expect there guys to get to your opponent’s tower; The opponent will have an answer.


Inferno TowerInferno Tower: The bane of any Golem/Giant/PEKKA player’s existence, the Inferno Tower does an insane amount of damage to a single target after locking on for a few seconds. With the Zap nerf, you should try your best to stall pushes after the Inferno has been reset, like distracting with units, or using a troop with the ability to stall the push (Ice Wizard and Ice Spirits) Other than that, just drop this defense in the middle.


Clash Royale Hog RiderHog Rider: A card that is ALWAYS used offensively, but it’s defensive properties have not been explored. At tourney level, the Hog can take 2 shots from a Sparky (Sparky does 1300, Hog has 1400 health, it takes 2 shots to kill it.) Hog is extremely good at luring and distracting, as seen below. Hog can also defend against Pekka as well, it’s really funny to see a Pekka chase a Hog back to the bridge, while an Inferno melts away at the Pekka. Hog can also distract the AOE troops, so that the Tank can be attacked by itself, and the AOE can be attacked after the Tank is killed.

1SyakVX

Clash Royale FreezeFreeze: Freeze is rarely ever seen anymore, but Freeze is quite useful on defense. Simply Freeze a push, and have a high-damage unit, or an AOE spell to kill of the push. Freeze is useful if a push is already at your tower, you can freeze it and drop another troop that can kill off the push. It is a big investment, so try to get to 10 elixir before freezing.


Clash Royale P.E.K.K.AP.E.K.K.A: A big tank that can absorb a lot of damage, and can deal massive damage as well. You can use PEKKA to tank for your tower, a 3000 health shield, making it really hard for a push to get to your tower. You can also use PEKKA to distract troops, like slow-moving troops that target troops.


Spell Valley:

Clash Royale ZapZap: An extremely versatile card, that can be used to finish off low-hp towers, stun troops, and take out small units. You can use Zap to make a troop re-target, so that you don’t lose too much tower health. This can be done with Miner especially. When zapping Minion Horde, you want to zap when the first minion’s (The one in the front) shadow crosses the bridge, so that the Crown Tower won’t lose any health. If you do it too late, the 3 last minions will actually get to the tower, and do damage to it. Zapping Royal Giant is also a good play, you can make it re-target on to your building. The same goes for pushing, you can zap your opponent’s defending troop to make it re-target to another troop.

Clash Royale mirrorMirror: Not really a use for defending, but I guess you could mirror a defending troop.


Clash Royale PoisonPoison: You can use Poison like Fireball, but you need to do it earlier, as Poison does damage over a period of time. Use Poison to kill off support troops, medium health troops, and kill off groups of hordes. Poison is a cross between Arrows and Fireball, which makes it so good. It’s probably why Poison becomes the better choice then Fireball when it comes to High-Level Play.


Clash Royale Fire SpiritsFire Spirits: These little critters can do a lot of damage for 2 elixir. They have a higher damage output then Fireball and Poison at tourney standards, which makes them popular, as they don’t get the 40% less damage on to a tower like AOE Spells do. To use these guys defensively, you want to take out a swarm or group of troops with these critters. Pair Fire Spirits with Zap, and you have an improvised Fireball, that does more damage. You can get a tower at 500 health destroyed with Fire Spirits and Zap alone.


Clash Royale FurnaceFurnace: Spawns Fire Spirits that go BOOM! Place Furnace in the middle or back, and it will make it very hard for your opponent to drop of groups of troops. You can also use Furnace to slowly burn away at a slow-push, while damaging the Support. Furnace can also draw Royal Giant or Hog Rider towards it, and with 1300+ health at tourney levels, it can take several hits.


Clash Royale WizardWizard: A strong AOE Troop, that in my opinion, needs a buff. You can use Wizard to clear groups of troops. Wizard’s AOE is actually quite big, if a Musketeer is shooting away at your Wizard, and the Musketeer is standing 2 tiles away from the Crown Tower, amazingly the Wizard still does damage to the tower while hitting the Musketeer. He’s underused, mostly because he costs 5 elixir, and has a low pool of health.


Builder’s Workshop

Clash Royale MortarMortar: Use Mortar defensively by dropping in the Middle, where it will slowly kill off groups of troops. You need to place it early, so that the Mortar can actually get several hits on to the troop. Mortar can kill the Support behind a Tank, while damaging the Tank, so it’s quite good on defense. However, Mortar is slow, so you need to stall the push for a while, so that the Mortar can actually kill a Support.


src=”https://clash.world/images/clash-royale-elixir-collector.png” alt=”Clash Royale elixir collector” width=”141″ height=”170″ />Elixir Pump: The Elixir Collector is one of the most popular cards and very powerful if used correctly. Playing it correctly will give you a big advantage over your opponent, while playing it incorrectly can straight up lose you the game. It costs 5 elixir and gives you 7 elixir throughout its lifespan. You can use Elixir Pump to defend but, since it doesn’t do damage, you can only use it to lure a troop, but you need to back the Pump with another troop in order to defend a push.


Clash Royale GolemGolem: A massive beefy tank that explodes on death and splits into two less-beefy Golemites, the Golem is the premier tank troop in the game. You can use Golem to distract Mini Pekka, or Pekka, or any ground-targeting troop, and it’s funny to see a Pekka chase after a Golem, as they both travel at the same speed. If you have destroyed your opponent’s tower, the Golem can go to the King Tower… and lure nearly every ground-targetting troop that your opponent drops on that side.

Royal Arena

Royale GiantRoyal Giant: Put him in front of a Crown Tower to tank damage from a push, he can be an improvised shield for your tower. At tourney standards, he can survive 3 Sparky Shots. Since he only targets buildings, he can push units out of range of the tower, so that they re-target and attack him. Royal Giant can also clear Mortar or X-Bow, which is a nice defensive bonus.


Clash Royale Three Musketeers3 Musketeers: Use these girls to defend high-hitpoint troops. 3 Musketeers absolutely hammer Lavahounds, Pekkas, Golems , Giants, and Royal Giants. Be careful though, as they will be Fireballed or Poisoned if your opponent wants to avoid their push being destroyed. 3 Musketeers can kill off Support troops as well. Extreme High-Risk defending, but high reward if you can pull it off.


Clash Royale Dark PrinceDark Prince: Splash Attacker, but is outclassed by Valkyrie. Dark Prince can kill groups of troops, and because of his charge, you should drop him at the back to build up his charge. Once his charge has built up, he can do good damage to ground troops. Use his shield to your advantage, as it can take a whole Sparky shot at tourney levels. Don’t expect him to survive for long, as he is quite weak bu himself.


Clash Royale GuardsGuards: These guys are literally ‘Guards of your Crown Tower’. They are really good on defense, as they have shields, and a combined dps that is quite high. Pekka has to take 8 hits to kill them all, and in that time-span, the Pekka would be left on very low health. The sad thing is that Guards remain quite weak until they get to tourney standards, which is hard for F2P players like me. Use Guards to take out Medium Hp troops, High Hp Troops, Support Troops, or basically anything that the Guards can target.

Frozen Peak

Clash Royale Ice SpiritIce Spirit: Ice Spirit is essentially the walking ‘Zap’. Use Ice Spirit to stall troops and pushes, and when Ice Spirit is paired with a ground-targeting high damage dealing troop, it can absolutely demolish pushes. In conjunction with Inferno, it proves very strong as the troops will get frozen and melted by the Inferno and Ice Spirit Combo. Ice Spirit and Fire Spirits make an improvised Fireball, while Ice Spirit and Rocket can make aiming your Rocket more accurate.


Clash Royale BowlerBowler: Bowler is extremely good on defense. His knockback is really fun to play with, as you continually push back troops, and slowly damaging them. Use him to damage support units behind a Tank, or simply just troll a Spawner decks. He is quite costly, at 6 elixir, so try to have a full bar of elixir when to defending. Bowler can push units back away from your tower to make them re-target, so use that yo your advantage.


Legendaries

Clash Royale Ice WizardIce Wizard: Master of Defending. Just plop him down, and you’ll slow down a whole push, while your tower slowly chips away at it. Ice Wizard works with nearly any troop in the game, so just drop another defensive troop to help the Ice Wizard.


Clash Royale PrincessPrincess: Treat her like the troop version of Arrows. Dropping her behind the tower, or in front of the King Tower is usually the best place to put her when defending. She’ll clear hordes for you, but you’ll need to assist her when it comes to medium health troops. Troops like Mini Pekka and Knight work well with her, as well as Valkyrie. You do want to bait the opponent’s arrows before using her.


Clash Royale SparkySparky: High Damage Output, so you can use her to kill High-Hitpoint Troops. She can clear hordes, but she has a 5 second re-charge, so you need to back her up.When a push comes your way, with Tank and Support, you can zap the Tank, and it will stop, so that all the Support troops will run into the Tank, and Sparky’s splash will be able to kill the Tank and Support.


Clash Royale The LongThe Log: Use The Log like you would for Bowler. Simply push back troop to make them re-target, or kill Princesses and swarms.


Clash Royale LumberjackLumberjack: Use Lumberjack like you would for Rage. Let him die, and rage all your defending troops.


Clash Royale MinerMiner: You can use Miner to distract troops and lead them away from a push, essentially dis-assembling a push. Miner doesn’t do that much damage, so only use him to take out the Support Troops. You need to pair a troop with him if you want to kill the Tank.


Clash Royale Lava HoundLava Hound: You can use Lavahound for defending by simply letting all the Support Troops target the Lavahound. When the Lavahound explodes, the Pups can kill the Support and Tank, but this won’t work if your opponent has an AOE Support, or if your opponent has an AOE Spell in hand.


And that wraps up my guide on how to use every card defensively. I’m exhausted from writing this, it took me 2 days, but it sure was worth it. I hope you guys enjoyed the guide!

Shared by T-Rex


Most Common Mistakes Against Beatdown Decks

2

Hey guys, I am going to release a series helping you fix the most common mistakes while dealing with different deck archetypes.

I choose Beatdown deck archetype to begin this series because beatdown decks are extremely popular at the moment. Beatdown deck users usually crush the opponent’s Towers due to the opponent’s only mistake.

Most Common Mistakes Against Beatdown Decks

What is Beatdown Decks?

In general, Beatdown decks are designed to dominate you by building a huge pushes based on Elixir advantage.

To read more about all deck archetypes, take a look at here!

Most Common Mistakes Against Beatdown Decks

Overcommitting: Since Beatdown users need the Elixir advantage to destroy you, try not to waste a lot of Elixir otherwise you will be done.

Placing defensive building too early: The early building will lose a lot of HP before you really need it. This also lets your opponents use cards to deal with your building effectively (for example, use Minions to distract the early Inferno Tower).

Letting the opponent build a push: Once your opponent places something expensive down (Giant, Golem, P.E.K.K.A, Bowler, Lava Hound etc) down, push on the opposite lane (applying pressure), forcing your opponent to split his Elixir to defend. Do you let Hog Rider get to your Tower? Do you let X-Bow target your Tower? Do you let Miner chip away your Tower? Why would you let a beatdown user build up a push, which is very hard to stop?

Spending too much on applying pressure: To stop the opponent from doing a huge push, you need to apply the pressure, but not too much. Spending a lot Elixir on applying pressure is pretty related to overcommitting. If your opponent can somehow stop it without losing the Tower, you’re done!

I want to put this in a specific case because I have seen so many players spending everything they have on the opposite lane.

Forgetting a part of the push: In beatdown decks, the tank is generally as threatening as the supports behind. While dealing with beatdowns, you have to stop the entire push, meaning you can’t ignore any part of the push. For example, most people always try to take out the Sparky first while defending against Giant Sparky. Distract the Giant with your building otherwise he will punch your Tower really hard.

Not ignoring some units: Keep the advantage or beatdown will destroy you! For instance, If some Minions are coming down to your Tower, you will have to choose between ignoring them or defending them. While dealing with beatdown decks, most of the time you should not. It’s better to let your Tower soak some damage. The 2 Elixir you spent to counter 500 damage of the Minions could have countered 9999 damage later in the battle.

Letting the opponent pump Elixir: When your opponent plays the Elixir Collector, you need to either destroy it with Rocket/Miner or apply the pressure immediately.

Attacking the wrong lane: When the opponent already dealt a lot of damage to a side of your map, you should attack on the other side If you didn’t do a lot on the opponent’s Tower on the same side. Beatdown decks heavily rely on counterpushing. If you attack on the same side, you will give your opponent the advantage transforming their defenses into enormous attacks.

Hope this helps guys! Don’t hesitate to comment If you have any question!

Shared by PeakCell_CR

Best 3 Crown Decks in Clash Royale

8
3 crown deck clash royale

Are you getting bored of playing for 1 crown wins in Clash Royale? Today, I am going to show you the best 3 crown decks I have ever played. Hopefully you guys will like them!

3 crown deck clash royale

Best 3 Crown Decks in Clash Royale

If you’re looking to progress the quickest and get legendary cards, then you have to open your Crown Chests every day in a timely manner. So far, I’ve found 3 Legendary Cards in the last few weeks from opening my Crown Chests.

Now getting these Crown Chests can be a pain sometimes, so what I like to do is use decks that are more geared towards 3 crowning. So I’m going to show you guys 3 different decks that are made to do just that, get you 3 crowns and get you your Crown Chest fast!

Giant Witch Rage Deck

Clash Royale GiantClash Royale WitchClash Royale RageClash Royale Zap
Clash Royale MusketeerClash Royale Mini P.E.K.K.AClash Royale elixir collectorClash Royale Minions

The first deck is a deck that features the Giant and Witch with the Rage Spell. Along with heavy hitters such as the Mini P.E.K.K.A and Musketeer, which makes any combination with the Giant and Rage Spell a very deadly combo to stop, especially now that we can use Zap Spell to reset the Inferno Tower, a Raged up Giant will do crazy damage. Now there’s an art for getting 3 crown wins, which is different from normal gameplay where your goal is usually to take control of the battle by making great defensive plays and then converting that defense into offense. But the art of 3 crowning is very different.

P.E.K.K.A Three Musketeers Deck


Clash Royale P.E.K.K.AClash Royale Three MusketeersClash Royale RageClash Royale elixir collector
Clash Royale MinionsClash Royale ZapClash Royale Fire SpiritsClash Royale Barbarians

Next we have the Pekka Three Musketeers deck. This is another deck that I love to 3 crown with because the Three Musketeers are insane when they get going with a Rage Spell. Whenever you’re using the Three Musketeers in a deck, you always want to consider having Barbarians because they can be used to bait area damage spell cards like Fireball or Poison that are big threats to the Three Musketeers. And remember what I said about Zap Spell resetting Inferno Towers, this allows the Pekka on a Rage Spell to go insane.

Sparky Goblin Barrel Deck

Clash Royale GiantClash Royale SparkyClash Royale Ice SpiritClash Royale Goblin Barrel
Clash Royale Fire SpiritsClash Royale ZapClash Royale Mini P.E.K.K.AClash Royale elixir collector

And the final deck is my super fun Sparky Goblin Barrel deck, which I’ve used to win a lot of tournaments with. The idea is to pose instant pressure on your opponent with the Goblin Barrel and Sparky together. Both Sparky and Goblin Barrel are used to bait Zap Spell, which if your opponent does zap either one of them, the other will be free to deal heavy damage. Now I know a lot of you guys with Sparky don’t have the Ice Wizard, so you could go with the alternative, which is to use an Elixir Collector instead. The good thing is you still have the Ice Spirit to slow things down, and what I like the most about the Ice Spirit is that it doesn’t die to a Zap Spell of equal level.

Okay thanks a lot for reading guys! Hopefully you have found these 3 crown decks helpful! Don’t hesitate to comment If you have any advice or question. Good luck!

Clash Royale Arena 2 Deck – Giant Beatdown [Fundamental Series]

71
Clash Royale Arena 2 Deck

Hey, Nitrome95 here, coming at you guys with the Clash Royale Arena 2 Deck, Giant Beatdown, and my new series called “fundamentals deck”.

Where did I get the idea? Well, I realized that the most powerful win conditions (the card you want to get to the Tower) in the game (excluding Royal Giant and Elite Barbarians) come from low Arenas!

So in this series, I will be teaching you guys simple decks for a certain archetype that will help you build up the skills for later in the game.

Clash Royale Arena 2 Deck

Clash Royale Arrows

Clash Royale Arena 2 Deck – Giant Beatdown

This deck is an aggressive deck with the first win condition you receive in the game, the Giant. Keep in mind that I will be covering a lot of skills that may seem like common sense to some because this deck is made for beginners.

Cards Breakdown

Clash Royale GiantGiant – The card that you want to get to the tower. Never play this card alone, as it is weak by itself. You will want to place this big guy in the back 50% of the time to set up for a slow push in double Elixir time, where you put your support troops behind the Giant. Since he only attacks buildings, don’t use him on defense unless you need to soak up damage for an emergency.

Clash Royale TombstoneTombstone – This card is honestly so underused or used incorrectly in lower Arenas. Since Tombstone is a building, it lures defensive targeting units, such as the Giant and Hog Rider. It also stalls your opponent’s support troops, most importantly, the prince’s charge move. You will want to have at least one up at all times where it is near the middle of your side of the Arena here:

Clash Royale fireballFireball – You will want to use it on medium sized units. Only Fireball a group of troops if you are killing more Elixir worth of troops compared to the amount you spent. Never Fireball a lone tower unless the tower is extremely low on HP.

src=”https://clash.world/images/clash-royale-musketeer.png” alt=”Clash Royale Musketeer” width=”141″ height=”170″ />Musketeer – You may notice that there are no Arrows in this deck, but Musketeer does an excellent job shooting Minions out of the sky. If you are in an Arena where you face Minion Horde, you may want to use Arrows or witch in the free card slot (will explain later).


src=”https://clash.world/images/clash-royale-skeleton-army.png” alt=”Clash Royale Skeleton Army” width=”141″ height=”170″ />Skeleton Army – You can replace this card with Minions. Both cards deal high damage for such a low Elixir cost. If your opponent wasted their Arrows, send in a push with these; they are deadly.

Clash Royale ValkyrieValkyrie – A solid splash unit that will clear out any weak troops to splash.


src=”https://clash.world/images/clash-royale-skeletons.png” alt=”Clash Royale Skeleton” width=”141″ height=”170″ />Skeletons – You might be wondering “This card sucks!” if you just started the game. Skeletons are great at stalling troops in an area for a bit and only costs 1 Elixir. Believe me, they are better than you think.

Whatever 3 Elixir Card You Want!– I would test this deck in your Arena and see what card is missing in the deck. From there, you can add a card. Your best bet would probably be Arrows, but there are so many other unique possibilities for this card.

General Gameplan

Attack

As you see, the object of this Clash Royale Arena 2 Deck is to make a rock solid defense, so that you will be comfortable with building a big push up.

There are two ways to do this:

  1. The first is counterpush (I will explain later)
  2. The other is a slow push.

You need to use both to succeed against your opponent.

I made it to P.E.K.K.A’s playhouse with underleveled cards (lvl 4 and 1 Common, lvl 1-2 Rare, lvl 1 Epics). This deck can get you really far without upgrading your cards a lot.

A mistake that I see tons of players do is that they either don’t commit enough to offense or commit too much. If you commit too much, you are leaving yourself open for an all out push on your tower. If you commit too little, you will never get to the tower. In the video, you can see that I sacrificed tower health at times to save Elixir for a bigger push.

Slow Push

This is the easier of the two. When you know that you have more Elixir than your opponent, drop your Giant in the back. Support with Musketeer, Valkyrie, your 3 Elixir card (unless its Arrows) and get ready with your Fireball for troops.

Counterpush

This is the more difficult of the two. What you will want to do is defend (I will show you how to defend later) with as little troops as possible. With the extra Elixir you saved, you can put a Giant in the front. Since they sent a push at you, they will not have much Elixir and hopefully you can take the tower. This technique is very advanced, so don’t worry if you don’t get it on your first try.

Defense

In this Clash Royale Arena 2 Deck, mostly all of your cards that are played offensively (the exception is Giant) are also played defensively.

If you see a Giant coming down the lane, you should already have a Tombstone down because you should always have a Tombstone on the map at all times. Place a Musketeer in the back to help take out the tank if it is a high HP tank. Valkyrie to take out the support troops. After you successfully defend, you have two options:

  1. If you have a lot of Elixir still, put your Giant to tank for the troops that are still surviving. This is the counterpush.
  2. If your defensive troops are badly damaged or you don’t have a lot of Elixir, you should not play anything. Build up your Elixir to place a Giant in the back for a slow push.

As you can see, defending is extremely important to attack properly. What I showed you is a standard defense.

If you don’t have the cards in your hand, or you don’t have enough Elixir available to set up the perfect defense, you will have to improvise.

Here’s a video of gameplay. For my privacy, I have decided not to include my voice in this video. Maybe if I become more popular I may add audio, but for now, this will do (this is my first video).

Conclusion

Overall, this deck is great at building your fundamentals. It forces you to set up solid defenses to set up for massive pushes that will be extremely rewarding.

If you play this Clash Royale Arena 2 Deck in low Arenas for a long time, you will have the skills to use more complex Giant beatdown decks.

Comment below if you guys want to see more of the series and like and subscribe to my channel, [Kairos] Nit Clash Royale.

The Definitive Guide to All Clash Royale Buildings

83
Clash Royale Buildings

Hey guys, it’s yah boi, SCorpSCilla, back at it again with a special guide to buildings.

This was requested by several old friends who argued about which one was better: Cannon or Tombstone.

In the end, I’ve decided to make a guide about EVERY SINGLE BUILDING in the game so far.

I have spent some time on this. You can just skip around to find some information on the building you want. With that said let’s move on.

Clash Royale Buildings

Clash Royale Buildings – The Ultimate Guide

Table of Contents

Each of these buildings has unique, although sometimes similar, properties. Some of them spawn troops. Others have long range. Still others even produce elixir!

We will be looking at their pros and cons.

Clash Royale Barbarian HutBarbarian Hut

This spawner lasts for a full minute and spits out two barbarians every 14 seconds. This means that you will get 8 Barbarians in total. It costs 7 elixir, so it is pretty expensive.

At tournament standards, it has almost 2000 HP, and can easily counter Hog Rider and Royal Giant when facing 1 on 1.

However, due to the rise of the new metas, this card has been very unpopular recently, and is easily countered with spells or air units.

It cannot target air. However, this card does provide some some excellent chip damage and support for countering.

Setting it in the middle is a good position.

Clash Royale Goblin HutGoblin Hut: Costs 5 elixir, it produces a Spear Goblin every 4.9 seconds and lasts for a whole minute, meaning that it can spit out 12 Spear Goblins in its lifetime.

It has 1,232 health, pretty modest, and because of it’s fairly fast spawn rate, it can allow a massive buildup of troops when targeting a tank such as Giant, or God forbid a Lava Hound.

This also provides a steady stream of chip damage and is not bad for 5 elixir.

The disadvantages are the same with Barbarian Hut: It is vulnerable to spells and can be easily countered.

Placing it behind the arena tower is advised.

Clash Royale Bomb TowerBomber Tower

At tournament standards, it has about 1670 HP, and lasts for 40 seconds. It has the hit speed of 1.6 seconds, a little faster than the actual bomber itself. It does 176 damage at tournament standards, and its DPS is 110.

Surprisingly a little tanky, it is good for taking out swarms and kiting building troops.

Although weak to air, it is surprisingly resistant to most spells other than rocket or poison.

Placing it in the middle is a good idea.

Fun fact: If you take out both arena towers and set it as close as you can to the King tower, if the opponent places a troop right next to the King tower, the splash damage can damage it. This has been confirmed many times.

Clash Royale CannonCannon

Has a 5.5 range, a 0.8s hit, and lasts for 30 seconds. At tournament standards, it has 742 HP, does 127, and has a total DPS of 158. It is cheap and costs only 3 elixir.

This is the perfect counter to Hog, and can draw Balloons and Giants to it as well.

Musketeer can outrange the Cannon and take it out. However, it is also good at taking out Skeleton Army and small troops such as Goblins, Spear Goblins, and even Archers.

When protected, it can provide some serious damage at countering. A good example would be Guards and Cannons against a charge of Elite Barbarians.

Fairly popular card.

Clash Royale elixir collectorElixir Collector

Pretty self-explanatory. It produces Elixir. It is somewhat expensive, costing 6 elixir. It lasts for 70 seconds and produces one elixir every 8.5 seconds. This means it will give 8 elixir in total. At tournament standards, it has 1020 health.

This building is perfect for big pushes and beatdown decks such as Golem or P.E.K.K.A.

Because of its cost, you might want to put it where it is not vulnerable to spells, Miner, or Goblin Barrel. A good spot is right in front of the King Tower, in between the other Arena Towers. This is awkward for Miners and Rockets to go too. Miners will be subject to being crossfired by the two Arena Towers, and might even activate the King’s Tower. The same goes for Rocket.

Fairly popular card, as you can see why.

hut deck

Clash Royale FurnaceFurnace

Spits out two Fire Spirits every 10 seconds, and lasts for 50 seconds, meaning that it will spit out 10 spirits total. At tournament standards, It has 1056 health and spawns level 9 fire spirits, which is important because they will only die at two shots from an arena tower.

If left alone, it can chip away the tower for almost 850 damage. It deals with Hogs OK and can draw in Giants and Golems.

This building can spawn troops that actually attacks air, so if you don’t have Fire Spirits or really any air defense card in rotation, you can use this against Minion Hordes. Just remember this: Baby Dragon are Fire Spirits’ worst nightmare.

This card has been increasingly popular in the past (especially with most of my decks that you can search on Clash.World including Furnace :D). You can read more about it at here.

Clash Royale Inferno TowerInferno Tower

Costs 5 elixir, and has a hit speed of 0.4 seconds, with a range of 6 and lasts for 40 seconds. At tournament standards, it has about 1,400 health. It’s damage can range from 35 to 705, and its total DPS is 87-1,760.

With that insane damage, you might be thinking, well heck yeah! This building is the best!

But before you add this to your deck, here are some disadvantages.

  1. It takes time to get that insane damage. It needs to charge up.
  2. It can only target one thing and retargets slowly. This makes it vulnerable to large swarms of troops.
  3. It can be reset by Zap, a card that 90% players have in their decks.

Still, I love this card because of its ability to shred tanks. Giant falls to its knees. P.E.K.K.A. follows next. Lavahound bursts in a fiery death. Even Golem, the most tankiest of all, with a large of HP even the King Tower cannot compare to, bows down before this tower.

Clash Royale MortarMortar

Costs 4 elixir, has a hit speed of 5 seconds, a deploy time of 4 seconds, a range from 3-11, and to top that off, only lives for 30 seconds, meaning that will only get 6 hits off. No wonder that many people use it.

At tournament standards, it has 1,272 HP, damage of 229, and a small total DPS of 45.

There are SO many counters to this card: Rocket, Minions, Giant, even Skeleton Army. However, it does have a few advantages.

Because of its blindspot, this is PERFECT for Giant pushes. It cannot target the Giant, so it will hit the support units instead. Add in a tank killer and something else to kill the Giant, and boi you just got something to counter Giants with.

Also with its long range, it can easily get a few hits off the Arena tower.

If it landed every single blow on the Arena Tower, it would do only 1,374 damage. Yep.

Clash Royale X-BowX-Bow

X-Bow has a slightly expensive cost for 6 elixir. It has the highest hit speed in the game (0.3 seconds), its deploy time is 4 seconds, and it has the lifetime of 40 seconds.

It has insane range, and although it does only 29 damage, it has a DPS of 86. If it locked onto the tower and never got hit, it will do about 3400 damage, more than enough to take a tower, and some more.

This card is usually used in siege decks, and although not enough alone, it can help take out a tower with some support and a tank.

Can be countered when alone, but of course X-Bow users never send it alone. Sigh.

Clash Royale TombstoneTombstone

Cheap and is 3 elixir, has a spawn speed of 2.9 seconds, and lasts for 40 seconds.

This allows 13 Skeletons to spawn out and plus four more when it dies.

This card is very useful in many decks, such as Lavahound decks, and it can be a cheap counter to Hog Rider, Prince, and Mini P.E.K.K.A.

When couple with Ice Golem or Archers, it is perfect against Elite Barbarians.

It can be countered with spells, and air troops, but I still think that this card is really good.

You can read more about Tombstone at here.

Clash Royale TeslaTesla

The Telsa costs a good 4 elixir. Tesla has a really interesting property. Besides the 0.8 attack speed, lifetime of 40 seconds, and its damage of 112 at tournament standard, or a DPS of 140, it can hide underground when not attacking. This means that an enemy has to be in range for it to attack each other.

Good against small hordes and moderate health troops, it can draw Giant, Hog Rider, and other building targeting troops once again, and if hiding, cannot be affected by any spells, except for one.

If frozen underground, it will stay underground. If frozen while attacking, it will stay open.

Fun fact: If frozen while about to go underground, the retreating sound will loop.


Well there you have it, a guide on every single building in the game.

What did we learn? Not much really.

But thanks anyways for reading this tiring guide of mine. Feel free to comment and support us on Clash.World.

Many of you have been asking for my clan, and all I want to say is that G.O.D. FOREVER (my clan) is already kinda packed with 35+ people, so join quickly before we change our clan to invite only, or else I might have to kick some people out. Remember that if you want promote (at least specifically from me), you will have to swear to the #AsianCode.

This is SCorpSCilla, and stay awesome.


Clash Royale Chests

7
Clash Royale Chests in Shop

Definitely Chests are the most wanted item in Clash Royale since you can get all cards by opening them and of course they are the only item in the game at this time haha. Although you can buy Giant Chest, Magical Chest and Super Magical Chest in game with Gems but them all can be acquired when you win the battles

Clash Royale Chests

Summary

Note: Please read this page for all details about the Tournament Chest.

Clash Royale Chests in Shop

Clash Royale Chests

Chest Obtained by Unlocking Time
Wooden Chest Clash Royale

Wooden Chest

Every 4 hours and can be stacked 15 seconds
Crown Chest Clash Royale

Crown Chest

Winning 10 Crowns Instant
Silver Chest Clash Royale

Silver Chest

Winning a match 3 hours
Golden Chest Clash Royale

Golden Chest

Winning a match 8 hours
giant chest

Giant Chest

Buying in Shop or Winning a Match 12 hours
Wooden Chest Clash Royale

Magical Chest

Buying in Shop or Winning a Match 12 hours
super magical chest

Super Magical Chest

Buying in Shop or Winning a Match 24 hours

What do those Clash Royale Chests contain?

Chest Arena Gold Total cards Guaranteed cards
Free Chest Arena 1 21-24 3 No Rare or Epic cards guaranteed
Arena 2 28-32 4
Arena 3 35-40 5
Arena 4 42-48 6
Arena 5 49-56 7
Arena 6 56-64 8
Arena 7 63-72 9
Arena 8 70-80 10 1 Rare
Arena 9 77-88 11
Silver Chest Arena 1 15-21 3 No Rare or Epic cards guaranteed
Arena 2 20-28 4
Arena 3 25-35 5
Arena 4 30-42 6
Arena 5 35-49 7
Arena 6 40-56 8
Arena 7 45-63 9
Arena 8 50-70 10
Arena 9 55-77 11
Golden Chest Arena 1 50-70 10 1 Rare
Arena 2 70-98 14
Arena 3 85-119 17
Arena 4 100-140 20 2 Rares
Arena 5 115-161 23
Arena 6 130-182 26
Arena 7 145-203 29
Arena 8 160-224 32 3 Rares
Arena 9 190-266 38
Crown Chest Arena 1 140-160 20 2 Rares
Arena 2 189-216 27
Arena 3 238-272 34 3 Rares
Arena 4 280-320 40 4 Rares
Arena 5 322-368 46
Arena 6 364-416 52 5 Rares
Arena 7 406-464 58
Arena 8 448-512 64 6 Rares
Arena 9 532-608 76 7 Rares
Magical Chest Arena 1 150-210 30 1 Epic + 6 Rares
Arena 2 205-287 41 1 Epic + 8 Rares (37% chance of containing a second epic)
Arena 3 255-357 51 1 Epic + 10 Rares (70% chance of containing a second epic)
Arena 4 300-420 60 2 Epics + 12 Rares
Arena 5 345-483 69 2 Epics + 13 Rares (30% chance of containing a third epic)
Arena 6 390-546 78 2 Epics + 15 Rares (60% chance of containing a third epic)
Arena 7 435-609 87 2 Epics + 17 Rares (90% chance of containing a third epic)
Arena 8 480-672 96 3 Epics + 19 Rares (20% chance of containing a fourth epic)
Arena 9 570-798 114 3 Epics + 22 Rares (80% chance of containing a fourth epic)
Giant Chest Arena 1 400-560 80 8 Rares
Arena 2 540-756 108 10 Rares
Arena 3 680-952 136 13 Rares
Arena 4 800-1,120 160 16 Rares
Arena 5 920-1,188 184 18 Rares
Arena 6 1,040-1,456 208 20 Rares
Arena 7 1,160-1,624 232 23 Rares
Arena 8 1,280-1,792 256 25 Rares
Arena 9 1,520-2,128 304 30 Rares
Super Magical Chest Arena 1 900-1,260 180 6 Epics + 36 Rares
Arena 2 1,215-1,701 243 8 Epics + 48 Rares (10% chance of containing a ninth epic)
Arena 3 1,530-2,142 306 10 Epics + 61 Rares (20% chance of containing an eleventh epic)
Arena 4 1,800-2,520 360 12 Epics + 72 Rares
Arena 5 2,070-2,898 414 13 Epics + 82 Rares (80% chance of containing a fourteenth epic)
Arena 6 2,340-3,276 468 15 Epics + 93 Rares (60% chance of containing a sixteenth epic)
Arena 7 2,610-3,654 522 17 Epics + 104 Rares (40% chance of containing an eighteenth epic)
Arena 8 2,880-4,032 576  19 Epics + 115 Rares (20% chance of containing a twentieth epic)
Arena 9 3,420-4,788 684 22 Epics + 136 Rares (80% chance of containing a twenty-third epic)

Excepting Wooden Chest and Crown Chest, currently you just can have 4 chests in total.

Goblin Gang – Basic Information and Tips

136

Goblin Gang will be available in Clash Royale in just a few hours.

Let’s take a closer look to see how this card works and how to make the most of it!

Clash Royale Goblin Gang

Clash Royale Goblin Gang

Summary

Clash Royale Goblin Gang
  • The Goblin Gang can be unlocked from Arena 8.
  • The Goblin Gang is literally Goblins + Spear Goblins.
  • When you deploys this card, 3 Goblins are always in the front and 3 Spear Goblins are always behind.
  • This card costs 3 Elixir to deploy.
Level Goblin Hitpoints Goblin Damage Goblin Damage per second Spear Goblin Hitpoints Spear Goblin Damage Spear Goblin Damage per second
1 80 50 45 52 24 18
2 88 55 50 57 26 20
3 96 60 54 62 29 22
4 106 66 60 69 31 23
5 116 73 66 75 35 26
6 128 80 72 83 38 29
7 140 88 80 91 42 32
8 154 96 87 100 46 35
9 169 106 96 110 50 38
10 186 116 105 121 55 42
11 204 128 116 133 61 46
12 224 140 127 146 67 51
13 247 154 140 160 74 56

Strategy

Both Goblin Gang and Skeleton Army cost the same Elixir but the Skeleton Army can potentally deal more damage. The Skeleton Army offers 1005 DPS while the Goblin Gang offers only 402 DPS (but it takes take times for every Skeleton gets locked on the target).

  • The Zap is not able to kill Goblins in the Goblin Gang, making it a great card when couple with Miner
  • The Hog still can land at least 1 hit at the Tower when being attacked by the Gang. However, Goblin Gang is more reliable at dealing with Hog since it can’t be completely killed by Zap.
  • Goblin Gang can completely shut down the Goblin Barrel without being harmed at all. Also, again, Goblins don’t die to Zap so your opponent can’t use Zap to protect the Goblin Barrel completely.
  • The Log, Tornado and Arrows are able to kill the whole Gang.
  • Great at dealing with Graveyard. The Gang also doesn’t die to the Poison instantly.
  • It shuts down the Battle Ram, Barbarians, Sparky, Elite Barbarians, Valkyrie, Minion Horde, Baby Dragon, Executioner (surround it)…  completely for a positive Elixir trade.

All of the information above was shared by Yarn from Orange Juice. For more details, you can watch his video at here:

Will you use this new card? Please share your opinions guys!

Electro Wizard Challenge – Best Tips and Decks

352

Okay so the Electro Wizard Challenge is available right now in Clash Royale! Good luck with the tips and deck I shared here guys!

It is never a bad idea to take a small heads-up of the upcoming event in Clash Royale!

Clash Royale Electro Wizard Challenge

Clash Royale Electro Wizard Challenge

Like all other events, this new event is just temporary. It will last for only 3 days so take the opportunity to get the Electro Wizard (but I bet that it will be extremely competitive since most players want him).

The first entry is free then It will take 100 Gems each time you want to Join.

In this Challenge, you will be able to use all cards (yes, even the ones you haven’t unlocked yet) to build a deck revolving around the Electro Wizard!

As soon as you enter into the Challenge, you are required to make a deck with the Electro Wizard. There isn’t any time limit so take your time to build a great deck! You can change your deck any time while playing in the Challenge. You don’t have to stick with only one deck. Also, you will have 3 deck slots so you can build up to 3 decks and easily switch between them (see the screenshot below).

electro wizard challenge 2

If you get the biggest Chest, you will unlock the Electro Wizard permanently even before the official release. After unlocking him, you will be able to pull him out from any other chest.

It offers not only the same rewards as the Grand Challenge but also a guaranteed Electro Wizard If you can get 12 wins!
 

Number of Wins Total Prize
Gold Cards
0 1,400 20
1 1,900 30
2 2,500 50
3 3,200 85
4 4,000 130
5 5,000 185
6 6,200 250
7 7,600 330
8 9,300 420
9 11,500 530
10 14,200 670
11 17,500 860
12 22,000 1,100 + Electro Wizard

All cards will be set to the Tournament Standards, even when your cards are low leveled.
For example, If you have level 7 Barbarians, they will be set to level 9.

Also, please remember that you can play this Challenge with your friends in Clan via the Friendly Battles menu!
This GIF will give you a lot of motivation!

How to build a great deck for the Electro Wizard Challenge!

Here are a few tips which definitely help you build a great deck for this Electro Wizard Challenge:

First, let’s talk about his HP

The Electro Wizard has 550 HP, meaning the Fireball can easily one shot him. That’s why you should have the Fireball in your deck while playing in this Challenge. I am pretty sure that we will be able to see the Fireball in literally almost any deck. With that being said, most players will not use Three Musketeers decks.

Fire Spirits can’t one shot Electro Wizard even If they can hit him. Bowler needs 3 shots to take out Electro Wizard.

Ice Golem is probably the cheapest counter to the Electro Wizard. Just make sure you place the Ice Golem in time otherwise the Electro Wizard can hit both your Tower and the Ice Golem, resulting in a waste of 2 Elixir and a heap of damage. Personally, I strongly recommend using Ice Golem over Fireball to counter the Electro Wizard.

Mini P.E.K.K.A can one shot Electro Wizard and Ice Spirit. You should take a note of this.

The appearance of Ice Golem, Fireball and Electro Wizard will reduce the userate of bait deck and 3M deck a lot in the future.

Now let’s talk about his damage

Electro Wizard’s damage is 200, which is pretty great, this is equivalent to Lumberjack’s damage.

He can solo kill Musketeer/Wizard on defense. He one shot Minions and Guard shields.

Also, remember that he calls Zap upon so you can drop him right on top of a Skeleton Army or Goblins to defend. Against Goblin Barrel, you can drop him next to your Tower where he can Zap 2 Goblins.

Don’t place him on a Minion Horde otherwise he will get shredded badly (he won’t die but will have just sliver of HP left). It’s better to place him far away from the Horde and let the Tower help him taking them out one by one.

Electro Wizard will definitely give Hog Rider loads of troubles getting to the Tower, meaning we will see Miner control, Siege decks and beatdown decks a lot in this Tournament. Don’t worry about the Royal Giant, he is only deadly If overleveled. If you want to be success in this Tournament, make sure your deck can counter these deck archetypes.

In shorts, here are a few tips for you before joining the Electro Wizard challenge:

    1. Don’t use Inferno Tower in your deck. It is not going to work well against Electro Wizard.
    2. Use Fireball and Mini P.E.K.K.A in your deck to shred through the Ice Wizard. Also, use a card which dies to Fireball in your deck to bait out Fireball.


    1. Chip decks will not doing well.


    1. Beatdown decks and Siege decks will be very popular!


  1. Electro Wizard is great on both offense and defense but his main use is support.
  2. Remember that Electro Wizard hits 2 targets at once so avoid using swarms. For example, it’s better to use Mega Minion instead of Minions in most situations in this Electro Wizard challenge.

This is my Miner Bowler control deck. I strongly believe that It will work with the Electro Wizard very well!

Clash Royale Electro WizardClash Royale Miner

    1. Miner: Clash Royale MinerWorks great with Electro Wizard. Don’t worry If your Miner is a bit late! The Electro Wizard with hit stunning hit will reset the Tower, force it to re-target the Miner.
    2. Fireball: Clash Royale fireballTo deal with the opposing Electro Wizard and chip away the opponent’s Tower.
    3. Electro Wizard – DudeeeeeeeeeeeClash Royale Electro Wizard
    4. Tornado – Clash Royale TornadoVery strong at the moment after the huge buff! It now can easily change lane of any troop nearby the center, pull Hog Rider/Golem/Giant to your King’s Tower. You can deal tons of other tricks with the Tornado. This card is absolutely pivotal in this deck.
    5. Ice Golem – Clash Royale Ice GolemThis is the cheapest counter to the Electro Wizard. Ice Golem also synergies with the Electro Wizard very well. Ice Golem + Electro Wizard’s Zap can kill Minion Horde. Very useful against Siege Decks and Beatdown Decks.


  1. Mega Minion can solo kill the Electro Wizard without the support of any Tower, prepping for any deck using offensive Electro Wizard.Clash Royale Mega Minion
  2. Bowler: Great against swarms and pretty tanky.Clash Royale Bowler
  3. Ice SpiritClash Royale Ice Spirit

In short, Miner Control, Siege and Beatdown Decks are the best ones you will want to use!

Shared by BlueAir


Another screenshot of the last chest by Justin Bartholomew:

Electro Wizard Challenge Deck

I takes some information and the GIF above from Yarn – Orange Juice. You can watch his video below for more details:

Good luck!