Home Blog Page 11

Win Clan Battles with Heavy Spells

63

Using heavy spells in normal battle and in Clan Battles are totally different. For example, in Clan Battles, when you use your heavy spells, regardless of your remaining Elixir, you almost always have the backup from your clanmate. The precise placement and timing of heavy spells can totally overturn a battle.

Below, I will be showing you the best ways of using them to chip away opponent’s Tower and to defend.

Heavy Spells

Win Clan Battles with Heavy Spells

First, I strongly recommend you bring at least 2 spells in your Clan Battle Deck. Preferably 1 cheap spell and 1 medium/heavy spell. This means, together with your friend, you should have 4 spells on your side, 2 medium/heavy spells and 2 cheap spells.

This is the list of spells which can use used on both defense and offense:

Heavy Spells

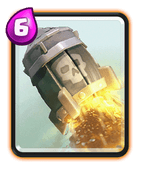
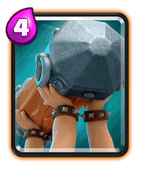
  • Rocket: 1,232 Arena Damage, 493 Tower damage.
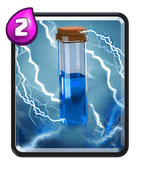
  • Lightning: 864 Arena Damage, 346 Tower damage.

Medium Spells:

  • Fireball: 229 Tower damage.
  • Poison: 8 ticks, 240 damage to Tower in total.

Small Spell

  • Zap: 64 Tower damage.
  • The Log: 96 Tower damage.
  • Arrows: 98 Tower damage.

Assuming that you already known the usage of medium spells and cheap spells by now. They are good at dealing with cheap troops and weakening medium HP troops/buildings. Get as much value from them as you can by using tanks, Miner or Hog Rider to bait out troops.

Ok now let’s get back to our heavy spells!

Clash Royale RocketRocket

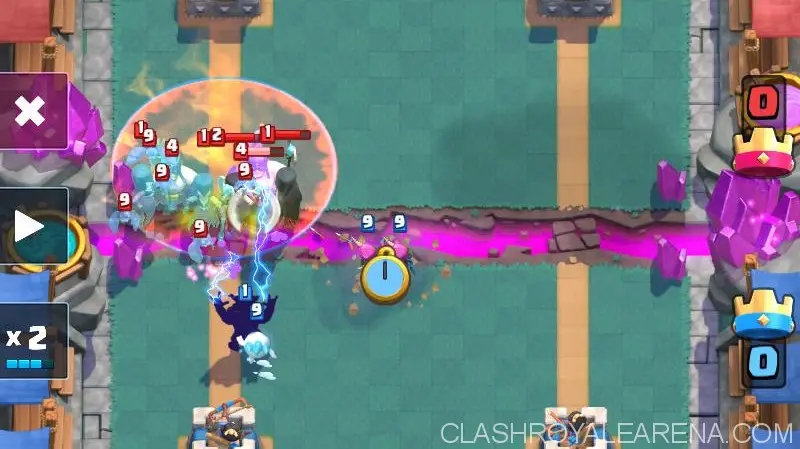
Rocket has literally the highest damage among all spells in Clash Royale.

However, its radius is not ideal at all (only 2 tiles). Thus, you need to make the most of it by group troops then blast them with the Rocket.

You can get great trade with Rocket by blasting these troops and the Crown Tower nearby

Clash Royale BarbariansClash Royale WitchClash Royale BowlerClash Royale WizardClash Royale SparkyClash Royale Executioner

On defense, use Rocket to deal with:

Clash Royale Elite BarbariansClash Royale BalloonClash Royale X-BowClash Royale Mortar

*Mortar + support troops

Try to avoid using Rocket on these troops because you will get negative Elixir trade. Find other ways/spells to deal with them:

Clash Royale Hog RiderClash Royale LumberjackClash Royale Mini P.E.K.K.AClash Royale ValkyrieClash Royale Dark PrinceClash Royale PrincessClash Royale Ice Wizard

  • Lumberjack/Hog Rider/Mini P.E.K.K.A: Too fast. Even If you can touch him, still -2 Elixir trade.
  • Valkyrie: Can’t kill her. Negative Elixir trade.
  • Dark PrinceYou can’t break his shield even with 99999 damage. Negative Elixir trade.
  • Knight: Can’t finish him. Negative Elixir trade.
  • Ice Wizard: Ok you can kill him but you will get -3 Elixir trade. His damage is not good also.
  • Princess: Not worth it. Better use other spells to finish her off like Poison, Log, Arrows, Fireball etc.

To be honest, Musketeer and Electro Wizard are quite situational. They are very threatening If your opponent builds up a heavy push. You will want to blast them together before the opponent places a tank down. Anyway, you still have Lightning, Poison, Lightning etc to deal with them.

Clash Royale LightningLightning

Lightning targets 3 highest HP units. Always wait until you can target 3 units.

For example, If your opponent usually places medium HP troop at the back and his partner will definitely place something else down to avoid Elixir leakage, obtain the value by using Lightning on those two and the Crown Tower nearby.

Although Lightning troops + Tower is tempting but truly you should avoid doing that to gain more positive Elixir trades. Just let your opponents place down several troops down and then kill them all!

This is the list of troops/buildings you should use your Lightning on:

Clash Royale MusketeerClash Royale Electro WizardClash Royale Ice WizardClash Royale WitchClash Royale Mega MinionClash Royale FurnaceClash Royale Goblin HutClash Royale Barbarian HutClash Royale WizardClash Royale elixir collectorClash Royale MortarClash Royale X-BowClash Royale SparkyClash Royale Three Musketeers

On offense, you may want to use Lightning to deal with Inferno Tower/Sparky/Inferno Dragon, allowing your tank to hit the Tower easier.

Also, beware of Lightning rod like Barbarians, Knight, Battle Ram, Ice Golem, Dark Prince and Valkyrie. If your opponents know you bring Lightning, they will most likely clump up their pushes with these troops. Save the Lightning as your trump card to gain huge Elixir advantage. Luckily you always have your clanmate by your side.

Finish Off Weakened Tower

Clan battle is truly very fun but to be honest, we rely on spells a lot during the last 2 minutes.

During this time, heavy spells can to their job very well.

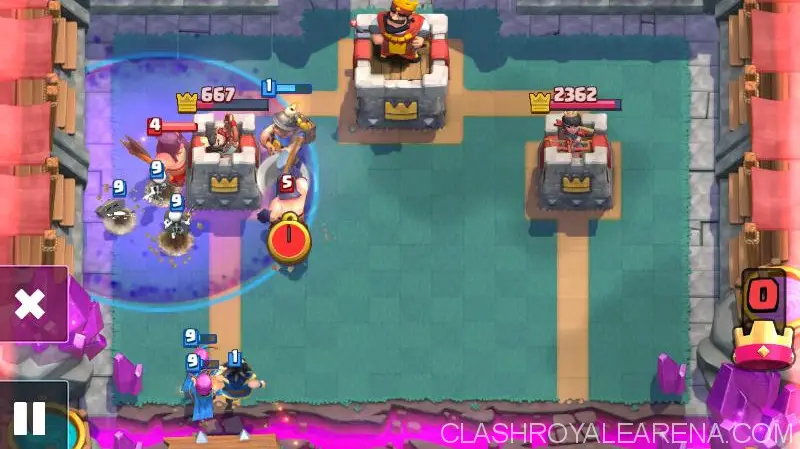
Combined with your friend’s spells, you can easily deal 1000+ damage to the opponent’s Tower in just 1 cycle. But beware because you will be very low on Elixir to defend.

To sump up:

  • Heavy spell shines in Clan Battles.
  • You can rely on your clanmate for defense If you need 6+ Elixir to get positive Elixir trade.
  • There are more troops on the ground than normal battle.
  • Heavy spells + medium/cheap spells = capable to clear troops.
  • During over time, you and your clan mate can easily finish off a weakened Tower with building.
  • Hold your spell on the spot a few seconds before using it so your clanmate can notify that.
  • Poison damage doesn’t stack so don’t try to use 2 at once.

Shared by venyong

Fast Beatdown Cycle Deck Guide! Gotta Go Fast!

92
beatdown cycle

Wassup guys! It’s B-Yatch’CH (aka DabMaster2) back at it again with another deck guide for you guys. Today I’ll be explaining cycle decks or fast beatdown decks.

Cycle decks use 1 main win condition and continuously cycle through the deck to be able to play that same win condition very quickly. These cycle decks can take advantage of other decks not being able to keep up to the quick pace.

Let’s get into it!

beatdown cycle

Complete Guide on Using Beatdown Cycle

Pros and Cons

Pros

  • Out cycle your opponent’s counters
  • Continually pressure your opponent
  • Very versatile
  • Strong advantage against Slow Siege
  • Chip away at the enemy tower

Cons

  • Strong disadvantage against Medium Control
  • Sometimes can be weak to heavy beatdown decks if they can get a large push going
  • Sometimes can be difficult to get through many hard counters to your win condition
  • It may be hard to deal massive damage on a tower at one time

How to Make a Cycle Deck

Step 1: Win Condition

The win condition is the most important part of the cycle deck.

Being able to cycle quickly through to this card is crucial. This card generally cannot be too expensive so it can be played easily.

Here’s a list of cards which can be used:

Clash Royale Hog RiderClash Royale MinerClash Royale X-BowClash Royale Mortar
Clash Royale GiantClash Royale GraveyardClash Royale BalloonClash Royale Elite Barbarians

Step 2: High-Damage Troop

The main weakness against cycle decks are big and heavy tanks. You will need to use a dedicated and versatile support troop which has the capability to dish out high DPS and take out many troops. Examples:

Clash Royale MusketeerClash Royale Electro WizardClash Royale ArchersClash Royale Mega MinionClash Royale WizardClash Royale Executioner

Step 3: Defense

Almost any building can work in a cycle deck, though not all cycle decks need a building. The best buildings to use are cannon and inferno tower. The cannon allows you to have a cheap and powerful defense. Having an inferno tower gives you a better chance against heavy beatdown decks. Furnace can be used to give the deck more control of the battle.

Another aspect of the defense is a tank or a high-health troop which can absorb damage. Knight or Ice Golem is most commonly used.

Step 4: Cycle Cards

Cycle cards are what makes up the aspect of a cycle deck.

Most cycle decks only use 2-3 cycle cards. The most common cycle cards are Skeletons, Ice Spirit, and Ice Golem. Anything 3 elixir or below can be considered a cycle card, though at least one of your cycle cards must be 1 elixir to ensure a faster cycle.

Cycle cards include:

Clash Royale SkeletonClash Royale Ice SpiritClash Royale Ice GolemClash Royale GoblinClash Royale Spear GoblinsClash Royale Fire SpiritsClash Royale Goblin Gang

Step 5: Spells

Cycle decks must use synergizing spells. Spell synergy allows for easier fixes and fast gameplay.

The best spells to use are Fireball, Poison, Tornado, Zap, and Log. Rocket and Lightning can also sometimes be use.

Cycle decks will normally use 2-3 spells.

Real Fast Beatdown Cycle Deck Analysis

2.6 Hog Cycle Deck

Clash Royale Hog RiderClash Royale MusketeerClash Royale Ice GolemClash Royale Cannon
Clash Royale SkeletonClash Royale Skeleton ArmyClash Royale ZapClash Royale fireball

Hog – Win Condition: The Hog is a powerful tower killer with good health and good damage. It’s cheap cost of 4 elixir allows easy cycle and fast attacks.

Musketeer – High Damage Troop: The Musketeer is used to provide high DPS and ranged support on defense and offense.

Cannon and Ice golem – Defense: The cannon is a cheap and solid defense. The Ice Golem is used on defense to tank damage or offense to soak up damage for the Hog Rider.

Skellies and Ice Spirit – Cycle Cards: These are versatile cards which can be used in many situations. They help to cycle through your deck to give you a better hand.

Fireball and Zap – Spells:  These two spells synergize very well. They can be used offensively or defensively.

You can take a look at here to read more about this deck!

X-Bow Cycle Deck

Clash Royale X-BowClash Royale Electro WizardClash Royale KnightClash Royale Inferno Tower
Clash Royale SkeletonClash Royale Ice SpiritClash Royale The LogClash Royale fireball

X-Bow – Win Condition: The main goal of this deck is to play as many X-bows as possible and whittle down the enemy tower by cycling through your cards. The X-bow must be protected by all your troops while it devastates the enemy tower.

Electro Wizard – High Damage Troop: Electro Wizard provides strong ranged support and can zap upon placement. His stun ability help to stall troops and protect the X-bow.

Inferno Tower and Knight – Defense: Inferno tower kills pesky tanks for a solid defense. The Knight can soak up lots of damage to protect the X-bow and provide decent DPS.

Skeletons and Ice Spirit – Cycle Cards: These cycle cards can be used to be able to cycle to another X-bow. They can also protect the X-bow well as a distraction.

Fireball and Log – Spells: Fireball and Log work very well to protect the X-bow. Fireball can kill many troops and The Log can push back anything in its path.

Clash Royale Arena shared this deck a few days ago. You should take a look at here for more details about it!

Miner Poison Cycle

Clash Royale MinerClash Royale Electro WizardClash Royale Inferno TowerClash Royale Knight
Clash Royale SkeletonClash Royale Ice SpiritClash Royale The LogClash Royale Poison

Miner – Win Condition: Miner is used to slowly chip away at the enemy Tower. He can also be used as a counter push to tank for remaining injured troops

Electro Wiz – High Damage Troop: He provides so much value as a ranged support card. He helps support the defense to stop almost any push.

Inferno Tower and Knight – Defense: To tank can get past while the Inferno Tower and Knight clean things up!

Skeleton and Ice Spirit – Cycle Cards: These cycle cards can be used on defense but their main purpose is to help cycle through to another Miner.

Poison and Log – Spells: Miner and Poison will slowly but surely whittle down the enemy Tower. The Log is used for clearing out small troops.

Take a look at here for more details about this deck!

Playstyle

The main playstyle is to send Mini pushes at your opponent, and conserve enough Elixir to defend against a counter push. Using too much Elixir may let your opponent deal massive damage to your Tower on a counter push.

Remember, you are no trying to deal heavy damage to a Tower and cripple down in one push. Cycle decks rely on fast cycling to be able to chip away at the enemy Tower. You need to keep constant pressure so your opponent doesn’t have the time to create a massive push.

Patience is key! Don’t expect to take down a full Tower in one push. Be patient and let your troops slowly chip away at the enemy Tower. I see many amateur cycle players who invest too much Elixir on a push expecting for it to take down a Tower, be instead gets countered easily.

Out Cycling

What makes a cycle deck a cycle deck is its fast card rotation. There are two separate ways to out cycle your opponent.

Attack Bombardment – Attack bombardment is when you bombard your opponent with attack after attack after attack. For example, a Hog cycle deck attacks with Hog + Musketeer + Ice Golem, but once the attack is over, the Hog cycle player places down Musketeer, Ice Spirit, Skeletons, Ice Golem, and is already able to play another Hog rush. Once an attack is over you can cycle through to another attack mere moments after.

Bait Cycle – Bait out your opponent’s hard counter to your win condition then strike hard. This can’t always be pulled off. It can only work if you have cards which need to be countered by a single card. For example, if you are using a Graveyard cycle deck and you see your opponent place their Graveyard counter(s), attack hard to punish them.

Noticing Mistakes

Sometimes, it can be hard to get your win condition to kill the Tower. You will need to notice these most common mistakes and capitalize on it to cripple your opponent.

Over-committing – Over-committing is a very deadly mistake of your opponent. If you have noticed your opponent has invested too much Elixir on a push, immediately counter-push and deal massive damage. When your opponent is out of Elixir, all they can do is watch as you deal heavy damage to their Tower.

Over-Defending – Like over-committing, over defending is when your opponent uses too much defense. Since cycle decks have cheap attacks which can be cycle to continuously. If your opponent over-defends, you can take advantage of the Elixir advantage and attack swiftly.

Focusing on Only 1 Lane – Good cycle deck players will attack both lanes to keep your opponent off balance. The only exception is Miner Poison because it relies on Miner and Poison to slowly chip one Tower. If your opponent is always expecting you to attack one lane, juke them out and attack the other side.

Countering Tanks

TheRumHam wrote an important article about the Doomsday Machine theory which ties into how to counter tanks with using a cycle deck.

Imagine there is a 10-Elixir legendary building called the Doomsday Machine. It has a lifespan of 90 seconds but if your opponent can place down two of these, it’s an automatic win.

This card would be a strategy which can be used by players.

Would you play passively? No, since you are going to lose if your opponent can place down a second Doomsday Machine.

Investing 10 Elixir on the machine leaves your opponent vulnerable to a large attack.

This card doesn’t exist, but the concept exists in decks.

Think about it this way: A Golem player investing Elixir on a large push is already creating his own “Doomsday Machine”. A Lavaloon player stacking up all his troops behind his Lavahound is also creating a Doomsday Machine. If the push is uninterrupted, the Doomsday Machine is unstoppable and can lead to a win for your opponent.

When playing a cycle deck and your opponent uses a heavy beadown deck, they are the one possessing the Doomsday Machine and it is up to you to disrupt it. You must pressure your opponent and attack the other lane so your opponent doesn’t have the chance to build up the Doomsday Machine.

Let’s say you are using the 2.6 Hog cycle deck and your opponent is using Giant beatdown. Giant + Bowler + Mega Minion + Poison is too much for only Musketeer and Cannon to hold off. The Hog player must disrupt their buildup and attack Hog the other lane.


That’s it for now, any questions, comments, or insults, post them in the comments below. Have a Clashtastic Day!

Clash Royale Princess – Advanced Guide, Strategies and Tips (Updated)

2

You just got the Princess and you want to know the best ways to use her?

Or you just lost the last match just because of the opponent’s Princess and you really want to counter this annoying girl now?

No worries! You will find everything you need to know about her in this guide!

clash royale princess

Clash Royale Princess

Clash Royale PrincessI don’t tell you my opinion; I’m telling you the facts.

In case you don’t know, Princess was very famous in many decks before Zap bait deck is coming out. You will see the sight of Princess and Ice Wizard together in Golem, Giant, Royal Giant, Hog Rider, almost any decks in Clash Royale.

From then on, Legendaries mean everything to us. Craving for legendary cards so badly, we are always hoping someday we will get either one as the legendary drop rate is incredibly low.

Legendary cards have always held a special allure. They symbolize power, prestige, and the potential to turn the tide of battle with their unique abilities. For many players, obtaining these elusive cards has been a long-standing goal, often pursued with fervor and anticipation.

Yet, as the game evolves and balance changes come into play, the significance of legendary cards has undergone a transformation. What was once a relentless pursuit for these rare gems has shifted towards a more strategic approach, where the utility and versatility of cards take precedence over rarity alone.

Take, for instance, the iconic Princess. Once revered for her ability to rain arrows from afar, she now finds herself overshadowed by the changing meta. With her slow hit speed, she struggles to fend off threats like the Elite Barbarian, even with support from spells like Freeze or Tornado. In this new landscape, players are turning to more adaptable cards that offer both defensive capabilities and support for offensive pushes.

Enter the Dart Goblin. Sharing similar health points with the Princess, this agile attacker has emerged as a formidable alternative. Specializing in chip damage, the Dart Goblin excels in creating Chip cycle decks, which capitalize on wearing down opponents over time. This strategic shift not only introduces a fresh playstyle but also opens up opportunities for innovative tactics, such as Arrow Bait decks, leveraging the expected increase in Arrow usage following the Zap nerf.

What’s intriguing is that despite the potential of Dart Goblin and Princess decks, they remain largely unexplored territory. This presents an exciting opportunity for players to pioneer new strategies and carve out their niche in the ever-evolving Clash Royale meta.

The beauty of Clash Royale lies in its adaptability. As cards rise and fall in popularity, players are constantly challenged to rethink their strategies and embrace new possibilities. In this sense, the evolution of legendary cards mirrors the broader evolution of the game itself—a testament to its enduring appeal and capacity for innovation.

So, if you’ve ever found yourself yearning for that legendary drop, perhaps it’s time to shift your perspective. Instead of chasing rarity for its own sake, consider the strategic potential of lesser-known cards like the Dart Goblin. Who knows? You might just discover a winning formula that sets you apart on the battlefield.

However, by the way, that’s the past. Nowadays, Princess is losing her glitter due to her slow hit speed. She is unable to stop an Elite Barbarian, even with the help of Freeze or Tornado. Thus, people ends up choosing more versatile cards that can perform any defense yet assist in a push.

Dart Goblin shares the same health points with Princess. They are chip damage dealers and playing well in creating a Chip cycle deck which could potentially add hidden tactics, Arrow Bait – I expect a slight uptick in Arrow’s usage soon due to the Zap nerf.

None of these Dart Goblin or Princess decks have been created so far, and it might be your chance to start one.

Summary

  • You can unlock the Princess from Arena 7.
  • Princess has very low HP but insane attack range (9 tiles), allowing her to snipe the opponent’s Tower from the opposite side.
Hit Speed Speed Deploy Time Range Target Cost Count Rarity Type
3 sec Medium 1 sec 9 Air & Ground 3 x1 Legendary Troop
Level HP Damage DPS
1 216 140 46
2 237 154 51
3 261 169 56
4 287 186 62
5 315 204 68
Changelogs
  • 23/3/2016: HP decreased by 10%.
  • 24/8/2016: Arena Damage Radius decreased by 25%

Strategy

Chip Damage without Engaging into a Battle

The outstanding stats that only Princess acquired in Clash Royale is her attack range. Range distance which could out-range the towers rendered this card an Overpowered Legendary. To balance the game, she dies in one shot by Arrow and Log.

Because of it, we often hide Princess at the back of the tower and far away from the battles to allow her to make her shots safely. This way could prevent the opposition to take her down along with your troops by just using a spell card.

Pulling her out of the fights annoyed the opponent is several ways: She is weak, so does her damage and yet her little damage could change the direction of any battles in the arena.

If the opponents don’t address to Princess, you may end up allowing Princess to do chip damage to your towers later on and even worse; another Princess is summoned on the other side. Remember that deploying double Princess at the same place is not a good idea, as separated Princess may force out at least 2 cards from your enemy.

In the fast-paced world of Clash Royale, every card placement can make or break a game. Among the vast array of troops and spells at your disposal, the Princess stands out as a delicate yet potent force on the battlefield. Understanding how to utilize her effectively can turn the tide of battle in your favor. One key strategy that seasoned players often employ is keeping the Princess safely tucked away at the back of the tower, away from the chaos of frontline combat.

The reasoning behind this tactic is simple yet strategic: by positioning the Princess behind your towers, you minimize the risk of her being taken out by enemy troops or spells prematurely. Unlike other units with higher hit points and defensive capabilities, the Princess is relatively fragile. However, her ranged attack allows her to target enemy troops and buildings from a safe distance, making her a valuable asset in controlling the battlefield.

By keeping the Princess out of direct combat, you deny your opponent the opportunity to easily counter her with a single spell card. Many Clash Royale players have experienced the frustration of watching their carefully deployed troops fall victim to a well-timed Fireball or Log, wiping out both the offensive push and the Princess in one fell swoop. Placing her behind your towers forces your opponent to commit more resources or make riskier plays to reach her, disrupting their strategy and potentially giving you the upper hand.

In short, the ultimate strategy of playing a Princess like Pro is screwing up the enemy’s summoning order. It’s not that difficult to do so as long as you learn when and where to place this 3 elixir Legendary card.

Consistently Pressuring

Same as most Chip Cycle decks, Princess is useful in taking chip damage thereby pressuring the opponent. Consistently play a Princess while the enemy is running out of elixir or cheap cards like Goblins (troop) and Arrow (spell) apply pressure to the opponents as it indirectly forces them to spend their elixir.

Sometimes, you may put down a pre-emptive Princess to lure out the opposing forces before making a terrifying push. By this way, the chance of tearing down the tower would be higher than not doing so. Consequently, other Princess could show up if your deck cycle is speedy.

Here is the cycle of how you play Princess all the time in the arena:

  1. Deploy Princess on the bridge, making one or two shots to the tower.
  2. When the enemy deploys troop and building up a push later, try to stop them with a real trade.
  3. If they are using a spell to eliminate Princess, push immediately as they don’t have that spell in the rotation to enforce their defense.
  4. Try to make a counter-push by taking advantage of their offense. By the time, Princess should probably be cycled back. Drop her outside the battle to assist your team.
  5. If the first Princess still survive after the fight and another Princess is ready, drop her on the other lane for chip tower damage.

For me, I would pair up Princess with beefy, tanky units like Giant, Golem, Royal Giant, and LavaHound-Aerial combo maybe.

These troops combination will last longer in the arena and allow Princess to assault from behind because the opponents need to deal with those tank combos since they are way more threatening than a lone Princess.

clash royale princess 2

Long Range is the Best Protection

Princess is like the Sniper of Clash Royale. Long hit range gives her advantage to attack and keep her safe at the same time.

Typically, we drop Princess at the other lane so she could attack the invading troops on the opposite side. The opponent would have to cast another spell specifically for taking down the Princess rather than assist their push.

However, the downside is Princess would not distract the opposing troops since she attacks from somewhere further. Hard hitters like Mini Pekka, and Elite Barbarian still able to rush to the tower and devastate the tower very quickly.

Another way to make use of her long hit range is hiding her behind the King’s Tower, making her invincible for a while. However, this technique only applies to the scenario where none of your towers had been taken down.

Take account of Princess’ long hit range whenever you build a deck is also a great idea.

Since we all agree that we have to take out the Princess, perhaps, the best way is by using either Log or Arrow, so adds Log-able and Arrow-able troops like Skeleton Army and Goblin Barrel may create secondary win condition for your deck.

Arrow, Log, Fireball Bait

Well, a popular strategy for deck building with Zap-able troops like Minion Horde, Goblin Barrel, and Skeleton Army, baiting out the opponent’s Zap and take benefits of the moment to strike is so called Zap Bait deck.

After the Zap being nerfed, I suppose there would be Arrow-bait or Log-bait deck with Princess, Dart Goblin, Goblin Barrel, and others Log-able troops because Goblin Barrel is now immune to Zap.

Soon, we would have Goblin Gang joining the battle. This type of “Bait” cycle decks are going to grow within the arena, maybe even becoming the new Meta. I don’t think this is what Supercell want as it’ll boost the usage of Hog Rider to all time high.

Clash Royale’s Meta decks change over time, particularly when there is a balance change update. Apparently, we are heading to Arrow-Bait and Log-bait Meta decks, but gamers are creative. That means more innovative decks shall rise to balance the Bait cycle decks.

strategies and deck compositions constantly evolve with each balance change and introduction of new cards. One of the most intriguing developments in recent times has been the transition from Zap Bait decks to Arrow and Log Bait decks, reshaping the competitive landscape and challenging players to adapt to new tactics.

Zap Bait decks have long been a staple in Clash Royale, revolving around the use of cards like Minion Horde, Goblin Barrel, and Skeleton Army to bait out the opponent’s Zap spell, creating openings for devastating counter-attacks. However, with the nerf to Zap, players have begun exploring alternative strategies centered around baiting out Arrow or Log spells instead.

The rise of Arrow and Log Bait decks is characterized by the inclusion of cards such as Princess, Dart Goblin, and Goblin Gang, which are resilient to these spells and can punish opponents who rely too heavily on them for area denial. The recent immunity of Goblin Barrel to Zap further strengthens this archetype, making it a formidable force on the battlefield.

As players adapt to these new dynamics, the Clash Royale meta is undergoing a significant shift. Arrow and Log Bait decks are gaining popularity, offering a fresh take on the traditional bait strategy and forcing opponents to rethink their approach to deck building and gameplay.

However, with the emergence of these new decks comes the potential for unintended consequences. The increased usage of Arrow and Log Bait decks may inadvertently elevate the prominence of certain cards, such as the Hog Rider, which synergizes well with this archetype and can exploit openings created by baiting out opponent spells.

This evolving meta underscores the dynamic nature of Clash Royale, where innovation and adaptability are key to success. While Arrow and Log Bait decks may dominate the current landscape, players are constantly experimenting with new strategies and deck compositions, ensuring that the meta remains fluid and unpredictable.

I believe the innovative decks would have more splash units like Valkyrie, Wizards, Witch, and even Executioner. Splasher decks are completely immune to Bait decks as Bait cycle decks always build around with swarms.

Shared by Unstoppable

Complete Guide to Using Princess v2.0

Shared by IndoorBreathing88

Countering

Princess is the card that you should react to immediately otherwise you will take literally infinite damage. People usually use spells as the reliable counters because they can take her out almost immediately and also do some great damage to the Tower.

Clash Royale The LogClash Royale ArrowsClash Royale MinerClash Royale fireballClash Royale Poison

Best Counters to Princess:

  • The Log: Undoubtedly this is the best counter to Princess! However, because of this, many tanks will try to bait out The Log by using Princess so you just don’t rely on it too much!
  • Arrows: Another great counter. Same as above, watch out for spell bait cards!
  • Miner: This is a decent counter. He can take out the Princess decently and force your opponent to deploy another card to defend. Be careful with the placement by the way because your opponent could use Tornado on him.
  • Fireball: Because this is a negative Elixir trade so only use this If you can damage the Tower also.
  • PoisonIf the opponent defends your push with Princess on the same lane, don’t hesitate to Poison her, the Tower and troops nearby!

Other ‘okay’ counters to Princess

  • Mini Tanks such as Knight, Valkyrie, Lumberjack, Mega Minion, Bandit, Mini P.E.K.K.A… can effectively counter the Princess then transform into the counterpush.
  • Squishy Cards such as Skeletons, Fire Spirits, Spear Goblins: Wait until the Princess locks on something else otherwise the Princess will 1 shot them. However, these cards can be countered reactively.
  • Cheap Cards such as Goblins, Guards, Archers, Goblin Gang, Minions, Dart Goblin – These cards can take out Princess in just one tick but some can be easily taken out by The Log.
  • Other Spells such as Tornado, Lightning – Not the best but work very well.

Offense

Although Princess does little on her own, she is a very good card to support offensive push.

Some great uses of her on offense:

  • Doing Chip Damage – This is the most well-known use of the Princess. Simply drop her at the bridge to deal chip damage. This is probably one of the best opening moves.
  • Applying Pressure: Using Princess usually forces your opponent to do something to react.
  • Chipping troops or buildings -Place her on the other lane to defend or in the middle to chip away Furnace, Tombstone, Elixir Collector etc.

Behind a tank, she can successfully deal with Skeleton Army and brings Minions, Goblins, Archers HP etc down to Zapable.

Remember that you can’t do anything to stop your opponent from using spells on her. But you can use predict The Log to deal with Spear Goblins, Goblins, Skeletons, Fire Spirits etc.


Defense

Princess’s best use is on defense for sure.

I always try to place her on the opposite lane while defending to snipe away the opponent’s push. However, she doesn’t do a lot damage herself so you still want to couple her with something else.

Always use her from a distance unless you are desperate.

He is reliable at dealing with swarms and spawner decks. To prevent the opponent from using spells on her, place her near your King’s Tower on defense.

Princess can shutdown these cards effectively:

  • Goblin Gang, Spear Goblins, Goblins – She can take out Spear Goblins in just 1 shot and leaves Goblins at critical HP.
  • Minions, Minion Horde – Brings Minions to 1-shit-able HP.
  • Barbarians -By doing constant chip damage, she can take out Barbarians in just a few shots.
  • Skeleton Army – R.I.P
  • Fire Spirits – R.I.P
  • Clone: R.I.P
  • Guards – With the help from the Tower, Guards will not be a problem at all.
  • Mega Minion – Prevents Mega Minion from doing 516 damage at Tournament Standard.
  • Bomber: Unless you want to take that 271 damage at Tournament Standard.

Tips

  • Drop her at the bridge to do some chip damage at the beginning is always a great move. This forces your opponent to react immediately.
    On the other hand, If you are using a heavy deck, drop her at the back to force the opponent to make the move. Due to the long attack range, she can help you defend any push.
  • If your opponent keeps using cheap cards to counter her, consider making a predict with Zap/The Log.
  • When your Princess is alone and the opponent sends out a Miner, it’s like 99% the Miner will target your Princess. Use any small card to protect her!
  • When your opponent plays the Princess at the back, you can drop your Princess at the bridge and on the same lane. Your Princess will hit the Tower and the opponent Princess first and of course the opponent’s Princess will die first.
  • If your opponent doesn’t have any spell in his hand, use Princess behind the King’s Tower to defend. She will help your counterpush later.

Interactions

This is the list of some interesting card interactions for you:

  • Arrows 7 levels higher will kill a Princess.
  • Zap 12 levels higher will kill a Princess.
  • The Log 1 level lower will kill a Princess.
  • Minions 6 levels higher will survive a Princess shot. Shared by TheeNinjaa
  • Spear Goblins 11 levels higher will survive a Princess shot.

Strategies

Princess works best in these decks:

  1. Spell Bait
  2. Chip Cycle
  3. Hog Cycle

Best Princess placements

Shared by IndoorBreathing88

princess defending on the opposite lane
Princess defending on the opposite lane
Princess defending behind the Tower
princess at the bridge
Princess at the bridge
princess snipe a building at the center
Princess snipe a building at the center
princess defending in front of King's Tower
Princess defending in front of King’s Tower

Decks

There are a ton of decks using Princess effectively just because of her awesomeness but I am just mentioning one in this guide, the deck I am using right now.

The one below is one of the most popular decks at the moment.

Clash Royale BanditClash Royale PrincessClash Royale The LogClash Royale Goblin Barrel
Clash Royale Goblin GangClash Royale fireballClash Royale Skeleton ArmyClash Royale Inferno Tower

This deck can easily counter Giant, Hog Rider, Golem and so many other meta win conditions. The only trouble you may find are fast cycle and Lava Hound decks.

I hoped you enjoyed this advanced princess guide on how to use her, as well as basic strategy.

Thanks for reading!

6 Best Opening Moves in Clash Royale

303
best opening moves in Clash Royale

In Clash Royale, it is actually biased in favor of the player who moves second. People usually choose not to move first in order to react properly… But there is always a guy who starts first, right?

best opening moves in Clash Royale

Best Opening Moves in Clash Royale

When you make the move second, although you lose Elixir (usually less than 1 Elixir If you can react fast), you still get a ton of information.

Player, who makes the first move, usually gives enough information regarding what kind of push it is and which lane he/she is going to push.

The player who reacts can freely decide to whether defend or attack on the other lane. Either, he/she will gain the advantage.

However, there are still numerous opening moves that gives you the huge advantage, or at least mitigate the downside.

The Neutral Opening Move

You can force your opponent to commit by playing an opening move which doesn’t commit you.

The most common play is to split Archers behind the King’s Tower. This one is completely neutral as it doesn’t commit to any lane. The Archers will either do some delicious chip damage or will help you deal with push on any lane. This move applies a pressure on your opponent, forcing him/her to commit. If he/she decides to do nothing, you will get 3 Elixir for free. If they do, you will be the reacting one.

A neutral move can also be done by using Skeleton Army, Minions, Goblin Gang although they are not 100% neutral as they device unequally. Moreover, with Skeleton Army and Minions, one side can be safely ignored so you will need to be able to support it later on.

Using Minion Horde is not recommended as it’s too much Elixir.

Also, playing Princess behind/in front of the King’s Tower is okay as she can defend both lanes and she is also slow.

starting with princess

Starting with Princess

The Cycle Move

If you have a very cheap troop like Ice Spirit or Skeletons, use this opportunity to cycle and shape your hand.

Although your opponent doesn’t have to react to Skeletons or Ice Spirit, you will get the advantage because you now have a better hand.

That’s great If your opponent does the react. If he/she doesn’t, you can make an initial push with your Skeletons/Ice Spirit. For example, you can couple the Ice Spirit/Skeletons with your Hog Rider/Mortar. Remember that you don’t have to do so. You can just keep waiting or make another move with other troops.

It is recommend to split Skeletons at starting because If your opponent decides to push, Skeletons will act as distraction regardless of either lane.

The Light Push

If you have cheap troops with the potential for chip damage, you can try to force your opponent to answer the light push.

For example, drop Spear Goblins or Fire Spirits at the bridge at the beginning. If your opponent chooses to not defend, you will get some nice chip damage and cycle your deck. If your opponent defends with spell, you just managed to get it out of the cycle; try to capitalize on that! If the opponent answers with a troop, you just forced them to commit on that lane, giving you the reactive seat.

2 Elixir troops are best for this move but you can absolutely do it with 3 Elixir troops. Using 3 Elixir troops is more risky. However, your opponent usually can’t afford to ignore them. Also, If he/she has a bad starting hand, you will get ahead.

For example, playing Goblin Gang at the bridge puts your opponent in an absolutely dangerous situation, forcing them to react immediately on that lane. If the opponent uses Log on the Gang, they will get +1 Elixir trade. However, If he/she reacts a little bit late, he/she will lose the Elixir advantage. In this case, basically, you spend 1 Elixir to get the reactive seat.

Goblin Barrel, Dart Goblin, Miner, Princess etc are other great examples for 3 Elixir troops which can’t be ignored.

starting with goblin barrel

Making a light push with Goblin Barrel

Spawner Opening

Starting the game with Furnace or Goblin Hut is great as this applies the pressure on your opponent immediately while still acting as defense.

Place them in the middle to protect both lanes, making it harder for the opponent to punish you. He/she also can’t ignore them.

Tombstone is another great opener, which can be used to support your push later.

Elixir Collector

Using Elixir Collector has been a well known opening move since 1990s.

This doesn’t commit you to any lane and gives you a huge Elixir advantage. However, make sure you have a good defensive hand ready because If your opponent doesn’t have Miner/Rocket/Barrel ready, he/she will try to punish you with a sneaky big push.

The Aggressive Push

Do you want to catch your opponent off-guard with an all-in push?

Truly this is a very risky play so make sure you have an extremely solid starting hand which is difficult to be countered and is great enough on defense If the push fails. To be honest, I don’t like this opening move very much but it’s kinda lacking to not include it here.

For example, use Hog Rider + Ice Spirit push or Miner + Minions push can do significant damage If your opponent doesn’t have a good starting hand. However, If your opponent can deal with the push properly, this can put you far behind.

If you are playing against a less experienced player, you can get the chance of catching someone who didn’t skip the battle’s intro screen.

Bonus: Source: Oh Long Johnson


In conclusion, there are a lot of great opening moves in Clash Royale.

Also, please note that I didn’t mention Siege decks in this guide as I am not good at using Siege…

Which one works best for your deck? Let you know what you think about it!

Of course you can start the battle by placing a tank behind the King’s Tower but it will definitely give your opponent the advantage.

Shared by Filobel

Clash Royale Arena Tournament

98
cra tourney

Once again, we are going to have the 14th Clash.World Arena Tournament this weekend!

cra tourney

Clash Royale Arena #14 Tourney!

  • Name: Clash.World Tourney #14
  • Password: kairostime
  • Tourney is open for joining at 9:30 AM MST (Mountain Time) this Saturday, November 25th 2017.
  • This is 1,000-player Tournament.

Password unlocked for invited players at 8:00 AM (MST).
Password (kairostime) unlocked for everyone at 9:30 AM (MST).
Tournament starts at 10:00 AM (MST).

If you have any question, feel free to comment below.

Good luck guys!

Ultimate Guide to Managing Elixir – Basic and Advanced Tech

88

Hello Fellow Clashers! I’m KairosTime and today I’m bringing you a Strategy Guide on How to Manage Elixir so you can improve your gameplay! This is a guide for new players and experienced alike!

This written guide comes with a video guide that includes specific examples that I would recommend watching!

clash royale elixir

How to Manage Elixir in Clash Royale

Table of Contents

  1. What is an Elixir Advantage?
  2. All the ways to get an Elixir Advantage
    1. Spells
    2. Troop Interactions
    3. Elixir Collector
    4. Spawners
  3. 3 Resources to Managing Elixir
    1. The Elixir Bar & Leaking
    2. Tower HP
    3. Time

What is an Elixir Advantage?

An Elixir Advantage is when your total Elixir is greater than your opponent’s.

This includes the Elixir in your Elixir Bar, as well as the cost of the troops that you have on the field.

It has been said that even a 5 Elixir advantage total can win you the entire match. This means that it is essential to try and manage your elixir so that you can overwhelm your opponent.

Note: While an Elixir Advantage is extremely important, there are other important aspects in the game that can win or lose you a match despite Elixir Advantages. I will cover these in future videos and guides.

All the ways to gain an Elixir Advantage!

There are lots of ways to get an Elixir Advantage, and some are more complex than others. We’ll cover them in order of how easy it is to understand the advantage you’ll get.

Spells

This is the easiest to calculate. You can get an advantage by spending less to clear a troop with a spell than your opponent spent to put that troop down.

All this requires is simple math.

Examples:

  • Spend 2 Elixir to Log 3 Elixir Goblin Barrels for a +1 Elixir Trade
  • Spend 3 Elixir to Arrow 5 Elixir Minion Hordes for a +2 Elixir Trade
  • Spend 4 Elixir to Fireball 5 Elixir Barbarians for a +1 Elixir Trade

princess and the log

Positive Elixir Trade? Fanart by captainsunshines

Troop Interactions

The way that troops interact with each other will also help you gain an elixir advantage if you play the right troops in the right places.

There are 3 ways that troops will interact in order to help you gain an advantage:

  • Death for Death
  • Death for Counterpush
  • Death for Answer

Death for Death

A Death for Death interaction is where the troop that you place will clear the enemy troop, but will die in the process. To get an advantage, you need to spend less elixir defending than the cost of the enemy troop

Examples:

  • Spend 3 Elixir for a Mega Minion to clear a 4 Elixir Baby Dragon for a +1 Elixir Trade
  • Spend 2 Elixir for Fire Spirits to clear 3 Elixir Minions for a +1 Elixir Trade
  • Spend 2 Elixir for an Ice Golem to clear a 3 Elixir Skeleton Army for a +1 Elixir Trade

Death for Counterpush

A Death for Counterpush interaction is where you place a troop that will defend the enemy push so that your troop will have full, or near-full health. This allows you support that troop, or use that troop as support for another card for a strong counterpush.

Because your opponent spent Elixir with their push, but your troop has full health, they will have to spend more Elixir to clear that troop which gives you an advantage.

Examples:

  • 3 Elixir Skeleton Army to defend a 3 Elixir Miner
    • With the majority of the Skeleton Army still alive, your opponent will have to spend more elixir to get rid of it
  • 7 Elixir PEKKA to defend a 4 Elixir Hog Rider
    • With a full-health PEKKA and your opponent being down 4 Elixir for the Hog Rider, you’ll be able to support the PEKKA with an Elixir Lead
  • 4 Elixir Valkyrie to defend a Goblin Gang
    • Use the Valk to support your win condition to make for a difficult push to stop.

Death of Answer

This is very similar to Death for Counterpush, except that you don’t support your defending troop but your opponent still has to spend Elixir to counter your defender.

Getting an Elixir advantage this way depends on your opponent making poor card choices to get an advantage. This makes this a non-reliable way to get an advantage, but it’s important to note.

This can be a smart move if you want your opponent to go on the offense when you’re ready for them.

Examples:

  1. Spend 3 Elixir for a Mega Minion to clear a Princess at the bridge.
    • If your opponent defends with an Ice Spirit this would be an +1 Elixir Advantage.
    • If they defended with a Musketeer, this wouldn’t be an advantage
  2. Spend 4 Elixir for a Furnace to clear 3 Elixir Minions that would then require a response
    • If they defend with a Poison only or Fireball only, this would be a +3 Elixir Advantage (-1 for Minions, and +4 for the spell)
  3. Spend 3 Elixir for Minions to clear a lone Knight
    • If your opponent defends with Zap, this would be a +2 Elixir Advantage
    • If your opponent didn’t defend with anything, this would be a neutral trade

Elixir Collector

The Elixir collector is really simple, but it also has 1 aspect to it that a lot of people don’t think about, and that can cost them the game.

The simple part with the Elixir Collector is that you invest 6 Elixir for the Elixir Collector to give you a total of 8 Elixir over a period of time. This is a 2 Elixir Advantage (That’s simple). That’s not the only aspect to how the Elixir Collector gives you an advantage.

Elixir Collector and Elixir Rate

The biggest advantage of the Elixir Collector in my opinion, isn’t the 2+ Elixir Advantage, but the fact that it gives you a faster Elixir Rate during the duration of the Elixir Collector.

Normally, you gain 1 Elixir every 2.8 seconds (1.4s in 2x Elixir). When you have an Elixir Collector down, this increases your Elixir rate to 1 Elixir every 2.1 seconds (1.1 in 2x Elixir). This means that if you can put down an Elixir collector and keep it safe, you will have a faster Elixir Rate than your opponent, which means you can put troops down faster. If you use this advantage right, you can use this to overwhelm your opponent.

If my opponent has the Fireball or Poison, I will still use the Elixir Collector as long as I can spare some health on the tower closest to it because I will still have a faster Elixir rate than my opponent. Also, playing the Elixir Collector brings the advantage of forcing your opponent to go on the offense when you want them to. This gives you control in the match in addition to getting an Elixir Advantage.

Spawners

When it comes to spawners, the math starts to get more complicated. Ultimately, you need to know that if a Spawner isn’t dealt with, it can produce massive value if it isn’t dealt with properly. They allow you to defend while putting pressure on your opponent.

To best explain how Huts give value, here is a chart that I will explain:

spawners

  • Cost: This is the Elixir cost to place the hut down (Simple, right?)
  • Waves: This is the number of waves that are produced during the lifetime of the spawner (Still with me?)
  • Cost w/o spawn: This is how much it would cost to deploy the same number of troops if you didn’t have the spawner. The number in parenthesis tells you how much you save in Elixir if the Spawner isn’t damaged in battle
  • Cost per wave: This is how much elixir it costs for each individual wave of troops coming out of the Hut. If you want to get an Elixir Advantage against a spawner, you will need to spend a small amount of elixir to get rid of as many waves as possible

Example:

  • The Barbarian Hut costs 7 Elixir and produces 5 waves of 2 Barbarians which is a total of 10 Barbarians.
  • In order to normally produce 10 Barbarians, you’d need 2.5 sets of the regular 4 Barbs. This would theoretically cost you 12.5 Elixir but because you only spent 7 Elixir to put the Hut down, this theoretically gives you a 5.5 Elixir advantage
  • In order to get an Elixir advantage when facing a Barbarian Hut, you would need to spend less than 1.4 Elixir per wave, or put down a troop that would take care of multiple waves (like a Bowler)

Because of the mechanics of Spawners, they can be used to get an Elixir Advantage if your opponent doesn’t have a good way to clear them, or doesn’t know when to absorb damage, and when to defend.

Shout out to FIGGY0023 (FIG Kid Clashet) and his stunning contents.

3 Resources to Managing Elixir

Aside from gaining Elixir Advantages through the means previously mentioned, there are other resources that you can use and master in order to manage your Elixir to ensure you have the advantage.

These additional resources are:

  1. The Elixir Bar (Leaking)
  2. Tower Health
  3. Time

The Elixir Bar & Leaking

When you are at 10 Elixir, you stop generating Elixir and won’t continue generating Elixir until 1 second after you place your next card (more on that 1 second later).

This is called Leaking or Bleeding Elixir.

If you leak too much, and your opponent doesn’t leak any Elixir, you can get a disadvantage simply because you took too long to play your card.

By making sure you never, or rarely leak elixir, you can give yourself the advantage.

1 Second Server Delay: Clash Royale said in a comment on Reddit, “There is an intentional 1 second delay built into card deployment for all players, which helps to smooth out different degrees of latency across the globe.

Important: Because of this 1 second Server Delay, if you do not want to leak elixir, you have to play your cards at least 1 second before you are at 10 elixir.

The diagram below shows when you should place your cards so you don’t leak any Elixir:

elixir leak clash royale

Note: If you are using the Elixir Collector, the bar should be 1 Elixir before so that you don’t lose the Elixir that your pump generated.

Tower Health

The 2nd resource that you can use in order to manage your elixir is your tower’s health.

Important: The only HP that counts is the last HP on all of your towers! Every other HP is just a means to get to that last HP, but only that last HP will get you a crown.

One of the differences between a good player, and a great player is how well they use their tower’s health as a resource by allowing an enemy troop to damage a tower rather than defending so they can save up Elixir.

Examples:

  • Use a 3 Elixir Mega Minion to defend a Hog Rider rather than a 3 Elixir Cannon. The Hog Rider will do damage to the tower, but you can then support that Mega Minion for a counter push that will be difficult to stop since the opponent spent 4 Elixir on a now-dead Hog Rider
  • Rather than defend against a Miner who is on a tower with a decent amount of HP, rush the other lane, or drop a big tank (PEKKA or Golem) and build up a push. By doing this instead of defending the Miner, you have more Elixir on the field and that can make it difficult for an opponent to stop you.
  • Defend an Electro Wizard with Skeletons and let him hit your tower once. By allowing him to hit your tower, you’ve gained a 3+ Elixir advantage that you can use to punish your opponent later.

Important: It takes a lot of practice to know when you can afford to take some damage on your tower, and when you should focus on defending. By mastering this one principle, you will truly become a master in The Arena!

Time

The last topic we’ll touch on when it comes to managing your Elixir is the resource of Time. When it comes to time, troop placement and troop speed play a big role in how you can use time as a resource to gain Elixir.

Troop Positioning: By placing your troops in different locations, you can gain more elixir than your opponent in the sense of having more troops on the field by the time they reach the bridge. By placing a slow troop at the bridge, you essentially have 0 seconds to gain more elixir in order to support your troop, but if you put it behind the King’s tower, you have 16.8 seconds to build up Elixir, which allows you to make an even stronger push with the additional 6 Elixir you’ve generated in the time it takes for that slow troop to reach the tower.

Troop Speeds: Slower troops give you more time to build up Elixir before they reach the bridge, while faster troops give you some time, but maybe not enough to actually make this advantageous. Below is a charge explaining how much Elixir you can gain depending on the troop speeds by placing them behind your King’s Tower in both 1x and 2x Elixir.

troop speeds

Example: By placing a Giant at the bridge, you have 0 seconds to gain elixir before your main push has begun. By placing a Giant behind the King’s Tower, you have 16.8 seconds to gain elixir before your push has begun. By the time your Giant makes it to the bridge, you will have built up an additional 6 to 12 Elixir (1x and 2x Elixir) that you can use to Defend the other lane, or to support your main push.


Thanks so much for reading this guide! If you made it this far, you should now have the tools necessary to Manage your Elixir.

This is Part 1 of a series I am coming out with that I call, “The Strategy Guide to Clash Royale”.

If you’re interested in learning more, make sure you subscribe on my YouTube Channel so you can be the first to see my guides.

If you have any questions, feel free to leave them as comments on my video and I’ll get back to you as soon as I can!

Ticking By,

KairosTime

Medium Control Decks – Information and Basic Tips

1

Hey guys! Its me Blaze Stone back with another guide for you all! This is my 2nd guide of the series ‘Advance Control Decks’.

Let’s talk about Medium Control deck today!

medium control deck

You can see my earlier guides here:

  1. Control Deck 101
  2. Fast Control Decks

Everything You Should Know About Medium Control Decks

What is a Medium Control Deck?

A medium control deck is a control deck whose average elixir cost ranges from 3.3 elixir to 3.8 elixir which means it is a medium paced deck.

These decks are pretty versatile as they can defend against fast cycles as well slow pushes effectively as they have a balance of offense and defense and cheap and expensive troops.

Pros and Cons:

Pros:

  • Very versatile.
  • Have ability to give a good fight against all decks.
  • Can shift from defensive to offensive more easily than other decks.
  • Strong advantage against Fast Beat down.

Cons:

  • Takes time to know when to shift from offensive to defensive and vice versa.
  • Can have a hard-time gaining crowns because they can’t play as aggressively to damage as Fast decks and can’t form a big elixir advantage and strike hard like a slow deck.
  • All-round balance even though beneficial can be a drawback sometimes as it isn’t strong in anything particular. Sorta like ‘Jack of all trades but master of none’.
  • Strong disadvantage against Slow siege.

Types of Medium Control Decks:

Now, you won’t read this anywhere except here but this will help you understand Medium Control Decks better. Also, a big thanks to Bandit FTW to bring this point to attention to me.

He said that although his deck falls in medium speed range it is actually played like a fast deck. I actually though about this and many more decks came to my mind so that’s why I am gonna talk about this.

Also, the main reason this thing happens is because Medium speed range is transition zone between fast and slow decks.

So you actually get lot of difference between a 3.3 elixir deck and a 3.8 elixir deck even though they fall in the same speed range.

  1. Fast-Medium Control: These decks have a avg cost of 3.3 and 3.4 elixir. Even though they fall in Medium Range their play style tilts towards fast decks.
  2. Pure Medium Control: These decks have a avg cost of 3.5 and 3.6 elixir. They fall more or less exactly in between the Control deck avg cost range(2.5 to 4.5 elixir) which makes them balance in terms of defensive and offensive capabilities.
  3. Slow-Medium Control : These decks have a avg cost of 3.7 and 3.8 elixir. Even though they fall in Medium Speed range their play style tilts towards slow decks.

What principle/tactic it uses?

In the last guide. I talked (sorry wrote) about 2 tactics: Offensive control tactic and defensive control tactic.

Offensive control relies on continuous offense to restrict opponents offense where as Defensive Control relies on strong defense and gaining elixir advantage to strike hard.

As Medium decks have a balance between offense and defense, the tactic it follows is also a mixture of these two tactics and it is called ‘Counter-pushing’. Surprising eh? Counter-pushing means successfully defend the opponents push by gaining a bit of elixir advantage and then using the advantage to counter push with your win-condition and troops left on defense. This is the main tactic of medium control decks.

Fast-Medium Control decks follow both Offensive Control and counter pushing as they are basically fast control decks with more costlier defensive cards.

Pure Medium control decks mostly follow counter-pushing but as they are in between they can shift from counter-pushing to offensive control and defensive control as per the opponents deck and playstyle.

Slow-Medium Control decks follow defensive control and counter pushing tactics as they are basically slow control decks with a cheaper offensive cycle.

What is the general game plan?

The general game plan should be heavily based on counter pushing!

Start your games slow with sending lone win condition to scout his counter or make passive plays like placing Musketeer behind king tower.

Play defensive in the first 2 minutes and do weak counter pushes to keep on offense and pressure.

In the double elixir time, go on the offensive mode and counter push aggressively by using troops left on defense as well as new troops and spells dealing as much damage as you can.

Finally, in OT shift to ultimate defensive mode and use spell cycle to win.


What win conditions should be used?

Miner: The ultimate counter pusher. Decent HP and ability to pop anywhere makes him best for such decks.

Hog Rider: The most versatile hog comes here as well. High Damage, decent HP and good speed and cheap cost makes him great in such decks.

Battle Ram: This card was underrated when released, suddenly rose in popularity and now disappeared again. This card is pretty good counter pusher as it can tank hits and destroy any buildings.

Graveyard: This card when played right is so OP. If not countered properly, it can devastate a tower.

Threat cards: These cards are not used as win conditions but more like as a threat that if not countered can deal lot of damage. Players play them(or rather act) as their win-condition but don’t actually treat (or depend on) them as their win condition. Instead the above cards are used as the win-conditions.

P.E.K.K.A.: P.E.K.K.A. in control decks is treated more like a tank and defensive card while the win condition is actually Miner, Hog or Battle Ram. People focus more to defend P.E.K.K.A. while the actual damage is dealt by the other win condition.

3 Musketeers: 3M in control decks are used to apply pressure on both lanes while the player actually focuses on attack on one lane. 3M split in the ratio 1:2 so on the lane with 2M they drop a mini tank. This is not a proper push but is vary powerful way to apply pressure. And the actually push is on the other lane with 1M with the win-condition(Miner, Hog or ram) and a swarm cards. So the player doesn’t really concentrate on 2M but on the 1M. The opponent has to defend both of them but mostly uses his spells on 2M while using a cheap and less-effective defense on the 1M. This enable the 1M push to cross the defense and damage.

Examples:

This speed range has a lot of variety so giving a slot method isn’t possible so I will be sharing examples.

Hog Trifecta

Clash Royale Hog RiderClash Royale MusketeerClash Royale ValkyrieClash Royale Fire Spirits
Clash Royale MinionsClash Royale ZapClash Royale PoisonClash Royale Inferno Tower

Miner Bandit Control

Clash Royale MinerClash Royale BanditClash Royale PoisonClash Royale The Log
Clash Royale MinionsClash Royale Goblin GangClash Royale Electro WizardClash Royale Inferno Tower

I posted a guide for this deck before at here.

Battle Ram Poison

Clash Royale Battle RamClash Royale PoisonClash Royale ZapClash Royale Valkyrie
Clash Royale Ice WizardClash Royale ArchersClash Royale Inferno TowerClash Royale Minions

I also have a small guide on this deck. You can take a look at here for more details!

P.E.K.K.A. Miner Poison Burner

Clash Royale P.E.K.K.AClash Royale MinerClash Royale PoisonClash Royale The Log
Clash Royale SkeletonClash Royale Ice SpiritClash Royale KnightClash Royale Goblin Gang

3M Ram Cycle

Clash Royale Three MusketeersClash Royale Battle RamClash Royale elixir collectorClash Royale The Log
Clash Royale SkeletonClash Royale Ice SpiritClash Royale KnightClash Royale Goblin Gang

Graveyard Poison

Clash Royale GraveyardClash Royale KnightClash Royale PoisonClash Royale The Log
Clash Royale SkeletonClash Royale ArchersClash Royale Electro WizardClash Royale Furnace

I hope these decks will give you the basic idea of making Medium Control Decks.

Thats all folks! Hope you guys liked this guide and I will be glad if it helped you. Be ready for the next and final guide of this series ‘Slow Control Decks. Ask me about anything in the comments section below.

By Blaze Stone

The Encyclopedia of Chip-Cycle

317

Hey it’s GetShrekt here bringing you guys my first ever guide for Clash Royale.

Chip-Cycle decks can be hard to play, and aren’t the right pick for everyone.

However, Chip-Cycle decks can be very powerful against almost all decks if you can play them right. Many key components to Chip-Cycle decks are unlocked in the early arenas, so this playstyle should be a viable choice for any player.

Today I’ll be sharing my guide of how to create and play Chip-Cycle Decks.

chip cycle deck

The Ultimate Guide to Chip-Cycle

Table of Contents:

  1. The Basic Idea
    1. What is a Chip-Cycle Deck?
    2. How can I make a Chip-Cycle Deck?
  2. The Basic Strategy:
  3. Advanced Strategy
  4. What You Should Know:
  5. Chip Cycle Decks

The Basic Idea:

What is a Chip-Cycle Deck?

A Chip-Cycle Deck is a deck consisting of cheap cards that allow you to gain advantages over your opponent and put constant pressure on them, denying their large pushes.

Many Chip-Cycle Decks contain cheap cards like Minions, Skeletons, or Goblins to try to gain elixir advantages through positive elixir trades.

Additionally, Chip-Cycle Decks will contain rush cards like Goblin Barrel, Miner, Hog Rider, or Princess. Rushing your opponent either forces them to defend and split up their synergy cards, or suffer large amounts of damage.

Many people underestimate the power of cheap troops. Lots of players are unaware that many cheap cards in the game can counter very powerful and expensive cards. Also, cheap troops can deal lots of damage if not dealt with.

Because of this, Chip-Cycle Decks will put constant pressure on your opponent and if played properly, can deny your opponent from creating large pushes. Now that you know about Chip-Cycle Decks, let’s learn how to create one.

How can I make a Chip-Cycle Deck?

Warning: Chip-Cycle Decks do not need Legendaries, but they do help a lot and will give you an advantage over your opponent. Miner and {rincess are two great cards for this playstyle, and you could face some problems if these Legendaries are not unlocked.

Chip-Cycle Decks are fairly easy to make because they have several key components, but each role in the deck can be carried out by many different cards.

Usually a Chip-Cycle Deck will contain two-three cards designed for defensive value. These cards should be able to take out troops on your side of the arena for a positive elixir trade. Goblins, Skeletons, and Minions are all a great choice.

Also, a Chip Cycle Deck will usually contain only one or two stronger defensive cards. These are very important because they are what define the decks defense. If your opponent drops expensive cards for a big push in one lane and you rush the other, these strong defenses will be your lifeline. Inferno Tower, Furnace, Mini P.E.K.K.A, Musketeer, Valkyrie, and Knight are some of the best choices.

Next, a Chip-Cycle Deck should have at least one spell. Spells come in handy on offense to clear away swarms and on defense to help stop gigantic pushes. Fireball, Poison, Arrows, Zap, and Log are the most viable options to use.

And last but certainly not least, offensive rush cards. These cards will deal the most damage to your opponent’s towers and put pressure on them, forcing them to react. Goblin Barrel, Hog Rider,Bandit, Battle Ram, Miner, and Princess are all great choices.

Here are some of my basic templates & examples for a Chip-Cycle Deck:

Cycle Card Low-Cost Support Troop Killer Medium Spell Main Offense Low-Cost Tank Killer Strong Tank-Killer Light Spell Utility
Skeletons Knight Poison Hog Mega Minion Inferno Tower Zap Ice Golem
Ice Spirit Valkyrie Goblin Barrel Hog Goblins Inferno Tower Zap Princess
Ice Golem Minions Guards Miner Goblins Musketeer Log Furnace

chip cycle deck 2

The Basic Strategy:

How to play with a Chip-Cycle Deck

Warning: Chip-Cycle Decks are not everyone’s playstyle. If you choose to play this Deck type you may need some practice in order to be a strong player with the Deck type.

Even though Chip-Cycle may appear to be the hardest play-style possible, it actually can be quite easy once you get the hang of it. I have broken this playstyle down into three parts: How to respond to a lone tank, How to counter a large push, and When to rush your opponent.

How to respond to a lone tank:

The best move to respond to a tank in the back is to rush the other lane with your offensive troop, or play a siege card like the Princess forcing them to respond. This way they can’t afford to put supporting units behind their tank, making it easier to be taken out by your strong defense.

If a good offensive card is not in your hand, I would suggest dropping a cycle card or putting high damage cards a few tiles behind the bridge to put your offensive troop in front.

TL;DR: Rush the other lane and be prepared to counter the tank with a strong defense

How to counter a large push:

Countering a larger push can be somewhat difficult. However, lucky for the simple formula-tank killer, support distracter, support killer, and spells for swarms you should be perfectly fine.

Say for example you have Inferno Tower, Skeletons, Zap, and Knight in my hand when your opponent drops Royal Giant and Electro Wizard at the bridge. You should drop Inferno in a frontal plant for the Royal Giant and Knight to take care of the Electro Wizard.

Say you rushed the other lane in response to a Golem with Hog Goblins but your opponent Cannon Zapped killing your push. Now they are able to place a Baby Dragon, Musketeer, and Minion Horde at your Tower. You play a building in the kill zone to kill the tank, a support killer like the Valkyrie for the Musketeer, a ranged or air-targeting troop like a Musketeer for the Baby Dragon, and finally a splash troop like a Wizard or spell for the Minion Horde. Now you have many troops for a powerful counter-push and should put an offensive troop in front for a counter-push.

TL;DR: Use a tank killer, support distracter, support killer, and spells to counter large pushes, and then counter-push with what’s left of your defense and an offensive troop

When to rush your opponent:

There is four main situations where you know you should rush your opponent.

  • When you know they are out of Elixir. You can do this by gaining continuous positive Elixir trades and using your arena towers to help out.
  • When you know their counter to your offensive troop is in rotation. If you see them drop their main defensive card as an offense or in a high health Tower lane it is a great idea to rush them.
  • When you know you have a troop or spell ready to counter their defense. If you know your opponents defenses saving a spell or hard counter to their defense is a great move.
  • Finally, when you have countered an expensive push. Now they have little Elixir and will most likely only have cheap troops. A strong counter-push is a strong rusher like Hog Rider or Elite Barbarians supported by a swarm or splasher and a spell on hand.

chip cycle deck 4

Deck Match-Ups

Chip-Cycle Decks are generally a well-rounded Deck against all decks. Below will be a summary of both what you should expect, and how to play against all the other decks archetypes in the game.

Against Beat-Down (Golem, Giant, and Lava hound)

Beat-down decks are a very powerful Deck archetype. It is key to know this Deck’s fatal weakness, in that the Deck will have poor defense and requires a lot of Elixir to build the three-crowning push. Therefore, this Deck match-up will be decided by your ability to apply constant pressure on your opponent, dealing damage to their towers well avoiding their massive pushes.

Against Hog Decks

Hog decks are very common right now at the top of the leaderboards because of their power on both offense and defense. What’s key to defeating this Deck is knowing that most Hog decks have powerful, expensive, singular-unit defenses like Valkyrie, Musketeer, Cannon, etc. That being said splitting up your offense after they pushed or any time you have an Elixir advantage is a smart move.

Against Royal Giant

Most of the time you will win because the Royal Giant needs proper support to be effective. Putting pressure on your opponent avoids this. Also, Royal Giant decks are weak to counter-pushes which can result in one push take-outs. The only thing to watch out for is Electro Wizard and Minions if you are using Inferno Tower since it can be distracted or killed.

Against Zap Bait

This purely depends on the cards in your Deck. Splashers will counter Minion and Goblin cards well and spells can crush Goblin Barrel and Skeleton Army. Having many spells and splashers basically insure the win. Always make sure you use the right card for the job, and don’t let your cards fall out of rotation.

Against Miner-Chip Decks

Chip-Cycle Decks have lots of cheap cards so the Miner will have a rough time hitting your Tower. Even if they have spells for you cheap troops you will always have more counters. On offense simply focus on letting your opponent push, and then counter push. Miner decks have poor defense due to their highly composed offense.

Against Three-Musketeers

Chip-Cycle Decks may face some problems against three-Musketeers because they crush cheap troops. However, if you use modified Deck types like in my templates above, you can manage a few stronger cards. Having both a medium and light spell and/or a strong support killer will crush three-Musketeers as long as you have them in rotation. Even though they are a nine Elixir card, it is not a good idea to rush them because you will need lots of Elixir to defend. It’s not like your countering a lone tank, you could be a two-three Elixir watching a Mini-tank and three Musketeers take both towers.

Advanced Strategy

How to get the best value

Value trades are one of the most important plays to make in a match using a Chip-Cycle Deck. A value trade or positive Elixir trade is when you counter an opponent’s card with a card cheaper than theirs. Chip-Cycle cards are one of the best Deck archetype to gain many value trades using cheap units and spells. Below will be listed the troops types in the game and their best value counters.

  • Tanks/Offenses: Use defenses to pull building targeting troops and a high damage cheap card like Goblins or Skeletons to deal even more damage and then counter-push. A tank on its own will be way easier to counter and you’ll receive better value.
  • Supports: Either surround with cheap troops like Skeletons/Goblins or counter directly with a support troop killer like Knight or Valkyrie. If a support is on its own, it’s best to surround since your Tower can help out. However, if a support is behind a tank you will need a support troop killer and defense or high damage card for the tank.
  • Swarms: This is the hardest area to gain value. Instead, you want to focus on getting their swarms out of rotation for your pushes, or always have a spell ready. If you bring only one spell, I would suggest saving it for their skeleton Army, and if they don’t have skeleton Army then for their Goblin Barrel. All other swarms are best taken out by a splash troop like a Wizard or Executioner.

chip cycle deck 3

What You Should Know:

Level Advantages/Disadvantages

Warning: Chip-Cycle Decks will be less effective if your cards are lower than your opponent, mainly because cheap troops have the greatest interaction change if they are lower level.

Over-leveled opponents are Chip-Cycle Deck’s kryptonite. If your opponent’s towers or cards are even one level higher than your cards, the battle could be completely different. With cheap troops, many interactions change when your opponent is higher leveled than you are. Here is a list of things you should know if you are facing people higher than you with a Chip-Cycle Deck.

Your Offense:

(Cheap Troops will deal decreased or no Tower damage)

Any cheap troop such as Archers, Minions, Spear Goblins, Goblins, Fire Spirits, and Ice Spirit will deal almost no damage when your opponent’s towers are one or more levels higher than your cheap troops. Also, if their Zap kills your Goblin Barrel, you should reconsider using it. Finally, if you are using furnace and their towers are three or more levels higher than your Furnace, they won’t make it to the Tower As an example, Minions equal level as your opponent’s towers will get off quite a few shots and at tournament standards, round up to about three-hundred and fifty damage. However, when your opponent’s towers are one or more levels higher, your Minions achieve less than seventy-five damage.

Facts to remember:

  • Zap six or more levels higher than Goblin Barrel will kill the Goblins
  • A crown Tower three or more levels higher than a furnace will not let fire spirits connect to the Tower
  • Your opponent can safely ignore your cheap troops if his towers are one or more levels higher than your cheap troops (Goblins, Spear Goblins, Archers, and Minions will get decreased damage, both the Ice Spirit and Fire Spirits will get no damage)

Your Defense:

(Spells will overrun your cheap cards)

On defense any cheap cards will be vulnerable to over-leveled spells, since they will kill cheap troops. For example, at equal level, Zap will not kill Minions, but if the Zap if two or more levels higher than the Minions, they will die. This means if your opponent plays a heavy-hitter or offense for your Tower and he has over-leveled spells for your cheap troops your Tower will be taken. You should be very cautious and have many defenses prepared against over-leveled spells.

Facts to remember:

  • Zap one or more levels higher than Goblins will kill them
  • Zap two or more levels higher than Minions will kill them
  • Zap two or more levels higher than an ice Spirit will kill it

Card Substitutes

Some players may find a great Chip-Cycle Deck that has a legendary or two in it that they do not have unlocked yet.

The world isn’t over, please do not panic.

Most players think that a card with no other cards like it has no substitutes, but they’re all wrong. What matters is that the substitute will have the same purpose as the original legendary.

All legendaries will have substitutes, no matter how similar or different the change will be. Just make sure to keep in mind that legendaries can be substituted, and to play the Deck how you should with the substitute and not the legendary.

Some substitutes might be a different cost, hit/not hit air, have more/less health, have more/less damage, etc.

Below are a list of legendaries commonly found in Chip-Cycle Decks and their most viable substitutes.

Types of Changes:

  • Attack Type (Splash/Single Attack)
  • Range (Melee/Ranged)
  • Elixir Cost (Higher/Lower)
  • Quantity (Singular/Plural)
  • Targeting (Ground, Buildings, Air & Ground)
  • Health (Higher/Lower)
  • Movement Speed (Faster/Slower)
  • Damage (Higher/Lower)
  • Card Type (Troop/Spirit/Spawner/Defense/Spell)

Here are some legendary substitutes to Chip-Cycle Legendaries:

  • Princess: Zap, Fire Spirits, Arrows, Archers, Dart Goblin, Musketeer, Baby Dragon, Wizard, Witch, Bowler, Executioner
  • Ice Wizard: Zap, Fire Spirits, Arrows, Archers, Minions, Mega Minion, Dart Goblin, Bomber, Musketeer, Baby Dragon, Wizard, Executioner, Witch, Bowler
  • Miner: Knight, Ice Golem, Hog,
  • Bandit: Knight, Mini P.E.K.K.A,
  • Lumberjack: Knight, Mini P.E.K.K.A, Valkyrie, Mega Minion
  • Log: Zap, Arrows, Fire Spirits,

Chip Cycle Decks:

Decks you can try!

Here are some Chip-Cycle Decks that I have used or am using right now and have worked out well:

  • Skeletons, Zap, Hog, Goblin Barrel, Arrows, Valkyrie, Inferno Tower, Minions
  • Furnace, Hog, Battle Ram, Log, Fire Spirits, Ice Golem, Musketeer, Mini-P.E.K.K.A
  • Goblin Gang, Miner, Battle Ram, Musketeer, Mega Minion, Zap, Fire Spirits, Mini-P.E.K.K.A
  • Miner, Skeletons, Knight, Ice Wizard, Wizard, Log, Fireball, Lightning
  • Ice Golem, Hog, Ice Spirit, Goblins, Cannon, Fireball, Zap, Musketeer, Skeletons
  • Battle Ram, Elite Barbarians, Zap, Goblin Barrel, Princess, Furnace, Fire Spirits, Ice Spirit

Conclusion

Chip-Cycle Decks are a very powerful, but hard learned Deck that can crush many metas in this game. Very few players are using this Deck archetype right now and are unaware of its capabilities.

I tried to cover every aspect of this Deck type in this article but if this still wasn’t enough I am truly sorry.

Please feel free to send me your decks or suggestions for more guides via the comment section below.

I may be starting a YouTube channel down the road and could feature all your unique decks.

Please try these decks if you are having trouble on the ladder, as these decks can crush the Royal Giant and Golem Metas all over Legendary Arena.

Thank you for your time and I hope you have a great day!

Stealing Miner Cycle Deck for Challenges

643

It’s XxBismuthxX here! On my first successfully submitted guide for Clash Royale arena! On this guide I will be talking about my Stealing Miner deck!

I posted this deck because of its power of multiple lane attacks that can both take a tower usually causing great damage. This deck is also fun (at least for me) to play which to be honest is the real point of CR!

stealing miner

Stealing Miner Cycle Deck

Clash Royale MinerClash Royale BanditClash Royale LumberjackClash Royale Ice Spirit
Clash Royale GoblinClash Royale ZapClash Royale Fire SpiritsClash Royale Minions

miner cycle analytics

Cards Breakdown

Bandit : We use this sneaky outcast in a similar fashion to Lumberjack, however there is a difference, more on that later. She is used like Lumberjack in defense and can wreck a Tower for 3 Elixir if played right.

Lumberjack : This speedy wood chopping guy is used for its crazy crushing damage that can solo a Tower with little help. Also used to defend a push coming your way unless it’s an air push. The Rage can be used to gain massive Tower damage fast enough that it is really hard to react to.

Miner : This Royal digger is never used on defense but it used to make a cheap powerful push that can take a Tower. This card is often accompanied with some stabby Goblins holding knives.

This digger is used to tank for units like these:

  1. Bandit (so she can take Tower and not die before taking Tower)
  2. Goblins (so they can do all they can while the Miner is tanking)
  3. Lumberjack (so he can chop longer and do more damage)
  4. Minions (same as the gold stealing stabby Gobs)

miner placements

Don’t send Miner to the red spots. Most of the time, you want to send him to the green spots.

Minions : These blue merciless flying Minions are used as your air defense and can be used with Miner to wreck the Tower. These blue Minions are mainly used on defense with their high DPS and the ability to fly (not get attacked by some ground units).

Fire Spirits : these fiery huggers are used to support Lumberjack and Bandit as they go to assault the Tower. These huggers can be used on defense as a counter to swarm type units these spirits can also be used on a Tower solo to deal a couple hundred damage if ignored which will probably be your opponents reaction to these Spirits solo.

Ice Spirit : This icy dude is a Zap resistant Spirit that can be used to buy you time on offense or defense. Also seen with Bandit or Lumberjack so they can get extra hits off.

Zap : this Mini Lightning hits units with a stun that is often used while skeleton armies and other . Swarm like units dare to get hands on your Lumberjack or Bandit. Can also be used as a . . defense against many units, ground or air.

Goblins : and last but not least we have our gold stealing stabby merciless Goblins that are used to attack with the Miner and sometimes used to defend hogs and other units that can’t target them or have slow hitting speed (ex : Mini P.E.K.K.A or P.E.K.K.A)

Fun fact about Goblins: They only attack towers because Princesses and Kings wear plenty of jewelry and expensive clothing and body ornaments (made this fun fact up)

Card Replacements

Note: don’t change the deck too much and try to maintain a cheaper cost

Gameplay:

First seconds: (3:00 – 2:30)

Scout opponents deck and defend. If they don’t attack go first with one of the cheaper pushes mentioned down below. And just go back and forth and try to do damage, you however probably won’t take a Tower unless your opponent is a noob, if so and you take a Tower use the laugh emote because this is the right time to use it (at least I laugh) also keep a low profile and use 3/4 of deck and keep Bandit and another card hidden if possible

Middle game: (2:30 – 1:00)

Now is pre x2 Elixir time so try to take or wreck a Tower (I’ve taken two in certain matches)

Also defend because you want to have minimal damage done to your towers is you are facing a deck that loves overtime/double time (ex : P.E.K.K.A, Golem, three Musketeer and more) this is also the time to use Bandit if going well if you are struggling keep Bandit a secret for a bit longer

x2 Elixir time: (1:00 – 0:00)

Now is the time to strike with everything you have and do several multi lane pushes and counter pushes, also keep an eye on defense as you push and take towers (do the mid game stuff too)

Overtime: (0:00 – -1:00)

Be careful what you do and keep pushing also keep an eye on defense I would do some Bandit sneak pushes now but you can do these in double Elixir time too, not just overtime.

Keep in mind if your opponent has any heavy DPS cards like Three Musketeers or P.E.K.K.A. If you can’t win, draw because time here in this stage of the game is on your side (especially in the last 20-30 seconds).

Pushes

Bandit Sneak: Use Bandit to get plenty of hard to react to damage on Tower:

  1. Do a Lumberjack push with fire/Ice Spirit(s) Note: do not use Zap this step
  2. While the Lumberjack’s Rage is up place a Bandit on the middle of enemy’s side (you must have taken one Tower already). After this prepare Zap if necessary.

Cold/hot Cutter: Lumberjack + Fire/Ice Spirit(s)

  1. Deploy Lumberjack and Spirit(s)
  2. Prepare Zap and be ready (especially if use Ice Spirit not Fire).

Mined Goblins: Use Goblins + Miner

  1. Deploy Miner and Goblins
  2. Prepare Zap

All forces in: Use everything possible

  1. Deploy Miner + Goblins + both spirits + Bandit + Lumberjack + Minions (do as many as possible)
  2. Prepare Zap
  3. Keep deploying until you 3-crown or until it seams clear that your push will fail

Matchups

Lava hound: Worst matchup go for the draw especially if it is a heavy push with Inferno Dragon Balloon Baby Dragon and more. Try to use air like units wisely and if possible bait Arrows before using Minions, and try to pressure them so they can’t push

Royal Giant: Fairly easy matchup! You got the Lumberjack and Bandit and if necessary Fire Spirits after that counterpush with Bandit + Lumberjack + Fire Spirits.
(If you used Fire Spirits already use Ice Spirit instead) after this dump a Miner + Goblins push on the other lane if you have enough Elixir now they don’t have Elixir and you have two strong pushes each on one lane!

Elite Barbarians: Pretty easy but you gotta be ready use Goblins + Minions and pull them into the zone where both towers can hit them if possible if they Zap, Arrows or Log kill the Elite barbs with Lumberjack or Bandit and counterpush with Fire/Ice Spirit(s). If they don’t Zap, Arrow or Log then counterpush with surviving units + Miner

Miner cycle: Use Lumberjack on Miner, and Zap on incoming units! Be careful if their Goblin level is higher than your Zap level, if so then pull to the Middle using Ice Spirit. You can pull to the Middle using Ice Spirit even if your Zap is out of rotation or if you prefer this method over Zap method like me.

Hog Rider: You have Bandit and Lumberjack, use it on the Hog Rider and counterpush with surviving troops + Fire Spirits if it’s a lone Hog, sometimes used to test the water!
Deploy Goblins to give them a false sense of the fact that you can’t counter Hog properly or your units are not proper, then when they go all in with Hog and support surprise them and gain Elixir advantage, remember the strongest opponent will try to seem weak until victory is clear.
If it’s not a lone Hog use Bandit/Lumberjack and counter the support units with Zap/Ice or Fire Spirit(s)

Three Musketeers: You place Lumberjack and then right after that Fire Spirits + Zap. Also, be sure you deploy these units in range of the Musketeers and the Tower. Also take note of the fact that the Musk could come in the middle of your side to take a Tower if you already lost one! be prepared is the most important thing and remember to track cycle and rotation to know if Three Musketeers are in their hand.
It’s important to know if the deck has Three Musketeers before they use it! You got plenty of time because they probably won’t use it until Double Elixir time. You can look for the Three Musk if their deck has Elixir Pump, a hidden card, a Knight, a Giant, an Ice Golem, or a Miner etc.

Conclusion

Thank you for reading my first submitted guide! And enjoy if I missed anything contact me on this deck’s page! Thanks for reading again! Hope you like the deck!-XxBismuthxX