Home Blog Page 14

Three Musketeers – From Basic to Advanced

97
clash royale three musketeers

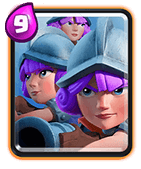
With the rise of Beatdown deck, people are using Three Musketeers a lot more now. Although Three Musketeers is not an easy-to-use card, it is not hard at all to make the most of it. In this guide, I am going to show you the most simple tips to utilize this card!

clash royale three musketeers

Clash Royale Three Musketeers

Table of Contents

  1. Summary
    1. Level Interactions
    2. What they can do
  2. When and where to play Three Musketeers?
  3. Counters
  4. Cards to play with Three Musketeers
  5. Three Musketeers Decks

Summary

Clash Royale Three Musketeers

Cost Attack speed Movement speed Deploy time Range Target
9 1.1 sec Medium (60) 1 sec 6 Air & Ground
Level HP Damage DPS
1 340 100 90
2 374 110 100
3 411 121 110
4 452 133 120
5 496 146 132
6 544 160 145
7 598 176 160
8 656 193 175
9 720 212 192
10 792 233 211
11 870 256 232

Level Interactions:

  • If Three Musketeers are 1 level higher: They will one-shot Ice Spirit and Minion.
  • If Three Musketeers are 1 level lower: They will die to Fireball.

What they can do

People should not underestimate Three Musketeers as they are a very powerful card.

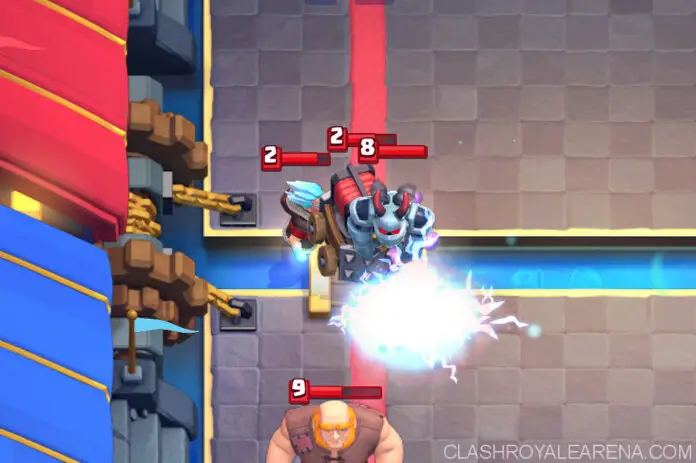
Three Musketeers can easily defend almost any push If untouched. This will likely never happen because of the insane DPS they offer. Most of the time, your opponent will use heavy direct damage cards such as Lightning, Rocket, Poison + Zap or Fireball + Zap etc.

When you defend with There Musketeers, If they Lightning/Rocket your Musketeers, no worries, it is usually a great trade since they have spent a lot of Elixir on the push itself plus the cost of the spell.

In addition, If they are not paying enough attention, you can slip 1 Musketeer to the opposite lane, forcing your opponent to answer the move, giving you an even better Elixir advantage.

On offense, Three Musketeers can solo kill the Tower If left untouched. They are the immediate threat which must be answered. There are plenty of ways to outplay your opponents even If their defenses are strong.

When and where to play Three Musketeers?

Try to split them whenever you can to disrupt your opponents.

Behind the King’s Tower

three musketeers placement 1

When your opponent has Lightning! Otherwise you need time to react and place down at least one mini tank to protect your Musketeers.

In the middle

three musketeers placement 2

Do this when you want to use Musketeers to support a tank which is about to cross the river. You can also do this when defending against a push which is already on your side. This placement is weak to Lightning and Fireball+Zap

In front of the King’s Tower

three musketeers placement 3

Do this If you want to sacrifice the Tower HP for a huge counter push. This placement is weak to Lightning tho!

All in one lane

Only do this If you know your opponents can’t punish you and/or they still need more firepower to defend themselves.

All in one lane behind a tank

When you have a tank running towards the opponent’s Tower and you see them split their Three Musketeers, you can send all of your Musketeers in one lane to overpower the opponent’s defense.

You could take down the Tower while your opponent could only deal a small amount of damage with the single Musketeer.

One Tower Down

This is one of the most interesting 3M plays: Placing them in the middle of the opponent’s side. However, only use this when you are sure that your opponent doesn’t have anything to deal with them or doesn’t expect it.


Counters

Clash Royale fireballClash Royale PoisonClash Royale FreezeClash Royale RocketClash Royale Lightning

Clash Royale Skeleton ArmyClash Royale ValkyrieClash Royale Minion HordeClash Royale BarbariansClash Royale Elite Barbarians

Because There Musketeers are glass-cannon, they have so many counters. But If the opponent slips up one, Musketeers can be very dangerous.

I am listing the counters below and what you can do against them.

Fireball + Zap: If your opponent has Fireball, always try to split them in the middle so all three won’t not get removed by the Fireball.
I usually get the most success when playing 1 Musketeer behind a tank and 2 Musketeers on the unsupported lane. My opponent always Fireball+Zap the 2 Musketeers while the one on the other lane is supporting the tank. Fireball + Zap = 6 Elixir = 2 Musketeers = equal trade.

Poison: Pretty much the same thing as above. Split them!

Rocket: Rocket is very weak to splitting Three Musketeers as they will not have much to stop the Musketeer + Tank push on the other lane.
Never play them behind/in front of your King’s Tower because your opponents will be able to hit 2 Musketeers plus your Crown Tower.

Lightning: Countering Lightning is pretty hard at all but sometimes it is very easy. This also depends on how your current cycle is doing.

On offense, If you already have a tank pushing towards the opponent’s tower, try to place a mini tank and then your Three Musketeers in the middle of them. Since 2 tanks are protecting the Three Musketeers, your opponents wont be able to Lightning them. If you have your 3M down before playing the tank they will Lightning your 3M as soon as they can so ready to place them mini tank/tank down on top of them.

On defense, to form the counterpush with Lava, you want to place them in between the King’s Tower and the Crown Tower with a mini tank protecting them. This play gives your opponent an awkward Lightning to use, giving you more than enough time to make the next play.

Skeleton Army: It is pretty annoying If your opponent plays Skeleton Army on top of your Musketeers during an offensive push. However, they are weak If played on the tank.  Use Log/Arrows/Zap to take them out before they do tons of damage.

Minion Horde: It is such a nightmare If your opponents use Minion Horde to deal with your Musketeers while they are already locked on something else. However, If your opponents use Minion Horde to solo-kill Musketeers, they will disappear pretty quickly. Pair your Musketeers up with Ice Spirit!

Elite Barbarians/Barbarians: When your opponents play one of these on your Musketeers, you need to disable them immediately! Freeze/Ice Spirit are great at this. You can also Log them, forcing them to retarget your tank.

Valkyrie: Use The Log, Ice Spirit… pairing up with your Three Musketeers to kill her as fast as possible. Freeze is also very effective in this case.

Freeze: There is nothing much you can do. Good luck!

Cards which have a nice push potential with Three Musketeers

Golem: He has an insane amount of HP to protect the Three Musketeers. Its cost is very high though so it is nearly impossible to make the push If you are not in the x2 Elixir time.

P.E.K.K.A: After the recent nerf, a lot of players are using the P.E.K.K.A Three Musketeers combo. She can soak damage and also help Musketeers deal with threats like Barbarians, Elite Barbarians and other group troops.

Giant: Excellent for protecting Three Musketeer. Easy to use during the x1 Elixir time.

Knight: One of the best cards to use when you need to split your Three Musketeers. He can tank and dish out a lot of damage for only 3 Elixir.

Ice Golem: Very cheap mini tank which can effectively protect your Musketeers. He has great HP and the unique slow effect!

Miner: Good for the surprise pushes with the single Musketeer after the opponents already committed to defending the other lane.

giant 3 musketeers

Popular Deck Archetypes with Three Musketeers

Three Musketeer Cycle: This type of deck consists of plenty of cheap cards to be able to quickly cycle through the Three Musketeers and to outcycle their counters.

Three Musketeers + Light Spell + Medium Spell + Mini tank + Support + Skeletons + Ice Spirit + Cheap Building

Three Musketeer Tank Beatdown: This deck archetype contains medium-cost tanks, helping you create the decent push to defeat the enemy:

Three Musketeers + Giant + Heavy Spell + Light Spell + Cycle Card + Support + Support + Building

Pump Three Musketeer Split: This deck archetype uses cheap defensive cards and control cards to maintain the tempo of the game:

Three Musketeers + Elixir Collector + Skeletons + Ice Spirit/Light Spell + Miner + Defensive card + Building + Light Spell.

Pump Three Musketeer Beatdown Deck: This is the very heavy deck which focuses on creating massive pushes to overwhelm the opponent.

Three Musketeers + Elixir Collector + Heavy Tank + Light Spell + Cycle Card  + Heavy/Medium Spell + Support + Defensive Building/Card.


Okay guys, that’s everything about the Three Musketeers I want to share with you today!

Have fun with this card! Good luck!

Shared by Articuno64fan 

Meta Miner Poison Hybrid Deck

439

Hey guys, RSivak back with an awesome Miner deck I’ve been using on the ladder. It is none other than a Miner Chip/Control hybrid deck!

I recently pulled my 6th Miner from a Crown Chest and upgrading my favorite card to Level 3 made me look for a great deck to play with.

I stumbled upon this deck and thought I’d give it a try and it was able to give me a new trophy high in one day!

miner burner deck 3

Clash Royale MinerClash Royale Electro WizardClash Royale PoisonClash Royale The Log
Clash Royale KnightClash Royale Inferno TowerClash Royale Ice SpiritClash Royale Minions

Meta Miner Poison Hybrid Deck

Cards Breakdown

Miner: The Miner is such an amazing card as his ability to dig to any part of the arena so quickly and chip away gives him the perfect role in this deck. In a pinch he can be used on defense to knock out any support troops like the Musketeer, Witch or Wizard. Not replaceable, his role isn’t really filled well by any other card.

Electro Wizard: Your perfect defense card, his stun mechanic makes your opponents push go slower allowing more time for your defense to shred. He is such a strong card now, as he is like the Zap spell but with more versatility. Not really effective on offense, but after defending as he heads toward the tower, consider dropping a Miner at the tower to tank for him. Take a look at here to read more about him!

Poison: Miner + Poison is just so strong right now, with all the spell bait decks around, you can easily gain tons of elixir advantages when you Miner Poison a tower, as long as they drop something worth Poisoning. Rule of thumb is something more than 3 elixir, that would lose more than ¾ of its health in the poison. I’ll give a couple of great trades down in the Tips section.

The Log: Even with the recent nerf, The Log is still a strong counter as it outperforms Zap on ground swarm defense, killing Goblin Barrels and Princesses. If you don’t have The Log, sub in Arrows, or Zap. If you have Electro Wizard, then use Arrows, as it will give better defense overall, but if you don’t have Electro Wizard then Zap will be the best replacement for The Log.

Inferno Tower: Your perfect defense building, shreds through all the beatdown decks that have been around lately. It’s great because it can shut down shut a wide range of cards like Giant, Golem, Balloon, Lavahound. It should be used only when needed as it is the most expensive card in the deck, and can be punishing if you misuse it.

Knight: I hardly ever used this card, but the Knight is actually pretty strong, it’s a great mini tank with pretty decent damage and it comes at 3 Elixir. Whenever I deal with a beatdown push, I like to drop the Knight off at the support troops to tank for the Inferno while it shreds the tank, this gives your Inferno more lifetime which severely limits any push they can make giving you more time go on the attack.

Minions: Secondary air defense and usually used to attack in tandem with the Miner, Miner at the tower and Minions at the bridge is a deadly combo if ignored. Cheap card, good against single target troops or ground only troops making it perfect on defense when air splash is out of the picture.

Ice Spirit: A cheaper version of freeze, this card is perfect for giving you a bit more time to attack or defend. If your Ice Spirit is the same level as the opponent tower then you can drop it at the bridge and then a Miner at the tower, the Ice Spirit will tank allowing your Miner to get a few extra hits which translates to a few hundred points in damage! Since Balloon can sometimes be a pain with this deck, an Ice Spirit on defense will help shut it down, in a pinch you can shut down Minion Horde with Ice Spirit and Electro Wizard Zap.

General Game Plan:

The perfect starting hand has the Miner with either the Ice Spirit or Minions, just make a small push with the Miner, to probe how they defend, and try not to overextend so early on, so a Miner Minion, or a Miner Ice Spirit push is the best bet.

  • If the Miner is not in hand or the next card, drop a Knight or the Electro Wizard in the back and make small plays until you get your rotation perfected.
  • Keep on sending the Miner to the tower, if they have Elixir Pump, Poison it, even if it’s on the other tower, the Miner will deal more overall damage to the tower than the Poison ever will.
  • If you see them dropping Goblin Gang, Skeleton Army, Minions, or Minion Horde to deal with your Miner, Poison them and the tower, these are all good trades.
  • If they drop Barbarians on your Miner, I usually balk at Poison, because the Barbarians won’t stay in the Poison that long, so make your call on that.

Defend pushes with Knight, Electro Wizard and Inferno Tower and don’t be afraid to counter push with a Miner and your remaining defense.

Keeping pressure on your opponent is key, and preventing damage on your tower is just as important.

This deck is perfect in normal elixir and double elixir, it works well in both as it has the perfect average elixir cost.

More often than not your wins will be with you having whittled their tower down low without major damage done to yours, this is good because you have been playing perfect defense then.

Counters:

Elite Barbarians: These guys can be just a pain if you don’t expect them with their annoying ability to shred through almost anything, Knight and Ice Spirit are a good counter if you place them in the center pulling them in the kill zone where both towers can attack. If you know your opponent uses his Elite Barbarians for offense, then consider keeping the Knight and Electro Wizard on defense.

Spell Bait: This does quite well against Spell Bait, keep The Log for the Goblin Barrel and the Electro Wizard, Knight and Poison should take care of the rest of the Bait. Remember you do lack splash units except for the Electro Wizard Spawn Zap, so make sure you get the best value from his spawn.

Hog Ridaaah: Rule of Thumb, do not place Inferno Tower to aggro the Hog Rider at the start of a match, they might be running Hog Giant and wait for you to waste the Inferno Tower only to drop a Giant in the back and form a massive push. Electro Wizard if played correctly will only let one Hog swing, so until you know they don’t run a Hog Tank deck keep your Electro Wizard for defense.

Beatdown: Always conserve your Inferno Tower until you need it! If they drop a Golem in the back, then push the other lane, with a Miner Minions push, split their attack into two lanes and this will give you an easier time to defend. Try not to drop the Inferno until the tank nears the bridge. Use the Knight to attack and tank the support troops your opponent sends, this gives your Inferno more time to heat up and melt the push.

Tips:

  • Drop an Electro Wizard on a lone Hog as it is 2-3 tiles after the bridge, this will only let one hit on the tower.
  • Ice Spirit + Miner combo is deadly! Use its cheap cost to your advantage!
  • Knight + Ice Spirit is a great defense for Elite Barbarians so make sure you have them if your opponent is running them as the offense.
  • Poison for value! I Poison the tower and the troop if they defend against my Miner with Skeleton Army, Goblin Gang, Minions, Minion Horde, Musketeer, Wizards(all three), Witch, Bomber, Furnace, Archers. All of these give you a great trade with Poison as they either die or survive with a sliver while dealing 240 tower damage.

All right guys, I hope you enjoyed this Miner guide, and may it gain you many wins on ladder and in Tournaments/Challenges!

RSivak signing off.

Miner Bandit Poison Control Deck for Challenges

214

Hey guys! My name is Blaze Stone and I’m back with another guide for you all!

Today, I will show you guys my Miner Bandit Poison Control deck which I have been rocking with in Challenges and Tournaments!

bandit poison

Miner Bandit Poison Control Deck

Clash Royale MinerClash Royale BanditClash Royale PoisonClash Royale Minions
Clash Royale Goblin GangClash Royale The LogClash Royale Electro WizardClash Royale Inferno Tower

bandit control analytics

Card Breakdown

Miner: Miner was my first Legendary card and though I don’t use it nowadays on the ladder, I still love to use him in challenges and tournaments. IMO Miner is a most unique troop because it can be spawned anywhere in the arena! (Also, if you notice it is the only troop which spawns from the ground XD). Miner is the main win condition of this deck. A lone Miner can easily deal a few hundreds of damage and when couple with Poison or any troop, it can be devastating. It is also good in killing princesses, pumps, spawners and even glass cannons like Musketeer and Wizard.

Bandit: Bandit is my newest legendary card and currently sitting at lvl2 (Legendary chest and draft chest). Bandit is a bit underused at the moment because most of the players have not seen her true potential. She is fast, cheap, decent health and moderate damage. So she is great in cycle decks or chip/control decks or more exactly as most call it: Blitz/Burn deck. She is invulnerable while dashing so in order to use this properly always place her at least 4 tiles away from her target. Treat her as a Secondary win condition. however, don’t depend on her for too much damage. I recommend you to visit this guide by Exordium: //clash.world/guides/clash-royale-Bandit for more info.

Poison: Poison is my all-time favorite card and I will soon try to write a guide on how to us it properly. As for now, Miner+Poison will be your most used offensive combo. Miner deals the damage and Poison mainly kills the troops which are used to counter the Miner along with dealing damage to the Tower. Poison is also the strongest counter to Graveyard in this deck. So when up against Graveyard try not to use Poison on offense. More tips about this below.

The Log: The Log currently is a staple in nearly all challenge decks. Mostly because of the popularity of Hog-Log Bait decks in challenges. (Log is used to counter decks which try to bait The Log out, ironic isn’t it?) Now much to say about The Log as everyone knows how to use it.

Minions: As I have said in my earlier guides, I use Minions in nearly every deck I create because they are so versatile. Split Minions behind a Tower for chip damage, couple them with Miner for a cheap yet Tower threatening Mini-push, use them to kill Mini tanks and non (or weak)-splash damaging glass cannons. And I have to say this: ‘Roses are red, Minions are blue, they can fly and will crush you!’

Goblin Gang: This card is steadily rising in popularity. They are so versatile than Minions. Actually, the role of Goblin Gang (GG, as I will call them throughout the guide) is pretty similar to that of Minions. The difference between the two is that GG has more DPS than Minions while Minions can fly as compared to GG which are ground.

Electro Wizard: This guy is a God! He is so amazing on defense as well as offence. The recent nerf has done much to reduce its popularity and effectiveness. Use him to resent infernos, princes and Sparky! Electro Wizard will mostly be used on defense first and then followed by a Miner or Bandit (both in double Elixir) as a counter push. He is great when coupled with Miner as his stun-effect will make the re target the Miner instead of him or other troops. It can also counter a Hog if you place him directly on top when Hog is two tiles from the river in order to take only 1 hit. Also, his spawn damage can kill small swarms.

Inferno Tower: The best defensive building currently IMO. Use to kill hogs, giants, P.E.K.K.A.s, golems and hounds effectively. Just remember to keep protected from cheap troops use to distract. Also, try to place it far from river, near the cross-fire zone.

Card Substitutions:

This deck contains 4 legendary cards and most of you might not have them so I offer some substitutions. However, the gameplay can change a bit.

Miner: Miner is a unique card as I stated above so there aren’t any effective substitutions. Sorry, if you haven’t unlocked it yet.

Bandit: Bandit is a card that can be used on defense as well as offense with equal effectiveness. However, there isn’t a card which offers both the abilities. So, I will give you two options instead. Opt for Knight if you want a more defensive gameplay where you will have to rely solely on Miner as win condition. Or sacrifice a bit of your defense for Battle Ram if you want a more offensive gameplay where you use both Miner and Battle Ram as win-conditions.

The Log: Zap, of course. However, against Log-bait decks I recommend using GG to counter Goblin barrels instead of Zap as they are more effective because Zap no longer counters Zap completely.

Electro Wizard: Musketeer is the best substitution for Electro Wizard right now. Except for spawn damage and the ability to target 2 troops at same time with stun effect, Musketeer can perform same role as Electro Wizard. Also, I don’t recommend ice Wizard instead of Electro Wizard as they are way different and ice Wizard isn’t a good choice for challenges.

Now that we have completed everything about the cards lets proceed to the game plan.

General Gameplan:

3:00-2:00

Here, you will analyze what kind of deck your opponent is using. If you he places pump the he is mostly likely using Golem, if he places Tombstone he may be using Lavaloon, if he uses Goblin Barrel he is using spell bait and if places Bowler he is most likely using Graveyard Bowler-nado. Try this method in order to get a glimpse of his deck by only seeing his single card.

The best ways to start a game are:

  1. Splitting GG behind the king.
  2. Splitting Minions behind the king.
  3. Sending a lone Miner.
  4. Sending a lone Bandit.

Try to play slow and less offensive.

2:00-1:00

This is the time when the real battle actually starts. Try to deal as much chip damage as you can with Miner and the cheap troops (using Poison less for saving Elixir for defense) and keep your defense strong with Inferno Tower, Electro Wizard and Bandit. Try to fully analyse his deck and play style as well as the counters and way he uses them against Miner and Bandit.

1:00- 0:00

This is the period where you really start becoming offensive. Try to use Bandit and Poison in every Mini-Miner push. Don’t let down your guard however and keep your defense decently strong. Launch counter pushes with Miner after every successful defense in order to keep up the pressure.

Overtime:

This is the period where Miner and Miner decks really shine. In this period, the players become really defensive and rely on mostly spells for finishing of the towers. The main reason for this is that it is extremely difficult for troops to get past the enemy defenses. However, Miner doesn’t face this problem much. As long as you can keep on cycling Miner as fast as you can while not letting the defense down ( which is really easy because the troops of this deck are not that costly and are only very fast and fast. So cycling and pressuring is really easy) as well as changing the Miner placement every time by being creative, you cane asily take any Tower out.

Against popular challenge decks:

Golem Beatdown: Golem decks are costly and rely heavily on pumps. So as long as you keep on destroying pumps and pressuring them on the other lane with Mini-pushes which can’t be ignored, you can easily win because the opponent can’t build up a strong push and the lone Golem will be killed by Inferno Tower easily.

Lavaloon: The technique is pretty similar to the above one. Keep on pressuring and you will win easily. Inferno Tower for hound and Electro Wizard and/or Minions for Balloon and support.

Miner Poison: Pretty annoying match up against this deck because the game play is almost the same. Whoever is fast in cycling and creative in placement will win the game. Pretty clutch matches.

Hog-Log Bait:  Easy but annoying match-ups. Keep Log reserved for barrels and be aware of the occasional deep barrels they may use against you. They mostly push with Hog+GG which can be counter by Electro Wizard and Inferno Tower (I know it is -2 Elixir trade but Electro Wizard survives with decent health so opponent will counter it so the trade gets balanced.) They counter Miner and Bandit with skarmy so keep your Poison reserved and try to pre-Poison.

Graveyard: Keep your Poison reserved for Graveyard. However, it is difficult to damage without Poison, another technique is out cycling them quickly with your cheap troops after pushing with Miner+Poison and recycling back to Poison. This tactic is a bit risky though.

Tips and Tactics:

  1. Whenever you are using GG, try to split them up. They split up in the ratio 4:2. So split them in such a way that the 4 Goblins help go in the lane you are pushing while 2 go in the other lane. The opponent will ignore them 99% (the 1% who don’t are wasting their Elixir). The two Goblins will deal 100+ damage easily and this will eventually add up to a surprising amount which may help you take down a 2nd Tower if you lose one yourself.
  2. Bandit can be used with Minions or GG for alternate offense.
  3. Electro Wizard placed in middle of arena can help defend both sides if opponent is using double lane pressuring.
  4. A surprising way to get a 2nd crown while using a Miner deck is this: place Minions near your Tower and collect Elixir and then send a Miner on the 2nd Tower. Then quickly place Bandit+GG in the middle of the opponent’s area when both towers target Miner at the place where u place RG or 3M. If you have Poison, then Poison the whole area. I know this is over-committing so I only use it in double Elixir time when opponent places Golem or Lava hound so opponent is really low on Elixir. This push is so strong and surprising that it catches the opponent off-guard and can quickly deal tons of damage even if opponent tries to counter the push because Bandit and GG being quite fast go (dash for Bandit) straight to the Tower and you already have Miner and Minions. And Poison helps if opponent places Skarmy, GG or Minions because they will die quickly. And most of the time opponents Rage quit. This tactic allows me to win 2-0 while using a control deck against a beat down deck (surprising, eh?).

Thats all folks! Hope you guys enjoyed reading the guide and try out this deck in challenges! Ask me about anything in the comments!

By Blaze Stone

Best Ways to Get Clash Royale Gold – Get 1 Legendary Card Every Week!

15
Clash Royale Gold

Undoubtedly Gold is the most important thing in Clash Royale since you can do everything with Gold, from upgrading cards to buying Legendaries. Since it is that important, getting Gold is not easy at all for most players. Do you usually have to wait a few days when you want to upgrade a card or when you want to buy Legendary in the shop?

Today, I am going to show you how to earn lots of Gold in game with ease!

Clash Royale Gold
How to Get Clash Royale Gold with Ease!

In Clash Royale, you can earn Gold for free by:

Assuming that you are a casual player in Arena 10...

Firstly, the easiest way to earn Gold in game is opening Chests (all chests, including the Tournament Chest, Clan Chest etc.). Try to open them whenever you can by playing a few battles every day to take all of that easy money. You can get about 80 Gold from every free chest, this means you can get about 320 Gold every day from opening Free Chest (2 in the morning and 2 before sleeping).

Donating is the other way to earn Gold in Clash Royale. Find an active Clan at here to reach your daily request/donate limit.

Some players think it’s stupid to give the hard-earned cards away, especially Epic cards. Yes, it’s pretty hard to get them but you can get XP and 5 Gold for every donated common card, 50 Gold for every Rare and even 500 Gold for every donated Epic card. Also, you can get those donated cards back whenever you want. The Gold is not taken from the player getting cards from you. It’s just like you are selling cards but the buyers don’t have to pay. Life is sharing guys!

Assuming that every day you donate 8 Rares, which takes 80 spaces in total of the daily donation limit. The rest should be 160 commons (You can donate 240 card slots every day). Which means, you can get up to 8×50 + 160×5 = 1,200 Gold every day by donating card.

Assuming that you are just a normal player, who donates 5 Epic cards every Sunday, you can earn 2,500 Gold from those Epics (500 each). Besides, you can donate 8 more Rares and and 110 Commons, which gives you 8×50 + 110×5 = 950 more Gold.

To sum up, you can easily earn about 10,650 Gold every week.

By donating, you can get up to 8 Epic Cards from the Store every week! That’s very crazy If you don’t want to get those free Epics since It’s much harder to get them than the donated ones.

To sum up, you can get up to 10,650×4 = 42,600 Gold every month = 1 Legendary Card.

Remember that I haven’t mentioned unlocking Clan Chest, Draft Chest, Silver, Gold, Giant, Magical, Super Magical and Tournament Chests yet.

Also, as long as you keep requesting cards, you always can take your cards back, so why not give them away, right?

You can request 120 Commons or 12 Rares every day in Legendary Arena.

Updated: New Trick to get 1 Legendary Card Every Week!

sydney_11 shared this outstanding trick today and I bet that you guy would love it!

No worries If you are out of Gold! This trick will help you get the Legendary you want with ease!

On the next Saturday, after collecting the Clan Chest, just join any New Zealand Clan when the time there is 9:30 pm.

New Zealand uses the GMT+12 timezone so assuming that you are in the New York, you will join at 5:30 am (New York is GMT -5). Read more at here.

They will be requesting Epic cards when you join the Clan because it will be Sunday midnight there. Just donate the cards you don’t want to use! After a few hours, when your donation limit cool down ends, leave the Clan then Join any Clan in China/Hong Kong and start donating Epics again!

Just keep doing this, keep moving from New Zealand → Hong Kong → India → German → U.K → US East Coast → US West Coast. Just keep doing when your donation limit ends.

By following this trick, you can extend the Epic Sunday up to 2 days! This is insane guys!

I have tested this trick myself and have earned about 50k Gold since last week.

Also, please note that the new Clan members might not request the cards you want to donate and you will waste a lot of time. To overcome this, don’t join any Clan immediately after leaving your Clan! You can use an alt account to join the Clan first and see which cards being requested. Once you have found a Clan with 10+ requests, use your main account to join the Epic party!

Good luck!

Stupid-Easy Guide on Building Beatdown Decks!

272

Hey Guys! It’s lightningmaster823 here and today I will show you the easiest ways to create your own Beatdown deck!

Building Beatdown Decks

Stupid-Easy Guide on Building Beatdown Decks!

Deck Archetypes

In my opinion, there are 5 different archetypes in Clash Royale:

  • Beatdown has you using expensive units to accumulate a push that your opponent has to react quickly, however after expensive units are deployed, you are easily vulnerable to attacks on the other side
  • Siege uses buildings as win conditions (X-Bow, Mortar, and Spawner Decks), they force your opponent to react, however, they get destroyed by Beatdown Decks
  • Control Decks are often at a medium average elixir cost, they focus on getting chip damage on towers, usually only has 1 win condition, but often gets demolished by siege and even beatdown if you screw up.
  • Salty Ladder Decks use cards that you can easily obtain and upgrade (mainly Royal Giant and Elite Barbarians), you drop them at the bridge and you opponent has to react extremely quickly, however, they’re fairly easy to counter.
  • Hybrid Decks are basically just a combination of at least 2 of the other 4 archetypes above.

To read more about Deck Archetypes, please take a look at here.

Why Beatdown is Good:

Obviously, beatdown has you packing a crap ton of troops on the field at a time, it absolutely wrecks siege decks as since you can easily put your tank to soak up the damage from the building. Beatdown also forces your opponent to immediately react as since most pushes can’t be ignored. Support units can wreck certain counters.

Why Beatdown is Bad:

Control Decks, especially Cycle Decks and Spell-Bait Decks, often wreck Beatdown, as since all 3 of those archetypes allows you to pressure the opposite lane to force the beatdown user to spend elixir on defense, or take heavy tower damage. Also beware about beatdown users’ worst nightmare: INFERNO TOWER!!!

How to Play Beatdown Decks:

As an experienced beatdown user myself, I tend to do this:

3:00-2:00

I would start with your tank in the back, if not in your hand, try using emotes to get your opponent to make his/her first move (I sometimes do that), if they rush the other lane, then don’t play the tank until double elixir time unless you are confident that you can defend the other side.

2:00-1:00

Keep playing defense, try to sneak in a few attacks if you can, but if you can’t or that you’re not confident, then don’t risk it as doing so may cost the game.

Double Elixir Time:

This is the time where many beatdown decks (especially heavy beatdown) come into play, apply pressure to your opponent by placing your tank in the back, if your opponent rushes the other lane, then defend as best as you can. Keep trying to place support units as you go; soon your opponent will be basically destroyed if they don’t react fast enough.

Overtime:

Keep pressuring your opponent by using your tank; try to spell cycle while you’re at it. Everything else is basically the same as Double Elixir Time

Good Tanks to use in Beatdown Decks:

Giant: Despite being my least favorite card, he is decent at 5 elixir, so if you’re new to this, you may want to use  Giant as it’s easy to create a push (don’t use it if its extravagantly underleveled), at tournament standards, he has 3344 HP, that’s quite a bit for 5 elixir. You can also use him to stall opponents during the last 20 or so seconds of the match.

Giant Skeleton: Although he isn’t meta, he’s beefy as well, having a bomb that does almost 1000 damage makes him good on both offense and defense, he can also do better on defense as since he actually attacks the troops, and his bomb will kill most of them. If you get him extravagantly close to the tower, your opponent will suffer heavy damage from the bomb.

P.E.K.K.A: Good tank, plenty of damage, 7 elixir, She’s good on both offense and defense as well, with that 1 second deploy time makes her extremely viable on defense, also allows counterpushes. Only downside is that you won’t get as much elixir as you would if she still had that 3 second deploy time

Lava Hound: Fits into Beatdown, in the Aerial Assault category (which is a sub-archetype for beatdown), however, it’s a good tank for air troops (Balloon, Mega Minion, Inferno Dragon, or even Battle Ram).

Golem: The ultimate king of Beatdown Decks in my opinion, despite having a very expensive cost at 8 elixir, he has about 4200 HP at tournament standards, does more than 200 damage per hit, and calls for immediate response. If you’re new to using beatdown, I would suggest Golem as it has really good HP, even at level 1. Yet being 8 elixir, you can run Elixir Collector to gain elixir

Spells to use in Beatdown Decks:

I would strongly suggest using 2 damaging spells in beatdown decks, one heavy, one light.

  • Heavy Spells: Fireball, Poison, Lightning, Rocket
  • Light Spells: Zap, Arrows, The Log, Tornado

The Two Types of Beatdown Decks:

There are two types of beatdown decks in my opinion, which are light and heavy, you can tell by your Avg. Cost (As I can tell, Light Beatdown Decks are usually 3.4-4.1 and Heavy Beatdown Decks are usually 4.3+)

How to Build a Light Beatdown Deck:

Light Beatdown Decks tend to have cheaper troops, but still pack a punch!

  • Slot 1: The Main Tank (Giant, Giant Skeleton, Golem, etc.)
  • Slot 2: Cycle Card (Skeletons, Ice Spirit, Goblins, etc.) or a Win Condition (Battle Ram, Balloon, Graveyard, etc.)
  • Slot 3: Secondary Tank (Knight, Ice Golem, Valkyrie) or Cycle Card*
  • Slot 4: Any Passive Building (Furnace, Tombstone, etc.) or a STRONG Tank Killer (Mini P.E.K.K.A., Elite Barbarians, Barbarians, etc.)
  • Slot 5: Support Unit (Archers, Minions, etc.)**
  • Slot 6: Light Spell (Zap, Arrows, etc.)
  • Slot 7: Heavy Spell (Fireball, Poison, etc.)
  • Slot 8: Support Unit**

*Slot 3 should only have a Cycle Card if the win condition is the secondary tank or that the secondary tank is a cycle card, such as an Ice Golem.

**Support Units are used as either an offensive unit or a defensive unit.

Example of a Light Beatdown Deck:

Golem Poison Deck

Clash Royale GolemClash Royale SkeletonClash Royale Baby DragonClash Royale Tombstone
Clash Royale Mega MinionClash Royale ZapClash Royale PoisonClash Royale Archers

Avg. Cost: 3.5

How to Build a Heavy Beatdown Deck

Heavy Beatdown Decks pack a bigger punch, but are more risky to play.

  • Slot 1: Main Tank
  • Slot 2: Win Condition
  • Slot 3: Secondary Tank or Defense Unit (Skeleton Army, Barbarians, etc.)***
  • Slot 4: Elixir Collector****
  • Slot 5: Support Unit
  • Slot 6: Light Spell
  • Slot 7: Heavy Spell
  • Slot 8: Support Unit

***Slot 3 should only have a defensive unit if the win condition is the secondary tank or that the secondary tank is a defensive unit.

****Elixir Collector must be used in a heavy beatdown deck, especially if the average cost is 4.5 or higher.

Example of a Heavy Beatdown Deck:

Giant Sparky Deck

Clash Royale GiantClash Royale SparkyClash Royale BarbariansClash Royale elixir collector
Clash Royale MinionsClash Royale ArrowsClash Royale PoisonClash Royale Wizard

Avg. Cost: 4.6

Other Examples of Beatdown Decks

(I’d like to give Lolman a big thanks for helping me out on this part of the guide!)

Giant Balloon (Heavy)

Clash Royale GiantClash Royale BalloonClash Royale Baby DragonClash Royale elixir collector
Clash Royale Goblin GangClash Royale ArrowsClash Royale fireballClash Royale Electro Wizard

Avg. Cost: 4.3

LavaLoon-Freeze (Light)

Clash Royale Lava HoundClash Royale BalloonClash Royale Goblin GangClash Royale Tombstone
Clash Royale Mega MinionClash Royale ArrowsClash Royale FreezeClash Royale Electro Wizard

Avg. Cost: 4.0

Golem Beatdown (Heavy)

Clash Royale GolemClash Royale Goblin GangClash Royale LumberjackClash Royale elixir collector
Clash Royale MinionsClash Royale The LogClash Royale LightningClash Royale Electro Wizard

Avg. Cost: 4.5

Related Contents

Our other “ultimate guides” on buildings decks:


Hope you enjoy this guide! Please comment if you are concerned with anything.

And hope that this will help you when using beatdown!!! 🙂

Elite Miner – The Burning Deck

265

Hey everyone, this is General NX here.

You all seemed to enjoy the last article and video, so I’m back!

This is an original deck built for challenges, and I’ve found it to be extremely fun. It’s a Miner control deck that carries Elite Barbarians, which recently received a nerf. However, this deck still gets value out of them by playing them different than before, and they are one of my favorite cards in this deck.

While this deck is strong, it does require a lot of skill to play. So buckle up folks, you’re in for a long ride.

miner burner deck 3

Elite Miner – The Burning Deck

Clash Royale MinerClash Royale PoisonClash Royale Elite BarbariansClash Royale Inferno Tower
Clash Royale Ice SpiritClash Royale Electro WizardClash Royale The LogClash Royale Knight

elite miner burner

The Deck

This deck is quite fun to play in challenges, and your main goal is to chip out their tower with Miner and Poison. It’s mainly a control deck, but it does have a cycle side to it. You’re going to end up playing faster than beatdown, but not as quickly as cycle. However, you have many defensive options to most cards so that you won’t get destroyed by cycle.

There are three legendaries in this deck. Miner is irreplaceable, but you can replace Electro Wizard with Musketeer and Log with Zap or Arrows.

Cards Breakdown

Miner: Your main win condition. You’ll want to use him to chip out your enemy tower with his annoying damage.

Miner placement is vital to this deck, as you don’t have much else to destroy towers.

He’s your best starting card because you can find what their Miner counters are.

Depending on each counter or situation, you change the way you play him.

When you haven’t taken a tower yet, never put him close to the King or the middle because he can activate their King’s Tower or do very little damage because both towers are targeting him. If you have taken a tower, remember to place him at the bottom-left corner or two tiles to the left of the Princess Tower. Using those placements don’t allow the King’s Tower to shoot at your Miner, letting him to much more chip damage.

Elite Barbarians: These guys are one of the most fun aspects of this deck. Essentially, they’re your defensive punish card, as they can easily kill a tower if they aren’t countered. They’ve actually won me some games just because I capitalized on my opponent’s mistakes.

You will play them defensively most of the time. They are resistant to most spells, very fast, and have a very good DPS. Alone, they only allow a Hog Rider one hammer swing on the tower. While they do cost 6 elixir, they must always be addressed, making them very effective counter pushers.

Poison: Your main offensive spell of this deck. You’ll occasionally use this on defense against Lavaloon, but that’s usually the only time you’ll use defensive poison. It’s a great support card for your Miner to deal a ton of chip damage. It also supports your Elite Barbarians because it can effectively clear swarms, but you should save it exclusively to support your Miner.

If you want, you can replace Poison with Fireball for a faster impact spell. However, I believe Poison is better in this deck because it does more overall damage, has a bigger radius, and clears an area of swarm for a duration of time.

Inferno Tower: A great tank-killer and defensive building. You want to save Inferno Tower for tanks and big threats, especially against Lavaloon. It’s your only building in this deck, so play it cautiously.

If you’re down Inferno Tower, Elite Barbarians do help out because of their DPS. However, you shouldn’t rely on them and Inferno Tower is more consistent in tank-killing.

Electro Wizard: He’s potentially the best utility card in the game right now, so there’s no questioning his role in many decks. He is a great air defense and makes a good counter push with your Miner. Miner and Electro Wizard together do massive amounts of damage, so your opponent will always have to react to them.

In this deck, his on-spawn Zap is pretty important on defense because it is one of your best ways to counter Minions using this deck. You’re only other way to eliminate Minions are Poison and Ice Spirit, and those aren’t consistent all the time.

Ice Spirit: Cheap cycle card with good utility. This guy can stop pushes for some time, and give you a little time to react to threats. Paired with the spawn zap of Electro Wizard, you can take out Minions, Princess, Goblins, Archers, and other small troops. It’s great for cycling to your Miner, and Ice Spirit + Miner is one of the best starting combos you can have.

I chose Ice Spirit over Skeletons because this deck is not lacking in the distraction and damage department. Electro Wizard can distract well, and Elite Barbarians dish out a lot of damage. I tried them at first, but they seemed like dead weight for this deck. With Ice Spirit, you get better air defense and more stun utility, which I prefered more over the damage and distraction of Skeletons.

The Log: Ah, good old log. This piece of lumber is your best bet versus Goblin Barrel and Log-Bait. While this deck does have Poison, that doesn’t effectively kill Goblin Barrel. Originally, I had Zap here, but The Log is overall better in most areas. It knocks back troops, deals more damage, and rolls a good distance.

Its role in this deck isn’t much different than its role in other decks. It kills swarms and controls the game. You’ll want to use it to kill swarms in this deck more than control because you already have so many control cards. However, it’s still useful and can change the outcome of many situations.

Knight: He’s a solid mini-tank with a good hit speed and a decent DPS. Against Graveyard, he will be your best bet (other than Poison). When Elite Barbarians are unavailable, Knight can clean up many small pushes on his own. In fact, just Knight + Electro Wizard can stop most ground pushes on their own.

In this deck, his main job is defense, as Miner is better suited for offense. Sometimes, you will want him to tank for your Miner, but he usually will die while stopping many pushes. He is great versus Bowler, glass cannons, Graveyard, Lumberjack, Elite Barbarians, and many more ground troops. Overall, a solid ground defense.

elite miner poison

Strategy and Gameplan

Before Double Elixir:

Your starting hand is important in this deck as it affects the way you start and play the rest of the game.

Your ideal starting hand should have Miner, and you should immediately jump the gun and drop him on the Crown tower. This will give your opponent two options:

  1. If they just take the damage, then that’s free chip damage for you.
  2. If they reveal their Miner counter, then you now know what they will be using to stop your Miner.

If Miner isn’t in your starting hand, then your next best option is to have Ice Spirit. You can drop it at the bridge to chip the tower and cycle your deck at the same time.

If you don’t have either Miner or Ice Spirit, then you should either cycle by placing troops in the back, or waiting for your opponent to make the first move. It really depends on your hand and your opponent’s deck, so adjust your play style accordingly.

Usually, I find that before double elixir, I can chip about half or more of a tower. Just Miner and Poison is really annoying for your opponent and it can do a lot of damage if ignored. In return, if I’m successful on defense, I take about 500, more or less, damage to one of my towers.

However, there will be occasions where you will actually take a tower with Elite Barbarians when your opponent makes a mistake or you make a very great play. The rest of the game, you’ll be less on the offensive and more on your side of the arena.

And sadly, there will be times where you have lost or taken massive damage on one of your towers. With this deck, one mistake can cost you a lot. You will want to focus on taking at least one tower so that you can outchip their other tower. That will be your best bet on winning when you’re at a disadvantage.

Double Elixir/Overtime:

Cycle! When double elixir hits, that means you can cycle even faster and put more pressure on their towers.

Most of the time, you will only have to cycle three cards because you almost always play Miner and Poison together in double elixir time. This puts extreme pressure on your opponents and they usually don’t get to build up their big push. They might be able to send in a few mini-pushes, but those can be cleaned up with your defenses.

If your opponent does happen to build up a big push, you have plenty to defend it. However, against beatdown decks, you really want to watch out for Lightning. It can almost kill your Inferno Tower and Elite Barbarians and it does kill your Electro Wizard. When I know they have Lighting, I either space out my cards or drop all my mini-tanks in the Lightning radius. This usually protects your Electro Wizard, who is vital on defense in many scenarios.

If you haven’t taken a tower already, you will probably end up taking a tower in double elixir. Many times, I can pull out a win from a disadvantage because I cycle Miner very quickly and my opponent doesn’t have to troops to defend against it.

When you are in the situation where your opponent’s tower is very low, just remember how much damage your spells do to Crown Towers. Over the full duration, Poison does 240 damage, and The Log deals 96 damage. Combined, thats 336 damage! If you notice that your opponent’s tower is below 368, start attacking the other tower because you can easily use spells to destroy the first tower.

Mistakes:

The worst mistake you can make with this deck is making mistakes (yes, that sounds very obvious, but keep reading).

With this deck, you cannot afford to make any mistake, because it usually tends to you losing a tower.

For example, dropping Electro Wizard when they have a Minion Horde on hand is almost asking to be destroyed. Using Poison or Knight when they have Graveyard in cycle means you’re going to have a bad time defending the mass amount of Skeletons.

Just play smart, and you’ll find that your battle will be much more enjoyable.

Another mistake I make all the time is using Miner too aggressively.

Sometimes, I’ve used him when there’s a mass push coming my way, and now I’m down three elixir to defend. If you use him too much and you’re not making positive trades, the chances of you losing is much higher. The only time you will want to be over-aggressive is at the start of the match, when you’re trying to force a reaction out of your opponent.

Overall, just play on the safe side with this deck, it’s not a spammy cycle deck after all.

Matchups:

Lava Hound:

This is your hardest matchup by far. Because most Lava Hound decks carry Lightning, it severely limits your placement of Inferno Tower and Electro Wizard. Your goal should be to separate the push, try pulling the support troops away from the Lava Hound. Once all the support troops are destroyed, Lava Hound on its own is easy to deal with. Facing these decks will usually be the only time you use Poison defensively, as it kills Minions and Lava Pups, and damages Mega Minion and Balloon. Sometimes, when I know their ground counters, I rush with Elite Barbarians to put pressure on their tower, forcing them to spend defense Elixir. This is your hardest battle, but I’ve still won many times using this deck.

Hog Rider

Inferno Tower is one of the best counters to Hog Rider. Make sure you place it on the lane that their attacking. Otherwise, the Hog will just bypass your Inferno Tower. If they carry Zap or Lightning, adding Ice Spirit helps out a lot in defending him. This battle usually results in victory as almost your entire deck counters Hog Rider. Electro Wizard, Knight, Ice Spirit, Elite Barbarians all help out when your Inferno Tower isn’t in cycle or is unavailable.

Log-Bait

A relatively easy matchup as long as you play well, as I’ve probably won 9/10 of the matches pretty easily. You want to save your Log exclusively for Goblin Barrel, or in rare scenarios, Goblin Gang. Don’t use The Log on Princess, as it’s easier just to Poison her along with the tower or just use a troop to kill her at the bridge. This deck isn’t weak to splash, so she’s not that threatening. The only times these matches have come close is when my starting hand doesn’t have The Log and my opponent throws a Goblin Barrel. That’s probably the worst thing that can ever happen to you, but otherwise you should be fine against Bait decks overall.

Sometimes Log-Bait carries Hog Rider, which adds a little more threat to this matchup. However, Inferno Tower and Electro Wizard are extremely strong against Hog Bait pushes. Electro Wizard can easily dismantle a Goblin Gang or Skeleton Army and then start zapping the Hog Rider. Sometimes, I’ll even use my Log on the swarm troops to make my job easier, and use the on-spawn Zap of Electro Wizard to strike all three Goblins. The key is to Zap drop Electro Wiz when all the Goblins are still clumped together on the tower, so all three take the damage.

Three Musketeers:

This matchup can either be tricky, or very repetitive and boring. If your opponent is smart, you will have some trouble clearing out the Musketeers. If the Three Musketeers are all grouped together, a Poison Log combo should get rid of them. If they are split, I use Elite Barbarians and Log on the two, then Ice Spirit or Knight on the last Musketeer. You have to watch out for the Elixir Collectors however, as they put the advantage into your opponent’s favor. Sometimes, you will want to use Miner, Poison, or both to get rid of it and chip their tower at the same time. If the Collector is in the middle, just Poison it to cut down it’s health. If it’s behind the Towers, Miner and/or Poison will do the trick. But remember to keep doing chip damage because it’s easy to get a draw or a loss out of this matchup if you forget about offense.

Pekka

Inferno Tower. Honestly, it’s the hard counter to the armored behemoth. However, Pekka is usually paired with Electro Wizard or Lightning. Against Electro Wizard, Knight or Elite Barbarians can easily assassinate the backline support troops while the Inferno Tower burns down Pekka. Against Lightning, you can still pull and stun the Pekka easily with Electro Wizard, Knight, and Ice Spirit. Just keep chipping down the tower as you stop pushes, because she’s not much of a threat.

Giant

Almost the same story as Pekka matchups (you will play similar against all beatdown decks). He has less HP, but he is also less easily pulled. Inferno Tower and Elite Barbarians shred him to pieces, and Knight is good against support troops. Ice Spirit and Electro Wizard help out in slowing down pushes and they transition well into a dangerous Miner counter attack.

Golem

Like the Giant, but more hitpoints and more expensive. You can easily punish Golem users by rushing with Elite Barbarians just as they drop him. Golem matchups are very easy with this deck as you can take out supports quickly and destroy Elixir Collectors with Miner. The only thing you have to watch out for is Minion Horde, which is sometimes seen in Golem decks. Poison, Ice Spirit, and Electro Wizard are pretty good at taking them out and Electro Wizard turns into a great defensive card after.

Siege

Electro Wizard, Inferno Tower, Knight, and Elite Barbarians are all great against siege decks. If you’re facing Mortar, Electro Wizard and Inferno Tower can easily shut it down. You do have to be careful of distraction troops, but that’s what The Log is for, killing swarms. X-Bow is even easier at it gets distracted by Knight and Elite Barbarians as well, leaving it more vulnerable and doing less damage to towers. Sometimes, Miner even helps against siege, but avoid using him defensively because he’s much better on offense.

Graveyard

Poison and Knight are great counters to Graveyard, however both have drawbacks. Poison burns every second, which means that some skeletons will spawn and sometimes clip your tower. Knight tanks all the Skeletons, but your Tower has to help him in order for him to actually be an effective counter. Elite Barbarians aren’t very good against Graveyard because they still let Skeletons build up, despite there being two of them (and cost six elixir). This is because they destroy Skeletons at a rate of 0.75 seconds, and Skeletons spawn at a rate of 0.5 seconds. Usually, you will place Inferno Tower to burn down the tanks and Poison to clear out the Skeletons against Graveyard, but be prepared to out chip your opponent.

Miner

Knight is great versus Miner, as he doesn’t die to Poison and is a mini-tank with more damage and health. You just have to place him right so that the Miner doesn’t lock onto your tower. If you do this, usually you can outchip your opponent.

Elite Barbarians

The nerf made them much less threatening for this deck, and Knight alone can basically shut them down. However, there will be times where your need both Knight and Ice Spirit to stop them, but that’s still a great trade. If it’s your last resort, use your own Elite Barbarians to defend your opponent’s because they too will get the job done.

Conclusion

This deck is great and very fun to play across all levels. Originally, it was just for challenges, but I found that with the right levels, it can be very potent on ladder too! If you want to use it on ladder, my top priority would be leveling up Ice Spirit, as if it’s under leveled, it won’t reach the Crown Tower. I’d also recommend upgrading Miner and Electro Wizard as well because they become much better when you have them at good levels.

Remember to control the game, but don’t play too over-aggressive with Miner. He’s great at chipping, but it’s very easy to slowly put yourself in at an elixir disadvantage by making constant negative trades. Miner-Poison is great, and the other cards compliment and control very well. Elite Barbarians are your secondary offense, as you can use them to punish opponents and dismantle pushes.

As always, thanks for reading! I always appreciate you all reading this and I hope you learned something while reading. This deck is great and fun, so I advise that you at least give it a try in a challenge.

This has been General NX, signing out. See you all next time.

Double Prince Zap Bait – Push to Legendary Arena!

7
double prince

Howdy everybody! For those of you who aren’t familiar with me (but I assume most of you are), I am Supermarine, and I have decided to bring to you folks here on Clash.World a Double Prince Zap Bait deck made by my friend CrazyJake01

He used this very deck to make it from 3300 (Hog Mountain) all the way to Arena 12 in a matter of weeks!

So, before y’all get too anxious, I’m just gonna get into this while I can.

double prince

Clash Royale Dark PrinceClash Royale PrinceClash Royale Goblin BarrelClash Royale Fire Spirits
Clash Royale Dart GoblinClash Royale ZapClash Royale Goblin GangClash Royale Inferno Tower

copy deck

double witch analytics

The Double Prince Zap Bait Deck

Clash Royale PrincePrince: This lance-loving, tiny pony-riding, dashingly good-looking man is a very good card to have in a Zap Bait.

His charge deals huge damage on offense and defense, although he can have issues versus big tanks like P.E.K.K.A and Giant Skeleton.

He is also good bait for our Goblin Barrel, meaning that if they Zap Prince, then the Barreled Goblins can go in unhindered.

Clash Royale Dark PrinceDark Prince: The splash damaging counterpart of the gold-clad Prince, the Dark Prince is basically the opposite of what the Prince is.

Many people think he is trash, but after the Meta change, he has become a much more prominent card in the current scene of things.

His 360 splash when charging is great at helping the Prince where he is weak, and the Prince does the same for him.

Similar to Prince, this buckethead also provides good Zap Bait for your Barrel as well.

Overall, he is an all-around great card, and even more great in Zap Bait!

Clash Royale Goblin BarrelGoblin Barrel: Obviously, this is your win condition.

You can have different placements for this too.

If you want to get as much damage done as possible is a short time, then center placement is advised.

If you want to be able to juke out Arrows, The Log, or overleveled Zaps, then the side or deep placements are advised.

When using the side and deep placements, watch out for other things that the enemy may have, such as Ice Spirit, Goblin Gang, or Valkyrie.

Clash Royale Fire SpiritsFire Spirits: These poor little guys are barely experiencing any use these days, which is actually quite sad.

But, they represent well here in this deck (mainly because my friend doesn’t have Princess or Magic Archer).

They are great at swarm clear as well as for dealing that last bit of damage to that pesky tank you need down. These three actually have the highest DPS out of any unit in the game, meaning the 300 or so damage they deal together (roughly 100 per Spirit) is inflicted almost instantaneously!

Clash Royale Dart GoblinDart Goblin: Coming to you with the wooden mask, the iconic blowgun, and many years worth of didgeridoo lessons, that’s right!

You know him, you love him (probably not), it’s the Dart Goblin!

He has one of the fastest fire rates in the game, and his damage is quite decent too. This means that he is able to tackle Princess, Mega Minion, and even the Punish Horde if placed right!

He also helps to bait out Arrows or Log as well, helping the Barrel even more when it comes to damaging spell counters!

Clash Royale ZapZap

Pretty self explanatory.

Kill swarms and reset Infernos with it.

Clash Royale Goblin GangGoblin Gang: Essentially the Clash Royale version of the Furious Five, these dudes are great for Zap and Log bait alike.

Their DPS isn’t to be taken lightly either, as they are definitely capable of taking on many mini tanks, as well as lower-health big tanks.

You can also split them in the back to invest Elixir and shape your hand to better arm yourself defensively.

Overall, a staple in any Bait deck!

Clash Royale Inferno TowerInferno Tower

The 5 Elixir Rare card you get at P.E.K.K.A’s Playhouse, this fiery building is great for defense against big tanks, especially P.E.K.K.A, which is on the rise.

However, be sure to protect it using cards such as Fire Spirits or Goblin Gang, as there will be people trying to take it out!

Whether that’s by using a preemptive swarm or a reset card, be sure to bait it out using Goblin Gang or Fire Spirits first, so it will have free reign throughout the Arena!

Substitutions

Clash Royale Dart Goblinekf9WOpClash Royale PrincessClash Royale Magical ArcherClash Royale Hunter

Clash Royale Goblin Gangekf9WOpClash Royale Skeleton Army

Clash Royale Inferno Towerekf9WOpClash Royale Inferno Dragon

Clash Royale Fire Spiritsekf9WOpClash Royale BatsClash Royale MinionsClash Royale Ice Spirit

Clash Royale Zapekf9WOpClash Royale ArrowsClash Royale The Log

General Gameplay

3:00-1:00

Get some good chip damage pushes in during this time. This way, you decrease the time that your opponent has to attack.

This is especially useful if they’re using Beatdown of any kind, as a chip push can turn into a big punish!

Doing pushes with individual Princes and Barrel is also quite wise, as it saves one Prince for a rush attack or for defense.

In terms of defense, save you Gang and IT for emergencies.

1:00-End:

Get those Princes down! Double Prince combo is key to your success here, and if you can add in Zap, Goblin Barrel, or Fire Spirits as well, the opponent will be in massive trouble!

Matchups

Clash Royale GiantGiant

Always a relatively simple matchup to face, countering it is also relatively simple too.

Use the Inferno Tower in the center, and if there’s a swarm or reset card, use Goblin Gang or Fire Spirits to aid in the fight.

Clash Royale GolemGolem: Now, I understand that fighting Golem is NOBODY’S cup of tea.

However, Inferno Tower is the easy counter.

If this is one of those rare occasions where a Golem crosses the bridge and your IT isn’t in cycle (trust me, it was no fun when my friend was using this for the first time), put Prince behind your King Tower, so he can get a charge off on the Golem and deal significant damage.

A more efficient, but riskier option is to rush the other lane with Dark Prince+Goblin Barrel, then use Inferno Tower or Prince to defend.

Clash Royale P.E.K.K.AP.E.K.K.A

Inferno Tower or Prince+Goblin Gang is very efficient versus this robotic rabble rouser.

Use the Zap and Fire Spirits to deal with the support.

Dart Goblin also helps to whittle down the health of the P.E.K.K.A as well.

Clash Royale Lava HoundLava Hound: Inferno Tower is a wise decision (doesn’t everybody know that?) versus Hound.

Also use Dart Goblin on Pups if necessary.

If fighting LavaLoon and you know so, prevent their push from coming by rushing the other lane with Dark Prince+Barrel.

Your air defense is poor, so watch it!

Clash Royale Royal GiantRoyal Giant

Use Inferno Tower. Or, if you want to be able to counterpush, use Prince, then solidify the counterpush with Barrel and Fire Spirits (or use Dart Goblin).

Use Gang or Dark Prince (let him charge, though) on any Elite Retards.

Clash Royale Hog RiderHog Rider

Inferno Tower is a very wise counter to use versus the Hog.

However, you can use Goblin Gang or even Prince if he gets a charge off.

When using a Gang or Prince, be sure to establish a counterpush.

Also, do NOT let them outcycle you, otherwise you may not have the right cards in rotation for the right pushes!

Clash Royale Three MusketeersThree Musketeers

Without the standard issue Rocket, 3M actually becomes a problem, so don’t treat these three ladies as a joke.

What you need to do is when they deploy the Muskets, place Prince same lane just as they’re about to cross the bridge.

This allows the Arena Tower to provide valuable support to aid the Prince.

If they use Log to stop the charge, then use Dart Goblin. Counterpush if possible.\

Versus Pumps, use Dark Prince on the Tower and Barrel on the Collector.

Clash Royale GraveyardGraveyard

Dark Prince and Dart Goblin are great counters to the Graveyard.

Versus Graveyard Poison, use Dark Prince, as DG will not survive Poison.

Versus Graveyard Freeze, use Dark Prince to bait Freeze, then once it comes, Zap the Skeletons out, then Dart Goblin for best results and a neutral trade!

Clash Royale X-BowSiege: Prince and Inferno Tower are your best counters to siege structures.

When using Inferno Tower, be very careful of reset cards like Ice Spirit, and preemptive swarms such as Bats, Goblins or even Archers.

If necessary, you can also use Fire Spirits to get that last bit of damage done to a structure to prevent unnecessary damage to your Tower.

Clash Royale MinerMiner Poison: One of the hardest matchups, as none of our good Miner blockers can survive a Poison.

Dark Prince is a good Miner Blocker when Poison is out, but versus lone Miners, he isn’t, as his use will put you at an Elixir disadvantage.

So use Dart Goblin versus lone Miners (make him keep his distance) and DP to counter Miner Poison.

Use Inferno Tower if necessary, and counterpush whenever you can.

Clash Royale Goblin GangSpell Bait:

Use your Zap, Fire Spirits and Gang wisely! Use the Fire Spirits on the Barrel, and use Zap, DP, or Gang on anything else. Counterpush whenever you can.

Also be sure to use Double Prince combo often, as the Inferno Tower can get easily overrrun by the Princes if Zap is used.

Versus Tornado Bait, be sure to place the Prince in the BACK if using Double Prince.

This means that the Dark Prince will be pulled to the King Tower, but the Prince will not! This makes taking the Tower much easier!

Clash Royale Mega KnightMega Knight

Like with other tanks, Inferno Tower and Prince are great options.

Dark Prince is also generally good too, as it allows troops like Gang to strike MK while DP tanks.

If they place MK in the back, rush the other lane with Dart Goblin+Barrel.

It may not seem like much, but it can deal over 1,000 Tower damage if left ignored, so they’re gonna have to respond to it. This allows you to (possibly) kill the lone MK, if it is alone.


So that’s it for this deck guide! As always, leave a comment so I can hear what you guys have to say!
Until next time, see y’all later.

Get to Legendary Arena with Golem Deck [22 Wins In A Row]

3

Hey guys, my name is CCY and today I will be talking about the Golem deck that got me to Legendary Arena with 22 straight wins.

I love the Golem as it is a very interestinig card. I have created over 20 different Golem decks and tested them out. After about a month, I have finally created the strongest Golem deck. Just today I had played it and won 22 wins in a row, and I’m not even kidding.

Get to Legendary Arena with Golem Deck

Clash Royale GolemClash Royale The LogClash Royale ArchersClash Royale Furnace
Clash Royale LightningClash Royale ZapClash Royale Mega MinionClash Royale Skeleton Army

Substitutes:

  • The Log can be replaced with Fireball or Arrows.
  • Skeleton Army can be replaced with Barbarians, Minions, or Goblins.
  • Lightning can be replaced with Fireball or Rocket.
  • Golem can’t be replaced since it is the main win condition of this deck. But if you really don’t have it, Giant, Giant Skeleton, or P.E.K.K.A can replace it.
  • Mega Minion can be replaced with Mini P.E.K.K.A, Minions, or Baby Dragon.
  • Furnace can be replaced with Goblin Hut, Fire Spirits, or any other building.
  • Zap can be replaced with Arrows, Fireball, or Poison.
  • Archers can be replaced with Spear Goblins, or Minions.

Card Breakdown:

Golem – The Golem is the tankiest card in Clash Royale. He can absorb a lot of damage and its damage output is solid. This card is very expensive and slow, meaning you have to be careful when you place it, as opponents can rush you with Elite Barbarians or the Hog Rider. But once you have the Golem down along with some small troops behind it like Archers, it can deal a lot of damage, and the only hard counter against the Golem is the Inferno Tower and Skeleton Army. That is why the Lightning and Zap is in the deck.

Lightning – The Lightning Spell is very useful for kill powerful troops, along as damaging the crown towers, or buildings. Just remember one rule: only use the lightning if:

  1. It is used to kill a crown tower with very low health in clutch situations
  2. It is used to kill a troop that you have no hard counters for
  3. It is used to damage a crown tower with at least one other troop

Mega Minion – The Mega Minion is one of the most overused cards in the game because is amazing at defense, especially killing support troops placed behind large tanks. For only 3 elixirs, you can shut down a Hog Rider, and then counter push using it as a support troop. It’s very versatile, decently tanks, and deals a lot of damage.

Furnace – The Furnace is in my opinion the best defensive building in the game, because it spawns spirits that can easily kill Skeleton Armies and Minion Hordes. It also makes your opponent have to deal with the Furnace because in tournament standard one Fire Spirit will always make it to the tower.

Zap – The Zap is very useful for resetting Inferno Towers, Inferno Dragons, damaging Minion Hordes, and counter swarm troops like Minions or Goblins.

Archers – Archers are really good in this deck because they can shoot crown towers from behind a Golem, which will tank all the damage. Archers are also pretty good at killing air troops such as Minion Hordes, and Mega Minions. They are one of the best counters for the Inferno Dragon, stopping it from burning your Golem.

Skeleton Army – The Skeleton Army is a great counter to many cards such as Hog Rider, Elite Barbarians, and large tanks. Smart placement with the Skeleton Army is key, as players will often pre-log the lane if they have a kill card placed down. Placing it in the middle is a good strategy, as long as the Skeletons are in range of the opponent’s kill card.

The Log – The Log is one of the best Legendaries in the game. It is very useful in many situations and it is very good at clearing the path for the Golem. It can kill Skeletons, Archers, Minions, Princesses, and basically any other small troop.

General Gameplan:

In the first 30 seconds of the game, you want to see what type of deck your opponents has. Play defense with the Furnace, Mega Minion, Skeleton Army, and Archers! Also try to make mini-pushes to bait out buildings to get a good sense of your opponent’s deck.

During mid game, when there are about 2 minutes left, try to quickly gain an elixir advantage by making positive elixir trades.

Then place down the Golem at the very back. If your opponent pushes the other lane, try to quickly defend the push, then support your Golem. If your opponent places down a defensive building or tries to counter your Golem, this is a good sign.

  • First, if he has a strong building, Lightning it down, and try to hit the tower and maybe a troop.
  • Then, if he tries to swarm your Golem, Log their troops.
  • If he has a good defensive card like the Wizard or Elite Barbarians, let their troops target your Golem, then place down support troops.

You will almost always win every major push because your Mega Minion can kill almost any defensive troop, and your Archers can kill troops from a distance, as long as your Golem is tanking your support troops.

After you take one tower (which you almost always will), decide if you want to play defense for the rest of the game, or try to get a 2 or 3 crown.

If there is less than 30 seconds left, just defend. If there is more than 30 seconds left, attempt to pressure your opponent by playing a Golem right at the bridge, right after you take the first tower. This will pressure your opponent because he has to defend 2 lanes, and you will most likely get the second tower.

One very important tip I want to talk about is that it’s okay to allow some damage on your tower in order to build up a big push. In a lot of my games, my towers get damaged very badly because I don’t spend too much elixir defending. But instead, I have created a very large push that eventually 3 crowns my opponent.

Just today I was playing my Golem Deck, and both my towers had less than 1000 health left because I didn’t spend too much elixir defending it. But instead, I created a very large push consisting of a Golem, Mega Minion, Archers, Fire Spirits from my Furnace, and a ready-to-use Lightning. I instantly 3 crowned my opponent, as his only defense was an Executioner and Skeleton Army, which my support troops killed immediately.

Of course, that doesn’t mean never defend, even if a Hog Rider and Elite Barbarians are coming right at you. At the very least, put your Furnace down to soak up some damage while you create your large push.

Okay, that’s it for my Arena 11 Golem Deck Guide. Thanks for reading, and I hope you win many battles with this deck!

Deck Building Fundamentals – How to Learn Every Deck in Clash Royale!

449

Hello Fellow Clashers! I’m KairosTime and today I’m bringing you Part II to the “Strategy Guide to Clash Royale” with a Strategy Guide on How to Learn Every Deck. This is a guide for new players and experienced alike and is a precursor to my next guide which will be on How to build the Best Decks!

This written guide comes with a video guide that includes specific examples that I would recommend watching.

Deck Building Fundamentals

Deck Building Fundamentals

Table of Contents

  1. Mindset
  2. Classification 1 – Speed
    1. Fast Decks
    2. Medium Decks
    3. Slow Decks
  3. Archetype
    1. Control Decks
    2. Siege Decks
    3. Beatdown Decks
  4. Strengths, Weakness and Mindsets
  5. Utility
    1. Unity Decks
    2. Balance Decks
  6. Conclusion

In this guide, we’ll focus on 3 key topics:

  1. Mindsets
  2. 3 Different Deck Classifications
  3. Deck Examples

Understanding each of these Deck Classifications and how they work together will help you build decks that cater to your playstyle, utilize the strengths of your deck, and take advantage of the weaknesses in your opponent’s deck. It will also help you throw off your opponent’s mindset so they are forced to play the way you want them to rather than how they’d like to.

Important

It is important to understand that the principles in this guide are general guidelines and that there will be exceptions to every rule.

While most decks will fit into these classifications and will have certain strengths and weaknesses because of it, there are some decks that won’t fit or that could fit into different categories because of the way you play them.

By understanding these guidelines and learning when to be flexible with them, you’ll be one step closer to becoming a master of the game!

Mindset

Your mindset is your general plan to play your deck in order to succeed with it. While it’s important to be flexible with the way you play your deck, you’re typically going to have an offensive mindset and a defensive mindset.

If you can play your deck with the right mindset, or the right way, you will usually be able to throw your opponent off their mindset which will result in them playing their deck poorly. Learning to disrupt your opponent’s mindset plays an important role in becoming a master of the game!

It is important to realize that the mindsets of each deck type are good mindsets to have regardless of the deck you play, but the specific mindsets listed in the rest of the guide are typically how the respective deck type focuses on offense and defense.

Mindsets in this guide will be underlined and bolded

Classification

Classification 1 – speed Speed

The speed of a deck is the first classification that we will be talking about.

While speed primarily depends on the average elixir of the deck, there are exceptions depending on the deck’s shortest cycle (The cost of your deck’s 4 cheapest cards).

While a deck may have a higher elixir cost because of 4 expensive cards, it may have 4 cards that are relatively cheap which means that this type of deck can actually be played faster than other decks that have a similar average elixir cost.

Also, if all of the cards in the deck are within 1 to 2 elixir from the average elixir cost, the deck might be a little slower than other decks with a similar average.

For the sake of keeping things simple for this guide, we’re going to be focusing only on Average Elixir Cost, but please be aware that your deck’s shortest cycle may make some decks faster or slower.

offense defense

Fast Decks: speedspeedspeed

Average Elixir Cost: 3.0 or lower

Offense: StrongFast decks, also called cycle decks, are typically very offensive and can easily get damage onto an opponent’s tower. When playing a fast-paced deck, your offensive mindset should be to quickly find out what your opponent’s counters to your win condition/s are and out-cycle counters so they have to try and defend with sub-optimal counters. Doing so will result in large amounts of damage on your opponent’s tower if they decide not to defend, or positive elixir trades that you can cash in at a later time if they do decide to defend.

Defense: Weak Fast decks tend to struggle on defense because of the cheap cards in their deck that are easy to clear. The best defense for cycle decks tends to be a constant offense or a rush down the opposite lane of an enemy push. Unless your opponent is able to get good value out of a defense, your opponent will have a hard time keeping up with constant pressure

Medium Decksspeedspeed

Average Elixir Cost: Between 3.1 and 3.7

Offense: Decent – Being caught between the high offense of fast decks and the low offense of slow decks, medium-paced decks land right in the middle and are decent at damaging the enemy tower. As such, medium-paced decks give you the option of playing like a fast deck when your opponent’s deck is slower than your own, or playing like a slow deck when your opponent’s deck is faster. There will be times when out-cycling counters will give a medium-paced deck the advantage, and other times when building up a push will help you take the crown. While having the option of having 2 offensive mindsets is beneficial, it is important to know when to play fast and when to play slow. If you make the wrong decision and try to out-pace a fast deck or try to build up a push against a slow deck, you will likely lose.

Defense: Decent – Just like in Offense, Medium-paced decks must choose when it is better to defend like a Slow deck or a Fast deck. If you’re playing against a slower deck, it would be wise to apply constant pressure as a way to prevent your opponent from building up a push or even rush a lane. If you’re playing against a faster deck, using strong defenses will give you a good advantage. Learning when to play fast and when to play slow is an important factor in defending with medium-paced decks.

Slow Decksspeed

Average Elixir Cost: 3.8 or higher

Offense: Weak – Slow decks, also called heavy decks, tend to have weak offense because they have a lot of cards that are more elixir heavy and it usually takes some time to get damage on the tower. To overcome the lack of a fast and strong offense, slow decks have the mindset of slowly building up a push that is so large that it simply can’t be stopped. It’s important to be aware of which cards are in your opponent’s deck so that you can either preemptively counter their counters, or so you can be prepared to counter their counters.

Defense: Strong – Slow decks have a lot of different options that can be used to prevent tower damage which makes them very good at preventing damage from landing on a tower. However, it is very important for slow decks to not over-defend so that support can still be added to the main offense. A good mindset for a slow deck would be to use highly defensive cards so it is difficult for the opponent to land a hit on the tower. Often, slow decks have to worry about an opponent rushing the other lane, so it is important for slow decks to have solid defenses that can stop a rush.

speed 1

Classification 2 – Archetype

Most players that are reading this will already be aware of the classic 3 deck archetypes that were originally defined by The_RumHam in his “3 Decks of the Metagame” post on Reddit. Your Deck Archetype depends on the role of your deck’s Win-Condition and how you use your Win-Condition.

The 3 main Deck Archetypes are Siege, Control, and Beatdown.

In this guide, we will be looking at these 3 archetypes in a different light, and will be talking about the general Strengths, Weaknesses, and Mindsets of each of them.

win condition

Control Decks

control decksWin Condition Role: Primary tower destroyer up close

Examples: Hog Rider & Miner

Offense: Strong – Control decks tend to be able to have an easier time dealing damage to the tower than the other archetypes. That being said, most people are prepared to stop a push from a Control deck, and so it makes it very important to have the right offensive mindset of striking when the time is right. This may be when they don’t have the right counter to a certain card, or it may be when they don’t have the elixir to defend. In order to make this possible, it’s important for Control players to try and find every opportunity they can to get an elixir advantage so they can turn that into quick damage to an enemy tower.

Defense: Weak – Control decks tend to use offense as a strong defense because they typically use cards that aren’t as defensive as cards used in other deck archetypes. When it comes to playing defensively, control decks have the mindset of going for positive elixir trades so that they can continue going on the offense, thus preventing their opponent from having enough elixir to go on the offense.

Siege Decks

siege deckWin Condition Role : Primary tower destroyer from a distance.

Examples: Mortar & Xbow

Offense: Weak – Siege decks don’t typically have a lot of ways to easily damage the enemy tower but rather rely on the sole power of 1 or 2 cards to damage the tower. This makes Siege decks have relatively low levels of offense when compared to the other archetypes. As such, the offensive mindset for Siege is to protect the win condition. If you can protect the win condition well enough, you should be able to use the offense of that 1 card to take an enemy tower.

Defense: Strong – Siege decks tend rely on very defensive cards to keep their win condition alive which means that they are strong on defense. In the case of the Mortar and Xbow, you can even use the win condition in the deck as an added defense by “Turtling Up”, which is a term used for when you place the Xbow or Mortar further back in the center of the arena as a way to apply defensive pressure on your opponent. The defensive mindset for Siege decks is to turtle up when you’re not ready to go on the offense and would rather deal with the opponent on your side of the arena where you have the advantage.

Beatdown Decks

beatdown decksWin Condition Role: Protects support units that damage the tower

Examples: Giant & Lava Hound

Offense: DecentBeatdown decks typically have a fair amount of offensive cards, but not as many as control decks do. Instead, Beatdown decks take advantage of having the right cards in their deck to take care of enemy counters on the enemy side of the arena. As such, it is important for Beatdown decks to find out which counters their opponent has for their deck, and build their push based on those counters by either preemptively adding the right support troops to the main push, or by being prepared to counter defenses with the appropriate spell. This mindset is called using the right support.

Defense: DecentBeatdown decks tend to not be as defensive as siege decks, but also have a fair number of defensive cards to be used. In order to build up a proper push with the right support cards, a good mindset for a beatdown player to have is to use the tower’s health as a resource in order to build up enough elixir for the Beatdown push. If you don’t know what I mean by “use the tower’s health as a resource”, you will want to read my guide on “How to Manage Elixir”.

Strengths, Weaknesses and Mindsets

By using the 2 first deck classifications and organizing them like I have done in the chart below, you can learn a lot about these basic 9 different deck types.

comparisons

The first deck types I would like to talk about are the decks that are in Green. These are the decks that are decent at both offense and defense. For example, Siege decks tend to be weak on offense, but fast decks are strong on offense. By making a Fast Siege deck, you have a deck that is good at both defending and going on offense but may struggle when facing another deck that is more offensive or more defensive. This fits for both Medium Beatdown decks, and Slow Control decks.

Next, I would like to talk about the decks in Light Blue. Because of where these lie on the chart, they will be strong in one way and weak in another way. For example, both Fast Beatdown decks, and Medium Control decks have strong offenses and weak defenses. On the other hand, Medium Siege and Slow Beatdown decks have a weak offense and strong defense. These decks try to use their strengths to overcome their weakness by focusing on following the mindsets of their classifications.

The last decks I would like to mention the decks in Dark Blue. These decks are on the extremes of this chart and are the strongest in one way, and weakest in the other way. Fast Control decks focus on constantly applying pressure on their opponent but have a difficult time defending if their opponent builds up a push. On the other hand, Slow Siege decks tend to be able to defend nearly any push, but have a very difficult time doing enough damage to a tower to actually take it down.

In my experience, all of these deck types can be very strong if you play them the right way, and you have the right mindset. As the meta shifts due to balance changes and new card additions, different deck types will become stronger or weaker, and more or less popular. If you are good at playing a specific type of deck and would like to expand your ability to a different deck type, it might be a good idea to start with a different deck type that has similar characteristics to the one you’re good at playing.

If you would like examples of each of these deck types, I would recommend watching my corresponding video guide to this guide.

Classification 3 – Utility

On top of these 2 different deck classification types, there is a 3rd deck classification which adds another level. This 3rd classification has to do with a 3rd fundamental principle called “Utility”.

We will be covering the two different types of decks with regards to utility: Unity and Balance.

utility 2

Unity Decks

Unity Decks focus on 1 utility and fill that deck with that utility, while using 1 or 2 cards in the deck to overcome the weaknesses that utility has. These decks are built around overwhelming your opponent with the 1 utility until they can’t defend that utility any longer and you take their crown. These decks are extremely strong against some decks, but are very weak against other decks.

Unity Decks play around the main 1-2 counters their opponent has to their utility and once those counters are no longer a threat, they strike and that usually leads to the downfall of an enemy tower. Unity Decks are very strong if their weakness is unpopular in the meta or if the counters aren’t too difficult to overcome.

Some utilities that have been used to make Unity Decks in the past are:

basic utilities

When facing other Unity Decks , the mindset is to out-utility the opponent by creating the biggest threat.

The simplest example of this is a Flying Unity Deck that has no anti-ground cards facing a Ground Unity Deck that has no anti-air cards.

In essence, the first person to realize what’s going on and can take down the King’s tower the fastest will win.

While battles are way more complex than this, the principle stands true when two utility decks are facing each other.

Balance Decks

While Unity decks focus on 1 utility, Balance Decks are built around using multiple or all utilities.

By having an answer to everything, Balance Decks tend to be decent at facing all decks.

That being said, they can struggle against Unity Decks if they only have 1 or 2 counter to the utility that the Unity Deck has focused on.

The mindset of Balance Decks is to target enemy weaknesses and to out-skill enemy strengths. If you can do this with a Balance Deck, it will be difficult for your opponent to beat you.

Conclusion

With these 3 Deck Classifications, that makes a total of 18 basic deck types in the game. Whether you want to become Specializer who masters one or two of these Deck types and gains so much skill that no one can beat you, or a Generalizer who gets great with them all so no one can stand in your way with your complete understanding of the game, you now have the understanding of every Deck Classification which will help you become a master in The Arena.

Thanks so much for reading this guide! If you’re interested in learning more, make sure you subscribe on my YouTube Channel so you can be the first to see my guides. If you have any questions, feel free to leave them as comments on my video and I’ll get back to you as soon as I can!

Ticking By,

KairosTime