Home Blog Page 6

LumberRam – The Frisky Off Meta Deck

107
lumberram

Hey everyone, it’s Inaros here (Frisk Dreemurr in the comments) with my first deck guide, a Battle Ram cycle deck!

Now, I know that you must be thinking that you’ll get a typical meta deck, but this baby is VERY off meta. This deck came to be when I won the Battle Ram from it’s challenge. I was so enthusiastic to use it that I just threw together the cards you’re about to see and jumped right in! The rest was history… jumping from Frozen Peak all the way to the old Legendary Arena (now known as Hog Mountain), then to the new Legendary Arena! Prepare yourselves, for things are about to get REALLY Frisky!

lumberram

Lumberjack Battle Ram

Clash Royale BowlerClash Royale Battle RamClash Royale Ice GolemClash Royale Lumberjack
Clash Royale The LogClash Royale Elite BarbariansClash Royale Ice SpiritClash Royale Arrows

double witch analytics

Cards Breakdown

Clash Royale BowlerBowler: This big blue (or purple?!) dude digs the simple things in life, and you’ll soon learn to dig him when you understand his true power in this deck!

The Bowler tosses a huge rock in a linear direction, hitting troops in it’s way for as long as the boulder lives.

He is a splash damage dealer against cards like Skarmy, but not against the likes of Minion Horde.

He also has the ability to knock back several non-tank cards, making him a life saver and a great push dissector (only exception is the dreaded Lavaloon, curse that push!!!!).

Clash Royale Battle RamBattle Ram: Two Barbarians holding a large log, dealing significant damage if they connect it with a building. The fun doesn’t stop there, though…two Barbarians pop in to deal even more damage!

You’ll find that most of your pushes will be founded on this card, as you have several threat cards in this deck that an opponent with common sense will not let damage the tower.

Get creative with your ram combos, and remember to mix it up a bit so the opponent doesn’t know what to expect.

Clash Royale Ice GolemIce Golem: For only two elixir, this guy offers insane value.

To see an extensive report on what this handsome devil can do, click here.

He’ll be an important figure in defense and push protection in this deck, and he’s a good cycle card when in a pinch.

Clash Royale LumberjackLumberjack: Chop chop! The Lumberjack is the best legendary in the game (of course in my opinion)!

For four elixir, you have an insanely fast, fast hitting speed, high damage dealer that can reduce a tower to about 20% of it’s HP!

As a bonus, a built in rage spell is dropped upon it’s death, making it a very great card when you just want a tower fast.

Clash Royale Elite BarbariansElite Barbarians: These two muscle beaches are like regular Barbarians, only faster, tougher, and stronger!

Not much to say about these except that they’re a huge threat and that they’re excellent on defense…

Clash Royale Ice SpiritIce Spirit: This cute little ball of snow may look harmless, but will guaranteed be a life saver in many occasions!

It will freeze any opposing troop for roughly 1.5 seconds.

The best part? It’s almost always guaranteed to make it to the tower, giving you some free chip damage that your opponent won’t bother to pay attention too.

For a common and being 1 elixir, it’s pretty tanky.

Another cycle card in this deck.

Clash Royale ArrowsArrows: Not much to say. Clears swarms and helps out a lot against the pesky Minion Horde that wants to end your push.


Clash Royale The LogThe Log: I mean, do I even have to explain this one?! IT’S THE LOG!!! Let this guide do the explaining.


Replacements!!!

Bowler: Wizard, Witch, Baby Dragon

Battle Ram: Hog Rider

Ice Spirit: Ice Wizard (not recommended)

Lumberjack: Mini P.E.K.K.A, Musketeer, Valkyrie

Elite Barbs: Barbarians, Skeleton Army(not recommended), Minion Horde (not recommended)

Ice Golem: Knight

Arrows: None really except Fireball.

The Log: Zap

Tips and Advice

  • It’s okay to let your Lumberjack die. It’s pretty squishy, so letting it die is worth the rage effect that will boost your defense or offense.
  • Always pre-Log the lane your Battle Ram is going down, so your opponent can’t properly use their counter.
  • Your Ice Golem is your best bet if you need to mitigate damage against the likes of Mega Minion or Inferno Dragon. Use him wisely!!
  • It’s okay to take damage with this deck. Just because it has some extremely powerful stopping cards doesn’t mean you over commit.
  • To block the annoying Hog Rider from ever reaching your tower: Place your Bowler directly in front of the tower, then when the Hog is about to make it, put the Ice Golem next to the Bowler. The Ice Golem sorta gets stuck in place, and the Hog Rider is stuck in pocket! The Bowler will just casually mow down the Hog along with help from the tower.
  • Always, ALWAYS support your Ram with at least an Ice Spirit to increase it’s chances of dealing that juicy charge damage on the enemy tower.

General Gameplan

Single Elixir

Start with a lone Lumberjack or Battle Ram at the bridge to bait any important Glass Cannons or swarms (support them if you’re feeling bold!). If neither are available, just wait until the opponent drops their tank/glass cannon in the back and drop your Bowler in the same lane.

Always have your Bowler ready, because you never know when that raged Hog Rider or Elite Barbarians charge down a lane! Have your Bowler ready in general, because you’ll need it if you wanna stop most tank pushes

Predictive Log/Arrows are key here, so wait at least two seconds after dropping your Battle Ram to ensure safe travels.

Double Elixir (Things are gonna get FRISKY here!)

This is where you can get as aggressive as you like! This deck is extremely quick at cycling, so you don’t have to worry too much about defense (you’ll have a second or third Bowler if you cycle quickly; try to include Bowler in every push come Double Elixir time).

Build the most monstrous pushes you can imagine!

I’m talking E barbs+Lumberjack+Ice Golem+ Ram+ Ice Spirit, Bowler+Lumberjack+E-barbs+Ice Spirit, Ice Golem+E barbs+Ram+ Bowler, or even ALL the cards in this deck into ONE. GINORMOUS. PUSH!!!!

Matchups

Clash Royale Lava HoundLava Hound: To quote a certain robot from a sci-fi movie: “WE’RE DOOMED!!”


Clash Royale GolemGolem: Medium matchup.

You have E barbs and Lumberjack to shred through the big stone dude, Battle Ram to apply pressure, and Bowler to mow down the supports. Use Ice Golem and Ice Spirit to stall or even kite Inferno Dragon/Mega Minion. Watch out for Lightning.

Clash Royale Three Musketeers3M Pump: Semi-hard matchup.

Use Bowler for the single Musketeer and support, Ice Golem and Lumberjack for double Musketeers. You should be able to out cycle them.


Clash Royale Goblin GangBait: They’ll bow down to you if you use your Log/Arrows/Bowler correctly.


Clash Royale Hog RiderHog Rider: Easiest matchup. Watch out for E barbs, Lightning, or E wiz. Use the tactic mentioned in the tips.


Clash Royale X-BowSiege: They’ll COMPLETELY bow down to you, as their defense is garbage. Just try not to get out cycled.


Clash Royale GraveyardGraveyard: A medium matchup.

Try not, I repeat, TRY NOT to let their tank cross the bridge. You’ll have Lumberjack or E barbs to decimate it. You’ll need to save your Bowler a couple of times, though (see what I mean?), to deal with the skellies. Watch out for the Freeze Spell (though I haven’t seen it used with Graveyard in a while). Apply pressure so they have less time to use the Graveyard and even less to defend your push.

Deck Composition

The LumberRam deck is built around the synergy between the Lumberjack and the Battle Ram. Here’s the full deck composition:

  • Lumberjack: The core of the deck, providing both offensive pressure and a Rage spell upon death.
  • Battle Ram: The primary win condition, capable of delivering a devastating charge to enemy towers.
  • Bandit: Adds versatility with her dash ability, capable of taking out squishy targets and putting pressure on the opponent.
  • Electro Wizard: Provides crowd control and can reset Inferno Towers and Dragons, making it easier for your win conditions to connect.
  • Baby Dragon: Offers splash damage and synergizes well with Tornado.
  • Tornado: Used for grouping enemy troops, enabling Baby Dragon and Electro Wizard to maximize their damage output.
  • Poison: A reliable spell for controlling swarms and damaging buildings over time.
  • Ice Spirit: A cheap cycle card that can freeze enemy troops, giving your Lumberjack and Battle Ram more time to connect.

Strategy and Tips

Early Game

In the early game, focus on understanding your opponent’s deck and cycling your cards efficiently. Use Ice Spirit and Electro Wizard defensively to counter enemy pushes, and support your defensive units with Baby Dragon when necessary. Deploy the Lumberjack and Battle Ram combo to test your opponent’s defenses and apply pressure, but avoid overcommitting.

Mid Game

By the mid-game, you should have a good sense of your opponent’s deck. Start setting up for more significant pushes. Use Tornado to pull enemy troops into the range of your Baby Dragon and Electro Wizard, maximizing their splash damage. Deploy the Lumberjack to tank and provide a Rage boost for your Battle Ram and Bandit, increasing their damage output and speed.

Late Game

In the late game, double elixir time will allow you to execute more complex and powerful pushes. Use Poison to control swarms and chip away at buildings, creating opportunities for your win conditions to connect. Keep the pressure on with continuous Lumberjack and Battle Ram combos, supported by Electro Wizard and Baby Dragon. Be mindful of your opponent’s counter cards and cycle through your deck quickly to maintain pressure.

Matchups

Against Beatdown Decks

Against beatdown decks, use Tornado and Baby Dragon to control large pushes. The Electro Wizard can reset Inferno Dragons and Inferno Towers, crucial for stopping heavy tanks. Deploy the Lumberjack defensively to take advantage of his Rage drop, and counter-push with Battle Ram and Bandit.

Against Control Decks

Control decks can be tricky, as they often have strong defensive capabilities. Focus on cycling through your cards to keep up constant pressure. Use Poison to chip away at defensive buildings and support troops, and look for opportunities to break through with Lumberjack and Battle Ram.

Against Siege Decks

Siege decks require careful management of your defensive resources. Use Tornado to pull siege units out of range, and rely on Electro Wizard and Baby Dragon to clear supporting troops. Once you have a defensive stop, quickly counter-push with Lumberjack and Battle Ram to punish your opponent.

Conclusion

Well, this is it, the end of my first guide!

The LumberRam deck offers a unique and effective alternative to the traditional meta decks in Clash Royale. Its combination of aggressive pushes and versatile defensive capabilities can catch opponents off guard and provide a refreshing change of pace. By mastering the synergies and strategies of this frisky off-meta deck, you’ll be well on your way to climbing the ranks and surprising your foes. Give the LumberRam deck a try, and enjoy the thrill of off-meta success!

I guarantee you that you’ll have the game raining trophies, plus lots of fun with this deck! If it doesn’t turn out for you, then that’s OK. You can go back to the meta (ugh).

This is Frisk Dreemurr saying STAY DETERMINED!

How To Deal With Losing Streaks

1
losing streak

Wassup fellas, RohanReigns here talking about perhaps an untalked topic but a significant one, losing streaks.

losing streak

While some may have an incredible win ratio, but it’s no doubt that every player out there faces losing streak at least once. I recently had a losing streak and lost around 300 trophies within few hours. It really sucked!

And then I started analyzing my mistakes and came up writing this guide for you all so that you can avoid losing streaks in the time ahead. So let’s right into it!

Losing streaks in Clash Royale can be incredibly frustrating, especially when you feel like you’re stuck in a cycle of defeat. However, it’s important to remember that losing streaks are a natural part of the game, and there are strategies to help you overcome them. Here are some tips to deal with losing streaks effectively:

1. Take a Break

Sometimes, the best way to break a losing streak is to step away from the game for a while. This can help clear your mind and reduce frustration, allowing you to return with a fresh perspective and renewed focus.

2. Analyze Your Deck

One common reason for losing streaks is an ineffective deck. Take some time to analyze your deck’s strengths and weaknesses. Ensure you have a balanced mix of offense and defense, and consider tweaking your deck to better counter the current meta.

3. Watch Replays

Reviewing your game replays can provide valuable insights into what went wrong. Look for patterns in your losses—are there specific cards or strategies that are consistently giving you trouble? Identifying these issues can help you adjust your gameplay accordingly.

4. Study Successful Players

Watching high-level gameplay from successful players can be incredibly beneficial. Platforms like YouTube and Twitch have plenty of content from top Clash Royale players. Pay attention to their strategies, card placements, and decision-making processes to learn and improve your own gameplay.

5. Practice in Challenges and Friendly Battles

Instead of jumping back into ladder matches, consider practicing in challenges or friendly battles. This allows you to test new strategies and refine your skills without the pressure of losing trophies. It’s a great way to regain confidence and improve your performance.

6. Focus on Card Levels

Sometimes, a losing streak can be attributed to being out-leveled by opponents. Focus on upgrading your key cards to stay competitive. Participate in events and complete daily quests to earn more cards and gold for upgrades.

7. Stay Positive and Patient

It’s easy to get discouraged during a losing streak, but maintaining a positive attitude is crucial. Remember that every player goes through tough times, and perseverance is key. Be patient with yourself and recognize that improvement takes time and effort.

8. Join a Clan

Being part of an active clan can provide support and encouragement. Clanmates can offer advice, share replays, and help you practice. Additionally, participating in clan wars and other clan activities can be a fun way to take a break from ladder matches.

9. Adjust Your Playstyle

If you’re consistently losing, it might be time to adjust your playstyle. Experiment with different strategies and approaches to find what works best for you. Sometimes, a small change in how you play can make a big difference.

10. Set Realistic Goals

Setting achievable goals can help you stay motivated and focused. Instead of aiming to gain a large number of trophies quickly, set smaller, more manageable goals. Celebrate your progress and use each victory as a stepping stone to further improvement.

Losing Streaks and Tilt

For those who don’t know, losing more than 4-5 times in a row is simply called losing streak.

Tilt on the other hand refers to a combined feeling of frustration and over-excitement that disables your ability to focus in a battle and you lose as a result. Ever had a day when you just keep losing regardless of whatever you do? That’s not rigged matchmaking, neither is your deck weak. That’s tilt, an altered psychology of your mind that forces you to play explicitly.

I know you didn’t understand the previous line right? Well actually there are two kinds of playing in Clash Royale:

Explicit Playing

When you use your newly learnt knowledge strictly into a battle, without missing anything that the guide/video you learnt from, says, then that’s explicit playing. Example includes timing your defensive building right when RG crosses the bridge. When you first do that, it might take some time and you’ll do mistakes. Newbies play explicitly and it’s nothing bad about that. Everyone plays explicitly first and improve gradually.

Implicit Playing:

When you master something that it becomes a “walk-in-the-park” for you, then that’s implicit playing. Example includes perfectly spliting your Skeletons to kite the entire minion squadron. As you slowly progress in the game, the skills that you once used explicitly becomes natural and somewhat easy to you. Being a fast-paced game where a mistake costs you a loss, implicit playing is crucial for winning. So that was just some extra stuff that I wanted to share with you all. Re-entering into the topic, now let’s know some few causes of losing streaks and tilt.

Bad Internet Connection

Self-descriptory I guess.

The worse your internet connection, the slower you’ll be able to respond to their pushes, resulting frequent losses (provided you’re still playing with that internet).

Physical and Mental Tiredness

Playing while tired makes you unable to focus in a battle and as I previously said, Clash Royale requires constant focus in order to win.

This is actually true for me because the last time I went on a losing streak, I was sick (had slight fever) and physically tired. I kept losing till I halted playing for a while.

Technical Difficulties

It’s no less than a miracle when you win a battle while playing in a phone with only half screen working.

Other than that technical difficulties includes your phone’s charge level, sudden phone calls/messages, overheating issues etc.

They in fact don’t lose you a game but they do increase your chances of losing, which can turn into a losing streak ultimately.

Winning Streaks

Might sound controversial, but when you win a lot in row and are close to reaching a new PB, League or Arena, your mind’s psychology transforms drastically due to heightened levels of excitement.

This forces you to play explicitly rather than implicitly.

You expect a win anyhow in that final battle and become either too defensive or aggressive. Your response time decreases as you start to play more carefully and consciously. But those delayed responses are what cause a loss.

Just one loss and you become tilted. You keep playing expecting wins time and again but guess what, you lose every time. That makes you feel it’s the end of world, literally.

Playing In A Wrong Environment

It’s a significant one.

Playing while standing in queue and expecting wins in that situation is called foolishness.

Having a right environment before playing greatly increases your chances of winning and the opposite is just as true.

Stable focus and prediction plays are possible only when you’ve got the right conditions and preparedness.

Emotes

Arghh, emotes really hurt!

Crying or Laughing emote from your opponent after you lose sucks the positivity out of you. You begin to tilt. While some may have no effect of emotes, majority of players do have.

Be careful next time, don’t get winded by those emotes.

How to deal with Losing Streak?

Okay enough talking about the causes. Now let’s get into the useful part, what can you do to avoid tilt and losing streaks? To know, continue reading.

Stop playing when you lose 3 games in a row.

I think this tip should be the “tip of the century”!

Do exactly what it says, stop playing for a while once you’ve lost 3 battles in a row.

I don’t know if I should blame the matchmaking or something else, I’ve lost most of my games when I’ve continued playing even after 3 consecutive losses. I strongly suggest you guys to rest for a while. Get rid of that “king-with-a-moustache” icon and do something else. You have many things to do other than Clash Royale. And after all, it’s just a game.

Have a right environment before playing

Plug in your headphones if you have, make sure you have plenty of battery left and ensure that no one is gonna disturb you before tapping the Clash Royale icon.

I personally play Clash Royale when I am free or have no chores to do because that’s when I can focus well and have some smooth wins. Yes, you can play 2v2 , petty tournaments and friendly battles without having to prepare but it’s never a bad idea to not to play while having a meal (Did I confuse you?) or some thing like that.

By the way, you can actually play while sitting in your toilet but not for long xDD.

Mute your opponent if he BMs you.

Emotes are a great to blackmail your enemies.

Next time you play, go ahead and tap the mute emote icon after wishing a good luck. This way you can stay focused and un-influenced the whole match.

Muting emotes has actually improved my game play personally. I was actually a bad BMer before when I read this post. Read this post once and remember, behave well because “what you sow is what you reap”.

Don’t play when you’re sick

Because that might heat your phone faster (Jusk kidding :p).

Talking about my recent losing streak, it happened because I was sick actually. Then I noticed that playing while having a 102.8°F fever can degrade your in-game performance.

This applies to physical tiredness too. When your doctor says to rest while being sick, that’s true! Follow him and you can prevent losing streaks as mine.

And yeah, don’t battle right before you’re dozing off!

Don’t keep changing your playstyle or decks

There are various benefits of not changing your deck frequently.

  1. You can get used to the playstyle of your deck.
  2. You’ll play implicitly later on.
  3. You will discover new ways to countering something with your deck.
  4. You can upgrade your cards faster.

Just because you lost some matches doesn’t mean your deck is useless. So don’t change your deck completely instead you can analyze the weakness of your deck and replace one or two cards.

Watch your replays of lost battles

Rather than playing more matches, start watching replays more often because it does really help to point out the mistakes you did last time. And in the next games, you can avoid that error and win !

TL;DR version of this entire post: Have some rest for a while if you think you’re on a losing streak.

Thanks for reading guys!

Losing streaks in Clash Royale can be challenging, but they are also an opportunity to learn and grow as a player. By taking a break, analyzing your deck, studying successful players, and practicing in a supportive environment, you can overcome losing streaks and become a stronger, more resilient competitor. Stay positive, be patient, and remember that every loss is a chance to improve and refine your skills.

Don’t hesitate point out my mistakes in this post! I’ll keep updating this post for sure.

Have you faced any huge losing streak? Let me know in the comment section below, let’s see who has the record of losing the most trophies (😂).

And as always, take care, clash on!

Best Trophy Pushing Decks for F2Ps

222
trophy pushing deck

Hey guys it’s Ash and today I’m going to share three of the best trophy pushing decks you can use to gain trophies fast.

There are some decks that rely on using a lot of Legendary and Epic cards to be successful, but most people don’t have high level Legendary and Epic cards. So I’m going to share three F2P decks that I strongly recommend for trophy pushing.

trophy pushing deck

Best F2P Trophy Pushing Decks

Giant Witch Deck

Clash Royale GiantClash Royale WitchClash Royale Mini P.E.K.K.AClash Royale Mega Minion
Clash Royale LightningClash Royale ZapClash Royale Ice SpiritClash Royale elixir collector

The first deck is a Giant Witch beatdown deck. I’ve been having a lot of success with this deck, and it quite easily beats a lot of popular meta decks.

We’re carrying Lightning and Zap to damage and reset Inferno Tower. We have a powerful core, Giant Witch Mini Pekka and Mega Minion, that can’t die to Fireball or Poison.

The Witch is a very underrated card right now. She’s one of the best counters to the Graveyard, with her rapid fire splash attack the kills Skeletons in one hit each, while also being able to survive Fireball and Poison. She can also counter a Night Witch by killing Bats in one shot and her Skeletons distracting.

The Mini Pekka is also a very underrated card right now in the meta, being able to counter Battle Ram, Golem, Hog Rider, Giant, Royal Giant, Bandit, Knight, and lots of other popular meta cards with ease.

We have Zap and Ice Spirit and Lightning to stop those pesky Inferno Dragons that bridge spammers use (Inferno Dragon + Night Witch + Battle Ram).

Overall, this may look like an Arena 6 deck, but is actually usable in even Ultimate Champion 6400+ trophy range with high effectiveness.

Hog Bait Deck

Clash Royale Hog RiderClash Royale Goblin BarrelClash Royale PrincessClash Royale Knight
Clash Royale ZapClash Royale fireballClash Royale Ice SpiritClash Royale Inferno Tower

The second deck is a Hog Rider Goblin Barrel bait deck. Instead of Princess, you can also try Dart Goblin, which can also be used to bait The Log.

This deck has a very low 3.1 average elixir cost with excellent defense and a powerful offense with the Hog Rider and Goblin Barrel.

Use the Knight to shield for your Hog Rider or distract your opponent’s Arena Tower while you use the Goblin Barrel to damage their tower.

Focus mainly on baiting their Log. Once they use their Log, you can safely play your Goblin Barrel and deal damage. Also focus mainly on dealing chip damage, and you can even spell cycle at the end to finish off your opponent’s weakened towers.

When you’ve taken down one tower, you’ll have Arena Tower and King’s Tower active, so make sure to place down your Knight or Hog Rider at the center to distract both towers to protect your Goblins.

The deck has excellent defense, with Inferno Tower killing tanks, lots of area damage cards such as Princess, Log/Zap, Fireball, and Ice Spirit to control low HP hordes.

Mortar Cycle

Clash Royale MortarClash Royale RocketClash Royale KnightClash Royale Archers
Clash Royale Fire SpiritsClash Royale Ice SpiritClash Royale TombstoneClash Royale The Log

The last deck is a Mortar cycle siege deck.

Mortar is one of the best cards to trophy push with because it’s a Common card, allowing you quickly level it up. High level Mortars do a ton of damage and pose a lot of pressure for the low cost of 4 Elixir.

The deck also has excellent defense, allowing you to also defend and cycle Rockets on your opponent’s tower to finish off the game.

Start your battle by either splitting Fire Spirits or Archers and scout out your opponent’s deck. By knowing your opponent’s deck you can take quick advantage.

For example, if they place down Elixir Collector to start off with, then you should always Rocket it, but if you don’t have Rocket in your starting hand then you should pressure by placing down your Mortar with Ice Spirit or Fire Spirits or Knight. If they play Golem or Pekka or Lava Hound, then you should immediately place your Mortar on the opposite lane and instantly pressure.

Whenever you place down Mortar, always try to protect it. And always take a mental note of what your opponent is using to counter you and the patterns of the battle.

jndH1mS

I am also doing a $200 iTunes or Google Play giveaway ($20 gift cards for 10 chosen winners) for the whole month of July!

To enter the giveaway, just Subscribe to my YouTube channel, Like the video, and leave a comment in the video above!

Make sure you watch my video to get a sense of how to use each deck. Thank you for reading and watching my video. Be sure to subscribe for more daily Clash Royale videos!

Ash,

3M Ram Heal Combo (Deadly Combo)

66

Hey there. Lolman here!

When I was running this P.E.K.K.A, Lightning Meta counter deck and wanted to switch things up.

I’m not too good at using 3 Musketeers. The last time I properly played 3 Musketeers was when Elite 3M was actually a really viable deck. I dropped 3 Musketeers for a while. Now 3 Musketeers themselves aren’t really that great with Poison being so popular. Turring into CCGS, I saw a lot of hybrid-ish decks. 3 Musket+Heal+ Bridge Spam. So my thoughts were, rather than bridge spam? Why not just go back to the regular 3 musket cycle? It’s better on defense, plus far better on offence as well.

Now enough blabbing, let’s get onto the Deck.

3m heal

3M Ram Heal Combo

Clash Royale Three MusketeersClash Royale Battle RamClash Royale KnightClash Royale elixir collector
Clash Royale Ice SpiritClash Royale ZapClash Royale HealClash Royale Minion Horde

double witch analytics


Card Breakdown

Clash Royale elixir collectorElixir Collector

In the current meta, I am hesitant to play the Pump as a starting play. Although early game it is necessary to Pump up, there are a few things I usually look for before I Pump up.

  1. Is the Minion Horde available? Now. Most decks just spam spam and spam at the bridge. Horde is an easy counter to most spam pushes, you will be ahead by a LOT of Elixir and can punish them on the counter push with a Ram under the Horde, and maybe a Heal if they Zap your Horde.
  2. Knight? Knight is great vs Bandit and a lot of other cards for a positive trade. This is why you always want to have him in your starting hand or as your 4th card when you Pump up. This way you can afford to Pump up because with a Knight defending you will be able to mitigate damage most of the time. Also Knight will defend the Pump vs a Miner.
  3. Is Zap in your hand? Now Zap is very very important if your opponent say rushes you. It resets charging units. (Minus charging Bandit) and 1 shots most swarm units as well.

Now if these 3 criteria are met, I am still hesitant but I will Pump up. After waiting a second or two to see if my opponent will make the first play or not.

Clash Royale Battle RamBattle Ram Your main win condition!

You will want to use these bad boy to connect to the Tower as much as possible.

You don’t have direct damage spell so getting damage by using troops is the only way to win. Zap cycling is almost impossible.

I usually don’t like to go aggressively with Battle Ram. Like most control decks I want to defend then counterpush using positive trades and surviving troops.

Clash Royale Three Musketeers3 Musketeers Your secondary win condition.

You shouldn’t rely too much on these 3 to get damage on the Tower because your main win condition is the Battle Ram. However, using the Ram as a Lightning rod is totally fine. Actually, I recommend doing that if possible because protecting your Musketeers, getting a +2 Elixir trade will put you into a very strong counter push.

If the game starts and your opponent doesn’t play anything, I would split 3 Musketeers in the back, rather than pumping up if your hand isn’t that great.

If they Fireball, don’t Heal them early in the game. Try and keep the Heal as your pocket card. Like the Freeze. Once your opponent saw it, the surprise effect is gone and your opponent can adjust his plays accordingly.

Also one key thing is vs Poison, feel free to use 3 Musketeers on the same lane if your opponent doesn’t have the P.E.K.K.A.


Clash Royale KnightKnight- Now you can use Miner instead of Knight but I prefer the Knight because he’s much better on defense.

You can use him as a Lightning rod as well in order to soak up the damage and keep 2 of your Musketeers alive. (If you put 3M on the same lane). He can also acts as a tank for your Battle Ram.

Clash Royale Ice SpiritIce Spirit- Can be changed to Goblins or Skeletons if you have a lot of trouble vs Bandit/ Ram decks.

Also you can put a Tombstone in here for more Poison bait if you are fine with a slower cycle.

Clash Royale Minion HordeMinion Horde This card is really strong. Especially vs Golem decks. You just need something to tank for the Baby Dragon and Horde back end troops and you got a Horde. Kill the Golem off with them, then Battle Ram on the counter.

The DPS is pretty insane. However, use them with caution because they can be killed by Arrows and Poison easily.

Also Baby Dragon etc. So you will typically need to tank for that. Which is what you will use Knight for if your opponent has a Baby Dragon for an example. You can also surround the Baby Dragon as well, because it’s splash isn’t that great.

Clash Royale ZapZap- Now Log is okay but Log takes time to roll down and clear troops. Zap is more ideal for this, especially paired up with Ice Spirit.

Also Zap can help Ram connect on Tower vs Night Witch for an example. Its stun is somewhat important here.

Clash Royale HealHeal- This is your pocket card. In the current Poison meta this card is rather strong. You don’t really want to reveal this card too early in the game.

Usually, you want to use it on defensive Musketeers that get Poisoned or Fireballed early on.

If your opponent is smart, he/she will Log or Zap your Musketeers first. Then at bridge Fireball them. Healed or not, they would use 6 Elixir on 9 Elixir (2 Musketeers – 6 and Heal -3) so you want to make sure that you Heal if they Poison or Fireball your troops. Rather than giving them huge value.

Gameplay

Early game

Now 3 Musket + Battle Ram is extremely strong in the current meta but you will play this deck slightly different to how people usually do.

You will have to think carefully if you should Pump up as a starting move and if you want to simply start aggressive with a 3 Musketeers in back or Ram + Ice Spirit on bridge.

Now my thought process for each starting play will be listed below.

Pump as the first play? Either Knight, Minion Horde or Zap must be the next card.

3 Musketeers at the back? Heal/Knight/Ram must be next card.

starting move 1

Here with this hand I was hesitant to Pump up, we both made our move when we hit 10 Elixir. I should have waited and pumped up as well, however splitting 3 Musketeers wasn’t a bad move when opponent pumped because usually they were down on Elixir. I could pressure really hard and I also had Heal in hand just in case my opponent had a Fireball.

starting move 2

This is a hand I am comfortable starting off with a Pump. I had the Minion Horde, and Battle Ram if I need a tank. Also Zap was my 5th card which allowed me to be able to defend more. Depending on your starting hand you can decide whether it’s safe to Pump up or not. Here I was able to defend this push and counter. I did take about 1000 damage but I was able to take my opponents Tower on the counter push.

So with this deck, early on you most likely will take damage, however safely getting a Collector down is worth taking the damage. Do NOT give up your Tower though. No matter what, but… that being said. Sometimes it’s better to not over defend as well, but with the Collector down. Slightly negative trades are fine.

Play smart. This Deck really shines in 2x Elixir but you really only have 3 defensive cards: Minion Horde, 3 Musketeers, Knight. Battle Ram can kinda work but it’s not really stable.

You also want to avoid going too offensive.

3 Musketeers split in back doesn’t mean you will go all out. It would be a cycling move, in a way. Just this move offers a LOT of defense if rushed. Unlike a tank in the back.

Mid game

Around now, you will most likely be using troops on defense.  You most likely won’t be able to establish a solid 3M push around here, especially vs decks like bridge spam.

You want to use either Battle Ram behind Knight and keep your finger on Zap, or maybe use Ram in front of your Horde, finger on Zap and or Heal

You can also use a Heal on maybe 3-4 alive Minions if you know your opponent is broke to do close to, if not more than 1000 damage. So here is when you will focus mainly on counter pushing.

play heal 2

Here I was in a small pinch. He got a good Lighting on my 2 Musketeers and his Exe was on its way. I ended up letting him lock on. Knowing his only counters were Tornado, Exe, and Ice Spirit in a way. Also I had a Musket on other lane. He’d want to answer both. So I played Minion Horde behind Exe then seeing as he used the Tornado to counter it I healed my Minions. They did A LOT OF damage to the Tower. This turned out to be the game changing move which let me win vs him because he hard countered me with this match-up.

So around here you will want to continue pumping up after successfully defending a push and keep up pressure with Ram and all. Force your opponent to make negative Elixir trades. Use 3 Musketeers mainly for defense. Counterpush with them if they are alive.

Late game

Around now you will want to utilize your Pumps and the surge of Elixir to use 3 Musketeers.

Split Musketeers in front of your King’s Tower if your opponent doesn’t have Lightning. If they do, then split them at the back.

You will have some time to get a Battle Ram on your Musketeers to tank for it. The window however is really small so make sure you don’t miss it.

Go all in. Assuming your opponent cannot counter you easily. Go on the 1 Musketeer lane with Horde+ Ram.

So here you will want to just keep cycling 3 Musketeers and putting tanks in front till your opponents defense cracked.

Match-ups

Okay so of course we gotta get to the important bits. How well does this do vs the current meta?

Clash Royale Battle RamBridge Spam

Now while bridge spam is strong… 3 Musket Heal is stronger. You WILL NEVER lose. Follow my guidelines above about when to place your Pump and be careful.

They tend to overcommit Elixir so you can Pump up after defending a push.

Feel free to use 3 Musketeers on the same lane. Giving up a Tower is fine too. While going for the trade. 1 -1, 3 Musketeers always have the advantage.

Poison gives you a free Heal. Well to be fair, you get paid 1 Elixir to Heal because you counter 4 Elixir with 3 and they still have to answer the 9 Elixir 3 Musketeers.

If your opponent has P.E.K.K.A, it can be a little harder but that being said, you can Ice Spirit and if she attacks the Ram then your Musketeers will melt the P.E.K.K.A down.

Clash Royale GraveyardGraveyard

Vs this, DO NOT Pump up behind your king Tower. Pump up in the center.

Play Minion Horde at the back corner so the Poison can’t hit both Horde and Pump.

After you get Elixir flowing, defending Graveyard is VERY easy. In fact, after that first rush push, till you pump up again there won’t be any window for the opponent to rush you because they will have a hard time dealing with your Musketeers. Assuming they don’t have Giant Skeleton or P.E.K.K.A.

Clash Royale GolemLightning Beatdown

Lightnign is the card which can make your deck useless. It can be tricky but you can beat this.

Ideally you want to use defensive Musketeers to bait Lightning (without loosing your Tower) then Pump up, build Elixir advantage.

Now vs say Golem Lightning, a mistake I used to make is splitting my Musketeers. You want all 3 on one lane. Why? Because if they use Lightning at once you will have a Musketeer hitting the Golem, if you get a tank like the Knight? That’s 2 alive. If you have a Pump and get a Ram? That’s 3 Musketeers alive and you’ve successfully defended that push with ease and you will take their Tower.

So you want to Pump with your opponent and use 3 Musketeers on the same lane but be cautious and time your tanks right. Learning to count Elixir will come in handy when you attempt such things.

Clash Royale Hog RiderHog Rider

Not a huge deal. Minion Horde usually covers these pushes.

People tend to carry Zap so try to tank the Ice Spirit and do NOT place Horde over the Ice Golem, but over the Hog.

Knight and Ice Spirit can counter the Hog decently as well.


Give this deck a try! It’s been working really well for me. I’ve been getting consistent 12 wins with this deck. It’s really strong this meta.

Hope you all will like it!

Classification of Cards in Clash Royale

0
cards

This guide will be giving a brief explanation of all terms/classification related to Cards in the game which many players use on Clash.World, Reddit, YouTube and other sites.

This will help all readers to understand the guides in better way as well help them in building decks.

best clash royale cards

Clash Royale Card Classifications

Note:

  1. Many Clash Royale cards fall other 2 or more classes due to their versatility. So, don’t consider this as a mistake.
  2. For better understanding, I will be dividing the classes in 3 Types: Troop, Spell and Buildings. Also, some classes are related to not one but 2 or more types so they will be included in General
  3. The cards are allotted to a specific class based on the extent of their ability to perform the role of the given class.
  4. The new cards which are not released are not included in this guide because we don’t know how they perform and haven’t used them. So mentioning them will be speculation. And few may perfectly fit in a particular class like Flying Machine does in Air Troops but still I won’t mention them.

General Information

AoE: AoE means the Area of Effect. This class includes all cards(troops, spells as well as buildings) which deal area damage. It is generally recommended to have at least 2 such cards in each deck.

Example: Clash Royale Baby DragonClash Royale fireballClash Royale Bomb Tower

Win-Condition: This class includes all cards which are the major source of damage in the decks they are used. You will be using them all the time and your whole deck will be based around these cards. The Win-Conditions are Giant, Goblin Hut, Goblin Barrel, Giant Skeleton, Balloon, Barbarian Hut, Rocket, X-Bow, Hog Rider, P.E.K.K.A., Lava Hound, Graveyard, Mortar, Battle Ram, Golem, Miner, Sparky, Royal Giant, Elite Barbs, Three Musketeers.

Example: Clash Royale GolemClash Royale RocketClash Royale X-Bow

Win-Condition Support: This class includes cards which will be the main-support to your Win-Conditions. You will be using nearly always in your pushes. These are form the core of your deck along with Win-Conditions. These include Prince, Baby Dragon, Witch, Freeze, Poison, Dark Prince, Princess, Bowler, Executioner.

Example: Clash Royale PrinceClash Royale Baby DragonClash Royale Bowler

Spawner: This class includes cards which spawn other troops. If they are on the map for a specific amount then give far better value by the amount of troops they spawn. They generally annoy people as you have to counter many waves of cards. These include Witch, Goblin Hut, Tombstone, Barbarian Hut, Furnace, Night Witch.

Example: Clash Royale WitchClash Royale FurnaceClash Royale Barbarian Hut

Tank-Killer: This class includes cards which have the ability to kill Tanks due to their high damage. Every deck should have at least 1 such card while 2 are recommended for better defense. These include Mini P.E.K.K.A., Skeleton Army, Bomb Tower, Cannon, Minion Horde, Tesla, Inferno Tower, P.E.K.K.A., Inferno Dragon, Lumberjack, Night Witch.

Example: Clash Royale P.E.K.K.AClash Royale Inferno TowerClash Royale Inferno Dragon

Troops

Clash Royale GolemTank: This class includes troops with very high HP. These have 2000+ HP at Tournament Standards. They are generally used as Win-Conditions however, in some they are also considered as Threat Their main aim is generally to act as a shield and absorb damage for other troops. These include Giant, Giant Skeleton, P.E.K.K.A., Lava Hound, Golem and Royal Giant.

Clash Royale KnightMini Tank: This class includes troops with moderately high HP. They perform the role of a Tank to a limited extent. They may or may not be Win-Conditions. These include Knight, Prince, Valkyrie, Balloon (some extent), Hog Rider, Miner, Dark Prince (due to his shield), Ice Golem.

Clash Royale Baby DragonSplash Troop: This class includes all AoE They deal area damage and when used properly give lot of value. It is recommended to have at least 1 such troop however, decks work without 1. These include Bomber, Baby Dragon, Witch, Valkyrie, Fire Spirit, Wizard, Ice Wizard, Dark Prince, Princess, Ice Spirit, Bowler, Dart Goblin, Executioner.

Clash Royale MusketeerGlass Cannon: These cards with low HP so they can be killed easily i.e. like ‘Glass’ but they deal high damage and can be punishing if protected like ‘Cannon’ thus giving them the name Glass Cannon. These include Musketeer, Wizard, Mega Minion Electro Wizard, Lumberjack, Night Witch, Bandit, Flying Machine.

Clash Royale MinionsAir Troops: This class includes which fly. They have a advantage because ground troops cannot target them. It is recommended to at least have 1 but decks work fine without it. These include Baby Dragon, Minions, Balloon, Minion Horde, Lava Hound, Inferno Dragon, Mega Minion, Bats.

Clash Royale Ice WizardAir Targeting Troops: This class includes troops which have the ability to target air. It is recommended to have at least 2 in a deck. These include Archers, Musketeer, Baby Dragon, Witch, Spear Goblins, Minions, Minion Horde, Inferno Dragon, Fire Spirits, Wizard, Ice Wizard, Three Musketeer, Mega Minion, Princess, Electro Wizard, Ice Spirit, Bats, Night Witch (only by her spawned bats), Goblin Gang (only the Spear Goblins), Dart Goblin, Executioner.

Clash Royale Elite BarbariansMulti-Unit Cards: This class includes Clash Royale cards which deploy more than 1 unit when used. These offer lot of versatility because they can be split and can be used to distract Single Target troops. These include Archers, Skeleton Army, Goblins, Spear Goblins, Skeletons, Minions, Barbarians, Minion Horde, Fire Spirits, Elite Barbarians, Three Musketeers, Guards, Bats, Goblin Gang.

Clash Royale Minion HordeSwarm: This class includes Multi-Unit Cards which deploy many units when used. These have a high DPS due to high no. of troops and can used to surround troops in order to kill them. These include Skeleton Army, Barbarians, Minion Horde, Goblin Gang.

Clash Royale Ice SpiritCycling Cards: This class includes cards which have a very low cost (1 or 2 elixir). They are used to quickly move forward in your card cycle so that you get a particular card once again. They also help to lower the Average Elixir Cost of your deck. These include Goblins, Spear Goblins, Skeletons, Fire Spirits, Ice Spirit, Bats.

Clash Royale BanditMelee Troops: This class includes troops which attack other troops at a close range. They need to be very near the troops in order to deal damage. These include Knight, Prince, Goblins, Valkyrie, Skeletons, Minions, Giant Skeleton, Barbarians, Minion Horde, P.E.K.K.A., Miner, Elite Barbarians, Mega Minion, Guards, Dark Prince, Bats, Lumberjack, Night Witch, Goblin Gang (Goblins only), Bandit and all Building Targeting Troops (other than Royal Giant).

Clash Royale MusketeerRanged Troops: This class includes troops which attack from a long distance which varies from troop to troop. This enables them to take down troops even before they reach the troop. Their range also enables them to pull troops towards them. These include Archers, Musketeer, Baby Dragon, Witch, Spear Goblins, Inferno Dragon, Fire Spirits, Wizard, Ice Wizard, Sparky, Royal Giant, Three Musketeers, Princess (longest range), Electro Wizard, Ice Spirit, Bowler, Goblin Gang (Spear Goblins only), Dart Goblin, Executioner.

Clash Royale GiantBuilding Targeting Troops: This class includes troops which target only buildings. These are great Clash Royale cards as Win-Conditions because they go straight towards Crown Towers unless distracted by buildings. This also is disadvantage because they aren’t that effective on defence because they can’t damage other troops. However, they are great as a distraction, damage absorption and kiting/pulling. These include Giant, Balloon, Lava Hound, Battle Ram, Golem, Royal Giant.

Clash Royale Electro WizardTroops with Special Attribute: This class includes all troops which have a special attribute. These attributes include charge, dash, slowdown, stun, pushback, spawning and shield etc. They have a bit edge over other troops due to these attributes. These include Prince, Witch, Inferno Dragon, Ice Wizard, Battle Ram, Miner, Guards, Dark Prince, Electro Wizard, Bowler, Night Witch, Bandit.

Clash Royale Giant SkeletonTroops with Death Effect: This class includes all troops which have a special effect after death. These effects include Death damage, Death bomb, Slowdown, Spawning Troops, deploying spells etc. These include Giant Skeleton, Balloon, Lava Hound, Battle Ram, Golem, Ice Golem, Lumberjack, Night Witch.

Spells

Clash Royale The LogDamage Dealing Spells: This class includes all spells which deal damage. They can give a lot of elixir advantage if used properly. These include Arrows, Fireball, Lightning, Rocket, Zap, Poison, Tornado, The Log.

Clash Royale FreezeNon-damage dealing spells: This class includes all spells which do not deal damage. It doesn’t include Troop Spawning Spells which deal damage through the spawned troops. These include Rage, Freeze, Mirror, Clone, Heal.

Clash Royale Goblin BarrelTroop Spawning Spells: This class includes the spells which spawn troops when deployed. They deal damage indirectly through the spawned troops. This also means that there isn’t a guarantee of dealing damage. These include Goblin Barrel and Graveyard.

Clash Royale RageBuffers: This class includes the spells which strengthen your push. They are also considered as ‘Over-win’ cards. These include Rage, Clone, Heal.


Clash Royale ZapCheap Spell: This class includes spells which have a low cost and deal low damage. It is necessary to have at least 1 in a deck. These include Arrows, Zap, The Log, Tornado.


Clash Royale fireballMedium Spell: This class includes spells which have a medium cost and deal moderate damage. They take care of many troops if coupled with a Cheap Spell. These include Fireball and Poison.


Clash Royale LightningHeavy Spell: This class includes spell which have high cost and deal high damage. Only few troops can survive a hit from them and their high damage makes them great tower finishers. These include Lightning and Rocket.

Buildings

Clash Royale TeslaActive Buildings: This class includes all buildings which deal damage directly. They are generally used as an answer to opponent’s cards. They also include Tower Damaging Buildings. These include Bomb Tower, Cannon, X-bow, Tesla (disputed), Inferno Tower, Mortar.

Clash Royale TombstonePassive Buildings: This class includes all buildings which do not deal damage or deal it indirectly through the troops they spawn. They are mostly used as passive plays to make the opponent react. However, they can also be used as answer to opponent’s cards. These include Goblin Hut, Tombstone, Barbarian Hut, Furnace, Elixir Collector.

Clash Royale MortarTower Damaging Buildings: This class includes buildings which directly damage opponent’s tower from your side of the map due to their long range. They are generally considered as Win-Conditions. These include X-bow and Mortar.

Clash Royale Goblin HutSpawner Buildings: This class includes buildings which spawn troops. They give a lot of value if they survive the entire life-time. They are pretty annoying to deal with as they give waves of troops and not a particular push. These include Goblin Hut, Tombstone, Barbarian Hut, Furnace.

That’s all folks! Hope you guys enjoyed reading my quick guide about Clash Royale cards.

Please forgive me if I forgot to mention a particular card in a particular class.

Ask me about anything in the comments section below or on Discord.

Best 2v2 Deck Right Now: The P.E.K.K.A. B.S Deck

1
pekka

Hey guys, SCorpSCilla here, back at it again with a brand new 2v2 deck. With 2v2 battles, it is easy to crush your opponents with large pushes, or vice versa, and at the same time it is hard to destroy your enemy. Plus sometimes we might not have the brightest partners in the world. Never fear! This new meta deck will do just the job. You can also use this deck in 1v1 as well.\

Behold, my P.E.K.K.A BS deck!

pekka

P.E.K.K.A BS Deck for 2v2 Battles

Clash Royale P.E.K.K.AClash Royale Battle RamClash Royale BanditClash Royale Poison
Clash Royale Ice SpiritClash Royale Mega MinionClash Royale Dart GoblinClash Royale The Log

Now some people might say that this is a variation of other “phantom decks”, but I don’t think so.

For one, I started using this deck three months ago, way before bridge spam and phantom, so the originality is pretty clear. Also the deck that Surprizmadafaqua made, the Lumberloon deck which I inspired, also relied heavily on bridge spamming (tho he mistakenly called it cycling), and that was almost half a year ago! And also the VERY FIRST deck I made, Elite barbs Cycle, was also mainly bridge spam (a little chip too)!

Two, I don’t use Night Witch in this. Surprised? Also just to clarify, the full name of the deck is called the P.E.K.K.A Bridge Spam (my friends thought is was P.E.K.K.A is b- yu get what I’m saying right?).

Let’s get into it!

Card Breakdown

Clash Royale P.E.K.K.AP.E.K.K.A: Now with the one second deploy time, the P.E.K.K.A is a beast on defense. With its massive amount of hitpoint, it can take out an entire push and then make for a deadly counter push.

P.E.K.K.A should not be used as a win condition in this Deck, but instead should be used to take out tanks like Golem, Giant, Hog, and then be coupled with support troops to create for a potent counter push. Your opponent would be low on Elixir from just doing a push, and you will be able to punish him with a P.E.K.K.A push coming down the lane. This beast can survive 3 musketeers, so he can definetely help with a push.

Clash Royale Battle RamBattle Ram: In a deck like this, you want to rush with Battle Ram+support the moment the opponent drops something heavy in the back like a Giant, Golem, Sparky ect, or you can support the PEKKA with this beast. Its your choice, not mine 🙂

Usually, you should couple the Ram with Ice Spirit. This way, your opponent will have to spend Elixir to defend your push and wont have Elixir to support their investment in the back.

Clash Royale BanditBandit: After the buff, the Bandit is unstoppable.

Every body is using her and she can clutch dash damage even with low health. She is great when paired with Battle Ram or P.E.K.K.A to easily take out glass cannons that the opponent uses to stop your push, or can be used on defense to pick off support troops.

If you have already gotten one tower, you can place her in the middle of your opponent’s side to dash in for chip damage. It will only get two to four shots, but that chip damage is both key and big, especially since your opponent isn’t expecting a bandit to dash so fast and can’t defend fast enough (evil laugh).

Clash Royale PoisonPoison: Your main damage dealing spell. Use it on offense coupled with your Battle Ram or P.E.K.K.A to take out cheap swarm cards or get value by clipping the Tower and taking out glass cannons.

Not much to say but it helps to prevent cheap cards from shutting down your push and is also good for some chip damage.

Don’t hesitate to use it on defense when needed, especially against night witches (angry face)

Clash Royale Ice SpiritIce Spirit: Ice Spirit has been an extremely popular card lately as it can reset a Battle Ram’s charge, and can Freeze your opponents counter to Battle Ram giving it the charge hit.

You should almost always pair your Ice Spirit with Battle Ram as it will give a much better shot at the Ram landing the charge strike. Also Ice spirit can help defend a push really good, such as freezing an Inferno Dragon locked on to my PEKKA.

Clash Royale Mega MinionMega Minion: Pretty standard air defense. The flying glass cannon.

Not much to say. Just use it mostly on defense.

Clash Royale The LogLog- Duh!

Just remember while doing 1v1 to read your opponent’s hand.

For more details, read Karios’ guide to count cards.


Clash Royale Dart GoblinDart Goblin: I wanna talk about this special card.

For the very weakness of this deck is mostly Lavaloon, the last card you wanna place in this deck is a weak air defense.

However there are some reasons I choose the real MVP of all cards:

  1. Chip damage! Place it at the bridge with 1 shot health and it gets two shots off the tower with the power of a single muskie shot. Full health dart gob at the bridge is a god at the chip damage.
  2. Long range! While yes you can replace this goblin with the Night witch for less bridge and more SPAM!, you are vulnerable to poison decks which takes out the Bats. With Dart Gob, you can literally place him right in front of the king tower and he can just sit there, chipping away in defense, safe with the fact that your opponent can accidentally activate the king tower if they try to counter the dart goblin.
  3. Fast hit speed! This is important against Graveyard. The Dart Goblin can completely shut down the graveyard as long as it is protected. Otherwise, no DG? Good game!
  4. Log bait! In 2v2, your opponent may run a spell bait deck like RSivak’s Graveyard Spell bait deck, so a Dart Gob at the bridge can start off with both opponents spending their logs, so that’s great for your teammate!

Matchups

Now some matchups!

Clash Royale Lava HoundLavaloon: The Hardest Match up, but you shouldn’t panic as long as you cycle back to your Mega Minion, Dart Goblin, and Ice Spirit extensively. Also you should pressure the other lane with your bandit/battle ram so that the push should never happen in the first place. Also there are times when you should realize that the best option is to draw.

Clash Royale GolemGolem: Very easy. The PEKKA shreds anything (except Lavahound :/) just use poison for the Night Witch extensively.


Clash Royale Three Musketeers3 Muskies: Also (kind of) easy, since yur PEKKA can hold out against the two muskies, and you can use ice spirit and other stuff (i tend to use  word a lot) for the single one.


Clash Royale Goblin GangSpell bait– Use Ice spirit, DG, and Log extensively.


Clash Royale Battle RamBridge Spam– Spam your bridge spam at the bridge for a bridge spam push before they spam bridge spam at their bridge for a bridge spam push. (‘TF ?)

Giant- Also Pekka and stuff- basically like countering Golem decks.

Gravy- Use DG or poison on their Gravy to turn it into Skelly soup. 😀

Clash Royale Hog RiderHog- Also easy. Use your Mega Minion/ Bandit + Ice spirit to stop not too many hits. Remember the goal is to overwhelm your opponent by double elixir.


Deck Composition

  • P.E.K.K.A: The powerhouse of the deck. P.E.K.K.A serves as your primary tank and damage dealer, capable of shredding through even the toughest defenses. Place her behind your King Tower to build a massive push.
  • Battle Ram: This is your primary win condition. Battle Ram, supported by P.E.K.K.A, can break through enemy defenses and deal significant tower damage. Use it to pressure your opponent and force them to split their resources.
  • Bandit: Bandit provides quick and efficient pressure, capable of dashing through enemy troops and reaching the tower. She works exceptionally well with the Battle Ram.
  • Electro Wizard: A versatile card that can support both offense and defense. Electro Wizard’s spawn stun and zap attack are perfect for dealing with swarm units and stunning enemy troops.
  • Baby Dragon: The Baby Dragon offers splash damage to handle swarms and support your pushes. Its synergy with Tornado makes it a great addition to the deck.
  • Tornado: Use Tornado to control the battlefield, pulling enemy troops together for the Baby Dragon or P.E.K.K.A to annihilate. It’s also excellent for defending against large pushes.
  • Zap: A cheap and effective spell to deal with small swarms, reset Inferno Towers, and support your troops.
  • Minions: Minions provide air support and can quickly take down enemy troops and defenses.

Strategy and Tips

Early Game: Start by playing defensively, allowing your opponent to make the first move. Use cheap cards like Minions and Zap to deal with any initial threats. If your opponent overcommits, counter with a quick Battle Ram push supported by the Bandit or Electro Wizard.

Mid Game: By now, you should have a feel for your opponent’s deck. Begin building up bigger pushes. Place P.E.K.K.A behind your King Tower and support her with the Electro Wizard and Baby Dragon. Use Tornado to group enemy troops for maximum splash damage.

Late Game: In the double elixir phase, unleash your full potential. Create unstoppable pushes by stacking your P.E.K.K.A with Battle Ram and Bandit, supported by spells and splash damage units. Maintain constant pressure and don’t give your opponents room to breathe.

2v2 Specific Tips:

  • Communication: Use quick chat to coordinate with your partner. Let them know when you plan to push or defend.
  • Support Each Other: Complement your partner’s strategy. If they play a tank, support with damage dealers and spells.
  • Split Damage: Share the defensive duties. One player can handle ground troops while the other focuses on air defense.

Welp I hope yu liked this deck (and jokes).

Stay tuned for more! SCorp out!

Clash Royale Card Upgrade Costs

7

Clash Royale Card Upgrade Costs

Hello guys, I was getting asked a lot about the Clash Royale Card upgrade costs in Clash Royale lately. Sorry for the delay my friends! Here you go, an individual post where you can find everything about upgrade in Clash Royale!

clash royale Card Upgrade Costs

Summary of Clash Royale Card Upgrade

Here are strategies to unlock and upgrade your Clash Royale Cards.

There are five types of cards in Clash Royale: Common, Rare, Epic, Legendary, and Champion. Understanding how to unlock and upgrade these cards effectively is crucial for progressing in the game and dominating your opponents.

Types of Clash Royale Cards

  1. Common Cards: These are the most basic cards in the game, easy to obtain and upgrade. They form the backbone of most decks.
  2. Rare Cards: Slightly harder to find than Common cards, Rare cards offer more powerful abilities and stats.
  3. Epic Cards: These cards are even more challenging to collect but provide significant advantages when used correctly.
  4. Legendary Cards: Rare and powerful, Legendary cards can turn the tide of battle with their unique abilities.
  5. Champion Cards: The rarest and most powerful cards in the game, Champions have special abilities that can dramatically influence the outcome of a match.

Card Upgrade Mechanics

To upgrade a card in Clash Royale, you need to collect a specific number of cards of that type. Each upgrade increases the card’s hit points (HP) and damage stats by approximately 10% per level. Additionally, upgrading cards grants you experience points (XP), which contribute to leveling up your player profile.

Upgrade Process

Here’s a step-by-step look at how the upgrade process works:

  1. Collect Cards: You need to gather a certain number of the same card. For instance, upgrading a Common card from level 1 to level 2 might require 2 cards, while going from level 2 to level 3 might require 4 cards, and so on.
  2. Use Gold: Each upgrade requires a certain amount of gold, which can be earned through battles, chests, and other in-game activities.
  3. Upgrade the Card: Once you have enough cards and gold, you can upgrade the card. For example, if you have 22 cards of a particular type and the upgrade costs 2 cards, after the upgrade, you will still have 20 cards left. Importantly, upgrading a card does not result in losing any of your cards permanently.

Strategies for Unlocking and Upgrading Cards

To maximize your card collection and upgrade efficiency, consider the following strategies:

1. Participate in Events and Challenges

Events and challenges often offer card rewards that can help you collect and upgrade your cards faster. Regular participation can yield significant benefits.

2. Join an Active Clan

Being part of an active clan allows you to request cards from clanmates, making it easier to collect the cards you need. Donating cards to others also earns you gold and XP.

3. Open Chests Regularly

Chests are a primary source of cards and gold. Make sure to open them as frequently as possible and take advantage of the free chests and crown chests available daily.

4. Spend Gems Wisely

Gems are a valuable currency in Clash Royale. Use them to purchase special offers in the shop or to enter challenges that offer high rewards.

5. Focus on a Core Deck

Rather than trying to upgrade all your cards simultaneously, focus on a core deck of 8 cards that you use most frequently. This allows you to concentrate your resources and upgrade these cards more quickly.

6. Complete Quests

Quests provide a steady stream of rewards, including cards and gold. Make sure to complete them regularly to boost your progress.

Number of Cards Required for Clash Royale Upgrade

 Level Card Upgrade Strategies
Common Rare Epic Legendary Champion
Unlock 1 N/A N/A N/A N/A
2 2 N/A N/A N/A N/A
3 4 1 N/A N/A N/A
4 10 2 N/A N/A N/A
5 20 4 N/A N/A N/A
6 50 10 1 N/A N/A
7 100 20 2 N/A N/A
8 200 50 4 N/A N/A
9 400 100 10 1 N/A
10 800 200 20 2 N/A
11 1,000 400 40 4 1
12 1,500 500 50 6 2
13 3,000 750 100 10 8
14 5,000 1,250 200 20 20
Total 12,087 3,287 427 43 31

Clash Royale Gold Required for Upgrade

 Level Card Upgrade Strategies
Common Rare Epic Legendary Champion
Unlock N/A N/A N/A N/A N/A
2 5 N/A N/A N/A N/A
3 20 N/A N/A N/A N/A
4 50 50 N/A N/A N/A
5 150 150 N/A N/A N/A
6 400 400 N/A N/A N/A
7 1,000 1,000 400 N/A N/A
8 2,000 2,000 2,000 N/A N/A
9 4,000 4,000 4,000 N/A N/A
10 8,000 8,000 8,000 5,000 N/A
11 15,000 15,000 15,000 15,000 N/A
12 35,000 35,000 35,000 35,000 35,000
13 75,000 75,000 75,000 75,000 75,000
14 100,000 100,000 100,000 100,000 100,000
Total 240,625 240,600 239,400 230,000 210,000


XP Gained after Clash Royale Upgrading

Level Card Upgrade Strategies
Common Rare Epic Legendary Champion
Unlock N/A N/A N/A N/A N/A
2 4 N/A N/A N/A N/A
3 5 N/A N/A N/A N/A
4 6 6 N/A N/A N/A
5 10 10 N/A N/A N/A
6 25 25 N/A N/A N/A
7 50 50 25 N/A N/A
8 100 100 100 N/A N/A
9 200 200 200 N/A N/A
10 400 400 400 250 N/A
11 600 600 600 600 N/A
12 800 800 800 800 800
13 1,600 1,600 1,600 1,600 1,600
14 2,000 2,000 2,000 2,000 2,000
Total 5,800 5,791 5,725 5,250 4,400

Best Decks Cards:

Prices pulled from the Amazon Product Advertising API on:

Clash Royale, the popular mobile strategy game developed by Supercell, revolves around collecting and upgrading cards to build powerful decks and dominate opponents in real-time battles. Understanding the intricacies of card upgrades is crucial for success in the game. In this guide, we’ll delve into the various aspects of Clash Royale card upgrades, including costs, strategies, and tips to maximize efficiency.

Types of Clash Royale Cards

Before diving into upgrade mechanics, let’s familiarize ourselves with the types of cards in Clash Royale:

  1. Common Cards: Easily obtainable and typically form the backbone of many decks.
  2. Rare Cards: Slightly more challenging to acquire than common cards but offer greater power.
  3. Epic Cards: Scarcer than rare cards, epic cards often feature unique abilities and can significantly impact gameplay.
  4. Legendary Cards: Highly coveted and possess powerful abilities, but are the rarest to obtain.
  5. Champion Cards: The pinnacle of rarity, champion cards are exceedingly powerful and can turn the tide of battles in an instant.

Understanding Card Upgrades

In Clash Royale, upgrading cards is essential for enhancing their effectiveness in battle. Here’s what you need to know about the upgrade process:

  1. Card Acquisition: Players obtain cards through various means, including chests, rewards, and purchases in the in-game shop.
  2. Upgrade Requirements: To upgrade a card, players need to collect a certain number of duplicate cards. Each subsequent upgrade requires an increasing number of duplicates.
  3. Stat Boosts: Upon upgrading a card, its hit points (HP) and damage stats increase by approximately 10% per level, making upgraded cards more formidable on the battlefield.
  4. Experience Points (XP): Players earn XP when they upgrade cards. Accumulating XP contributes to leveling up player accounts, unlocking new features, and increasing card request limits.
  5. No Loss of Cards: Importantly, upgrading a card does not consume all duplicates. For instance, if an upgrade requires 2 cards and you possess 22 duplicates, you will still have 20 duplicates remaining after the upgrade. This ensures that players do not lose valuable cards in the upgrade process.

Strategies for Efficient Card Upgrades

To optimize your card upgrading process and progress swiftly in Clash Royale, consider the following strategies:

  1. Focus on Core Cards: Prioritize upgrading cards that are essential to your preferred deck strategies. Investing in core cards ensures that your deck remains competitive across various matchups.
  2. Balance Upgrades: While it’s tempting to focus solely on upgrading high-tier cards, maintaining a balance across all card rarities ensures versatility in deck building and adaptability to changing metas.
  3. Manage Resources Wisely: Keep track of your card inventory and resources to avoid overspending on unnecessary upgrades. Save resources for crucial upgrades or to acquire new cards introduced in updates.
  4. Participate in Clan Activities: Joining a clan grants access to clan chests and donations, which can provide a steady supply of cards for upgrades. Collaborate with clan members to maximize rewards and progress collectively.
  5. Complete Challenges and Events: Take advantage of special challenges and events that offer bonus rewards, including cards and resources. Participating in these activities accelerates your progress and facilitates card acquisition.

If any Clash Royale number above is wrong, please let me know show I can fix it as soon as possible. I will try my best to update these tables as soon as possible. Enjoy guys!

Battle Ram 101 – Everything You Want To Know! (Updated)

155

Hey guys! Its Blaze back with another guide for you all! Today, I will be talking about a card everywhere in the current meta: The Battle Ram!!

When the Battle Ram first came out it was pretty under-rated and was considered an off-meta card. But a few players started trying out and slowly and slowly the popularity of Battle Ram started to increase until it became one of the strongest meta card right now.

The Rise to Prominence:

As players began to experiment with the Battle Ram, its true potential started to shine through. Its ability to offer value in a variety of deck archetypes made it a versatile choice for both offensive pushes and defensive maneuvers. With a relatively low elixir cost, it became a staple in many competitive decks, gradually rising through the ranks to become a top-tier card.

One of the key factors in the Battle Ram’s rise was its unpredictability. Opponents never knew whether to expect a sudden offensive onslaught or a defensive counterattack, keeping them on their toes and forcing them to adapt their strategies on the fly.

Mastering the Battle Ram:

To harness the full potential of the Battle Ram, players must understand its mechanics and how to leverage them to their advantage. Proper placement and timing are essential when deploying the Battle Ram, as a mistimed charge can leave it vulnerable to counterattacks.

Additionally, synergizing the Battle Ram with other cards in your deck can amplify its effectiveness. Whether pairing it with support troops to clear the path or using spells to deal with swarms, building a cohesive strategy around the Battle Ram is key to success.

Countering the Charge:

While the Battle Ram is a formidable force on the battlefield, it is by no means unstoppable. Players must be prepared to counter it effectively to prevent their opponents from gaining the upper hand. Cards like the Skeleton Army, Mini P.E.K.K.A, or Inferno Tower can quickly neutralize the Battle Ram’s charge, turning the tide of battle in your favor.

Maintaining pressure on your opponent’s side of the arena can also limit their ability to build up a significant push with the Battle Ram. By forcing them to allocate resources defensively, you can disrupt their game plan and seize control of the match.

battle ram

Battle Ram – The In-depth Guide

Overview of Battle Ram:

  • Battle Ram is a Rare Card costing 4 Elixir and is unlocked from Arena 6 (Builder’s Workshop).
  • It is a building-targeting troop.
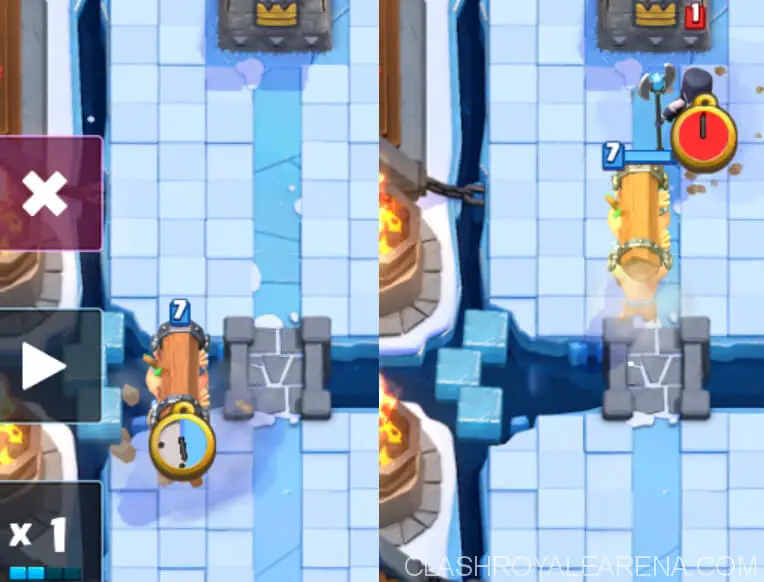
  • The Battle Ram charges to the nearest building and after it is destroyed, it will spawn two Barbarians. The charge mechanic is similar to that of the Prince and Dark Prince.
Cost Speed Deploy Time Range Target Transport
4 Medium 1 sec Melee Buildings Ground
Level Hitpoints Damage Charge Damage Barbarian level
1 430 140 280 3
2 473 154 308 4
3 520 169 338 5
4 571 186 372 6
5 627 204 408 7
6 688 224 448 8
7 756 246 492 9
8 829 270 540 10
9 911 296 592 11
10 1,001 326 652 12
11 1,100 358 716 13

Overview of Battle Ram:
The Battle Ram is a Rare Card with a moderate elixir cost of 4, making it accessible for a variety of deck compositions. Unlocked from Arena 6 (Builder’s Workshop), it becomes available to players relatively early in their Clash Royale journey. This building-targeting troop brings a distinctive twist to the battlefield dynamics with its unique charge mechanic.

Mechanics and Functionality:
The Battle Ram’s primary function revolves around its charging ability, akin to the Prince and Dark Prince. Upon deployment, the Battle Ram locks onto the nearest building and charges towards it with formidable speed. Upon reaching its target or being destroyed, the Battle Ram unleashes its payload: two Barbarians poised for battle. This dual-purpose nature of the Battle Ram adds layers of strategic depth to its usage, allowing players to leverage it both defensively and offensively.

Strengths:
One of the Battle Ram’s notable strengths lies in its ability to apply immediate pressure to the opponent’s defenses. Its rapid charge can catch opponents off guard, forcing them to react quickly to prevent significant damage to their structures. Furthermore, the Barbarians spawned upon the Battle Ram’s destruction can serve as a secondary threat, potentially overwhelming the opponent’s defenses if left unchecked.

Additionally, the Battle Ram excels in synergy with various support cards, such as spells like Zap or Log to clear the path for its charge or splash damage troops to cover its weaknesses against swarms. Its versatility makes it a valuable asset in a wide range of deck archetypes, from beatdown to cycle decks.

Weaknesses:
Despite its strengths, the Battle Ram is not without its vulnerabilities. Its reliance on targeting buildings makes it susceptible to distractions, such as low-cost troops or buildings placed strategically to redirect its charge. Swarm units, such as Skeleton Army or Goblin Gang, can quickly dismantle the Battle Ram before it reaches its intended target, nullifying its impact on the battlefield.

Moreover, opponents familiar with the Battle Ram’s mechanics may anticipate its charge and prepare accordingly, mitigating its effectiveness through timely deployment of defensive measures. As such, maintaining unpredictability in deployment and pairing the Battle Ram with complementary cards becomes crucial to maximizing its utility.

Optimal Strategies:
To harness the full potential of the Battle Ram, players must adopt strategic approaches tailored to their deck composition and playstyle. Incorporating cards that synergize well with the Battle Ram, such as support troops or spells, can enhance its effectiveness on the battlefield.

Furthermore, maintaining flexibility in deployment and timing is essential to catch opponents off guard and capitalize on openings in their defenses. Utilizing the element of surprise by deploying the Battle Ram in unexpected lanes or pairing it with other threatening units can pressure opponents into making suboptimal plays, tipping the scales in your favor.

Tips for using Battle Ram:

The Ram acts as a shield for the Barbarians. This makes it a great card on defense in order to absorb damage and buy some time. After the Ram is destroyed, the Barbarians will damage the opposing troops.

It is a great kiting card. Placing it in the centre of the arena but a bit towards the other lane, the opposing troops will target and follow the Battle Ram. Then you can use other ranged troops to target the opposing card while the Battle Ram escapes due to its charge mechanic. Sometimes, it can also reach the opponents Tower.

Battle Ram is able to resist the pull-effect of Tornado while it is charging. So, rather than been pulled it is kinda stuck in the place, neither moving forward nor backward.

When placed behind a tank, Battle Ram is deadly as the player will need to counter the tank first and then the Battle Ram. Battle Ram due to being fast while charging can go straight to the Tower or destroy any buildings that is distracting the tank. This combo is vulnerable to splash.

The Battle Ram stands out as a versatile and dynamic option that can turn the tide of battle when utilized effectively. Here are some tips to harness the full potential of the Battle Ram in your Clash Royale strategy:

1. Defensive Shield, Offensive Sword: The Battle Ram’s unique mechanic of transforming into Barbarians upon destruction makes it a formidable defensive option. Placing it strategically can absorb incoming damage from enemy troops, providing valuable time for your own defenses to retaliate. Once destroyed, the Barbarians emerge to counter-attack, turning the tables on your opponent’s offensive push.

2. Mastering Kiting: The Battle Ram excels as a kiting card due to its charge mechanic. Placing it slightly off-center towards the opposite lane lures enemy troops towards it, allowing your ranged units to target them while the Battle Ram makes its escape. This tactic not only mitigates damage but can also result in unexpected tower damage if the Battle Ram reaches its destination.

3. Resistance Against Tornado: Unlike many other cards susceptible to the pull effect of Tornado, the Battle Ram stands its ground while charging. This resistance allows it to maintain its forward momentum, denying opponents the opportunity to manipulate its path. Understanding this interaction can give you a tactical advantage in countering Tornado-heavy decks.

4. Deadly Duo with Tanks: Pairing the Battle Ram with a tank unit creates a deadly combination that demands immediate attention from your opponent. With the tank absorbing damage and drawing focus, the Battle Ram charges ahead, either targeting the enemy tower directly or clearing distractions like defensive buildings. However, be wary of splash damage units that can quickly dismantle this combo if left unchecked.

5. Adaptability is Key: Flexibility is the hallmark of a skilled Clash Royale player, and the Battle Ram embodies this trait perfectly. Whether used defensively to thwart enemy advances or offensively to spearhead your own assault, its versatility makes it a valuable addition to any deck. Experiment with different placements and synergies to discover the optimal strategy for your playstyle.

An0PNO

How about Weaknesses?

Battle Ram’s real strength is its charge-mechanic. While not charging its really weak and not much of a threat and can be countered very easily. This makes it weak against which can reset its charge.

If you have never played with the Battle Ram you may not know this, but against certain cards, the damage that kills the Ram also damages the Barbarians. This happens with cards like The Log, Bowler and Executioner as they deal linear damage. So the projectile after killing the Ram hits the barbarian which spawn behind.

Playing it like a lone win-condition is a bad idea as it only targets-buildings and even with strong support, after hitting a building the Barbarians aren’t good as a win-conditions. SO, its better to have another way to deal damage.

At first glance, the Battle Ram appears to be a force to be reckoned with, charging towards enemy structures with relentless determination. Yet, beneath this intimidating facade lies a glaring weakness—its susceptibility to reset mechanics. Without its charge, the Battle Ram loses much of its threat potential, becoming a mere shadow of its former self. Opponents can easily counter it with cards like Zap or Electro Wizard, nullifying its charge and rendering it ineffective.

However, the Battle Ram’s weaknesses extend beyond simple charge resets. Astute players may have observed a peculiar interaction with certain cards, such as The Log, Bowler, and Executioner. These cards, known for their linear damage output, possess the ability to deal damage not only to the Battle Ram but also to the Barbarians it spawns upon destruction. This nuanced interaction can catch unwary players off guard, leaving them vulnerable to unexpected counterattacks.

Furthermore, relying solely on the Battle Ram as a win condition is a risky strategy fraught with pitfalls. While it excels at targeting buildings and delivering swift blows, its accompanying Barbarians lack the resilience and longevity needed to sustain a prolonged assault. Even with robust support, the Barbarians are ill-suited to carry the weight of a win condition, necessitating alternative methods of dealing damage and securing victory.

Perhaps the Battle Ram’s most glaring weakness lies in its vulnerability to swarms. Faced with a horde of agile troops, the Battle Ram and its Barbarian companions quickly find themselves overwhelmed and outmatched. Swarm cards such as Skeleton Army or Goblin Gang can swiftly dismantle the Battle Ram’s advance, leaving little room for retaliation.

It is extremely weak against swarms as they can kill the Ram and Barbarians very quickly.

Strong Battle Ram Synergies/Combos:

  1. Battle Ram + Poison: This combo is a strong because Poison clears out swarms very quickly clearing the way for the Ram to hit the Tower. This deadly combination capitalizes on the synergistic relationship between the Battle Ram and Poison spell. By casting Poison on the opponent’s defensive swarms, such as Skeleton Army or Goblin Gang, you swiftly clear the path for the Battle Ram to charge straight towards the enemy tower, dealing significant damage in the process.
  2. Battle Ram + P.E.K.K.A.: This combo is popular right now because the P.E.K.K.A. acts as a tank and a threat card. People use a lot of Elixir to defend her because even one swing can be devastating. This results in less Elixir to counter the Battle Ram which deals lot of damage. Opponents often commit substantial elixir to defend against the formidable P.E.K.K.A., leaving them vulnerable to the Battle Ram’s devastating charge. Even a single swing from the Battle Ram can inflict considerable damage, making this combo a force to be reckoned with.
  3. Battle Ram + Three Musketeers: This is the most popular combo in challenges right now. Battle Ram act as a tank for the 3M which can clear any troop that is used to counter the Ram. A staple in challenge matches, this synergy pairs the Battle Ram with the Three Musketeers to create a formidable offensive threat. Acting as a tank, the Battle Ram absorbs enemy fire while the Three Musketeers unleash their devastating firepower, obliterating any troop used to counter the Ram and paving the way for a successful assault on the enemy tower.
  4. Battle Ram + Knight: This is a basic combo. Not much to say about it, Knight just acts as a tank for the Battle Ram, but you will need support and spells for better damage. Simple yet effective, the Knight provides a sturdy tank for the Battle Ram to charge behind. While this combo may lack the flashiness of other synergies, its reliability makes it a popular choice for players seeking a solid offensive strategy. However, supplementing this combo with support troops and spells can enhance its overall effectiveness.
  5. Battle Ram + Ice Golem: Ice Golem is the cheapest tank and it works great because its Frost Nova can kill Skeletons and Bats and can damage Goblins(Goblin Gang) and Minions well enough that they die to Zap. The Ice Golem’s Frost Nova ability synergizes excellently with the Battle Ram, offering both tanking capabilities and crowd control. By slowing down enemy troops and damaging swarms, the Ice Golem creates space for the Battle Ram to reach its target, while also providing a cost-effective solution to swarm-based defenses.
  6. Battle Ram + Valkyrie: A rather pumped-up Ice Golem combo, the Valkyrie can quickly clear any ground swarms as well as tank for the Ram. Only weakness is air troops so be sure to use spells and support troops. An upgraded version of the Ice Golem combo, the Valkyrie excels at clearing ground swarms and acting as a robust tank for the Battle Ram. While vulnerable to air troops, strategic spell usage and support troops can mitigate this weakness, allowing the combo to shine in various matchups.
  7. Battle Ram + Lumberjack: This combo utilizes the Rage effect of Lumberjack. A raged charging Battle Ram is damn fast and quickly reach the Tower. Just be sure to take care of swarms. Harnessing the power of rage, the Lumberjack accelerates the Battle Ram’s charge to unparalleled speeds, catching opponents off guard and quickly reaching their towers. However, players must remain vigilant against swarm-based defenses, as the lack of crowd control inherent in this combo can leave it vulnerable to counterattacks.
  8. Battle Ram + Golem: Golem is the costliest and beefiest tank in the game. Making it great damage absorber for the Battle Ram. After the Golem dies, its death damage clears out all swarms and you still have the Golemites. For those favoring a more heavyweight approach, the Golem serves as an exceptional damage sponge for the Battle Ram, soaking up enemy fire and clearing swarms upon death. The resulting Golemites provide additional pressure, forcing opponents to divert resources away from defending against the Battle Ram’s relentless assault.
  9. Battle Ram + Lava Hound: Lava Hound is another strong tank in the game. It is a great damage absorber and after the hound dies, the Lava pups will support the Ram which will now act as a tank. This combo was popular few weeks ago but now not much seen as people prefer Balloon with the hound and other Ram combos. While less prevalent in the current meta, the combination of Battle Ram and Lava Hound offers a potent mix of tanking and air support. As the Lava Hound distracts enemy defenses, the Battle Ram charges towards the tower, supported by the ensuing Lava Pups. Though less common nowadays, this combo can catch opponents off guard with its unexpected synergy.
  10. Battle Ram + Miner: Another great combo, this was popular before the Bandit buff. The two win-condition combo and their synergy with Poison makes it strong. Miner acts as a tank for the Ram and the Barbarians. Previously popular before the Bandit’s buff, the Battle Ram and Miner combo remains a force to be reckoned with. With the Miner acting as a secondary tank for both the Battle Ram and the Barbarians it spawns, this synergy can apply relentless pressure on opponents, especially when paired with the disruptive effects of Poison.
  11. Battle Ram + Bandit + Night Witch: I like to call this ‘The Phantom’. This is the strongest and the deadliest combo with the Battle Ram at the moment. You will see this in a variety of decks in challenges and tournaments. The combined force of the 3 cards is devastating and with right support will be insane. Combining the charging power of the Battle Ram with the evasive strikes of the Bandit and the relentless swarm generation of the Night Witch, this combo is a force to be reckoned with. With proper support, it can overwhelm opponents and secure decisive victories in challenges and tournaments alike.

Counters to Battle Ram:

Note: Battle Ram can be countered by many cards but I am gonna state only the ones which give positive, neutral and -1 Elixir negative trade without receiving Tower damage. Among the multitude of cards that players encounter, the Battle Ram stands out as a formidable force on the battlefield. Its ability to charge towards enemy towers with incredible speed makes it a challenging card to deal with. However, with strategic card selection and precise timing, players can effectively neutralize the threat posed by the Battle Ram while maintaining a positive elixir trade. Here, we delve into some of the most effective counters to the Battle Ram that not only prevent tower damage but also offer favorable elixir exchanges.

Buildings: Battle Ram targets buildings only. So, technically any building can counter Battle Ram. One of the simplest and most effective ways to counter the Battle Ram is by deploying a building. Since the Battle Ram targets buildings exclusively, any structure placed strategically can divert its attention away from your towers. Whether it’s the trusty Cannon, the versatile Tesla, or the towering Inferno Tower, these buildings not only soak up damage but also provide an opportunity for counterplay.

Swarms (Skeleton Army, Minion Horde, Goblin Gang, Barbarians): These swarms have a high DPS so they quickly kill the Ram as well as the Barbarians. Swarms of troops, including the Skeleton Army, Minion Horde, Goblin Gang, and Barbarians, present a formidable obstacle for the Battle Ram. Their high damage per second (DPS) allows them to quickly dispatch both the Ram and the Barbarians it spawns upon destruction. By overwhelming the Battle Ram with sheer numbers, these swarm troops efficiently mitigate the threat posed by its charge.

Mini P.E.K.K.A.: Due to her (or his?) high damage she can one shot the Ram and the Barbarians along with the help of Crown Towers. Even without the help of Crown Tower, she is a hard counter to the Battle Ram. The Mini P.E.K.K.A. emerges as a potent counter to the Battle Ram due to its high damage output. With the ability to one-shot both the Ram and the Barbarians, the Mini P.E.K.K.A. swiftly dismantles this formidable offensive unit. Even without the support of Crown Towers, the Mini P.E.K.K.A. stands as a reliable hard counter to the Battle Ram, offering players a solid defensive option.

Night Witch: Night Witch takes two hits to kill the Ram and each barbarian. However, due to Crown Tower and the Bats she spawns, her work is easier. The Night Witch, with her ability to summon Bats upon attacking, presents a unique challenge for the Battle Ram. While it takes two hits for her to eliminate both the Ram and the ensuing Barbarians, the Bats she spawns provide additional support in dealing with these threats. With the assistance of Crown Towers, the Night Witch effectively manages the Battle Ram, showcasing her prowess as a defensive powerhouse.

Electro Wizard: This guy deals good damage and constantly stuns the Ram, resetting its charge again and again. And even after the Ram is destroyed, he can take care of the Barbarians too. He is the worst night mare of the Battle Ram. The Electro Wizard emerges as a nightmare for the Battle Ram, thanks to his ability to deal substantial damage and continuously stun his targets. By resetting the Ram’s charge with each attack, the Electro Wizard disrupts its momentum, allowing for ample time to eliminate both the Ram and the Barbarians it spawns. His versatile skill set makes him an invaluable asset in countering the Battle Ram and maintaining control over the battlefield.

Charge Reset + Any Troop: As I said above, without its charge, the Battle Ram is very weak. So if you reset its charge using Zap, Log, Ice Spirit or even Tornado, any troop will take care of it. A well-timed spell such as Zap, Log, Ice Spirit, or Tornado can reset the Battle Ram’s charge, rendering it vulnerable to any subsequent troop deployments. Without its charge, the Battle Ram becomes significantly weaker, allowing for easier elimination by ground or air troops. This combination of charge reset and troop deployment offers players a versatile and cost-effective solution to neutralize the Battle Ram threat.

battle ram

Battle Ram in Different Archetypes:

Read more about deck archetypes at here.

Beatdown: A Battle Ram Beatdown Deck is generally constructed with another win-condition with high HP. Best examples are Golem and Lava Hound. The main tactic of any beatdown Deck is generally gaining Elixir advantage and then placing down all troops to build an seemingly unstoppable push. Battle Ram works in this Deck because it destroys any building trying to distract and kill the tank and also acts as a secondary tank for the support. After the Ram dies, the Barbarians still deal lot of damage behind the main tank of the Deck.

Control: This is the archetype in which Battle Ram is seen the most. Battle Ram is very versatile in this archetype. The Battle Ram control decks range from Solo Battle Ram Control, Battle Ram Miner, Battle Ram 3M, Battle Ram P.E.K.K.A. and Battle Ram Phantom decks. Battle Ram can be a devastating card if it makes contact with the Tower. Since Control decks manipulate the opponent and restrict its play, Battle Ram is one of the best cards to use in this archetype.

Siege: Battle Ram is really not a card to be used in a Siege Deck. Even if you try to build a hybrid-siege Deck with the Battle Ram, the Battle Ram won’t be a good choice. In contrast to its effectiveness in Beatdown and Control decks, the Battle Ram struggles to find relevance in Siege decks. The nature of Siege gameplay, which revolves around deploying long-range attackers to chip away at the opponent’s tower from a distance, does not synergize well with the Battle Ram’s close-quarters combat style. Attempting to incorporate the Battle Ram into a Siege deck is unlikely to yield favorable results and is generally discouraged.

Spell Bait: First of all, let me just say that I consider to be a different archetype while some of you don’t. However, the reason I consider it to be different is that it has a different playstyle than the Rock-Paper-Scissor (Beatdown-Control-Siege) archetypes. And even though it is currently played as a Control-type Deck, there are many other ways to play this archetype which are not seen much like Giant Sparky Spell Bait and Mortar Spell Bait, though they exist. Now, coming to Battle Ram, Battle Ram is a good card to use here because it is a good tank for the swarms and barrels as well as it can bait-out Zap and The Log because these two spells are used to reset its charge. Not seen much though, people prefer Miner and Hog Rider more in this archetype.

Best Battle Ram Decks:

Beatdown God with Battle Ram

Clash Royale GolemClash Royale Three MusketeersClash Royale Battle RamClash Royale Minion Horde
Clash Royale MinionsClash Royale ZapClash Royale Goblin GangClash Royale elixir collector

3M Phantom Deck

Clash Royale Battle RamClash Royale Night WitchClash Royale Three MusketeersClash Royale Ice Golem
Clash Royale BanditClash Royale Ice SpiritClash Royale ZapClash Royale elixir collector

P.E.K.K.A. Ram Control

Clash Royale P.E.K.K.AClash Royale Battle RamClash Royale Dart GoblinClash Royale Goblin Gang
Clash Royale Baby DragonClash Royale TornadoClash Royale The LogClash Royale Lightning

P.E.K.K.A. Phantom Control

Clash Royale P.E.K.K.AClash Royale Battle RamClash Royale Night WitchClash Royale Bandit
Clash Royale Baby DragonClash Royale Electro WizardClash Royale PoisonClash Royale The Log

Battle Ram Spell Bait

Clash Royale Battle RamClash Royale KnightClash Royale PrincessClash Royale The Log
Clash Royale PoisonClash Royale Goblin GangClash Royale Inferno TowerClash Royale Goblin Barrel


Understanding the Battle Ram:

The Battle Ram is a powerful offensive card available from Arena 3 onwards. It consists of two Barbarians carrying a wooden log, charging towards enemy buildings and troops. Once the Ram connects with its target, it deals significant damage, and upon destruction, the Barbarians emerge to continue the assault.

Key Stats:

  • Elixir Cost: 4
  • Hitpoints: 766
  • Damage: 275 (per Barbarian)
  • Targets: Buildings

Strategies and Tips:

  1. Pair with Tanky Troops: Utilize the Battle Ram alongside tanky troops like Giant, Golem, or Lava Hound to absorb damage and protect the Ram on its charge.
  2. Support with Spells: Spells like Zap, Log, or Fireball can clear the path for the Battle Ram, eliminating swarms or weakening defenses, ensuring a successful connection.
  3. Surprise Factor: Deploy the Battle Ram when your opponent least expects it, catching them off-guard and potentially overwhelming their defenses.
  4. Split Push: Use the Battle Ram to initiate a split push, applying pressure on both lanes simultaneously, forcing your opponent to divide their defenses.
  5. Baiting Defenses: Force your opponent to expend their defensive cards before deploying the Battle Ram, increasing its chances of reaching the target unscathed.

Advanced Strategies:

  1. Prediction Plays: Anticipate your opponent’s defensive placements and preemptively deploy the Battle Ram to evade their counters, securing a direct hit.
  2. Counterpushing: Utilize the surviving Barbarians from a defended Battle Ram push to form a counterpush, overwhelming your opponent with dual threats.
  3. Synergies with Tornado: Combine the Battle Ram with Tornado to disrupt enemy defenses, pulling units away and allowing the Ram a clear path to the tower.
  4. Chip Damage: Even if the Battle Ram doesn’t reach the tower, its initial impact deals significant damage, chipping away at the enemy’s defenses over time.

Deck Building:

When incorporating the Battle Ram into your deck, consider synergies with other cards, ensuring a balanced and cohesive strategy. Cards like Electro Wizard, Bandit, or Inferno Dragon can complement the Battle Ram’s strengths and cover its weaknesses.

That’s all folks! Hope you guys enjoyed reading the guide. Ask me about anything in the comments.

Sayonara!
By Blaze Stone

Knight – The Ultimate Guide (Very Heavy Guide)

8

Hello guys, today I am going to do an in-depth write-up on a card which is being used a lot at the moment, the Knight!

As you can easily notice, since last 2-3 game updates, people have been using Knight a lot more than ever. Picking the Knight as a topic at the moment is not a bad idea at all, right?

Players usually wonder “Why should I use the Knight? Why not Ice Golem, Lumberjack, Mini P.E.K.K.A or Valkyrie?”. This is because they all have different roles. Also, using Knight gives you some great benefits which can’t be found from any other troop.

Hopefully after reading this guide, you guys will love the Knight like me!

Clash Royale Knight

Knight – The Ultimate Guide

At the first glance, Knight seems like a boring card with moderate HP, moderate damage, moderate hit speed and no special ability. He is totally out-shined by other cards with cool abilities and stats. He is always “okay” in every meta, floating in the middle due to the appearance many new cards.

With an incremental increase in usage of the Knight, many are starting to realize not only its defensive capabilities, but also its defensive value as a card!

The Knight, formerly viewed as a weak vanilla card, has proven itself to be a defensive warrior.

As an advocate for the Knight since the Giant-Poison meta (in my opinion the meta he was most effective in I’m baffled no one used him then) this guide will be sharing what I’ve compiled using him for half a year.

In an attempt to bring constructive high level strategy, this guide will attempt to be as thorough as possible, hopefully encompassing any Knight strategy accumulated to date.

Table of Contents

  1. Summary
  2. Basic Usage
  3. Why Knight over other cards & Role/Purpose in decks
  4. Specific Defensive Scenarios
  5. Synergies

Summary

  • The Knight is lucked from the very first Tutorial Battle (Training Camp).
  • He is a melee troop with moderate HP and moderate damage. He is single-target troops.
  • When he is defeated, his sword falls and gets embedded in the Arena’s ground.
Cost Hit Speed Speed Deploy Time Range Target Transport Rarity
3 1.2 sec Medium (60) 1 sec Melee Ground Ground Common
Level Hitpoints Damage DPS
1 620 75 62
2 680 82 68
3 750 90 75
4 824 99 82
5 905 109 90
6 992 120 100
7 1,091 132 110
8 1,169 144 120
9 1,314 159 132
10 1,444 174 145
11 1,587 192 160
12 1,742 210 175
13 1,915 231 192
Changelogs
  • 18/5/16: Increased the Knight’s hitpoints by 10%.
  • 12/12/17: Decreased the Knight’s hit speed to 1.2 seconds (from 1.1 seconds).
  • 12/2/18: Balance Update decreased the Knight’s hitpoints by 6%.

Strategy

Introductory Segment:

Skip this if u don’t care about who I am

Hey, I’m SamSung, currently residing in Reddit Delta with 5100 trophies as a lvl 11. I run a 12/0/6/2 2.6 spell cycle Deck. Can also play Bandit Mortar cycle (I’ve just gotten my 5th Challenge 12win streak with this Deck, this time a 12-0 but with Rocket for Miner, give it a go!) (*edit: this was a couple of month ago, before Night Witch release and Bandit buff) and really any form of cycle Deck with fair success.

Don’t really like running completely meta decks, will usually change them up a little to spice the game up a little and to suit both the situation which my trophy range finds itself, as well as personal playstyle preferences.

Favorite card right now would evidently be the Knight. I also personally find Miner, Princess, Tornado, Goblin Gang & Ice Spirit to be really strong cards that suit my playstyle very well! P.E.K.K.A, Rage, Lumberjack, Battle Ram and Bandit, although not the most competitive cards, are definitely loads of fun.

I highly recommend those who haven’t to try them, as a lot can be garnered from giving these underused cards a go! Cannot function while playing beatdown.

Would say I’m fairly good at the game ~should be I’m addicted~ , but not near that competitive top tier ~I’m garbage~ . Can win with kind of underleveled cards (average is 12/9/6/3) and consistently get 12 wins in classics, also will average top 15 in 1k tourneys.

Personally a fat Canadian high-schooler struggling to survive the rigors of the international baccalaureate.

Basic Usage & Counters:

This segment focuses on barebones basics regarding the Knight as a card, targeted towards beginners

Clash Royale KnightThe Knight is a three Elixir common melee unit unlocked at the start of the game. The Knight boasts a 1.1 second hit speed, and has a medium movespeed, both average stats.

It’s in fact the first card you’re introduced to in the Tutorial, and is regarded by many as the most ‘vanilla’ card in the game, meaning it’s mechanically the most simplistic concept in the game.

At tournament standard the Knight holds 1,399 health. This is a median between the Ice Golem & its 1100 hit points at tournament standard, and the Valkyrie and its 1548 hit points, all of which are commonly classified as mini tanks. This high hitpoint pool makes the Knight immune to most, actually all, spells in the entire game!

Looking at the lighter spells such as Arrows, Log, & Zap, the Knight can withstand them with ease, and will barely be dented. Heavier spells, such as Fireballs & Poisons, will also deal minimal damage to the Knight, and he’ll persevere through with ease. Even the heaviest spells in the game, Rocket and Lightning, cannot fully deal with a Knight, who will survive through both!

In fact, with its cheap cost and High hitpoint pool, it can often act as a Lightning rod to fragile ranged “glass cannons”, such as Musketeers & Electro wizards The Knight also boasts 144 damage per second, similar to the damage output a Musketeer, with its 160 damage per second, has.

Such is decent, however not enough to be considered a high damage output troop per say. the Knight should not be used as a primary tank killer in any Deck.

knight vs goblinsWith these stats, although some may still think it’s a viable win conditiondumbass , the Knight shouldn’t be used as a primary win condition in a Deck.

Its medium move speed paired with its relatively low hit points (comparing to other tanks), combined with the fact that it’s a troop targeting troop, makes it very hard for it to reach the Tower. Distraction units such as Skeletons & Ice Spirits, both one Elixir, can deal with a lone Knight. Furthermore, the Knight’s melee nature makes it so that he’s unable to rid the board from air troops so effectively, making him poor air defense troop. Albeit this, he shouldn’t be relegated to useless against air troops, as he can provide some support in dealing with them, more on that later.

Furthermore, on offense, the Knight will struggle to deal with long ranged troops such as Musketeers, as his slow speed will give the Musketeer ample amounts of time to whittle him down.

However, it must be stated that an ignored Knight will take roughly 40% of a Tower, so never ignore one!

The Knight’s primary role in a Deck, with his spell resistant nature and surprisingly large hitpool for cost, along with a decent hitspeed, makes him an ideal defensive troop, but more on that later.

Role/Purpose in a Deck

Although this topic was touched upon in the last segment of the paper, there still is a lot to discuss

So, for starters, to reiterate, the Knight should not be used as a decks focus primary win condition.

  • His slow speed makes him vulnerable for longer periods of time.
  • Paired with his hitpoint pool, although relatively large considering Elixir cost, still isn’t large enough to pose a threat to towers.
  • His troop targeting nature, for better or for worse, makes it tough for him to reliably reach a Tower.
  • His low damage per hit makes it so that unlike the likes of P.E.K.K.A and Sparky, one hit isn’t going to make a substantial difference in a game and isn’t all you’re looking for when pushing with a Knight.

All in all, as most reading this paper should know, the Knight simply wasn’t designed to be used as a primary win condition, and should not be used as such!

Furthermore, due to his melee nature, he evidently shouldn’t be considered as air defense. Rather, where the Knight shines is the defensive end of the game.

knight vs golemThe Knight can fill several roles as a defensive card, and his cheap cost thus makes him an absolute stud on defense.

The first and foremost defensive role the Knight will fill in a Deck is as a stagger card! The Knight, with his high hit pool and low cost, is a great card to play to halt enemy pushes, or stall them further so that towers and high damage sources such as Cannons & Electro Wizards* can inflict an exponentially larger amount of damage.

The Ice Golem used to fit a very similar role a few metas ago. However, with the inability to deal damage, along with the nerf to the Mega Minion, a card which synergizes very well with it, added to the decrease in usage of Skeleton Army, has relegated the Ice Golem to a secondary option as a stagger card, giving the Knight the spotlight.

Stagger cards hold immense defensive value!

Due to the ability to take several hits from opponent troop targeting troops, providing ample amounts of time for the Tower to whittle down any threat, they can essentially be played as panic cards in most any situation, and still get the job done.

The Knight, although not a splash unit, with the support of the Tower, can deal with the likes of skeleton armies and Goblin gangs. To add to this, the Knight, a melee troop, can completely mitigate damage from, with the support of the Tower of course, Bats, Minions, Mega Minions Baby Dragons, and when played correctly, most of a Minion Horde!

However, this concept doesn’t only apply to when towers are supporting the Knight. The Knight has such a high hit point pool for his cost, that he can stagger several cards long enough to deal with any tank distracting Tower aggro.

During the Goison meta, when players would rush in with Giant Mega Minions, for a long time considered a busted push, I would casually play my Cannon and support it with a Knight on the Giant. Back when the Mega Minion was the strongest card in the game, it still took 6 hits to kill a Knight. This gave the Knight, Cannon and Tower more than enough time to deal with the Giant, and add an Ice Spirit to the Mega Minion and that was an easy positive trade. essentially in any situation where one is unsure what to play, or doesn’t have a direct counter in hand to whatever is coming at him, the Knight is a great card to simply plop down and give the Tower time to deal incremental damage, significantly mitigating damage.

The Knight, essentially is able to act as a panic card.

In most scenarios, playing a Knight will result in a significant amount of damage avoided. This applies to all mini tanks, and is the reason why they’re starting to become more and more popular. This was the most impactful factor in what made the Ice Golem so popular a few month ago, his ability to stagger damage for so cheap made him a defensive powerhouse. The same applies for Knight, and seeing as he’s able to inflict damage he becomes more versatile; hence the higher use rates for the Knight in comparison with the Ice Golem.

Now in certain cases, the Knight wouldn’t be the best option as a stagger card.

Both the Skeleton Army and the Goblin Gang are much more effective stagger cards in theory, as they deal a exponentially larger amount of damage and can tank more hits from several heavy hitters including P.E.K.K.A & Prince. However, as many know, they are fundamentally extremely susceptible to all spells in the game. This makes them less reliable stagger cards, as one can instantly Log them out for a quick +1 trade. This is the fundamental reason why the two tend to be used in conjunction.

When the primary counter to one has been used, or baited, the other can hypothetically be played and gain unimaginable value.

However, to add on to this, this is also a reason why many bait decks use the Knight. Assuming the opponent holds several counters to swarms and has been able to effectively keep them in their hand, the bait player has the option to play the Knight as a spell resistant stagger defensive card.

However, it must be recognized that the Knight doesn’t just hold defensive value in decks, and in some decks isn’t solely included as a defensive option:

  • Several deck archetypes, especially those that focus on cheaper high damage win conditions.
  • Decks that use Graveyard or Goblin Barrels as win conditions will commonly use the Knight as a mini tank.

Being a cheap mini tank for these fragile heavy hitters makes the Knight a great option to take Tower aggro away from said win conditions.

knight vs towerHowever, what makes the Knight a better option as a mini tank to say the Ice Golem is that the Knight, remaining relatively cheap, offers a threat in his own right.

As aforementioned, if the Knight were to reach a Tower, he would deal significant damage to it; this is a trait the Ice Golem does not possess.

With a push consisting of a threat on the Tower in the form of the Graveyard/Goblin Barrel, as well as the threat the Knight provides, a dual layered push. This is a concept I’ve seen discussed a lot, yet I haven’t been able to find a concrete strategy post dedicated to it.

Essentially this concept is as simple as it seems, duel layered pushes are those that provide two separate layers in a push, both of which are a Tower threat in their own right. They’re usually cheap, and will commonly rely on having one of the threats directly reach the Tower.

The most basic and original dual layered threat push I can think off is the retro Miner Goblins push. Both the Miner and the Goblins had to be answered, and for 5 Elixir this used to be a quick threatening push.

The Knight acts as a tank threat for either the Goblin Barrel or the Graveyard. This is especially effective with the Graveyard as it’s a card that requires precise cards and positioning to counter.

The more difficult it is to defend the threat the Knight is tanking for, the more effective and lethal the push becomes.

Now, although most decks that rely on the Knight as an offensive mini tank will use him as just that, some decks, especially those more cycle oriented that include the Knight, will use him as a runner card.

A ‘runner’ card is a card in a Deck that is used on defense and transitions into offensive play after having already garnered value defensively.

For instance, let’s assume a Knight was used to counter a naked Musketeer, the remaining Knight could be paired with a Hog Rider to form a counter push of sorts. Speaking of which, Hog Rider Cycle Decks, alongside Siege Cycle Decks, are most notorious for utilizing the Knight as a runner. Both use him defensively when needed, and counter push with him acting as a mini tank for the damage source of each respective Deck. Three Musketeer decks that still use the Knight will also commonly use him as the Deck’s runner.

Defensive Scenarios & Interactions:

The Knight, being a primarily defensive card, boasts several beneficial defensive interactions in which it would be recommended for one to play their Knight, this section goes over what specific cards the Knight is strong at shutting down.

giphyAs aforementioned, the Knight is fantastic against ranged support units! These include the likes of Electro Wizards, Musketeers as well as Archers & Bomber. Without Tower support, the Knight is able to completely shut down almost every ground based ranged troop in the game.

Furthermore, the Knight is not only able to shut down 1 ranged support units, but he can shut down 2, as long as the combined cost of both is 7 Elixir or under. This includes the likes of a Musketeer & an Ice Wizard, or an Electro Wizard paired with a Bomber/Archers, or even an Executioner with Spear Goblins.

Placement for such is pretty simple. just place the Knight on top of said ranged units. With the Executioner one is going to prefer placing the Knight to the Executioner’s sides to ensure his axe doesn’t proceed to chip the Tower.

Now, it must be mentioned that there are a couple of ground based ranged troops the Knight does struggle with.

The Witch, depending on how many Skeletons she has spawned, can be a challenge for the Knight, he’ll usually be able to take her out, however he won’t be able to take out much else. However, the only ranged support troop the Knight truly isn’t able to shut down without Tower support would be the Bowler. With his high HP, decent damage and knockback effect, without Tower support, the Knight struggles against a Bowler. However, his high hit point pool makes it so that by the time the Bowler has finally bowled through the Knight, whatever push the Bowler was supporting has died down.

Against the likes of high damage outputting troops such as heavy swarms & high single target damage troops, the Knight will be able to deal with most as long as Tower support is available.

Looking at ground based swarms, the likes of Skeleton Army & Goblin Gang are the foremost swarms. For both, as long as the Knight is played in the middle of the arena, with Tower support, he’s able to comfortably counter both and push on with roughly 60% HP left.

  • Without Tower support the Knight isn’t able to take out a Skeleton Army, however is just able to take out a Goblin Gang. For the Goblin Gang simply play the Knight on the Spear Goblins so he takes them out first, then leaving him with 3 shank Goblins.
  • It also must be mentioned playing a Knight against a squad of Barbarians will take them out assuming Tower aggro is present..

As per heavy hitters, there are 4 primary heavy hitters in the game, which are as follows: Mini P.E.K.K.A, Prince, Elite Barbarians, P.E.K.K.A.

  • With the Mini P.E.K.K.A, a lone Knight can easily shut one down with Tower support. Without it, one is going to have to use 1 Elixir Skeletons to allow the Knight to shut down the Mini P.E.K.K.A.
  • With the Prince, Knight isn’t going to be able to fully shut down a Prince, and the Prince will get a hit on the Tower, regardless of Tower aggro or not. Albeit this, once again, adding 1 Elixir Skeletons allows the Knight the fully shut down a Prince, with or without Tower aggro.
  • Examining Elite Barbarians, the 6 Elixir maniacs can comfortably be shut down by a Knight paired with any single troop in the game, this includes either of the one cost cards. Just ensure the Elite Barbarians are pulled to the middle of the arena, to where both towers have aggro on them. However, if Tower aggro is not on the Ebarbs, things become a little more complicated. Without Tower aggro, the Knight is going to have to act as a mini tank for whatever DPS troop one has to take out the Elite Barbarians, this can include the likes of Goblin Gang, Cannon, Mini P.E.K.K.A, Minions etc…. It must be quickly noted that if the king Tower is activated and all 3 towers are active, a lone Knight can take out a Prince or a pair or Elite Barbarianson his own.
  • Nonetheless, the P.E.K.K.A acts similarly to Elite Barbarians when assessing interactions. With Tower aggro, a Knight paired with 2 Elixir shank Goblins can completely shut down the masked lady. It should be mentioned that before the Skeleton patch, such was doable with 1 Elixir Skeletons. Regardless, if one were to find himself in a situation where the P.E.K.K.A doesn’t have Tower aggro, he’s going to want to play the Knight paired with a very high source of DPS. This can be a swarm such as Goblin Gang, Skeleton Army, Minion Horde amongst others, or it can be a tank shredder. My personal favorite is the Inferno Dragon. It’s fantastic against tanks, and even if they Zap it the Knight will stagger the P.E.K.K.A for long enough to where the Inferno Dragon will recharge up to maximal damage.
  • As a quick bonus, the Knight can survive a Sparky shot, and thus can counter a Sparky with Tower aggro, but will struggle against one without it.

Threat cards have recently been surging in the meta.

Although Ebarbs & The Prince/Dark Prince have dropped quite noticeably in effectiveness since their glory days, the likes of Night Witch has been dominating the meta for quite some time, Bandit and Battle Ram seem to be hot cakes right now, not to mention the Hog has always been the staple threat card for quite some time.

The Knight does fairly well against threat cards, depending on the card:

  • With or without Tower support, a Knight can comfortably shut down a Bandit, he’s the Bandit’s hard counter, and in a meta where the white haired thief is dashing left right and center through the arena, the Knight becomes very valuable.
  • Against the Battle Ram, the Knight is fantastic against the Barbarians themself, but he can’t stop the Ram from connecting to the Tower on his own. Adding either of the 1 cost cards completely shuts down the Ram for a neutral trade and a half health Knight on the counter push. However, if Tower aggro isn’t on the Ram, one is going to need to use 2 Elixir Goblins with the Knight to be able to shut it down.
  • The same applies for the Hog Rider. The Knight paired with 1 Elixir Skeletons limit the Hog Rider to a single swing with Tower support, and without it a Knight paired with 2 Elixir Goblins also limit the Hog to the same results.
  • Now, seeing as the Night Witch spawns an air troop,something the Knight can’t reach, it becomes a little tougher for him to deal with her. With Tower aggro, a lone Knight can deal with her just fine, as he staggers the Bats long enough for the Tower to snipe them off the field. However, behind a tank of sorts, the Knight Witch will get the better of the Knight. Pairing the Knight with Minions can shut down the Night Witch while providing one with a half healthed Knight and 2 Minions on the field.
  • Seeing as there isn’t anywhere to really cover the Dark Prince, he’ll be covered here, as he’s most akin to a threat card. The Dark Prince is in the same boat as the Bandit, to where a lone Knight will completely shut one down, with or without Tower support. Currently the Dark Prince is complete junk, and it gets outclassed in almost every way by the Battle Ram in beatdown & control decks (siege decks use non), it’s in dire need of another light hitpoint & damage buff from the Supercell team to be viable.

Depending on the tank,the Knight can either be a fantastic or terrible answer.

Note: Before progressing it must be mentioned that all tanks are assumed to have Tower aggro in this section, as after all they’re tanks, the main purpose they provide is to yield Tower aggro.

knight vs giantThe Knight is fantastic against troop targeting tanks such as the Valkyrie & the Giant Skeleton. His high hit point pool makes him fantastic against these low damage dealing tanks, and stalls them for long enough to be wiped by the Tower. It’s suggested that when countering a Giant Skeleton, that the Knight should be played behind it to allow it to escape from it’s death explosion. As per the building targeting tanks, the Knight isn’t the best option.

Against the Giant & Royal Giant, pairing a Knight with an Ice Spirit, as well as a cheap high damage per second unit such as 1 Elixir Skeletons, Bats or shank Goblins can lead to most damage mitigated. The Knight should simply not be used to actually counter a Golem, period.

When looking at troops that spawn on one’s Tower, the Knight is fairly effective against those too. The 3 troops that spawn anywhere on the map are Miner, Goblin Barrel & Graveyard.

The Knight is probably the best counter to the Miner in the game. He comfortably takes on a Miner 1 on 1 without Tower aggro, and his spell resistant nature makes him barely hindered by the Poison commonly sent in with the Miner. Predicting the Miner placement is the hard part, but if one is able to do so, it’s a guaranteed counter.

The Goblin Barrel is also going to require some predictions. If the Goblins from the Goblin Barrel are all spawned on one side of the arena Tower and one was able to guess such, the Knight will completely shut down the Goblin Barrel. However, if the Goblins are split, then the Knight isn’t going to be a great counter. However, if one must, the Knight should be played on the bottom Goblin.

Looking at the Graveyard, an unsupported Graveyard can easily be shut down by a Knight and the Tower should take minimal damage (there’s no set number due to the RNG factor of the card). If the Graveyard is being tanked for, which it should be, then the Knight should still be able to hold his own. His high hit pool allows him to both be spell resistant and tank several hits from the constantly spawning doots, and his decent hit speed allows him to rid of them fast. The problem is that with the RNG factor of a Graveyard, one skeleton may be left alone on the other side of the Tower and deal over 500 hundred damage. Pair the Knight with a the Log or a Zap to ensure the Graveyard is countered. Placement for the Graveyard is pretty simple, just play the Knight in the center of the Graveyard. Timing against Graveyard is important, it’s ideal the Knight comes down as early as possible, as taking an extra second to spawn him will make a significant difference in the amount of damage one takes from the Graveyard.

Synergies

Clash Royale Ice SpiritKnight + Ice Spirit/Skeletons

Probably the most underrated synergy in the entire game, the Knight paired with either of the 1 cost cards create an incredible defensive combination.

The Knight, in conjunction with either of the one cost cards, can comfortably completely shut down a pair of Elite Barbarians up to 2 levels over leveled.

The combo can also shut down a Minion Horde completely. The only troop targeting air card the Knight struggled at shutting down was a Minion Horde, and spending the extra Elixir, assuming Tower aggro is available, allows him to overcome the minion squadron. Simply play the 1 cost card of choice in the center of the arena, allow it to do it’s thing (the Ice Spirit freezes and harms the Minion Horde/the Skeletons split in the middle, leading the Minion Horde under the aggro of both towers), and proceed to play the Knight right in between the two arena towers 2 tiles above the king Tower.

If no idea counter is available to an incoming Giant or Hog Rider, a Knight paired with either of the cards limits either to 2 hits on the Tower, while a Knight paired with both cards limits them to no hits on the Tower, providing a full health Knight on the counter push. A Knight paired with both of the one cost cards can counter both a Goblin Barrel or a Miner. The combination of the Knight with both one cost cards, along with some form of high damage output, form a stable defense in most cycle decks in the game.

Clash Royale GoblinKnight + Goblins/Bats

Although more costly than the afore mentioned synergy, a Knight paired with either Goblins or Bats also form a sturdy defense.

This combination can counter all the troops countered by the previous defensive combination (Minion Horde, Elite Barbarians, Goblin Barrel, Miner), while also shutting down a tanked Graveyard.

Furthermore, this combination proves to be much more effective in match scenarios.

The Knight, being a cheap tank, and the Goblins/Bats being a damage source, lead to a fantastic combination. This will be a re-occurring theme within this synergy section, any form of DPS synergies effectively with the Knight.

The Knight offers cheap tank-age for the damage source to have more time to deal damage. The Knight paired with these 2 cheap high damage sources is the most basic form of this concept. The combination of a Knight with Bats or Goblins also form a much more threatening offensive combination.

Assuming the counter to the Bats or Goblins, Zap/Log respectively, has been countered, this quick 5 Elixir push can prove very threatening for an unsuspecting opponent. The high damage output of the Bats/Goblins along with their fast move speed make them an immediate threat.

Just ensure the Knight is tanking for either of the fragile 2 Elixir troops. All concepts stated here work for Minions & Goblin Gang respectively.

Clash Royale CannonKnight + Cannon/Inferno Tower

The concepts stated here work with any defensive buildings, I’ve personally found it to be most effective with the Cannon and Inferno.

The Knight paired with any of these buildings are an ideal way of shutting down most beatdown pushes. The building deals with the respective tank, while the Knight takes out, or at least staggers the support troops.

With the introduction of the Night Witch, this combination isn’t as effective, but regardless it’s a very strong synergy.

The Knight paired with both 1 cost cards and a Cannon was the ideal way of shutting down any goison push during that meta.

Clash Royale ArchersKnight + Archers/Electro Wizard

Referring back to the claim made in the Knight + Ice Spirit/Skeletons section, having a Knight, both one cost cards, and a source of high damage output create a sturdy defense, and the Electro Wizard/Archers act as that high damage source.

With the Knight acting as a stagger card, these ranged powerhouses accumulate an incredible amount of damage outputted.

Cards such a Musketeers, Mega Minions, Executioners work just as well as damage sources, and provide pros and cons in certain areas. Pairing the Knight with any of these ranged support troops, alongside a building can stop multi layered pushes.

For example, a Knight, Archers and a Cannon can shut down a Giant Graveyard Poison push for a +5 trade. Simply play the Knight in the center of the Graveyard, the Archers on the outskirts of the Tower, and the Cannon at a 4/3 plant to deal with Giant, and you’ve dealt with the supposedly threatening push, only taking roughly 400 damage (depending on Graveyard RNG).

Clash Royale X-BowKnight + Mortar/X-Bow/Three Musketeers

Although the three Deck archetypes are played completely differently, the Knight fills a similar role in all.

The Knight, being a cheap mini tank, provides a cheap option to tank for all of the listed win conditions.

With the Three Musketeers in particular, the Knight has the added advantage of acting as a Lightning rod for the Three Musketeers when used defensively.

Paired with the Tower, and only one Musketeer ends up dead (the Knight tanks the Lightning rod and survives with roughly 10% HP).

Clash Royale GraveyardKnight + Hog Rider/Goblin Barrel/Graveyard

A very simple yet effective synergy, the Knight is a fantastic cheap tank to either of these win conditions.

This synergy was already touched upon previously, and so it won’t be re-iterrated. Just ensure that with the Goblin Barrel in particular, the opponent’s counter isn’t in cycle.

Conclusion

It’s vital that players are aware of each and every individual card in the game, it’s purpose, functionality, and common interactions with other cards if they wish to become a holistic competitive player, as such provides them with the knowledge necessary when building, playing and countering certain decks.

This guide’s intent was to provide players with every and all information they’ll need to know regarding the Knight, essentially acting as a hub for all strategy Knight related.

This guide will be updated as time goes on and more is learnt regarding the game to ensure that it stays true to the preplaced title. Please let me know if I missed anything, got something wrong, or if something isn’t very clear, I’ll be glad to explain it.

Regardless, thank you again for reading this and hope you’ve gained something new, an upvote would ~obviously~ be appreciated, I need to feed my ego some more.

Note: Special thanks to the Reddit Alpha Clan Family for supporting the completion of the report. In particular thank you Dylan for playtesting certain interactions with myself, and SML, ZigZag, drquicksilver, dharanikota, Ghostly Dino, Dr Willow, Ben Elmore, Calipao, Fasweder, Sarima amongst others for reading over and editing/providing feedback!