Home Blog Page 4

Straightforward Guide on Building/Playing Fast Control Deck

2
fast control deck

It’s Blaze Stone back with another stupid-easy guide on building your own Fast Control Deck!

Let’s take a look! I bet that you guys will like this guy!

fast control deck

Straightforward Guide on Building/Playing Fast Control Deck

As some of you may remember I once posted a guide named ‘Control Deck 101‘ a couple of weeks back. In that guide I explained the basic idea of a control deck, how it interacts with other decks, good cards to use and a slot method for some basic control decks with examples.

But now I have decided to do a 3-part series on advanced control decks. These 3 parts will focus each on a particular type of control decks. These types are determined on their elixir cost and their speed.

So the three types are:

  1. Fast Control decks ( Average Cost 2.5 to 3.2 elixir)
  2. Medium Control decks ( Average Cost 3.3 to 3.8 elixir)
  3. Slow Control decks ( Average Cost 3.8 to 4.5 elixir)

So, today in the first part of the series I will talk about Fast Control Decks!

What is Fast Control Deck?

A fast control deck is basically a control deck with low average elixir cost ranging from 2.5 elixir to 3.2 elixir ( Some say that fast deck are only till 3.0 and below and above 3.0 are medium decks.

But I feel that 3.1 and 3.1 elixir decks are also pretty darn fast). These decks are pretty fast paced and depend on cycling as fast as they can.

What is the basic principle behind it?

Now, before I explain this I just want to tell you there are 2 principles ( or ways) to get ‘Control’ over your opponent and I will explain them in brief:

  1. Offensive Control Tactic: This requires constantly pushing with cheap mini pushes which opponent cant ignore ( Example: Hog Rider+Goblins) . The opponent has to defend or he will receive lots of damage and therefore can’t he/she can’t execute a proper push giving you an indirect control over his offense.
  2. Defensive Control Tactic: This tactic requires a strong defensive play with cards and synergies which give you a lot of value and elixir advantage( Example: Executioner+Tornado). This gives you control over the opponent and you can use the elixir advantage for offense.

Now, fast control decks work on the principle of ‘Offensive Control Tactic’ as these decks don’t have the relatively higher costing troops for good defense so they instead they try to restrict their offense by using offense. They follow “Strong offense is a good defense”( I think I interchanged it a bit XD).

What is the general game plan?

The general game plan of course works on the principle of offensive control.

Start your game a bit slow by building a push by placing a troop behind your king. Play less aggressive in the start but once you get to know your opponents deck and defenses start getting aggressive. The general mind set should be continuously attacking and wearing the opponents tower down, while giving him no chance for offense.

In overtime, you should cycle spells as well because you probably have weakened the tower quite a lot and due to cheap costing troops it is pretty easy.

Pros and Cons.

There isn’t a perfect deck in any meta and have pros and cons.

Pros Cons
  • Not good if you don’t know the art of cycling ( Thanks Lolman for giving me this term.)
  • Weak against decks with 2 buildings like Siege decks.
  • Defense crumble against a big push
  • Strong disadvantage against Medium Siege.

What are the best win conditions?

Clash Royale MinerClash Royale Hog Rider

As the deck is cheap, the win conditions should also be cheap. So the best win-conditions are:

Hog Rider: Good HP, very fast troop, decent damage and not-that-high cost and ability to synergize efficiently with most cheap troops make him the best card for Fast Control decks.

Miner: Cheap cost and ability to deal direct damage to tower makes him strong in fast control decks. Cheap troops enable a player to cycle him fast and constantly pressure. Also it synergizes well with the cheap troops who offer high damage but low HP  as Miner is the opposite High HP but low damage.

Battle Ram even though isn’t that costly isn’t good for fast control decks as it isn’t real made for such decks.

Deck building tips for Fast Control Decks

Now building Fast control decks is pretty easy. This is an easy to use and effective slot method for fast control decks. But I just want to make clear that there are lot of strong decks out there in the arena who don’t follow it.

  • Slot 1: Win-Condition( Hog Rider, Miner)
  • Slot 2: Cheap Spell ( Zap, The Log, Arrows, Tornado*)
  • Slot 3: Strong Spell( Fireball, Poison. Rocket/Lightning not recommended).
  • Slot 4 and 5: Cheap troops( Troops ranging from 1-3 elixir, Ice spirit and skeleton most recommended)
  • Slot 6: Cheap mini tank( Ice golem, Knight, Bandit. Miner can also be used along with Hog)
  • Slot 7: Ranged Troop with high damage( Musketeer, Electro Wizard, etc.)
  • Slot 8: Building( Cannon, Inferno Tower. Furnace not recommended as it is a passive building while Fast control decks are more active)

This is an efficient method to make Fast Control Decks.

Deck Examples

Finally, the last part of this guide. Now most examples are cycle decks and just to be clear ‘Cycle isn’t an archetype. It is basically used to refer the faster type of the main archetypes).

Example 1: 2.6 Hog cycle.

Lets start with a deck we are all familiar with!

Clash Royale Hog RiderClash Royale The LogClash Royale fireballClash Royale Ice Spirit
Clash Royale SkeletonClash Royale Ice GolemClash Royale MusketeerClash Royale Cannon

  • Slot 1: Hog rider( Win condition)
  • Slot 2: The Log( Cheap spell)
  • Slot 3: Fireball( Strong spell)
  • Slot 4: Ice spirit( cheap troop)
  • Slot 5: Skeletons( cheap troop)
  • Slot 6: Ice golem(Mini Tank)
  • Slot 7: Musketeer( Range Troop)
  • Slot 8: Cannon( Building)

Please take a look at here to read more about this deck: 2.6 Hog Cycle – The New Meta Deck

Example 2: 2.9 Miner Poison cycle

Clash Royale MinerClash Royale The LogClash Royale PoisonClash Royale Ice Spirit
Clash Royale SkeletonClash Royale KnightClash Royale Electro WizardClash Royale Inferno Tower

  • Slot 1: Miner(Win condition)
  • Slot 2: The Log(Cheap spell)
  • Slot 3: Poison( Strong Spell)
  • Slot 4: Ice Spirit(Cheap Troop)
  • Slot 5: Skeletons(Cheap Troop)
  • Slot 6: Knight(Mini Tank)
  • Slot 7: Electro Wizard(Ranged Troop)
  • Slot 8: Inferno Tower(Building)

We posted a similar deck before on Clash.World. You may want to take a look at it here.

Example 3: Hog-nado deck I got wrecked by on the ladder.

Clash Royale Hog RiderClash Royale The LogClash Royale TornadoClash Royale Ice Spirit
Clash Royale Ice WizardClash Royale KnightClash Royale MusketeerClash Royale Cannon

  • Slot 1: Hog Rider( Win Condition)
  • Slot 2: The Log( Cheap Spell)
  • Slot 3: Tornado*
  • Slot 4: Ice Spirit( Cheap Troop)
  • Slot 5: Ice Wizard(Cheap Troop)
  • Slot 6: Knight( Mini Tank)
  • Slot 7: Musketeer( Ranged Troop)
  • Slot 8: Cannon( Building)

*Tornado can also be used in the place of strong spell which will increase the decks defense but you will sacrifice direct damage for it. But if you cycle well and damage more easily tornado is worth it.

That’s all folks! Hope you guys like this guide and if you have any doubts ask me in the comments. I will try to submit the next guide in the series ( Control Deck 101 – Medium Control Dekcs) ASAP.

By Blaze Stone

New 2v2 Modes: Ladder, Friendly Draft and Challenge Matches

40

We are getting some new 2v2 game modes in Clash Royale for the ladder, friendly battles and Challenges!

new 2v2 modes

New 2v2 Game Modes

Players can create a 2v2 match and invite 3 other Clan mates to join this match. If you are invited, you can choose the side you want to join, as you can see here.

join draft battle

In the 2v2 Draft Battle, you have 60 seconds to pick cards. Similar to the regular draft Challenge, you have to pick card 4 times, 4 for you and 4 for the opponent. The cards your opponent picks/gives away will also show up on the screen like in the gif below!

2v2 Mode for Ladder?

This new mode is kinda ladder but it is not ranked, no trophy count. You can collect chests and farm Clan Chest, Crown Chest via this mode.

You can either invite a friend to play with you or do a quick match (an invitation will be sent to the Clan automatically).

This mode starts on Monday June 12th and ends after 7 days.

This is kinda a testing run. This mode will be used for the ladder in the future If everything runs well.

Buy NowProduct ImagePandasaurus GamesPrimeEligible
Buy NowProduct ImageKazravan Enterprises LLCPrimeEligible
Buy NowProduct ImageHasbro GamingPrimeEligible
Buy NowProduct ImageKazravan Enterprises LLCPrimeEligible
Prices pulled from the Amazon Product Advertising API on:


What do you think about these modes? Let’s us know your thoughts!

Old School Royal Giant Deck – Level 10 at 5,000 Club

1

Hey, It’s Infinite Light again!

I’ve made a couple posts about decks that level 10’s above 5k uses and you can take a look at here for more details.

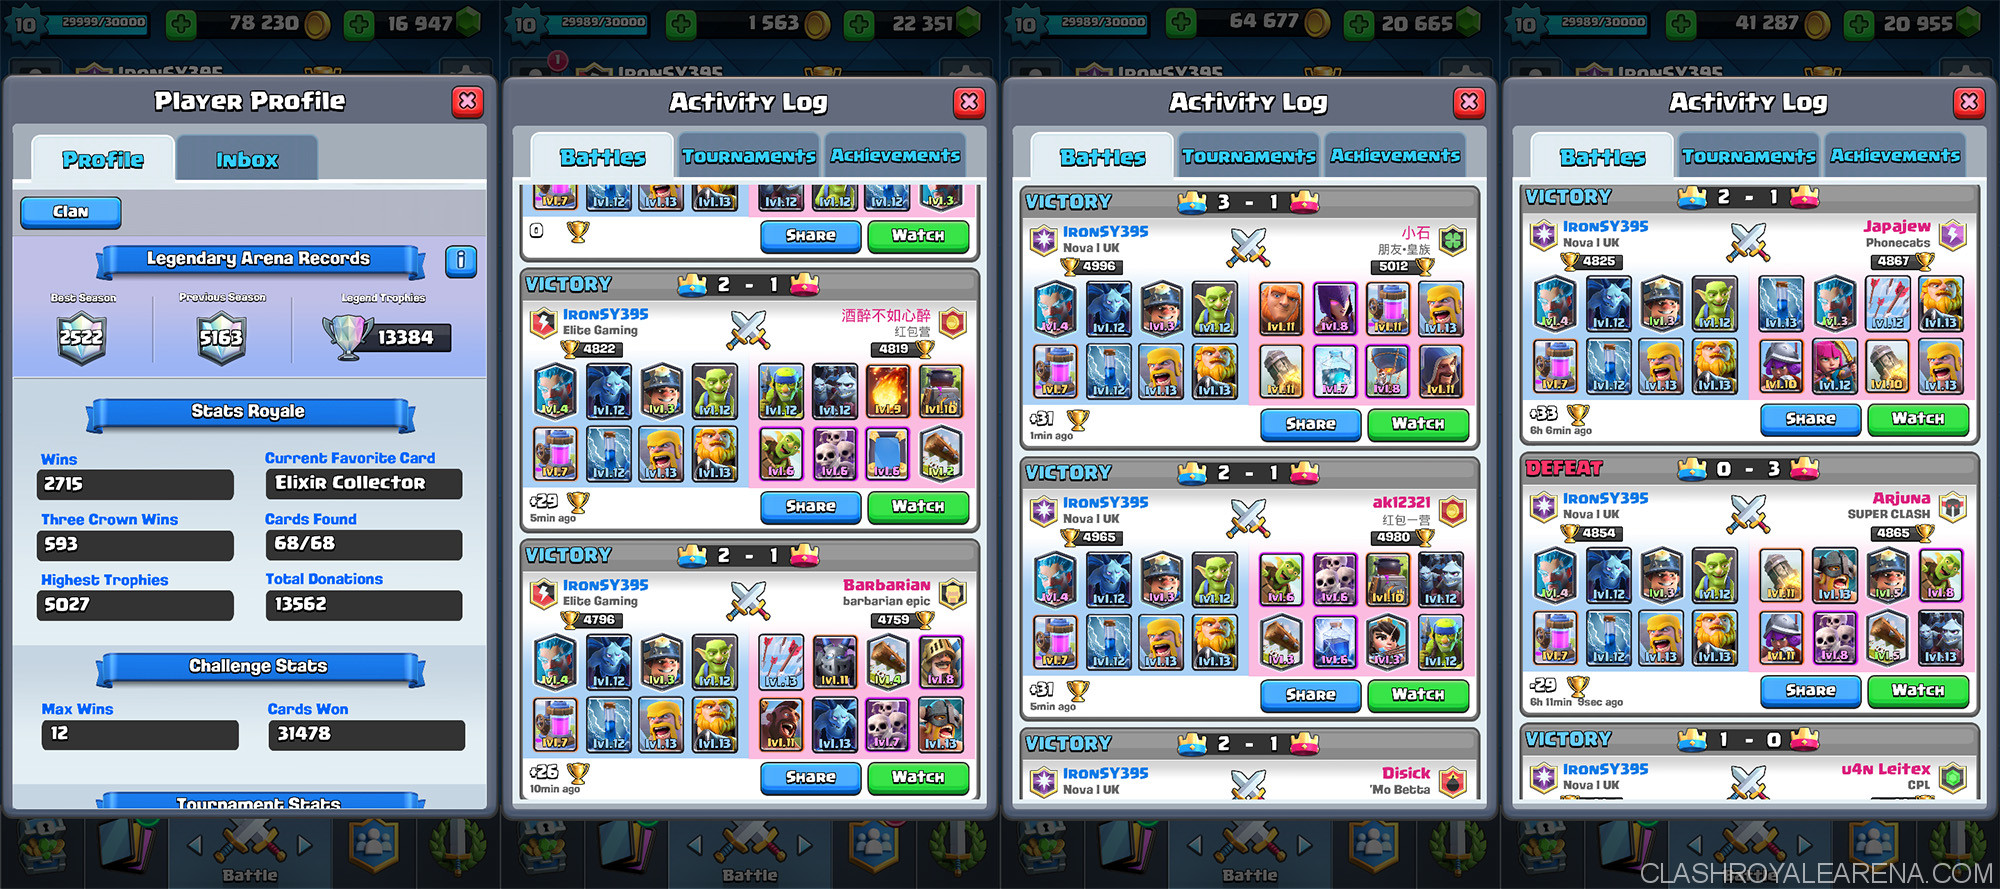
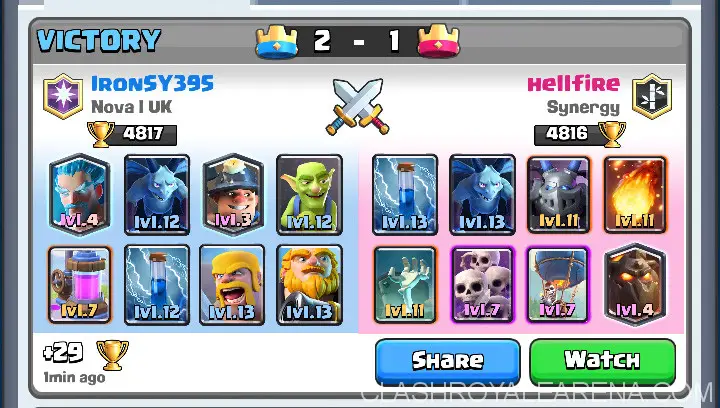
Today, I got a great RG deck that my good friend Ironsy395 uses. He’s been using this deck for a long time, so he knows every last aspect of it. He used this deck to hit 5k as a level 10 before the 30 day season, and with the 30 day season, he hit 5.3k as a level 11. He could have pushed much higher, but he didn’t play for a while until after the season started.

Old School Royal Giant Deck

Clash Royale Royal GiantClash Royale Ice WizardClash Royale MinerClash Royale Minions
Clash Royale GoblinClash Royale BarbariansClash Royale ZapClash Royale elixir collector

Old School Royal Giant Deck

The deck:

Royal Giant: The main Tower taker. Must always be supported or put in front of leftover troops from defense. This card is in a good state right now, and I think it is balanced because many things can counter it without taking too much damage.

Ice Wizard: Beast defender. Mitigates hundreds of damage and can be paired with RG. My 3rd legendary, and one of my favorites. It provides so much value for only three Elixir. Kills Minions, skarmy, and any cheap troops with the help of your Tower.

Miner: Used if RG isn’t in your hand. Paired with Minions and Goblins can take Tower. This is my favorite legendary so far. I use it for many plays. If they use Archers or ice Wizard to defend your Tower, don’t be afraid to send in Miner to kill them. Then, Zap the Tower to target on to your Miner and let the Royal Giant continue shooting.

Minions: Great support troop that offers insane value. It will wreck anything that if used to stop the RG, so always pair it up if you can. Lots of DPS and is a cheap alternative to barbs when defending against hogs.

Goblins: Great chip troop and distraction. Does a lot of damage when paired with Miner. I really like this card, and Ironsy uses it for tricky plays. It can be used to cycle and chip the Tower, but it is also a great defender and distraction. It can be used to distract Mega Minions and also chip the Tower, distract Mini P.E.K.K.A so it won’t even hit your Tower, and much more.

Barbarians: Main defense card. It can and will shred through every tank there is, and when paired with Ice Wiz can easily shut down any push. IMO, the best defensive card in the game. Perfect cost and DPS. Overleveled is annoying as hell to deal with, so make sure you spam the requests for this card! Also spam Royal Giants. This card is great because it defends well, and also requires immediate attention as ignoring them will lead to Tower destructions.

Zap: Use it for gob Barrel, Inferno Tower, Skarmy, you name it.

Elixir Collector: Cannot be replaced. When placed down, try to defend if they try to take it down. You should place it down in the beginning if you have barbs or Minions so you can defend their rush.

Overview

The Legendaries in the Deck CANNOT BE REPLACED. Elixir pump is a must have, as it allows you to cycle quickly. This Deck is a Royal Giant cycle Deck, even though the average cost is 3.8.

Synergies:

This Deck has many synergies. Goblins+Miner, Minions+Miner, RG+Minions, RG+leftovertroops, Miner+leftovertroops.

Goblins/Minions + Miner: This deals a ton of damage if ignored. Pretty cheap and Iron sometimes starts off like this to see how the opponent counters.

Leftover troops+Miner/RG: Delicious and annoying to deal with. The leftover troops will surround the RG, protecting it and also dealing with the defenses. Same goes for Miner.

RG+ Minions: This takes down towers quicker than you can say “Elite Barbarians”

Side Note: A lot of times, when they use ranged troops to defend against RG like Archers or Musketeer, don’t be afraid to send in Miner to kill it. If you have a Miner on the Tower and RG + something else, Zap the Tower so it targets the Miner and gives the RG extra shots off.

Defending:

With Barbarians: Barbarians aren’t used very often now, but they still provide insane value. Used against Hog is a -1 trade, but that’s fine because they now have to spend more Elixir to defend against the barbs. Note: Barbs can shut down Hog without it even touching your Tower if placed down quick enough.

With Ice Wizard: Ice Wizard is used mainly with something else, like Minions, Goblins, or Barbarians if they have a huge rush coming. The slow effect cannot be replaced, and is by far one of the best abilities.

With Goblins/Minions: Goblins are insane. One of my favorite cards, they can be used with Ice Wiz to defend Hog pushes. Same goes for Minions.

With Miner: Don’t, unless you run out of options. Miner does a decent amount of damage, but I usually use it to attack pump or princesses.

old school royal giant proof

Strategy/Gameplan:

This Royal Giant Deck takes a fair amount of skill.

Before you guys start ranting about how all you need to do is to place it down, think about why the RG is hitting your Tower. Is it because you can’t defend? Do you need a building? Is it your fault you run out of Elixir and they have enough to counterpush? This Deck cycles fast as hell, as I mentioned before. The pump also gives you lots of Elixir so you can keep cycling and defending.

What you want to do is to spend as little Elixir possible to defend, and focus on the counterpush.

If the Tower is really low and they send in something huge like a tank, just ignore it and go offensively. A lot of times, the games end in 2-1 wins because Iron ignores the push coming when his Tower is low, and instead goes offensively.

For example, there is a Hog Rider coming at your 500 health Tower and you know he has Fireball or Rocket. You already have one Tower down, and his other Tower is at half health. You would want to use Goblins instead of barbs, because the Tower is going down anyway, and you don’t want the Hog to stay alive much longer after it destroys your Tower. After you use Goblins, immediately place RG in the middle of the opponent’s side  so it starts shooting at the Tower for the win. Easy.

Another “strategy” is RG and Minions.

One of the most annoying combos, the Minions will distract or kill the defending troops/towers. When placed correctly, the Tower will lock onto the RG and the Minions will proceed to rip it to shreds. However, for Inferno Towers you want it to lock on to your Minions. The Minions will distract it and let the RG destroy and target the Tower.

Matchups:

Lavahound: Cancer Cancer Cancer. Always rush the other side with RG and Minions. Use Ice Wiz to defend, because the Lavahound itself won’t do too much damage. You can cycle quickly back to your Minions if you have to. If they have Lavahound Balloon, they usually have Arrows as well. That’s fine, just remember to pressure the other side so they may not get a chance to use the Balloon.

Here’s him beating a level 13 with Lavaloon:

old school royal giant proof 2

Royal Giant: Always be prepared to place down Barbarians. Ice Wiz and barbs work spectacular against RG Minions

Hog Cycle: You have many defenses in this Deck. Use them all. You cycle almost as fast as hogs, so you should have at least Goblins or Barbs everytime.

Siege: RG is their worst nightmare. Don’t be afraid and save your RG for the Siege. Use it on offense as much as you can. Mostly though, the game ends in a draw.

Beatdown Tanks: Against Giant and other tanks, remember to always use Ice Wizard and Barbarians together. Against Golem is a little harder, and against Golem Elite Barbarians is just pure cancer. Cycle and use your Goblins and/or your Barbarians and Miner.

Note: Don’t be afraid if they have a tank and Elite Barbarians. Use barbs for the Ebarbs if you have to. You can usually defend the tank with Ice Wiz and Minions/Goblins.

Overview

Overall, this Deck is insane. The synergies and offense is spectacular, and defense is pretty good. You want to try and spend as little Elixir as possible to defend, so you can focus on offense. I rate this Deck a 10/10, and I strongly suggest trying this Deck in ladder if you want to push.

Battle Ram Miner Control Deck – 12 Win GC and 1k Tournament Winner

465

What’s up guys! Corrosive Logic here with another Deck guide! Today I am featuring a Miner control Deck, with the Battle Ram and the Poison.

battle ram miner control

Battle Ram Miner Control Deck

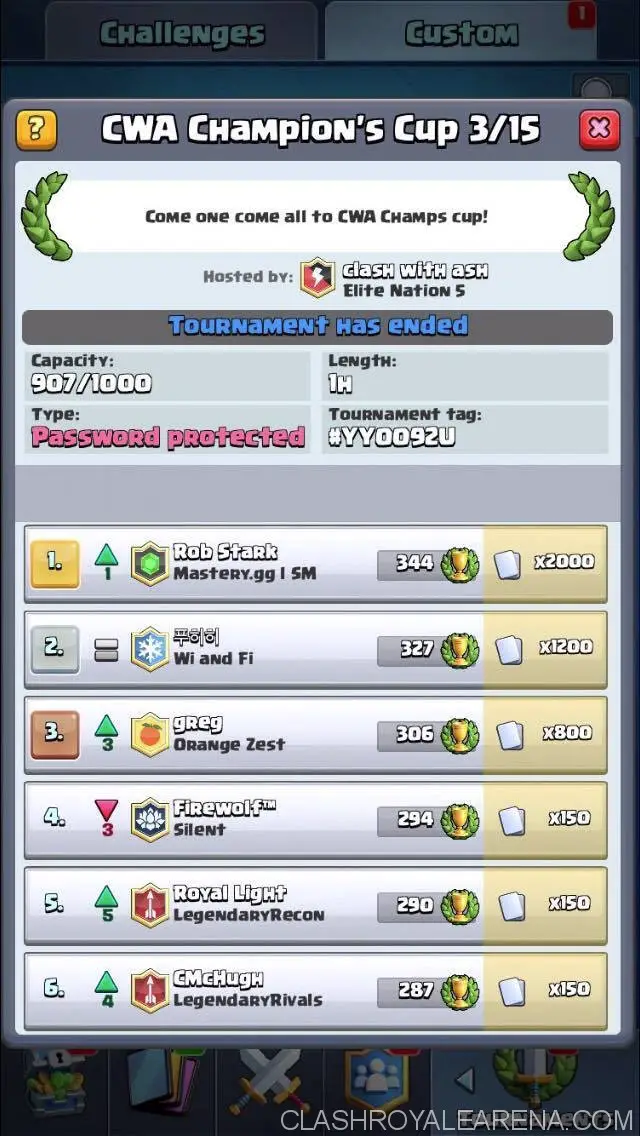
I found this Deck by watching pro player Rob Stark win a 1k Tournament and also get multiple 12 wins in grand challenges, but to my knowledge this deck was made by Coltonw83.

I also played tried this Deck and came 3rd in a 200 man tournament, but perhaps it was luck as I’m not the best at this Deck (Rob Stark), anyhow I will try and explain how to use the Deck as best as I can and at the end I will show you the interview I had with Rob if you want some more detailed explanations.

Proof of winning the tournament:

battle ram miner control proof

Card Overview and Replacements:

Clash Royale Battle RamClash Royale MinerClash Royale PoisonClash Royale Electro Wizard
Clash Royale SkeletonClash Royale The LogClash Royale KnightClash Royale Inferno Tower

Miner – This is the decks main win condition. The Miner is used for chip damage, taking out pumps, and tanking for troops such as battle Ram or Electro Wizard.

Battle Ram – The battle Ram is the secondary win condition, you might not get it to your opponents Tower often but the two spawned Barbarians are great at taking out their counters.

Poison – This card is great against any Deck. In the current meta a lot of support cards can be killed by Poison for example Electro Wizard, Archers, Minions, gob Gang.

Knight – A solid defensive repertoire, a must need in many decks.

Skeletons – Skeletons are great for positive Elixir trades and high DPS for a cheap 1 Elixir.

Log – Possibly the best support spell out there.

Electro WizardProbably the best legendary in the game right now and possibly even the best support card.

Inferno Tower – Commonly used in control/bait decks, the  Inferno Tower is a must need against beatdown decks to compensate for the low damage per push in a control Deck.

For the legendary Log and Electro Wizard, a possible F2P replacement would be Zap and Musketeer, respectively. The Knight can be replaced with the Bandit in some Deck variations, more offense less defense. Rob actually plays the ice Spirit instead of Skeletons in the 1k tournament (I think), but he’s using Skeletons in GC. This Deck is also commonly played with Goblin Gang instead of Skeletons.

General Gameplan:

Good offense? Better defense.

Traditional Miner control decks have always done well against Golem and Lavahound beatdown. However, in the current meta Balloon and Lightning have been causing control players immense problems. Players could simply ignore your Miner push and continue adding support units to feed their massive push.

But in this Deck, the Battle Ram is a card that MUST be reacted to.

So basically when they play a Golem at the back, you could push with the battle Ram on the opposite lane so that they have to defend and have less Elixir for their big push.

Early on in the game, establish what your opponents Deck is, then push accordingly. You are looking to go with the Miner battle Ram, but if your battle Ram isn’t getting to the Tower then use battle Ram Miner so that your Ram tanks for the Miner. You can practically counter push with any another support unit by simply using the Miner to tank for it.

Don’t Miner Poison unless you can get value out of the Poison. Remember above I mentioned all the different popular support units  that can be killed by the Poison.

Swarm cards are often good at countering the battle Ram, so sometimes you should seek to Poison the battle Ram counters too.

Matchups

Golem/Hound Beatdown:

This control deck is quite good against Golem beatdown, but may be slightly weaker to air troops.

Once they play their tanks at the back you can rush the other lane with Battle Ram Miner, forcing them to divide their push and even enabling you to deal lots of damage.

The Miner is also a brilliant Elixir Pump counter, send the Miner in to take out their pump. If they use something to counter it then you can Poison the troop, the pump, and your opponents Tower. Taking out Pumps is crucial against beatdown decks so that they don’t have a massive push coming.

If you can divide their push then you’ll have an easy job defending with the Inferno Tower. Place the Electro Wizard on the other side of the push so that they get less Lightning value. Don’t be afraid to use the Poison defensively to take out their support units.

Hog:

Your Inferno is enough to counter lots of Hog pushes. A good Hog player will try and outcycle your Inferno so be ready for that. Remember combos with Electro Wizard and another card will usually completely shutdown a Hog too.

Siege:

This can be a bad matchup if they catch you off guard. Against Xbow the Knight is a cheap tank, also the battle Ram is great at taking out Xbows. I don’t recommend using Inferno to counter xbow unless they don’t have Electro Wizard or if it’s out of cycle. It’s a gamble because if they managed to get other troops in front of the xbow, the Inferno will lock onto the xbow too late.

Graveyard:

This is the toughest matchup for this Deck. Use the Knight to tank Skeletons and Log them when enough have surrounded the Knight. Electro Wizard is also a good Graveyard counter but it can be killed by Poison. Use your Inferno to take out the tank.

Best Miner Counter – Avoid the Knight

In the current meta, the Knight is in so many decks, and it’s one of the best counters to the Miner. The reason it’s so good at countering Miner is because it only costs 3 Elixir and it can’t be killed by Poison or Fireball.

Cards like the Knight will be used to counter your Miner, so it is essential that you vary your Miner placement everytime. If they use another troops with the Knight, for example Electro Wizard, then it’s ok to use the Poison as you will get value.

battle ram miner control 2

Battle Ram on Defense?

It’s interesting that both of this deck’s win conditions can be played defensively in emergency situations. The Battle Ram can tank multiple shots and the two Barbarians are obviously going to do work on defense.

Sometimes if you are almost full on Elixir and your opponent’s Electro Wizard has a little bit of health left coming back to your Tower. You can play the battle Ram to soak 1-2 shots and let your Tower finish the Electro Wizard, also you now have the battle Ram to conjure a push with the Miner etc.

Interview with Rob Stark (Exceptional Player)

What is your favorite card and why

My favourite card is X-bow, it’s just satisfying to win with as it requires you to understand your opponent’s cards and counters well to be able to win.

What made you play this Deck in CWA Champs Cup? Under what circumstance will you deem a Deck good enough to take to a big tournament or grand challenge?

Battle Ram seemed like an underrated card at the time, and I wanted to see how it would hold up in a competitive setting. I had won a few GC with it prior to the tournament, so I knew it was decent at the least. But it’s hard to tell exactly how it’s going to do until you test it in the right environment. Generally I’ll want to win a few GC in a row with a Deck before I consider it for competitive play.

What sort of decks/cards counter this Deck, and what do you do against them?

Lavaloon is probably the hardest match up for this Deck, you have to apply good pressure on the opposite lane of the Hound, and make sure you still have Elixir to defend with Inferno. Sometimes it will come down to who can 3 crown first.

Under what circumstance will you push the opposite lane?

Good times to push opposite lane are whenever your opponent makes a good size investment at the back (preferably 6+ Elixir but can do with 5). If you’re playing against a control type Deck you’ll probably want to go same lane though

Do you have any general tips for using this Deck?

Don’t go all in on pushes early until you understand their counters. Only play battle Ram at the bridge unless you’re using it defensively. If they’re countering battle Ram well send that in before Miner so it tanks for the Miner.

How would you recommend someone getting better at the game, do you think that your skill came from playing a lot, or is it more natural talent?

Getting better at the game involves two main things: repetition and learning. When trying a new Deck you need to get as many reps as possible, but you also need to learn from your mistakes along the way. Share replays asking for advice, but also look at them yourself and figure out all of your mistakes, and what the correct play would have been.

A lot of mistakes come from not knowing or recognizing the correct play fast enough. If you can figure out how you’re supposed to react to the popular Deck types, you’ll be able to minimize some of your mistakes.

Any tips for playing in tournaments?

For me, I try to play as many games as possible. But if I find myself tilting, I’ll take a small break before starting again, to make sure my head is clear and I’m not rushing into it. Better to wait a minute and refocus instead of taking another L.

I also have Rob Stark’s gameplay and Deck breakdown in a video below, so check it out!

Conclusion

This is a very solid Deck that works very well against every Deck besides possibly Graveyard and Lavahound. There’s no doubt that a lot of practise went into this Deck before it got used in challenges and tournaments.

A big thank you to Rob Stark for helping me make this guide, also I would really appreciate it if you could check out my video, as it encourages me to continue putting my time and effort into these guides!

Thank you.

What is The Crown Championship? How To Join In Clash Royale Crown Championship

390

Today, Supercell has released an announcement about The Crown Championship.

So what is it basically about? We are going to tell you everything you should know about it in this page!

clash royale crown championship

What is Clash Royale Crown Championship?

So do you want to be one of the greatest players in the Clash Royale history? Want to join the all-star battles? Want to earn the title saying you are the World Champion ship of the year?

What is the Crown Championship?

  • Crown Championship is the ongoing Clash Royale global eSports competition, which was designed for fair and running with the competitive formats.
  • Anyone can join this tournament and get the chance to earn the title of the greatest Clash Royale player in the world.
  • This competition starts with a few global regions in the Spring Season. Full access will be available in August 2017.
  • First year prizes will be over $1,000,000 in total. Grand Finals will be hosted in November.

What are the details?

The Crown Championship Spring Season officially launches today, May 2nd 2017, for Europe, Latin America and North America regions. A series of Open Custom Tournaments will start from May 11th 2017. Regional competition for China, Japan and Korea will start very soon! The first battles will begin on May 11th 2017.

The running Spring Season starts from May to July. The Fall Season will start in August and the World Finals event will begin in November.

For the Spring Season, 8 Champions will be picked from hundreds of thousands of players who participate in the Open Tournaments.

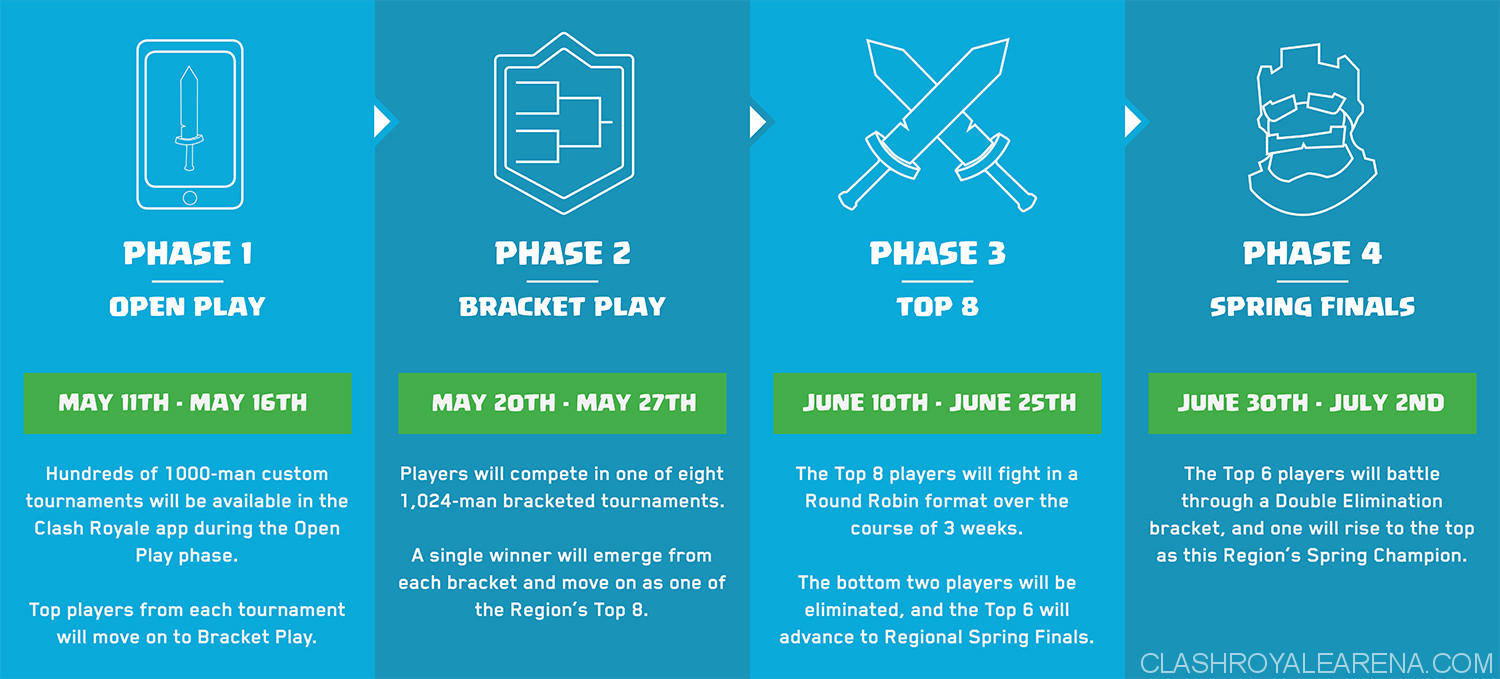
Take a look at this picture for more details:

Crown Championship Seasons

How to join in The Crown Championship?

Players must have at least level 8 accounts to participate. Also, players must be the residents of the respective regions and over 16 years old.

In order to participate in the Championship, visit this website and, press Register and then enter the respective information. After signing up, you will be able to access the Open Play Battles (and face tons of other players).

crown championship registration

After pressing Register Now, you will be moved to the Profile page, where contains the password for the respective competitions. You will be able to see the password once the Open Play phase started.

crown championship profile page 2

If you perform well in the Open Play phase, you will be able to participate in the Bracket Play. 8 Champions will be determined from this phase in order to choose the one who deserves the title of Spring Champion.

crown championship phases

  1. Phase 1 – Open Play: Hundreds of 1000-man custom Tournaments will be available in the Clash Royale app during the Open Play phase. Top players from each Tournament will move onto the Bracket Play.
  2. Phase 2 – Bracket Play: Players will compete in one of eight 1,024-man bracketed Tournaments. A single winner will emerge from each bracket and move on as one of the Region’s Top 8.
  3. Phase 3 – Top 8: The Top 8 Players will fight in a Round Robin format over the course of 3 weeks. The bottom two players will beb eliminated, and the top 6 will advance to Regional Spring Finals.
  4. Phase 4 – Spring Finals: The Top 6 Players will battle through a Double Elimination bracket and one will rise to the top as this Region’s Spring Champion.

Are you excited now?

Let us know your thoughts about this!

Heal Spell – Best Tips and Strategies

4
clash royale heal spell

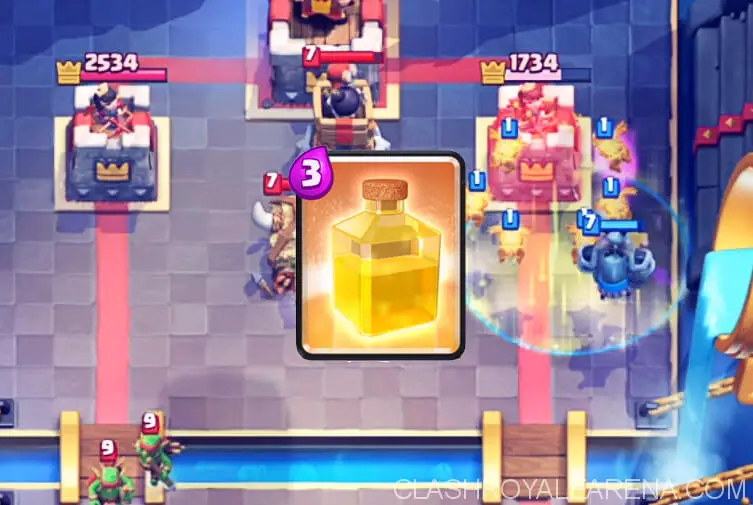
The Heal Spell was released in Clash Royale a few weeks ago. This is a very interesting spell which can bring tons of value If played properly. However, I still somehow haven’t seen people using it a lot in the Arena. That’s why I want to bring this spell to you guys again today.

clash royale heal spell

Clash Royale Heal Spell

  • The Heal is unlocked from Arena 10 (Hog’s Mountain).
  • It costs 3 Elixir to deploy.
  • Its name describes everything. It is used to heals friendly troops. It can’t heal buildings.

Stats

Cost Radius Duration Type Rarity
3 3 2.5 sec Spell Rare
Level Healing/Sec
1 100
2 110
3 121
4 133
5 146
6 160
7 176
8 193
9 212
10 233
11 256

Its stats are simple just like this.

At Tournament Standards, its healing speed is 167HP/sec and its lasts for 3 seconds, which is 501 HP in total.

Technically, the Heal Spell is a reverse Poison with the radius of 3 tiles.

Interactions

Against Poison, Heal Spell protects your troops perfectly in the short term since its healing speed is better than Poison’s DPS. However, Poison wins in the long run because it lasts longer.

In some specific situations, knowing this is crucial. For example, If the opponent uses Poison on your Three Musketeers, heal them to deal extra damage, forcing your opponents to use other troops/spells to deal with them.

Complimentary Cards

Talking about synergies, the Heal Spell will be able to compliment glass cannons extremely well, especially when they were already damaged by troops/spells.

Using Heal Spell would negate some instant damage spells (which can’t one-shot your troops) and create positive elixir trades.

For example, Use it when the opponent uses Fireball on your Three Musketeers.

Here are some great uses of the Heal Spells for you. If you know any others, don’t hesitate to comment!

  1. Heal + Musketeer/Three Musketeers against Poison/Fireball: Positive Elixir Trade. (Note: Use the Heal Spell against Poison when your Musketeers have about 50% HP).
  2. Heal + Barbarians/Elite Barbarians/Knight/Bomber/Mini P.E.K.K.A/Goblin Gang/Hog Rider/Valkyrie/Mega Minion/Wizard/Battle Ram/Prince/Balloon/P.E.K.K.A/Giant Skeleton/Executioner/Bowler/Lava Pups/Inferno Dragon/Sparky/Ice Wizard/Lumberjack/Electro Wizard/Bandit: The Heal Spell will help these cards survive the Tower shots, dishing out extra damage. High risk, high reward! Think twice before doing this because you will face a pretty huge counterpush.
  3. Heal + Skeletons/Ice Golem: Not really recommend doing this… Only do this If you want to deal with Lava Pups or similar troops on defense when you don’t have any better choice.
  4. Heal + Fire Spirits/Ice Spirit: Do this when all you want to do is to finish off the opponent’s Tower.
  5. Heal + Ice Wizard/Miner/Dark Prince/Dar Goblin/Spear Goblins/Witch/Baby Dragon/Goblins/Archers/Guards/Minions: This also helps you do a lot more extra damage and is great for fast cycle deck.

I don’t list other troops here because they either have little damage or can get 1 shot easily by most cards.

Nitrome95 also shared a great article about the best cards and decks to use with the Heal Spell. You should take a look at here for more details.

Will the Meta really shift?

Due to the appearance of the Heal Spell, you would probably think about this, right?

From my point of view, this wouldn’t change the meta too much. However, It will definitely add a lot more Beatdown decks using numerous glass cannons and cheap cycle decks into the Arena.

Shared by Jerrymouseisme

Everything You Need To Know About Synergies

22

There are 8 cards in deck. To win, you have to have the right combination of cards that synergize with each other and work together to create pushes and defend.

A synergy, by definition, is the cooperation of two or more (troops/buildings/spells) to produce a combined effect greater than when used separately.

card synergies clash royale

Table of Contents

Why should I choose two or three synergizing cards instead of one big card that can do it all?

An example of this question is, why choose Knight, Skeletons, and Ice Spirit when you can just choose P.E.K.K.A? (assuming her purpose is defense and you already have a another win condition) The Pekka only takes up one deck slot so already have more room in your deck for other cards.

The Pekka is much sturdier and reliable, so why go to trying to synergize smaller cards?

  • This is how people fall into the trap of making an expensive deck. By thinking you can cover more ground with different cards, you will really just struggle to get them down on the board and create pushes.
  • Due to the cheap cost, they are quick and easy to get on the battlefield.
  • Small plays can be made. What if there is a medium push coming my way but it doesn’t exactly deserve my epic Pekka? I have not gained the Elixir advantage that I want when revealing her. Sad to see a Pekka forced out by a Princess.
  • They can be played separately AND together. They also provide coverage for both lanes. If you place a Pekka on one side, the other side is vulnerable to attack. Whereas with cheaper options, you can split troops between the lanes and protect both sides.
  • The cheaper cards are so much more versatile and has so much more uses, combined and separated. Low elixir cards in general provide a ton of value for what it’s worth.

Cheap cards synergize with almost everything

The reason why Zap and Log are so popular is because these spells synergize with every troop that does point damage. Both have stalling effects (Zap does stun, Log has pushback), making it even more useful combined with any card. Same for Skeletons and Ice spirit. They don’t do the opposite, but they stall allowing your other troops to get more hits in, making your other troops more effective, or gain more value.

When making a deck, use at least one of these cards and it will guarentee a synergy:
Clash Royale The LogClash Royale ZapClash Royale Ice SpiritClash Royale Fire SpiritsClash Royale Tornado

Synergy matters more than levels!

Synergy > Overleveling.

Choosing cards that make each other shine is more important than high level cards that don’t want to cooperate. My advice is use your overleveled card and work with it for now, and once you have the desired card decently levelled, switch.

Synergies help establish the overall pace of the deck

This guide is not about deck archetypes, but this is still relevant. Changing one or two cards could change the whole playstyle.

By changing your Knight, Skeletons, and Ice Spirit, to a Pekka and two other cards you want, you could have a deck that does more on defense, but the problem is that the deck becomes more expensive. (See above)

Synergies can be separated into 2 Main Categories:

One card does what the other cannot, therefore covering each other’s faults

E.g. Ice Golem and Hog Rider This is the bigger group, and is essential for every deck. It is mostly seen in the variation of one splash card and one point damage card. In this category you have considered both units in which your opponent may choose to use: small, squishy troops, and heavy troops. This synergy can also be one tank and small troops (e.g Knight and Graveyard). Leftover squishy troops on defense can then be used on offense by dropping a tank in front, for example Miner.

One card increases the effectiveness of the other card

E.g. Tornado and Splash This mainly applies to spells such as Rage, Clone, and Heal. These spells are not adding or subtracting anything new to the arena, they are just improving on what’s already there.

Synergy on Offense and Defense

Synergy is necessary for getting your push to the tower. Having two spells (one 2-3 Elixir, another 4-6 Elixir) gives you many options of attacking.

Cards in the second category like Rage, Clone, and Freeze have good synergy with all offensive troops. Pick spells and cards that counter your win condition counter.

Follow the meta and know which cards are common counters, so you can prepare your meta counter.

Synergy is less obvious on defense. It is not necessary for there to be two cards on the field that have different purposes just to defend.

Log and Inferno tower is a good example of a defensive combo. The Log allows the Inferno to reach it’s maximum Tier without dying, even if it’s zapped.

A tank and glass cannon is also a common example of two cards that work well together. A Ice Golem can tank Elite Barbarians while musketeer does point damage.

Noob Mistakes Related to Synergy

Picking two cards that are very similar and not used for baiting reasons

I see this a ton with new players. They have Electro Wizard AND an Ice Wizard in their deck. Just because they are good alone does not mean they are good together, in the same deck. They are susceptible to making negative elixir trades when hit with spells. They serve the same purpose, making the deck imbalanced.

Always using the two cards together, because, well… they synergize.

If you have two cards that work well together, by all means, keep using them together. If you have a two card synergy that also synergizes with a third card—a “Triangle Synergy,” if you will, you have the option of combining either of them. Deciding when or when not to use your synergy together requires macro play. By switching things up, your opponent won’t know what your play will be because you have more options at hand. Having synergies allows you to make more plays and be a little more unpredictable.

They care too MUCH about synergy

Not everything in your deck is going to synergize when compared to each other one-on-one. Every card plays a different role, whether it does a better job with another card alongside it or not. Decks that have a unclear win condition can still survive if there is really good synergy with all the cards. Players can create steamroll decks or apply tons of pressure all the time. An example is bait decks. Goblin barrel normally wouldn’t be a win condition, but the other bait cards in the deck allow it to be so. If you are a beginner, make a coherent deck with the correct formula first, then worry about synergies.

Common Synergies

Now lets actually get into the synergy examples. Below are common synergies, and why they work.

Princess and Inferno Tower

The Princess is great at extracting the full value of the Inferno Tower. They are usually seen together in bait decks, but one is log bait and the other is zap bait. If you accidentally clump them together, there’s no worries, because one spell can’t shut both of them down (except lightning).

Many times after defending, the Inferno tower still has a decent amount of health left. Under normal circumstances, your opponent would just sit there watching it rot away. Not when you have the Princess!

Immediately after defending with Inferno Tower, place her at the bridge. This will usually force out cards like Mega Minion or Knight, to which the Inferno tower can roast away. If you’re lucky, you can sometimes force out a Valkyrie or Mini Pekka. Even if your opponent uses small swarm such as Minions, you inferno Tower will be able to tank the damage and still assist your arena tower.

If the push you’re trying to defend has a mix of swarm and tanks, use both at the same time. This way when you’re done, the Princess can walk up to the bridge and start her dread game.

Miner Poison/Rocket

EsoPa 2.9 Miner Posion Guide The cycling of this deck is very important. You want to make sure you can keep using the Miner to have a reason to Poison or Rocket the tower. Poison destroys swarms and Rocket can heavily damage big troops, like Bowler.

In the chance that your Miner doesn’t connect to their pump or is out of rotation, you still have spell options to get rid of it. Keep feeding your spells and you will win!

Poison Graveyard

Poison counters almost everything that counters Graveyard. Exceptions would be tanks like Knight and Valkyrie. The Graveyard’s 10 second duration and the Poison’s 8 seconds make sure enemy troops rot to their full potential. Doot doot!

Fireball and Zap

This can also be Poison/Fireball and Zap/Log. Fireball is literally on the edge of killing so many troops. Zap is the cherry on top. Wizards? Fireball Zap! Three Musketeers? Fireball Zap! Actually, Zap, then Fireball, Because of the Fireball’s knockback. I mean, Fireball, and then Zap before the fireball reaches them. So Fireball ZAP!

Balloon Freeze

This really is High DPS and Freeze. So this would work for Hog Rider, Prince, and so on. Sometimes there are troops that are impossible to get off the map instantly, so instead of doing that, just Freeze em! If you can catch enemy troops at the right time, your enemy will be punished greatly.

Knowing when to Freeze is important so that you can defend counter pushes and punish back in return for not having an elixir advantage.

Disposable units and X-Bow/Mortar

Your main objective is to get as much value as possible per cycle, and that means keeping your X-bow alive. Your support troops should have no intention of connecting to the other side, instead protecting the X-bow and distracting/destroying immediate threats. Cards like Ice Spirit, Fire Spirits, and Knight do this Job well.

Tank and Lightning

  1. Step 1: Place tank
  2. Step 2: Use Lightning for Inferno Tower/Musketeer/Wizard
  3. Step 3: ??
  4. Step 4: Profit

While you assemble your big beatdown push, your opponent is likely going to pressure you first, and then prepare his defense. Once your tank has crossed the bridge, there will be more than enough value for a lightning. This may be in the form of a building and Electro Wizard. If you use the Lava Hound, Hog cycle players will try to cycle to a second musk.

Other self explanatory synergies

  • Zap and Ice Spirit
  • Tank and Graveyard
  • Mini tank and X-Bow/Mortar
  • Tornado and any Splash Troop
  • Golem/Lava hound and Clone

Uncommon Synergies

These are some card combos that aren’t seen everyday and that you can have fun with.

P.E.K.K.A 3M

Uncommon because it is so expensive. The Musketeers have excellent range, being able to target towers much more quickly, and sniping buildings or other troops. The high firepower means that common counters to the Pekka are wiped out faster. If my opponent has 3 pumps down with an adequate amount of time left, I’d say GG.

You can take a look at here to see a post on Clash.World about this deck!

Barbarian Hut and Graveyard

A constant stream of tanks is perfect for the Graveyard. Your opponent won’t know when you will activate the spooky music. Barbarian Hut is also very defense, what most Graveyard decks are all about. To defend the never ending Barbarians, your opponent may overcommit on defense, in which you can rush the other side with Knight + Graveyard.

Bandit and Golem

Bandit can quickly get to the Golem’s counters and start hacking away all while the Golem is tanking. Make sure to have a cheap spell to go along with this!

Giant Skeleton and Tornado

I don’t think Giant Skeleton is never not seen with the Tornado (I can’t say the same the opposite way around). He’s a wild card because this combo has the potential to make huge positive trades. We all know how good it feels. Giant Skeleton is not one to get to the tower; just one where you can recover from big negative elixir trades on defense.

Pekka and Tornado

This one’s a funny one. When your opponent tries to rush the other lane or kite your Pekka, pull em over with the Tornado! When your Pekka is about to connect to the tower and your opponent drops troops at the last second, pull them behind the tower so the Pekka will have a clear path to victory.

Some other fun synergies

More on playing an off-meta deck!

Deck Building Regarding Synergy

An excellent deck doesn’t need to shout synergy.

Looking at how cards fit into a deck rather than the synergy of two cards is important.

I won’t include Fire Spirits just because they synergize well with my Hog. I already have other swarm control and by using Ice Spirit instead I can make the deck cheaper. Another example is picking between Minions and Archers in a Lava Hound deck. They are similar, but I would choose Minions because they are an air card, and can distract Inferno towers. In a Golem deck, I would pick Poison over fireball, because I know the Golem will take a while, holding all the enemy troops in one spot.

You must also decide whether you want synergizing spells, synergizing troops, or both. Synergizing spells usually means faster gameplay and quick fixes, like Hog cycle. Synergizing troops means relying on counter pushes and stacking up, like Golem beatdown.

Another thing to keep in mind is balance.

By focusing too much on synergy, the deck may be too offensive or too defensive. If I want to counter the air meta, I may ditch my Musketeer and Ice Spirit that goes well with Hog in favor of Archers and Mega Minion. If I use a cannon instead of Inferno tower or Tesla, I must have other air units to successfully defend Lava Hound.

Below are three decks that have excellent synergy.

Deck 1: Tornado Graveyard
Clash Royale GraveyardClash Royale KnightClash Royale BowlerClash Royale Baby Dragon
Clash Royale TornadoClash Royale Electro WizardClash Royale SkeletonClash Royale Poison

This deck has so much synergy while still being defensive like a tradition Graveyard deck. The Tornado takes advantage of the Blower and Baby Dragon’s splash, while Poison kills enemy troops with the Graveyard. This deck is defensive utilizing the Electro Wizard and Knight. Almost card in this deck can be used as a tank for the Graveyard. Take a look at here to read more about it!

Deck 2: Battle Ram Three Musketeers
Clash Royale Battle RamClash Royale Three MusketeersClash Royale elixir collectorClash Royale Skeleton
Clash Royale KnightClash Royale Goblin GangClash Royale ZapClash Royale Ice Spirit

This deck has two tanks for when you split Musketeers. The pump is to gain an Elixir advantage and also bait a Fireball so you can safely bring out your Musketeers. The cycle cards and the Knight are great at defending while you wait till double Elixir. When you split your Musketeers your other cards can be split as well (Zap one side, Ice Spirit the other, Goblin Gang split) to create chaos!

We posted a similar deck on Clash.World before. You may want to take a look at it xD

Deck 3: X-bow
Clash Royale X-BowClash Royale Inferno TowerClash Royale Ice SpiritClash Royale Minions
Clash Royale SkeletonClash Royale KnightClash Royale The LogClash Royale fireball

X-Bow has a tough time with tanks, that’s where the Inferno Tower comes in. You can choose to pair it with your X-bow or defend first. Let your opponent make the first move so after defending, your X-bow will have a clearer path to the tower. Cheap cards and the Knight are to make sure getting to your X-bow is 200% harder.

Thinking About Your Own Synergies

This guide does not cover every synergy, just gives a preview of some and their nature. To make your own synergy, think about the following questions:

  1. Do they die to the same hard counter?
  2. Do they die to the same spell?
  3. When played together, how much elixir does it cost? Is it even realistic?
  4. In what ways is the synergy better than it’s more expensive counterpart? I.e Zap and Ice Spirit vs Arrows
  5. How will the other cards in your deck benefit because of this synergy?
  6. Is your synergy able to assist defensively and offensively?
  7. Is there another synergy that does it better?

Synergies are a big part of this game, and learning how to play them and where they come from will improve your game immensely.

Thanks for reading my synergy guide!

Any criticism, suggestions and questions are welcome, have a nice day 🙂

Shared by CocoZebra
How To Counter Every Deck in Clash Royale

4

Hello fellow Clashers! I’m KairosTime and today I’m bringing you Part III to the “Strategy Guide to Clash Royale” with how to Counter Every Deck in Clash Royale using The Two Triangle Theory. This is a guide for new and experienced players alike and will complete your understanding of how every deck in Clash Royale interacts with each other. This is a precursor to a future article that I will publish on How to Build the Best Decks.

Counter Every Deck in Clash Royale

How to counter Every Deck in Clash Royale

and skyrocket your trophies

Champion Grand Champion Ultimate Champion

If you haven’t read Parts I and II on my Strategy Guide to Clash Royale, you can do so here:

  1. How to Manage Elixir
  2. Deck Building Fundamentals

This written guide comes with a video guide that includes specific examples that I would recommend watching.

In this guide, we will focus on 5 key topics:

  1. The Deck Archetype Triangle
  2. The Deck Speed Triangle
  3. The Theory of 2 Triangles
  4. The Card Counter Exception
  5. Deck Building Application

Before I move on, I wanted to give a big shoutout to Kairos Kingdom Clan Leader metaky, and avid Clash Royale Competitive player and redditor edihau for helping me develop the Clash Royale Theory of 2 Triangles.

The Deck Archetype Triangle 

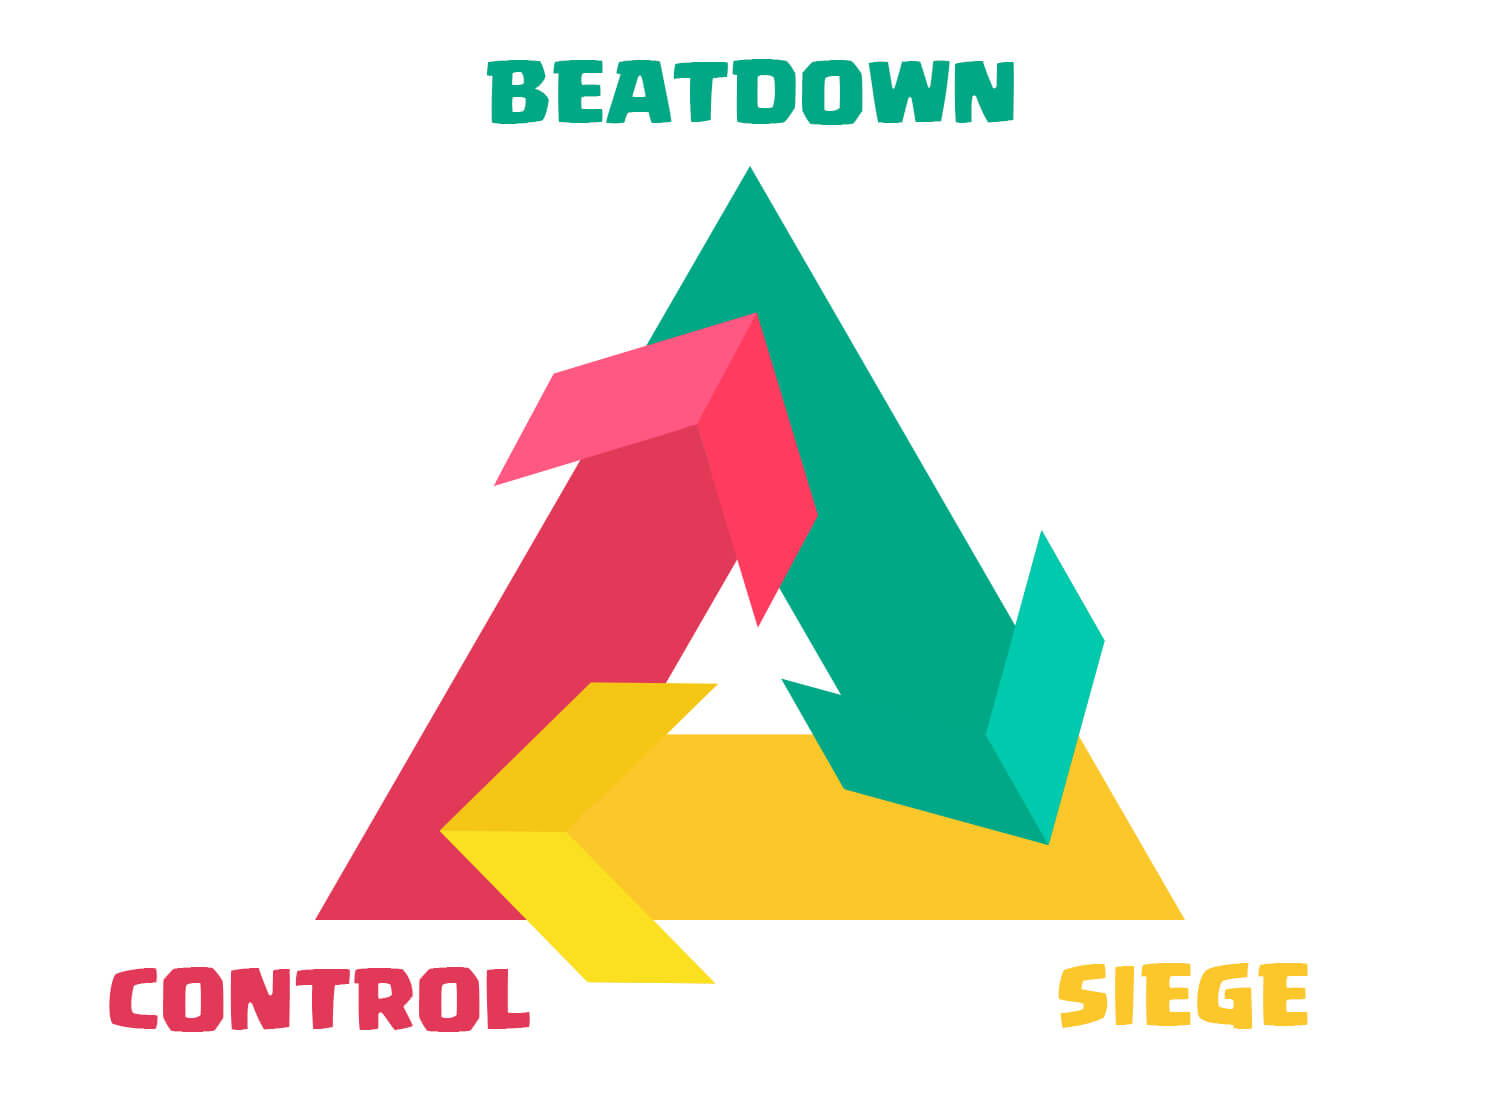
Many of you are aware of this 1st Triangle, or the triangle of Control, Beatdown, and Siege originally defined by The_RumHam.

Here is a quick refresher including some additions:

Beatdown Siege Control
Win Condition Role Protects support units that damage the tower Primary tower destroyer from a distance Primary tower destroyer up close
Overall Offensive Ability Decent Weak Strong
Offensive Mindset Use the right support to counter enemy defenses Protect the win condition Strike when when the time is right (Elixir Advantage or Counterpush)
Overall Defensive Ability Decent Strong Weak
Defensive Mindset Use the tower’s health as a resource Turtle up if needed Focus on making positive Elixir trades so you can go on the offense
Overall Focus Creating an overwhelming offense while attempting to defend if needed (Prefers fighting on your side of the arena) Bouncing between an offensive strategy or defensive strategy depending on the situation (Stays on their side) Defensive gameplay geared towards making positive trades and channeling it into offensive combos (Prefers fighting on their side of the arena)
Example Giant, Golem, Lava Hound, PEKKA Mortar, Xbow, Rocket (sometimes) Hog Rider, Miner

Note: Offensive and Defensive Ability are based off of ease of dealing or preventing damage to a tower and not the focus of play-style.

For example,

  • Control decks focus on playing defensively and make trades that they can turn into a strong offense, but under pressure, they’re defenses struggle. Their defenses are good at setup up for a strong offense, but overall their defenses will crumble under pressure.
  • Siege has the ability to prevent damage easier than any other archetype, but if a Siege player only focuses on Defense, they’ll never win. Since Siege decks have a hard time turning their defenses into offenses, they need to be played the right way at the right time.
  • Beatdown decks have a decent offense and decent defense, but when they start building up an offense, their defenses are inflexible. Beatdown decks have defenses that can be turned into an offense, but not as well as a Control Deck and not as poorly as a Siege Deck.

TL;DR: Beatdown Focuses on offensive strategy and defending if possible, Siege bounces between offense and defense, and Control focuses on Defensive strategy to make counterpushes.

Your mindset works if you can explain why Clash Royale is not played in a vacuum–find a way to bring up the fact that, for example, siege is weak on defense only because it can’t set up any sort of counterpush. Apply what counterpushing gives each archetype to everything.

deck archetype triangle

Illuminati Confirmed?

giphy

Archetype Triangle Explained

By taking a look at the triangle to the right, you can see a simple representation of how these Archetype Advantages and Disadvantages influence the game.

Beatdown decks have an Archetype Advantage to Siege decks because of the fact that the win conditions typically target enemy defenses. In addition, because Siege decks tend to have a weak offense, it is hard for them to break past the tankiness of the win conditions to actually land damage on the enemy tower.

Siege Decks have an Archetype Advantage to Control decks because Siege decks do well on their side of the arena, while Control decks focus on turning successful defenses into counterpushes. Since Siege Decks don’t go onto the enemy side, it is hard for Control Decks to win with this focus. In addition, it is difficult for Control decks to overcome the defensive ability of Siege decks since they tend to not be able to build up a push like Beatdown decks can.

Control decks have an Archetype Advantage to Beatdown decks because they tend to play better against enemy troops on their side the arena. Additionally, Control decks can disrupt a Beatdown push by rushing the opposing lane when the Beatdown player doesn’t have as flexible of a defense.

While this is only 1 piece of the puzzle, this is useful when it comes to choosing which type of deck to use in the current meta. It is important to realize that these Archetype Advantages aren’t so strong that they can’t be overcome. The marker of a truly skilled player is being able to beat their opponent with skill when they’re at an Archetype Disadvantage.

xbow vs rocket

The Deck Speed Triangle

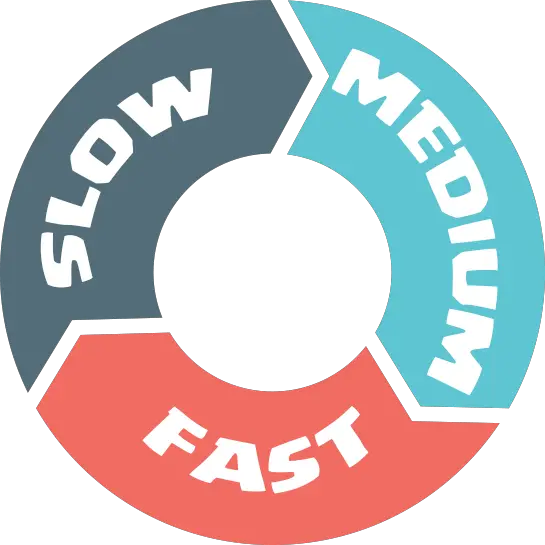
While you’re most likely aware of the Archetype Triangle, you may not have heard about this 2nd triangle that was also touched on by /u/The_RumHam in his “Doomsday Machine Theory” post on Reddit. This shows the interactions between Fast, Slow, and Medium Decks.

Here’s some quick clarification:

Slow Medium Fast
Average Elixir Cost 3.8 Elixir or higher 3.1 Elixir – 3.7 Elixir 3.0 Elixir or lower
Overall Offensive Ability Weak (Takes a lot of time/effort to deal tower damage) Decent Strong (Takes little time/effort to deal tower damage)
Offensive Mindset Build up a push that is so large that it can’t be stopped If you’re faster than your opponent, out-cycle counters. If you’re slower, build up a push. Out-cycle enemy counters so your opponent can’t counter you optimally
Overall Defensive Ability Strong (If not going on the offense, takes little effort to prevent tower damage) Decent Weak (Takes a lot of effort to prevent damage from a big offense)
Defensive Mindset If focusing on offense, use highly defensive cards of low cost. If focusing on defense, use impassable defensive cards If you’re faster than your opponent, apply constant pressure or rush. If you’re slower, use strong defenses. Apply a constant offense or rush a lane so your opponent can’t build up an offense
Overall Focus Begin building up a push when you know it’s safe to do so. Play defensively until it’s safe to build up a push (when you’re ahead on elixir) Determine if you are faster or slower than your opponent and adapt your playstyle accordingly. Overcome a weak defense with a constant offense

speed triangle clash royale

Speed Triangle Explained

By taking a look at the triangle to the right, you can see a simple representation of how these Speed Advantages and Disadvantages influence the game.

Slow decks have a Speed Advantage to Medium Decks because Slow decks have the ability to make a bigger push than Medium Decks can. If a Slow push and Medium push are going down the same lane, the Slower push will overwhelm the Medium push and make its way to the tower with added support. Medium decks have a hard time rushing the other lane or disrupting the slow push and so it makes it difficult for Medium Decks to beat Slow Decks.

Medium decks have a Speed Advantage to Fast Decks because Medium decks have the ability to build up a push while being flexible on defense. If a Medium Deck starts building up a push and the Fast Deck tries to rush the lane, the Medium Deck should be able defend with their flexible defense and continue adding support to the offensive push. Because Medium Decks have a flexible defense and their pushes offer more offense than Fast Defenses can handle, Fast Decks have a hard time beating Medium Decks.

Fast decks have a Speed Advantage to Slow Decks because when a Slow deck goes on the offense by dropping an expensive investment, their defense is so inflexible that Fast Decks can take advantage of it and rush the other lane. In order to prevent a lost tower, the Slow Deck has to defend with everything they have, which leaves little or no support in the main push, which the Fast Deck can clear while the Slow Deck recovers their elixir to prepare for the next push. If the Slow Deck can’t defend, this will result in massive tower damage or even a lost tower. Because of the flexibility of Offense and Defense that Fast Decks have, Slow Decks have a hard time beating Fast Decks.

This is the 2nd piece of the puzzle when it comes to understanding why certain decks have an advantage or disadvantage against other decks. Similar to Archetype Disadvantages, these Speed Advantages and Disadvantages aren’t so strong that one can’t overcome them. Indeed, the sign of a truly skilled player is when they are able to overcome their opponent with skill even when they are at a Speed Disadvantage.

The Two Triangle Theory

two triangle theory

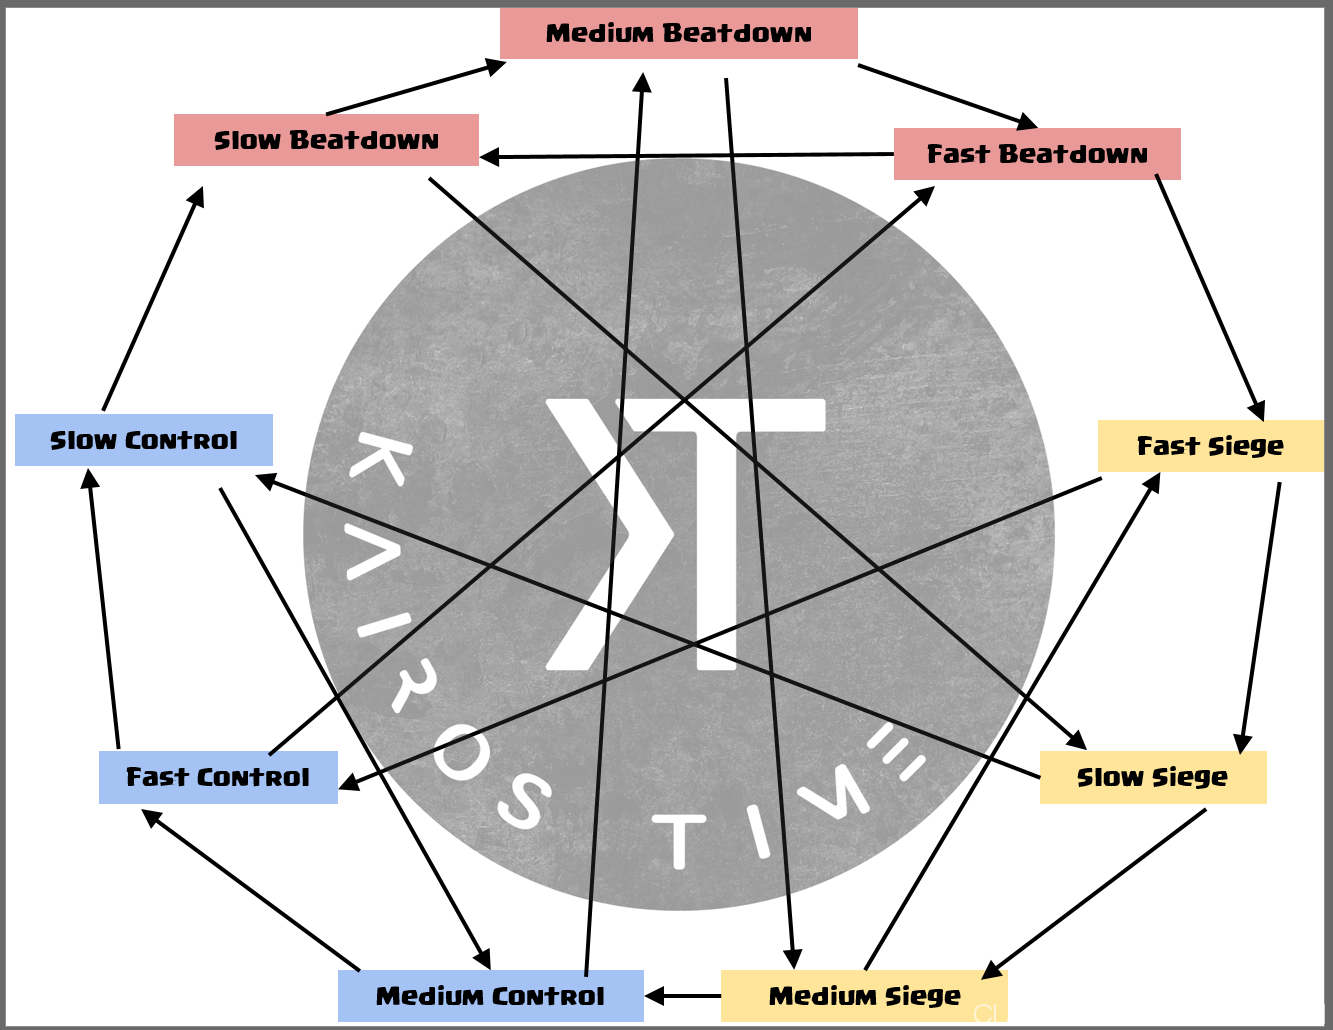
Now that we understand the basics of how different Archetypes and Speeds of decks interact with each other, we have a bigger understanding of why certain decks do a good job at countering others.

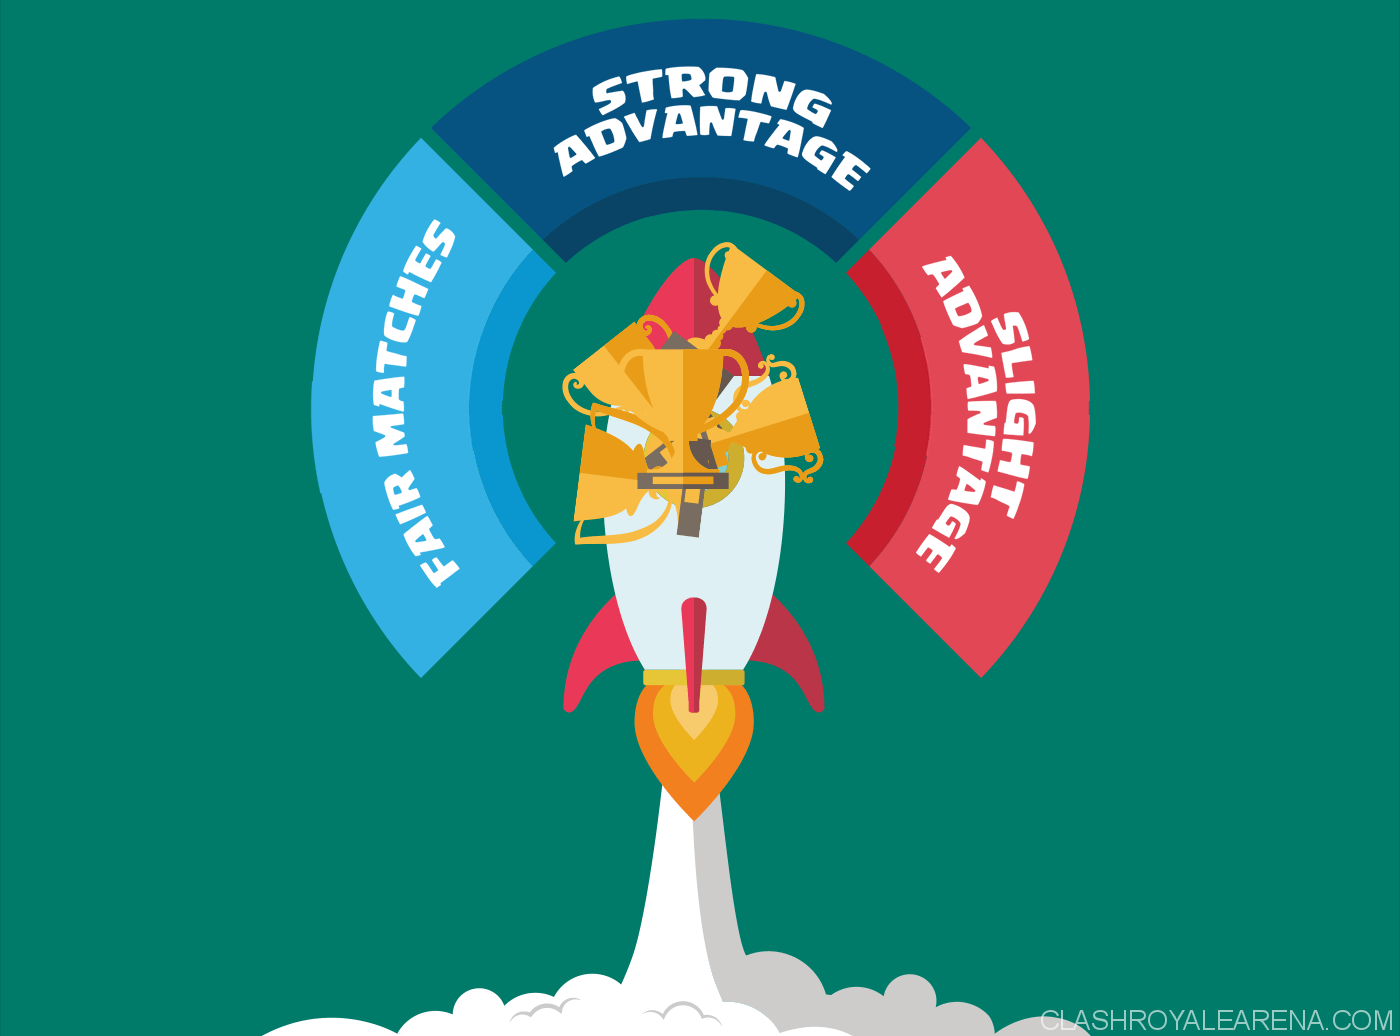
This is The Two Triangle Theory: By combining the Advantages and Disadvantages found in the Archetype and Speed Triangles, every deck type will have Fair Matches, Slight Advantages/Disadvantages, and Strong Advantages/Disadvantages against other deck type.

Fair Matches

A Fair Match is where 1 deck has an advantage in 1 of the two triangles, but the other deck has an advantage in the other triangle.

For example, a Fast Control deck has the Archetype Advantage over a Medium Beatdown deck, but the Medium Beatdown deck has a Speed Advantage over the Fast Control Deck. This results in a fair match.

Note: Every deck type has 3 decks that it is a Fair Match with, 1 of which is its same Deck Type.

We’ll use Fast Control as an example:

  1. Fast Control vs Medium Beatdown (Fast loses to Medium, but Control beats Beatdown)
  2. Fast Control vs Slow Siege (Fast beats Slow, but Siege beats Control)
  3. Fast Control vs Fast Control (Same Deck Type = Fair Match)

In Fair Matches, it is typically the most skilled player that takes the victory, or the player who makes the fewer number of mistakes. In the ladder, card levels can play a big role in who wins.

Slight Advantage

A Slight Advantage is where 1 deck is the same as the other deck in 1 of the two triangles, but has the advantage in the other triangle.

For example, a Fast Control deck has a Slight Advantage over a Slow Control deck because they are the same Archetype, but the Fast Control Deck has a Speed Advantage against the Slow Control Deck. This results in a Slight Advantage.

Note: Every deck type has 2 decks that it has a Slight Advantage over and 2 that it has a Slight Advantage against.

Once again, we’ll use Fast Control as the example:

  • Slight Advantage:
    1. Fast Control vs Slow Control (Fast Control has the Speed Advantage)
    2. Fast Control vs Fast Beatdown (Fast Control has the Archetype Advantage)
  • Slight Disadvantage:
    1. Fast Control vs Fast Siege (Fast Siege has the Archetype Advantage)
    2. Fast Control vs Medium Control (Medium Control has the Speed Advantage)

Slight Disadvantages can definitely be overcome with skill, especially if you realize you’re at a disadvantage and you adapt your gameplay to overcome the it.

slight advantage clash royale 2

For a printable version of all of the Fair Trades, Slight Advantages, and Strong Advantages on one sheet, you can find one here.

Strong Advantage

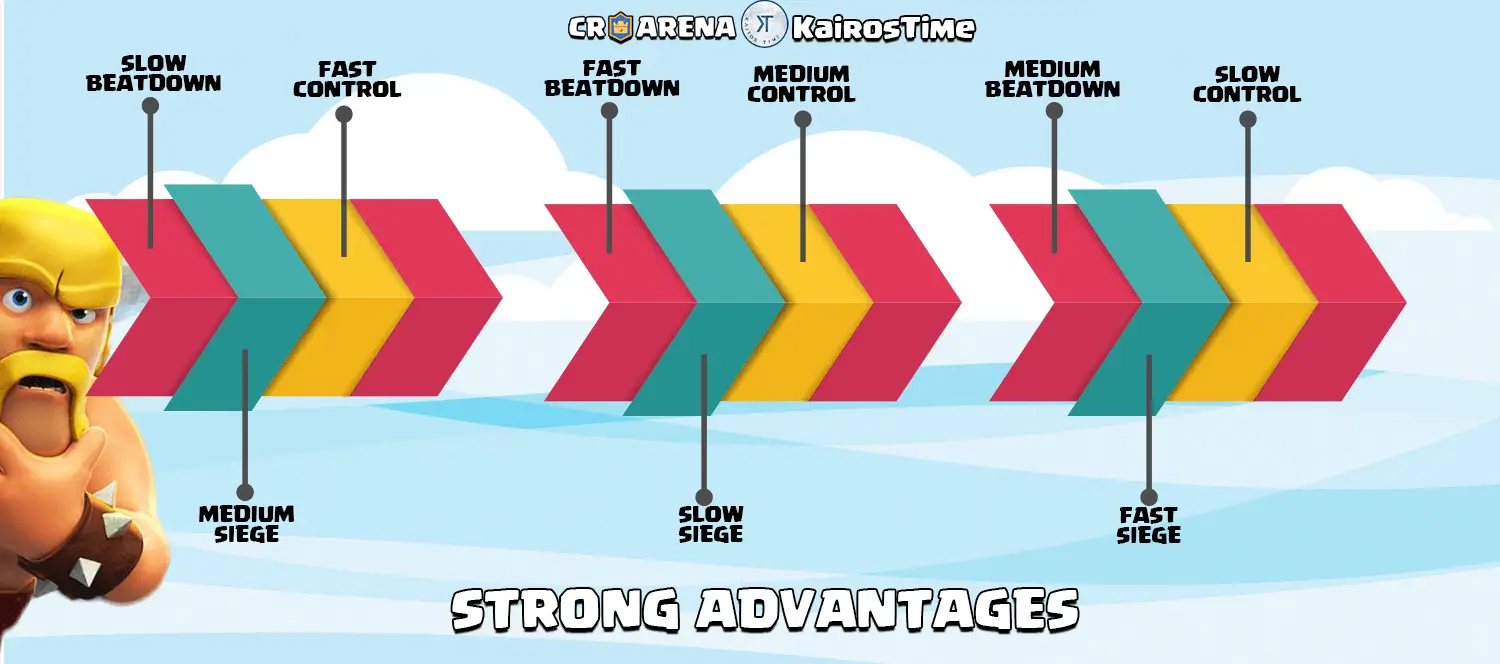
A Strong Advantage is when 1 deck has both an Archetype Advantage and a Speed Advantage over the other deck.

For example, a Fast Control deck is a really tough matchup for a Slow Beatdown deck because Fast has a Speed Advantage over Slow, and Control has an Archetype Advantage over Beatdown. This results in a Strong Advantage

Every Deck type has a Strong Advantage and a Weak Advantage to another deck.

Example:

  • Fast Control has a Strong Advantage against Slow Beatdown
  • Fast Control has a Strong Disadvantage against Medium Siege

Strong Advantages can still be overcome by skill, but it takes a lot of effort to do so. There is a 3rd and final puzzle piece that I’ll talk about later in this strategy guide that will help you overcome Strong Advantages.

strong advantages

Simply having an Archetype Advantage and a Speed Advantage simply isn’t enough when it comes to winning your matches. On top of Skill-Level, there is 1 big exception that you can actually use to your advantage to overcome the disadvantages your deck might have according to the Two Triangle Theory.

The Card Counter Exception

The Card Counter Exception is this: A deck may have an advantage over another deck despite Archetype and Speed Disadvantages if its cards are good counters to the cards in the other deck. This means that you can still beat an opponent who has a Strong Advantage without much effort because your cards simply counter your opponent’s cards.

For example, let’s say you are running a Fast Beatdown Giant Cycle Deck (Clash With Ash recently featured a Fast Beatdown deck on his channel with 44 straight wins in GC’s that you can see here). And let’s say you are facing a Slow Control 3 Musketeer Pump Deck. Because Slow Control has the Archetype and Speed advantage over Fast Beatdown decks, it should theoretically be difficult for you to overcome your opponent without a lot of skill and excellent timing and placement. BUT, if you have the Lightning in your deck, or Fireball + The Log, the matchup is going to be much easier for you because you have cards that do an excellent job at countering your opponent’s main Win Condition, the Three Musketeers.

The Card Counter Exception plays a huge role when it comes to Unity Decks, decks that focus on one main utility in order to make their deck stronger and weaker depending on their opponent’s deck.

For more information, read my guide on Deck Building Fundamentals!

One example may be a Spell-Bait decks (Fast Control Unity Deck) facing against a Slow Beatdown Deck that carries a lot of splash cards in it. Even though the Spell-Bait deck has the Archetype and Speed Advantage, the deck is going to have a hard time against their opponent simply because the cards in the Slow Beatdown deck do such a good job at countering swarm cards.

deck building application

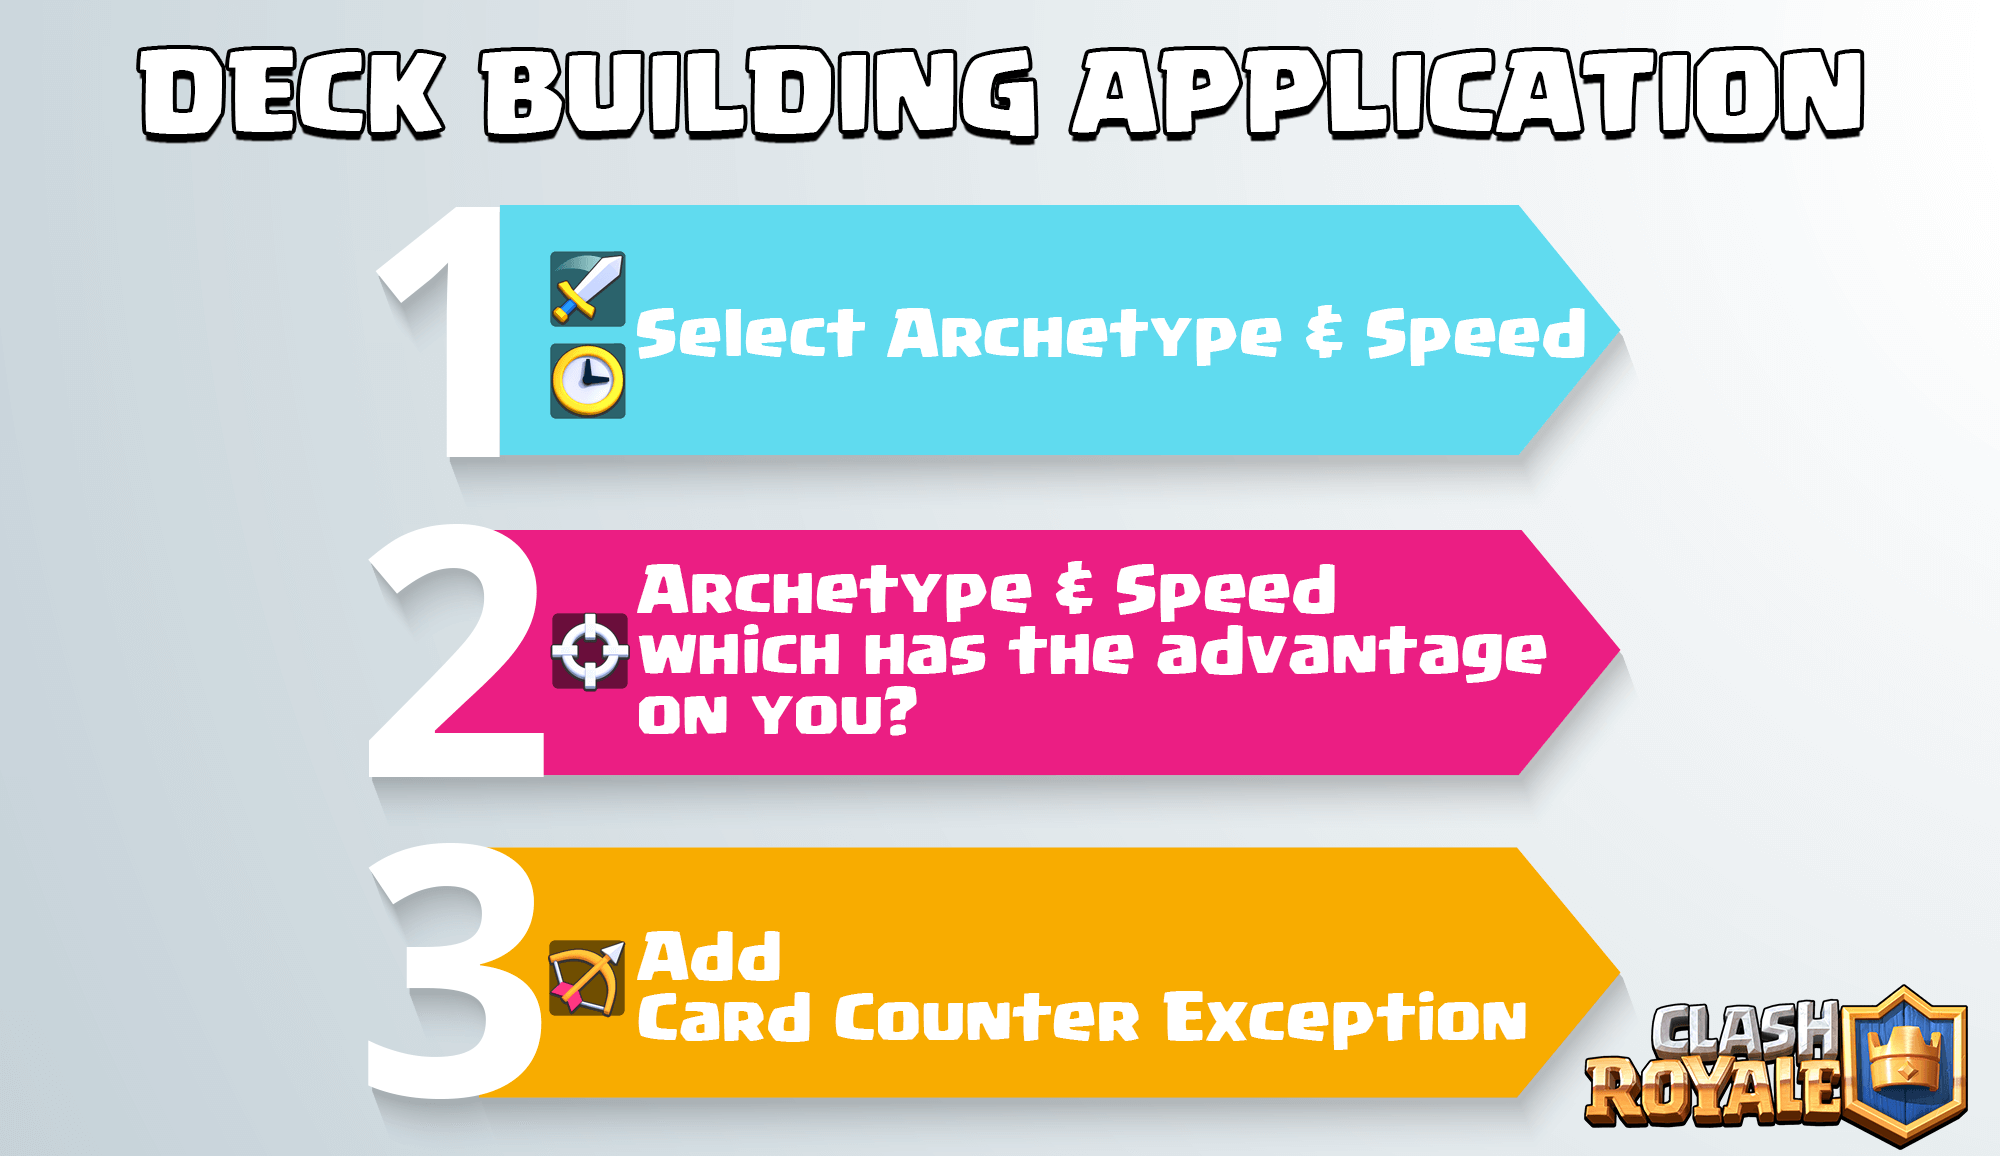
Deck Building Application

I am not going to cover everything about building decks in this Strategy Guide because I’m planning on doing a future Strategy Guide on How to Build the Best Decks. But, I did want to briefly cover how you can use The Two Triangle Theory to build a deck that is solid enough to stand tall in any meta.

To start off, you’ll want to examine the current meta in whichever area of the game you plan on building the deck for (Ladder, Challenges, etc.). In any meta, there will be a little of every Speed, and probably a little of every Archetype, but the meta will usually have a somewhat of a theme. If you can determine the theme, whether there be more fast decks in general, or more control decks in general, you can select a deck Archetype and Speed that does a good job at countering those themes.

Once you’ve selected a deck Archetype and Speed that you want to use, the next thing you’ll want to look at the Archetype that has an advantage over you, and the Speed that has an advantage over you.

The next thing you want to do is take advantage of the Card Counter Exception to try and build a deck that can stand up against any deck that should have an advantage over you. You can do this by asking yourself which cards do you commonly see being used in decks with the Archetype Advantage over your deck and in decks with the Speed Advantage over your deck. By selecting 1-2 cards that do a good job at countering those commonly used cards.

This should result in you having a solid deck that you can use to beat any deck, regardless of its Archetype or Speed.

For example, several metas back, I started noticing a lot of Fast or Medium decks and a lot of Control or Beatdown decks in the ladder around my trophy range. I took an Xbow deck that a clan-mate was having success with and modified it to do a better job at countering the current meta. Since my deck was a Medium Siege deck, I knew I most likely wasn’t going to have an issue with Fast or Medium Control Decks, and so I focused on the making sure I could do a good job at countering Medium or Slow Beatdown Decks. By including the Inferno Tower and the Skeleton Army, I had 1 hard counter and 1 soft counter to all Medium and Slow Beatdown Decks. By following this process, I had a deck that countered a good part of the meta, and could handle situations where I should have been at a disadvantage.

Conclusion

With a firm grasp of the Two Triangle Theory and The Card Counter Exception, you now have a better understanding of why certain decks do a better job at countering other decks, and how you can use it to Counter Every Deck in Clash Royale!

Thanks so much for reading this guide! If you’re interested in learning more, make sure to subscribe to my YouTube Channel so you can be the first to see my guides. If you have any questions, feel free to leave them as comments on my video and I’ll get back to you as soon as I can!

giphy

Want to be a part of a group of people who love Clash Royale as much as you do? We probably have what you’re looking for in the Kairos Kingdom Community Discord Server! Join Today!

Ticking By,

KairosTime

Supreme Guide to Balloon Rage

15

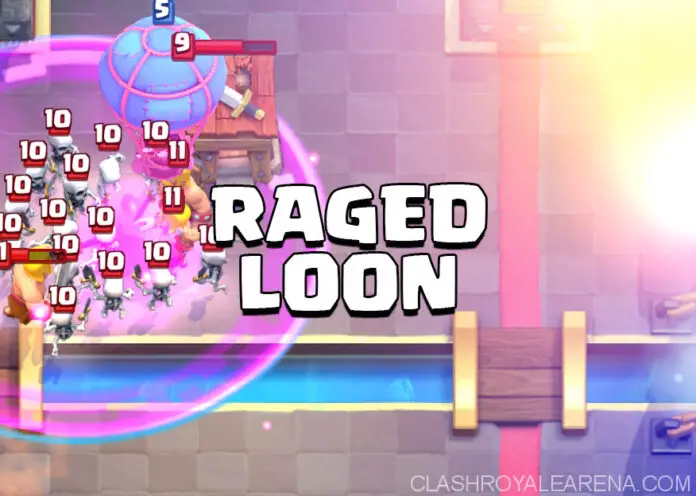
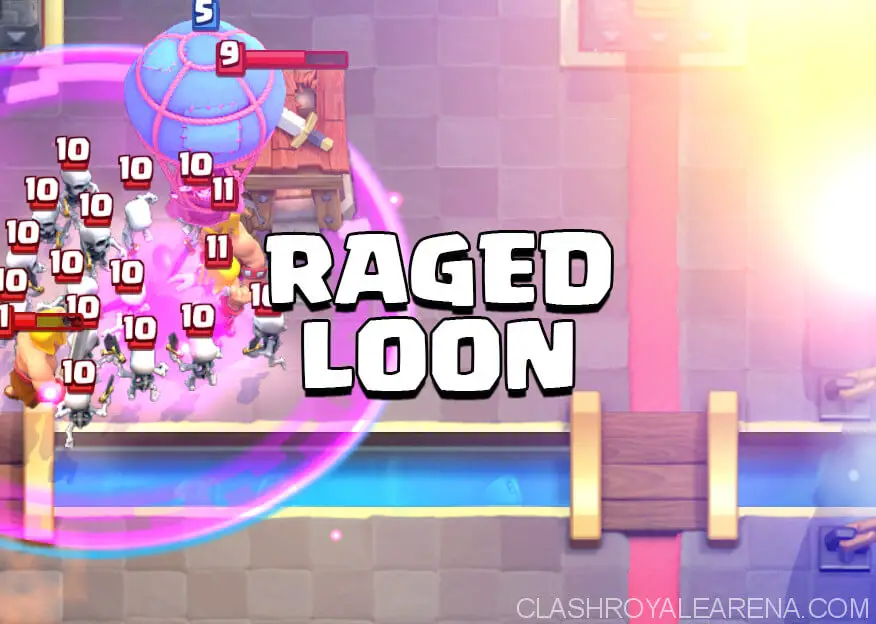
Wassup guys! It’s DabMaster2 back at it again with another guide for you guys! This time I’ll be sharing the Ultimate Guide to using Raged Balloon! The raged Balloon is extremely deadly with the Rage allowing the Balloon to move way faster and to attack faster too.

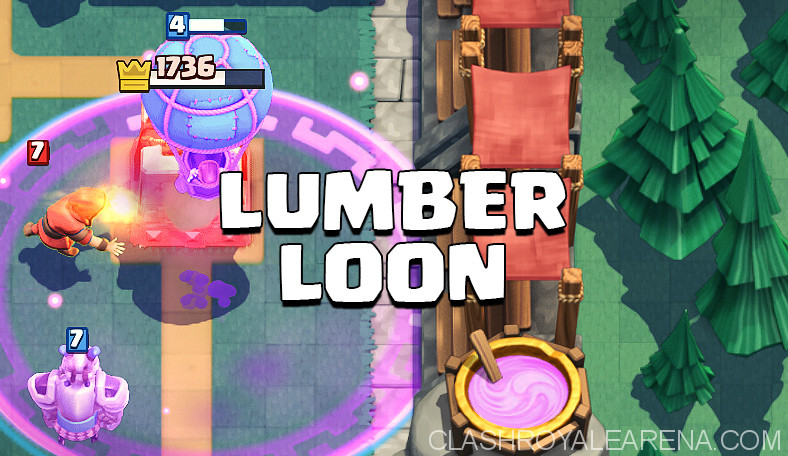
There are two types of raged Balloon decks: The normal Balloon Rage, or the LumberLoon combo.

Let’s get into it!

rage loon

Supreme Guide to Raged Balloon

Table of Contents

  1. Why Rage Balloon is so good!
  2. Why Rage Balloon could be bad.
  3. General Gameplan
  4. Building a Rage Balloon deck.
  5. Example Decks

Why Rage Balloon Is Good

Very Surprising

Seeing a frightening Balloon floating towards the enemy Tower is intimidating enough but if it’s raged, your opponent will likely panic since one mistake and the Tower can take massive damage. Rage Balloon decks rely on surprising and fast attacks. It requires your opponent to play flawless defense or suffer the consequences.

Great for Comebacks

Rage Balloon decks are also great at comebacks. One Tower down? Don’t worry, you still have a chance to whittle down their Tower with the Rage Balloon. Like I said, one mistake and your opponent will suffer massive damage. Players tend to play more confidently when a Tower up but take advantage of that confidence strike hard with the comeback!

Crazy Damage

A regular non-raged Balloon has a hit speed of 3 seconds. Once raged, its hit speed is increased to about 2 seconds! This one second increase can allow your Balloon to get more hits and do much more damage.

Why Rage Balloon Could Be Bad

Hard to Use

As the Balloon is the only main win condition, it can sometimes be hard to get it to the Tower. Balloon decks require precise timing with spells. Getting too aggressive on a push can also result in getting crushed by the counter-push.

Weak against Multiple Anti-Air troops

Since this Deck only relies on the Rage spell, of your opponent has many air-targeting troops, the Balloon will have a challenging time getting to the Tower. Tornado is even more frustrating. You may think your Balloon is getting to the Tower then BAM! The Tornado drags it away.

Less Defensive Troops

Using the Rage spell can result in less defensive units since the Rage takes up a card slot. Your Deck may have a harder time defending. Rage Balloon decks rely on mostly defensive units then 2 to 3 main offensive cards.

General Gameplan

Every battle is different. This is an outline for how you should play.

Start of Match (0:00 – 0:30)

In the beginning, find out what your opponent’s win conditions are and what their counter cards are to your Balloon. Don’t play too aggressively since losing in the beginning of the match can still be hard to make up for even though this Deck is good at comebacks.

Mid Game (0:31 – 1:59)

Now that you have found out your opponent’s counter cards and win condition, you can start making more pushes. Play mostly passively then counter-push with your remaining defensive cards. If your opponent is playing passively too, start with some troops in the back and if your opponent is really waiting for you to make the first move, rush them with a small Rage Balloon push, nothing too big so you don’t get destroyed by the counter-push.

Double Elixir (2:00 – 3:00)

Once double Elixir strikes, it’s party time! Play much more aggressively with as many Rage Balloon attacks as possible. With the extra Elixir flowing, you can make much larger and stronger pushes more often. If you have successfully defended a push with more troops left over, counter attack immediately if you have the Elixir.
Overtime

If you’ve made it this far, the battle is probably a close one. Continue to chip cycle damage on the Tower to whittle it down. Preserve your Tower since one mistake can lead to a defeat. Sometimes, you just can’t do any damage to the Tower. In that case, wait for the right moment then surprise your opponent with an opposite lane push! The beauty of the Rage Balloon is that it can easily take a Tower in one push.

lumberloon deck 2

Building a Rage Balloon Deck

There are 2 types of Rage Balloon decks:

  • Normal Rage Balloon
  • LumberLoon

The Normal Rage Balloon is more versatile on offense since you can place the Rage any way you want and the LumberLoon is more focused on defense with the Lumberjack and Balloon as the main offensive units. You can choose which you prefer. Here I’ll show you the slot method for building your very own Rage Balloon Deck!

Balloon Rage

  • Slot 1 and 2 – Balloon and Rage. This is obvious since the Deck is a Balloon Rage Deck.
  • Slot 3 – Spell(s). In this Deck, you choose to use either 1 support spells or 2 support spells. Having only 1 support spell allows you to have more defensive units but less spells to help on offense and vice versa for having 2 support spells. If you choose to have 2 spells take out Slot 6 (defensive support 2). Examples are: Arrows, Zap, Fireball, Poison.
  • Slot 4 – Main defense. This card can either be a heavy hitting tank killer like the Mini-P.E.K.K.A, or a building for a more solid defense. Rage Balloon decks should have a very solid defense like an Inferno Tower since you will have less card slots to work with. Examples are: Inferno Tower, Tombstone, Mini-P.E.K.K.A.
  • Slot 5 – Defensive support 1. The defensive support should be an all-round versatile card to defend with. Rely heavily on this card to support your main defense. Examples are: Executioner, ice Wizard, Musketeer.
  • Slot 6 – Defensive support 2. This is another card which will help on defense. This is used to back up the defensive support and/or and main defense. Examples are: skeleton Army, Goblin Gang, Minions, Mega minion.
  • Slot 7 – Offensive tank/support. Your offensive tank is a card which will absorb damage from your Balloon so the Balloon can float by with less damage taken. Examples are: Knight, ice Golem, Miner.
  • Slot 8 – Versatile response card. As a versatile response card, it should able to be used in many situations and help on both offense and defense. Examples are: ice Spirit, Skeletons, fire spirits, any swarm card.

LumberLoon Deck

  • Slot 1 and 2 – Balloon and Lumberjack. Once again, obvious choice.
  • Slot 3 – Spells. Spells are what you need to make up for the weaknesses of your other cars. Lacking splash damage? Use a Fireball to make up for it. You might even be able to use Freeze!
  • Slot 4 – Main defense. This card can either be a tank killer or a building for a solid defense. This doesn’t have to be too much of a main defense since you will have more cards to work with. Examples are: Inferno Tower, Tombstone, Mini-P.E.K.K.A.
  • Slot 5 – Defensive support 1. The defensive support should be an all-round versatile card to defend with. Rely heavily on this card to support your main defense. Since this Deck has more units, this card doesn’t have to be relied on as much. Examples are: Executioner, Ice Wizard, Musketeer.
  • Slot 6 – Defensive support 2. This is another card which will help on defense. This is used to back up the defensive support and/or and main defense. Examples are: skeleton Army, Goblin Gang, Minions, Mega minion, Inferno Dragon.
  • Slot 7 – Defensive swarm. Any swarm will work. This will help immensely to stop pushes Examples are: Skeleton Army, Goblin Gang, Guards.
  • Slot 8 – Offensive tank/versatile response card. In this Deck, the main tank for the Balloon is the Lumberjack. If you don’t like using the Lumberjack to protect the Balloon because he is too fragile, you can use ice Golem or Knight. If you don’t need an offensive tank, instead use a versatile response card. Examples are: Minions, Mega Minion, Miner, Knight, Ice Golem, Ice Spirit, Fire Spirits.

Example Decks

Remember, these decks aren’t always the right one for you. These are only examples. If you don’t like to use these decks you can make your own.

Rage Balloon

Clash Royale BalloonClash Royale RageClash Royale Inferno TowerClash Royale Arrows
Clash Royale Skeleton ArmyClash Royale Ice GolemClash Royale MusketeerClash Royale Minions

  • Balloon – It’s hard to have a Balloon Deck without a Balloon…
  • Rage – In normal Elixir time, only Rage the Balloon when you know it will get to Tower. Only in double Elixir you can start playing much more rages.
  • Inferno Tower – Your defensive building. Only play it reactively against tanks and hogs.
  • Arrows – This is your one and only spell (not counting Rage). Use it wisely! On offense, these Arrows come in handy against minion hordes. With a lack of splash damage in this Deck, being caught without Arrows can be devastating.
  • Skeleton Army – This will be your versatile response card. Use it to swarms and assassinate single-targeting troops.
  • Musketeer – This is your defensive support 1. She provides extra DPS to help with the Inferno Tower.
  • Ice Golem – He is your offensive tank to protect the Balloon.
  • Minions – Minions are the defensive support 2. They can also transition to offense well to support the Balloon for extra DPS.

Another example Rage Balloon Deck is the Pompeyo Rage Balloon Cycle Deck

LumberLoon Deck

Clash Royale LumberjackClash Royale BalloonClash Royale TombstoneClash Royale Ice Wizard
Clash Royale Inferno DragonClash Royale Skeleton ArmyClash Royale fireballClash Royale Zap

  • Balloon – It’s hard to have a LumberLoon Deck without a Balloon…
  • Lumberjack – It’s a pity he’s not used often. He is great on offense with the high DPS he offers. Although, he is not too great on defense since he has low health. Lumberjack deserves an HP buff to increase his usability on defense.
  • Tombstone – This is your main building. You can place it early to bank Elixir and it can swarm (no skill) Elite Barbs.
  • Ice Wizard – He is your defensive support 1. His slowness ability is invaluable in allowing other support troops to do extra damage and help to slow down attacks so that over leveled (no skill) RG might not get the extra hit off.
  • Inferno Dragon – This is your defensive support 2. Use him mainly as a tank killer since this Deck lacks a tank killer (skarmy gets zapped and Lumberjack dies fast). He is underestimates by most people but he can be very useful on defense to take down big tanks, although he is basically useless on offense.
  • Skeleton Army – Skarmy is your swarm card. They help to clean up pushes against single-target troops and surround splash attackers.
  • Fireball – Mostly only use it on defense. It provides much value and use it on clustered medium-health troops.
  • Zap – Do I even need to explain this? 😊

Another example is my original OG LumberLoon Deck.


That it for now! Any compliments, questions, or insults, post them in the comments below.

Have a Clashtastic Day!