Home Blog

Clash Royale Clan Wars Guide – The Ultimate Guide

157

clash royale clan wars battle

What is Clash Royale Clan Wars?

Clan Wars is the new feature being released in the huge 2018 April update.

The Clan Wars event lasts for 5 days. The whole Clan (50 members) can participate in Clan Wars.

Battle with your Clanmates and gain lots of rewards against other Clans around the world.

What you need to do right now:

  1. Find an active Clan which has at least 10 members to participate in Clash Royale Clan Wars.
  2. Your King’s Towers need to be at least level 8.
  3. Only Leaders or Co-Leaders can start the Clan Wars.
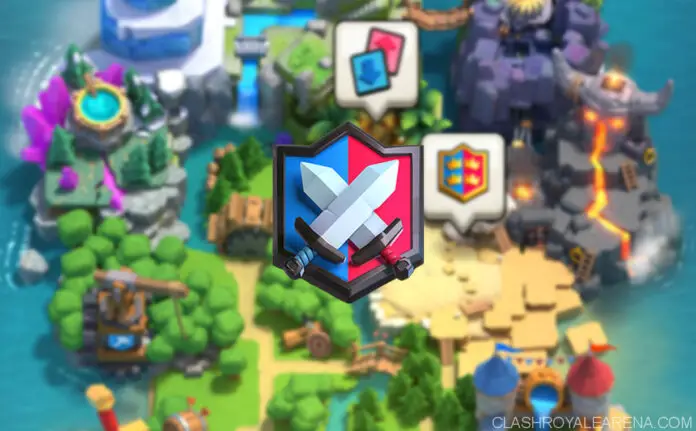
  4. Once the Clan War has started, go to the Social tab to see the map below:
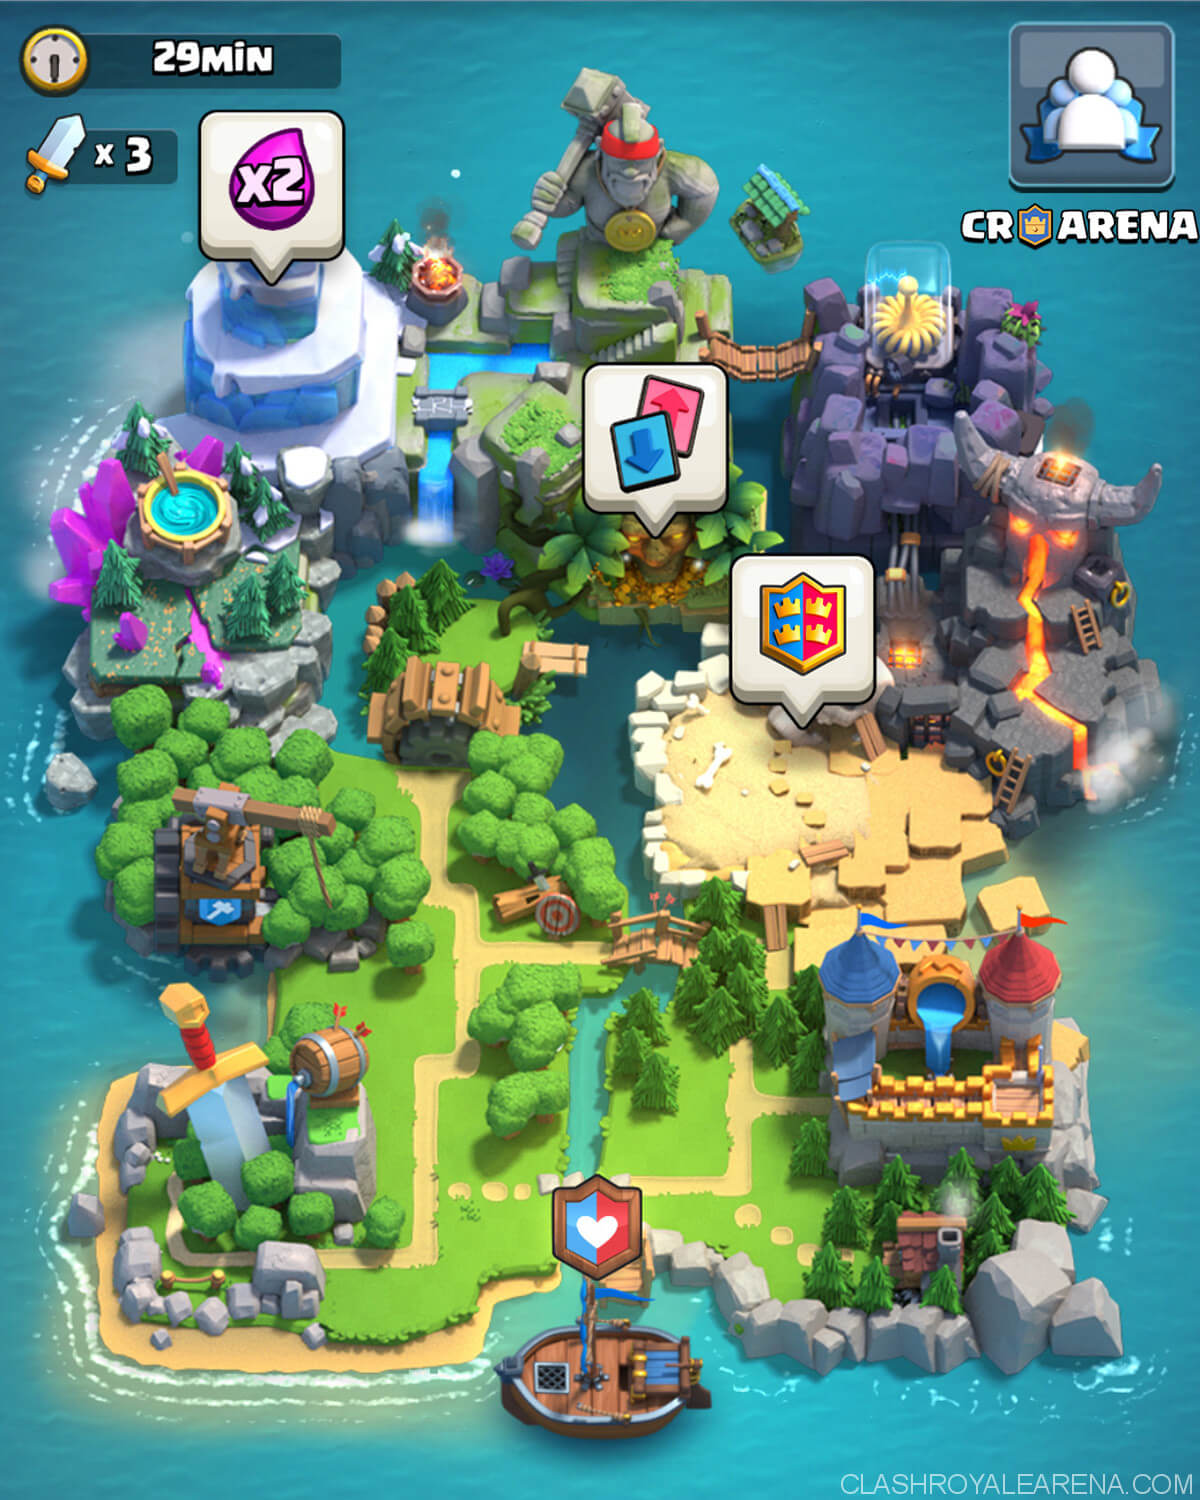
clash royale clan wars map

Clan Wars Day #1: Collection Day

On the first day of the Clan War, do your best to get as many Clan Cards as you can for your Clan.

What is Clan Cards?

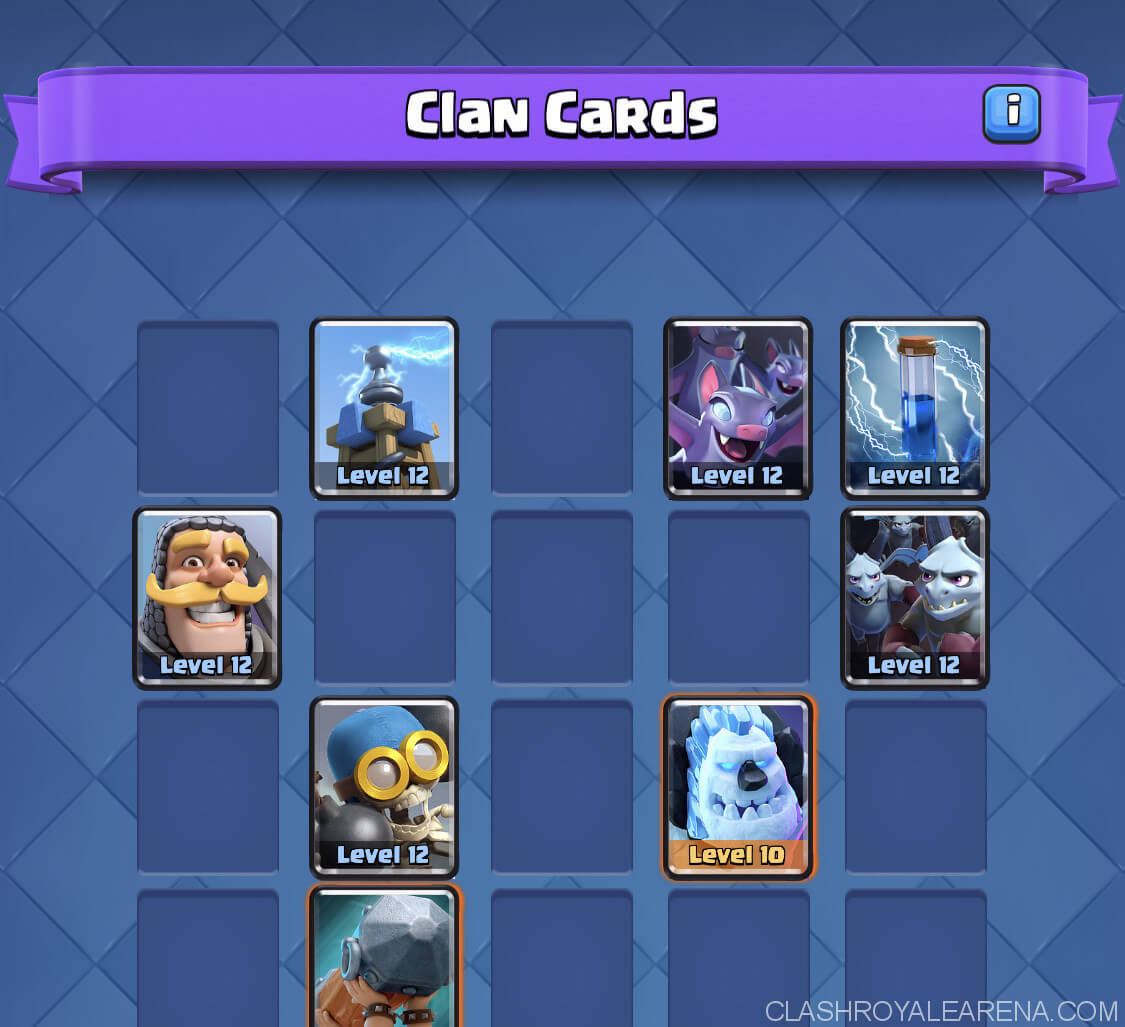
Clan Cards are used to build up your War Decks in the Clan Wars. Players can collect the Clan Cards on the preparation day.

The whole Clan use a public Clan Card Collection for the Clan Wars. All of the Clan Cards collected by Clan members on the preparation day will be moved to this Clan Card Collection. Clan Cards and levels are the same for every member in the Clan.

Clan Cards will be level up automatically as more cards are collected, no gold required.

The Clan Card levels will be lowered to your own cards level if they are higher than yours.

Clan Cards Tips

    • If your own card levels are too low, or usually lower than your Clan card levels, consider upgrading them.
    • You should upgrade multiple cards at once, rather than upgrading just a few cards to maxed.


What is Collection Day?

The first day of the Clash Royale Clan War is the Collection Day. During the first day, you have 3 matches to play in the War Map (screenshot above).

There are different game modes here for you to choose: 2v2 Ladder, Sudden Death, 2v2 Double Elixir, Draft Mode and Double Elixir. Once a game mode played, it will be replaced by a different game mode.

You use your own cards to play on the Collection day.

The number of Clan Cards you can get on the first day based on your Clan War League and your match results.

The winner will get more Clan Cards than the defeated one. The higher League your Clan is, the more Clan Cards your members can get.

Tips for the Collection Day

  • You can easily see and change your deck right on the Collection Day screen.
  • Play any game mode you want.
  • The winner will have x2 more cards than the defeated one. It’s definitely worth doing your best to get the win. If all of your members have 3 wins on the first day, that’s such a huge opportunity for your Clan on the second day.
  • Draft matches have the Tournament Standard. If your card levels are not great, it is always recommended to play Draft.
  • If all of the 50 members in your Clan participate in the War, your Clan will be matched with other 50-member Clans.
clash royale clan cards

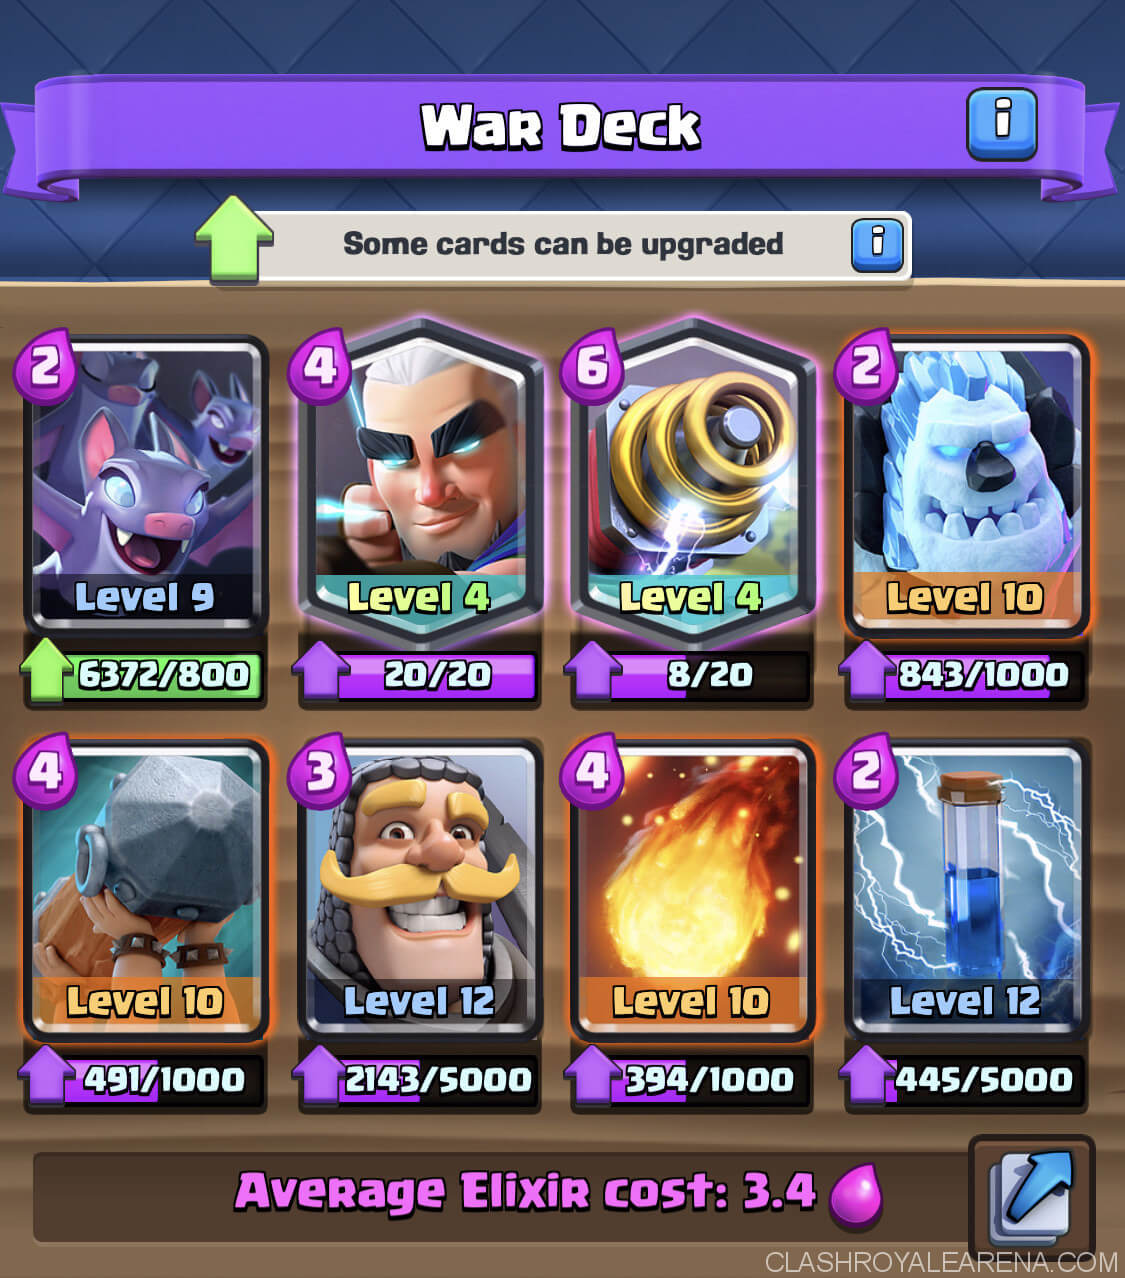
clash royale war deck

Clan Wars Day #2: War Day

The second day of the Clash Royale Clan Wars is the War Day.

On the War Day, you have to build up a deck based on your Clan Cards.

You can’t use cards you haven’t unlocked yet, and your Clan Card levels can’t be higher higher than your own ones. So consider upgrading your own cards again at here.

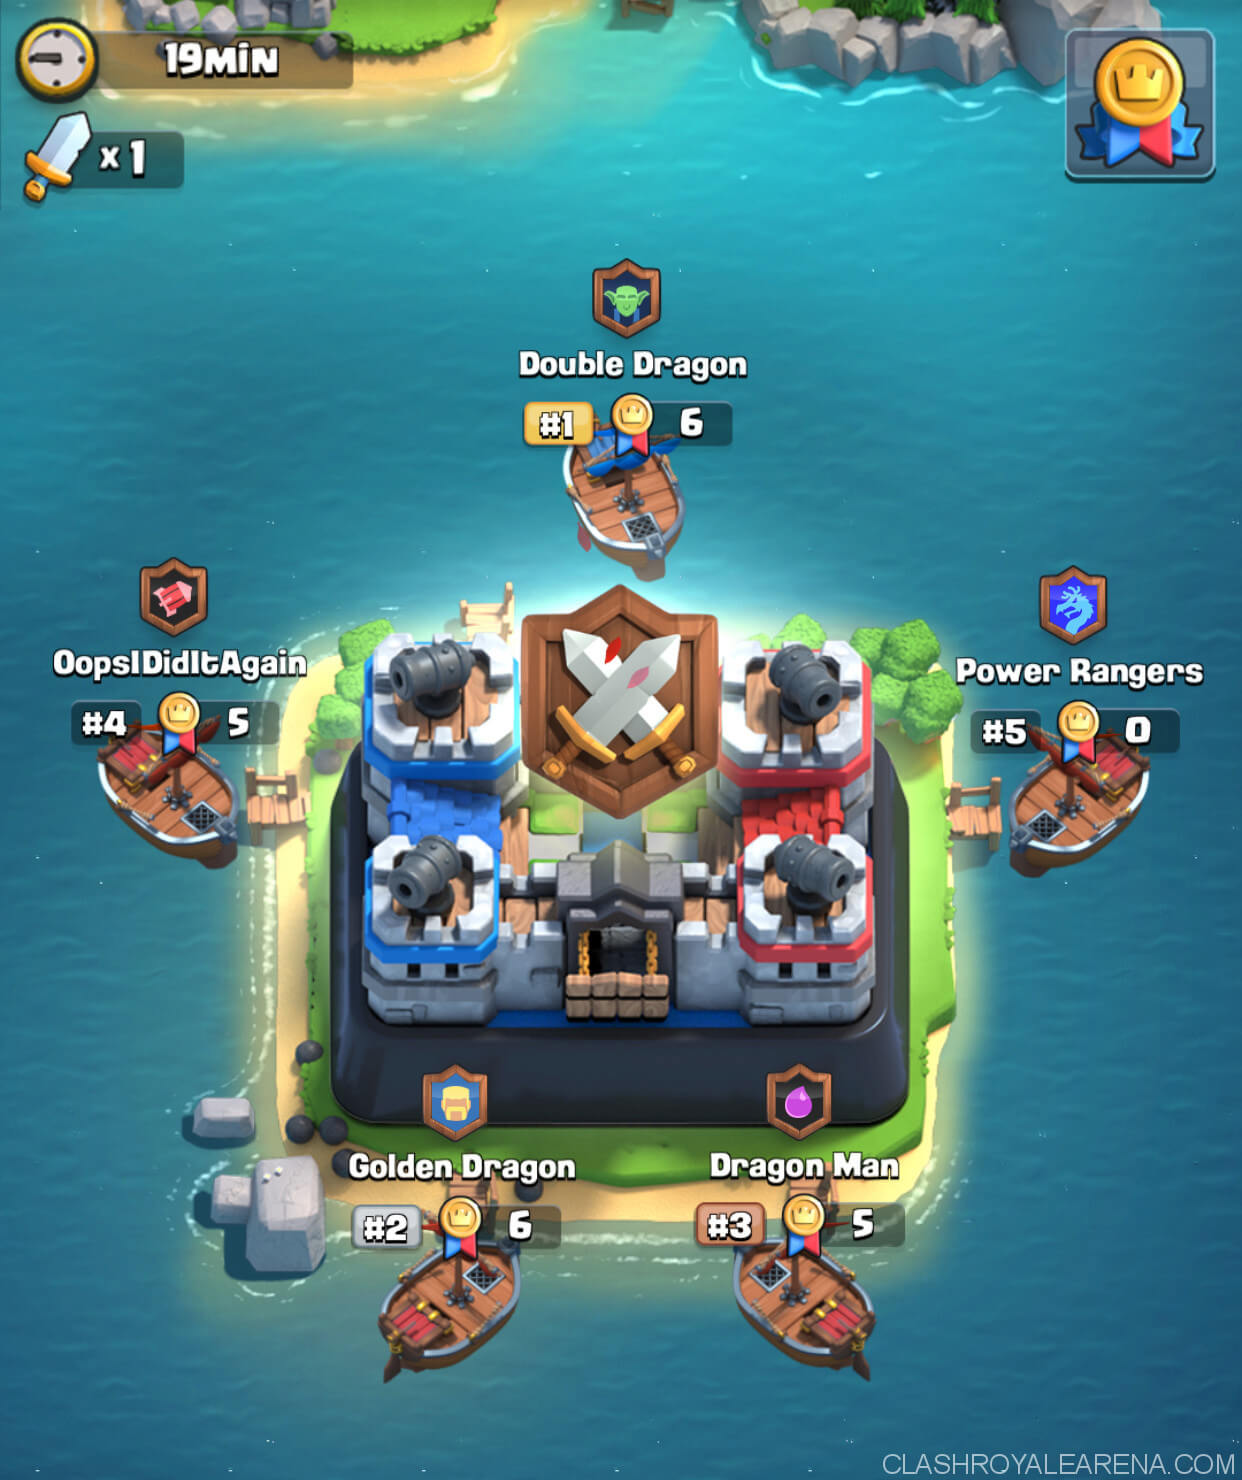
Your Clan will get matched against 4 other Clans. Each Clan member has only 1 attack on the War Day using their own decks.

Tips for the War Day

  • Don’t forget to share your Clan deck with other Clan members via the Clan deck building screen.
  • Always test your Clan decks first before using it in the War.
  • Some players might have more than 1 match to ensure all of the Clans have the same matches played.
  • If you do not want to participate in the War, do not play in the Collection Day.
  • If you get hard-countered in a match and you just can’t win it, do the best to get a crown to help your Clan.
  • Win matters, play aggressive decks to win the match. Since the opponent Clans likely never get matches against you, there is no reason to take the tie.
  • Tap on your Clan’s boat to see more details about your Clan.
  • You can nudge players who haven’t used their attack yet.
clash royale war day

Rewards!

  • The rewards will be determined based on your Clan Trophies.
  • Gain more Clan Trophies to progress through the Clan Leagues.
  • You will get the War Chest at the end of the Clan War Season (2 weeks).
  • The War Chest is based on your Clan League and the highest ranked war you participated in during the season.
  • Better rank + higher league = bigger chest.

Clan League

Here are all of the information you need to know about Clan League.

Clan League Clan Trophy Requirement Collection Day Victory Gold War Day Victory Gold War Day King Level Cap
Bronze I 0 100 200 9
Bronze II 200 100 200
Bronze III 400 100 200
Silver I 600 150 300 10
Silver II 900 150 300
Silver III 1,200 150 300
Gold I 1,500 200 400 11
Gold II 2,000 200 400
Gold III 2,500 200 400
Legend 3,000 250 500 12

War Chest

Total Cards = (Clan League Base Value) + (Rank Bonus)

Gold = 7 x Total Cards

Rares = (Total Cards)/4; Epics = (Total Cards)/15

Clan League Base Value
Bronze I 90
Bronze II Updating…
Bronze III Updating…
Silver I 210
Silver II Updating…
Silver III Updating…
Gold I 330
Gold II Updating…
Gold III Updating…
Legend 450
Rank 4th-5th 3rd 2nd 1st
Bonus N/A 60 120 180

Instant Guide to Building Clan War Decks

First, you need to pick a win condition based on your favorite archetype.

Pick something you are interested in playing or you are confident that you are good with.

However, before picking the exact win condition, you need to pick out the archetype you want to play!

  • Beatdown
  • Siege
  • Control
  • Hybrid

Beatdown

Clash Royale GolemClash Royale GiantClash Royale Royal GiantClash Royale Three MusketeersClash Royale Lava HoundClash Royale Graveyard

You will have a tank in general for your main damage output!

You will need to sacrifice tower HP for elixir leads, place and protect a Collector to further this elixir lead (in some decks)!

If you do decide this is the archetype you want to play, here are some notable win conditions for you:

Pros Cons
Great vs Siege decks! Weaker vs fast cycle decks.
During 2x Elixir, you have the advantage vs cheaper decks. Cards like P.E.K.K.A need you to make specific adjustments to take down.
Amazing counterpush potential Get struggled vs hard counters like Exenado or Giant NW decks.
Lots of 3 Crown wins. 1 misplay tank could cost you the game

Siege

Clash Royale X-BowClash Royale Mortar

Using Siege decks, you typically want to have a fairly cheap cycle.

You can easily take care of their units within the range of their towers! This can pose many advantages.

The win condition buildings are fairly tanky and can be used on defense as well!

Typically you have more than 1 win condition in this archetype.

Pros Cons
Works great vs faster cycle decks. Weak vs beatdown pushes.
Cheap cost allows you to out cycle counters Multiple tanks and heavy spells can be very annoying.
Only need 1 tower then defend. Weaker in 2x elixir
Almost always can get a draw. Once lost a Tower, you will be in a tough situation.

Control

Clash Royale MinerClash Royale Goblin BarrelClash Royale Skeleton BalloonClash Royale Hog RiderClash Royale Battle RamClash Royale Three Musketeers

You will want to control the pace and the tempo of the game.

Make sure your opponent follows your cycle. And like siege, have a deck that can defend really well at mitigating damage and giving up the least amount of damage possible.

Typically cheap to mid-range average elixir decks.

There are two other sub-archetypes in this section are: Cycle and Bait.

Fast cycle.

Pros Cons
Some decks here have hard counters.
Great vs beatdown decks! P.E.K.K.A and Siege counters most of these decks.
Great on defence to avoid damage. Usually doesn’t have enough damage to get more than 1 Tower.
Most of the time, stronger than siege.

Hybrid

Clash Royale GiantClash Royale Hog RiderClash Royale MinerClash Royale X-BowClash Royale MortarClash Royale Three Musketeers

Here are some types of Hybrid decks you would want to know about.


    + Control: Giant Miner, Giant Graveyard, Golem Graveyard etc.

  • Beatdown+ Bait: Giant Sparky, Giant 3 Muskets, Giant Goblin Barrel etc.
  • Siege+ Bait: Mortar Bait – Hog Rider or Miner, X-Bow with Elixir Collector, etc.
  • Siege + Control: X-Bow P.E.K.K.A, Mortar P.E.K.K.A, etc.
Pros Cons
Typically can’t be hard countered. More skills based so you need to make decisions on the fly.
Harder to predict with a more diverse playstyle. 2nd win condition will take up 1 slot. Sometimes can be tedious.

Building Deck Around The Win Condition!

Before we get further, I want to explain some terminologies I will be using in the guide

  • Win condition – Card that gets you the most damage output.
  • Heavy spell – Spell that does typically above 200 damage.
  • Light spell – Cheap spell, less than 4 Elixir, for clearing swarms.
  • Glass cannon – Low-mid HP troop with high damage-per-second (DPS). Typically die to spell (or survive with just a little of HP). Examples: Witches, Wizard, Musketeer etc.
  • Mini tank-  Mid HP unit. Medium DPS. Used for sponging damage but not too reliable vs heavy pushes on their own. Examples: Ice Golem, Knight etc.
  • Splank – Tank + Splash damage dealer. Examples: Baby dragon, Valkyrie, Bowler etc.
  • Tank – Heavy card with 3000+ HP.

Beatdown

I will address 3 Musketeers separately because though beatdown you would typically play it different to a regular Giant or Golem deck + deck would build differently too!

Consider replacing the #7 or #8 cards with a Collector if your deck is too expensive.

Slot #1: Win condition

Clash Royale GolemClash Royale GiantClash Royale Royal GiantClash Royale Three MusketeersClash Royale Lava HoundClash Royale Graveyard

Slot #2: Heavy spell

Typically to clear away medium-low HP troops, getting value in the process.

Clash Royale fireballClash Royale PoisonClash Royale Lightning

Slot #3: Light Spell

For clearing swarms.

Clash Royale ArrowsClash Royale ZapClash Royale The Log

Slot #4: Main Support Card

Clash Royale Mega MinionClash Royale MinionsClash Royale Dark PrinceClash Royale Night WitchClash Royale Musketeer

Cheap cards that typically almost always paired up with the Giant.

It can either be a ground troop, or air troop. Should be below 5 Elixir, cheap and have splash damage and.

Slot #5: Ranged attacker

Typically would be able to deal damage from far away!

Clash Royale MusketeerClash Royale WizardClash Royale ExecutionerClash Royale Ice WizardClash Royale Witch

Slot #6: Glass Cannon/Tank Killer!

This will be your main way of dealing with your opponents heavy cards and their win conditions.

Clash Royale Mini P.E.K.K.AClash Royale MusketeerClash Royale Night WitchClash Royale LumberjackClash Royale BarbariansClash Royale Elite Barbarians

Slot #7: Ground Swarm+ Cycle

Something that can tank hits from dangerous troops like P.E.K.K.A, Prince etc so your Mini Tank won’t die or your own tank won’t get hit.

Also these guys could be your secondary source of getting damage!

Clash Royale GuardsClash Royale GoblinClash Royale Skeleton ArmyClash Royale Goblin Gang

Slot #6: Air Swarm or Cycle Card

Clash Royale Minion HordeClash Royale MinionsClash Royale BatsClash Royale Fire SpiritsClash Royale Ice SpiritClash Royale Skeleton

These guys are similar, maybe a slight spell bait but in the air.

I prefer having a cycle but defensive card in my decks that fit this criteria.

That being said you can put in a cycle card here instead of the air swarmy card.

Examples

14pt;”>Deck 1 – Giant Beatdown


Clash Royale GiantClash Royale PoisonClash Royale ZapClash Royale Night Witch
Clash Royale Flying ZappiesClash Royale Inferno DragonClash Royale GuardsClash Royale Bats

14pt;”>Deck 2 – Giant Classic Beatdown


Clash Royale GiantClash Royale fireballClash Royale ZapClash Royale Minions
Clash Royale MusketeerClash Royale Mini P.E.K.K.AClash Royale GoblinClash Royale The Log

14pt;”>Deck 3 – Golem Beatdown w/o Pump

Clash Royale GolemClash Royale Dark PrinceClash Royale ArrowsClash Royale Lightning
Clash Royale Mega MinionClash Royale Night WitchClash Royale TombstoneClash Royale Goblin

Siege

Slot #1: Win Condition

Clash Royale X-BowClash Royale Mortar

Slot #2: Heavy Spell

Secondary win condition

Clash Royale RocketClash Royale fireball

Slot #3: Light Spell

For clearing swams

Clash Royale The LogClash Royale ZapClash Royale Arrows

Slot #4: Mini Tank

Soak up damage while you whittle down their troops HP with your own or the X-Bow or Mortar

Clash Royale Ice GolemClash Royale KnightClash Royale Valkyrie

Slot #5: Defensive Building or Tank Killer

Mainly for dealing with tanks in beatdown decks

Clash Royale TeslaClash Royale Mini P.E.K.K.AClash Royale Inferno Tower

Slot #6: Ranged defensive troop

Typically for dealing with air threats. Also able to cycle and kill troops from the safety of your side, protecting your X-Bow.

Clash Royale ExecutionerClash Royale WitchClash Royale MusketeerClash Royale ArchersClash Royale Electro Wizard

Slot #7: DPS Troop / Cycle Card

This isn’t the same as your defensive building.

This should be mainly a cycle card but all the same a card that does good DPS and transform into a counterpush.

Clash Royale ArchersClash Royale Mega MinionClash Royale Minions

Slot #8: Cycle Card

Mainly to just cycle while giving defensive utility.

Clash Royale SkeletonClash Royale Ice SpiritClash Royale BatsClash Royale Fire SpiritsClash Royale Goblin

Examples

3.3 X-Bowler Cycle

Clash Royale X-BowClash Royale fireballClash Royale The LogClash Royale Ice Golem
Clash Royale BowlerClash Royale ArchersClash Royale SkeletonClash Royale Mega Minion

Standard 2.9 Mortar

Clash Royale MortarClash Royale RocketClash Royale ArrowsClash Royale Knight
Clash Royale ArchersClash Royale SkeletonClash Royale Ice SpiritClash Royale The Log

3.0 Mortar Cycle

Clash Royale MortarClash Royale fireballClash Royale The LogClash Royale Ice Golem
Clash Royale Dark PrinceClash Royale PrincessClash Royale Goblin GangClash Royale Bats

Control

Slot #1: Win Condition

The main damage dealer.

Clash Royale GraveyardClash Royale MinerClash Royale Skeleton BalloonClash Royale Goblin GangClash Royale Three MusketeersClash Royale Balloon

Slot #2: Heavy Spell

Clash Royale fireballClash Royale PoisonClash Royale LightningClash Royale Rocket

Slot #3: Light Spell

Clash Royale ZapClash Royale The LogClash Royale Arrows

Slot #4: Mini Tank

Clash Royale KnightClash Royale LumberjackClash Royale Ice GolemClash Royale Battle Ram

Slot #5: 2nd Mini Tank/Ranged Attacked

Clash Royale Baby DragonClash Royale MusketeerClash Royale Mega MinionClash Royale Ice WizardClash Royale BanditClash Royale PrinceClash Royale Dark PrinceClash Royale Knight

Slot #6: Tank Killer

Clash Royale Inferno DragonClash Royale TombstoneClash Royale Goblin HutClash Royale Mini P.E.K.K.AClash Royale Dark PrinceClash Royale PrinceClash Royale TeslaClash Royale Minion Horde

Slot #7: Ground Swarm

Clash Royale GuardsClash Royale Goblin GangClash Royale GoblinClash Royale SkeletonClash Royale Skeleton Army

Slot #8: Cycle Card

Clash Royale Ice SpiritClash Royale SkeletonClash Royale Bats

Examples


Graveyard Poison Cycle

Clash Royale GraveyardClash Royale PoisonClash Royale The LogClash Royale Ice Golem
Clash Royale Ice WizardClash Royale Dark PrinceClash Royale Goblin HutClash Royale Mega Minion

Hog 3.0

Clash Royale Hog RiderClash Royale fireballClash Royale The LogClash Royale Ice Golem
Clash Royale MusketeerClash Royale Mini P.E.K.K.AClash Royale GoblinClash Royale Bats

Oldschool P.E.K.K.A Miner Poison


Clash Royale MinerClash Royale PoisonClash Royale ZapClash Royale Bandit
Clash Royale Electro WizardClash Royale P.E.K.K.AClash Royale GoblinClash Royale Mega Minion

Hybrid

Slot #1: Main Win Condition

Clash Royale Hog RiderClash Royale GiantClash Royale Battle RamClash Royale X-BowClash Royale MortarClash Royale Miner

Slot #2: Win Condition #2

Clash Royale Hog RiderClash Royale GiantClash Royale Battle RamClash Royale X-BowClash Royale MortarClash Royale Miner

Slot #3: Heavy Spell

Clash Royale fireballClash Royale PoisonClash Royale RocketClash Royale Lightning

Slot #4: Light Spell

Clash Royale The LogClash Royale ZapClash Royale Arrows

Slot #5: Support

This is the support for the main Win Condition. For example, If you want to build Giant Miner Deck, use NW for Giant.

Clash Royale Night WitchClash Royale Electro WizardClash Royale BanditClash Royale Royal GhostClash Royale MusketeerClash Royale Flying MachineClash Royale Dark PrinceClash Royale Wizard

Slot #6: Ranged Troop/Cycle Card

If the slot #5 is a ranged card, use a Cycle card here.

Clash Royale MusketeerClash Royale Ice WizardClash Royale Electro WizardClash Royale WizardClash Royale ExecutionerClash Royale ArchersClash Royale Ice SpiritClash Royale Skeleton

Slot #7: Ground Swarm

Clash Royale GuardsClash Royale Goblin GangClash Royale Skeleton ArmyClash Royale Goblin

Slot #8: Air Troop

Can be single or swarm, depending on the win conditions and the idea of the deck.

Clash Royale Baby DragonClash Royale MinionsClash Royale BatsClash Royale Mega Minion

Examples

Mortar Bait

Clash Royale MortarClash Royale MinerClash Royale The LogClash Royale Zap
Clash Royale Ice GolemClash Royale BatsClash Royale Goblin GangClash Royale Minion Horde

Giant Miner Hybrid

Clash Royale GiantClash Royale MinerClash Royale fireballClash Royale Zap
Clash Royale Night WitchClash Royale MinionsClash Royale GoblinClash Royale Minion Horde

Mortar Miner

Clash Royale MortarClash Royale MinerClash Royale fireballClash Royale The Log
Clash Royale KnightClash Royale Flying ZappiesClash Royale GoblinClash Royale Mega Minion

Give it a test run!

Now that you’ve built your deck, you will want to give it a test go. Perhaps a challenge, tournament or friendly battle.

When I was testing some decks above, I created a few of them on my own.

I am not saying they will be perfect! Playing a game or two with them will show you where to improve the deck, what to change etc. Know what cards might be better.

Trial and error before you finalize a deck!

Lastly, you will need to make sure you’ve undergone several cycles of trial and error before you finalize your deck.

When you’ve finally finished the deck, just grind away with it. Get used to it’s cards, when to play what etc!

Once you got a good grasp of the deck, winning with it will not be too challenging of a thing to do!

With the help from darchangels13 and lolman

The Encyclopedia of Chip-Cycle

317

Hey it’s GetShrekt here bringing you guys my first ever guide for Clash Royale.

Chip-Cycle decks can be hard to play, and aren’t the right pick for everyone.

However, Chip-Cycle decks can be very powerful against almost all decks if you can play them right. Many key components to Chip-Cycle decks are unlocked in the early arenas, so this playstyle should be a viable choice for any player.

Today I’ll be sharing my guide of how to create and play Chip-Cycle Decks.

chip cycle deck

The Ultimate Guide to Chip-Cycle

Table of Contents:

  1. The Basic Idea
    1. What is a Chip-Cycle Deck?
    2. How can I make a Chip-Cycle Deck?
  2. The Basic Strategy:
  3. Advanced Strategy
  4. What You Should Know:
  5. Chip Cycle Decks
The Basic Idea:

What is a Chip-Cycle Deck?

A Chip-Cycle Deck is a deck consisting of cheap cards that allow you to gain advantages over your opponent and put constant pressure on them, denying their large pushes.

Many Chip-Cycle Decks contain cheap cards like Minions, Skeletons, or Goblins to try to gain elixir advantages through positive elixir trades.

Additionally, Chip-Cycle Decks will contain rush cards like Goblin Barrel, Miner, Hog Rider, or Princess. Rushing your opponent either forces them to defend and split up their synergy cards, or suffer large amounts of damage.

Many people underestimate the power of cheap troops. Lots of players are unaware that many cheap cards in the game can counter very powerful and expensive cards. Also, cheap troops can deal lots of damage if not dealt with.

Because of this, Chip-Cycle Decks will put constant pressure on your opponent and if played properly, can deny your opponent from creating large pushes. Now that you know about Chip-Cycle Decks, let’s learn how to create one.

How can I make a Chip-Cycle Deck?

Warning: Chip-Cycle Decks do not need Legendaries, but they do help a lot and will give you an advantage over your opponent. Miner and {rincess are two great cards for this playstyle, and you could face some problems if these Legendaries are not unlocked.

Chip-Cycle Decks are fairly easy to make because they have several key components, but each role in the deck can be carried out by many different cards.

Usually a Chip-Cycle Deck will contain two-three cards designed for defensive value. These cards should be able to take out troops on your side of the arena for a positive elixir trade. Goblins, Skeletons, and Minions are all a great choice.

Also, a Chip Cycle Deck will usually contain only one or two stronger defensive cards. These are very important because they are what define the decks defense. If your opponent drops expensive cards for a big push in one lane and you rush the other, these strong defenses will be your lifeline. Inferno Tower, Furnace, Mini P.E.K.K.A, Musketeer, Valkyrie, and Knight are some of the best choices.

Next, a Chip-Cycle Deck should have at least one spell. Spells come in handy on offense to clear away swarms and on defense to help stop gigantic pushes. Fireball, Poison, Arrows, Zap, and Log are the most viable options to use.

And last but certainly not least, offensive rush cards. These cards will deal the most damage to your opponent’s towers and put pressure on them, forcing them to react. Goblin Barrel, Hog Rider,Bandit, Battle Ram, Miner, and Princess are all great choices.

Here are some of my basic templates & examples for a Chip-Cycle Deck:

Cycle Card Low-Cost Support Troop Killer Medium Spell Main Offense Low-Cost Tank Killer Strong Tank-Killer Light Spell Utility
Skeletons Knight Poison Hog Mega Minion Inferno Tower Zap Ice Golem
Ice Spirit Valkyrie Goblin Barrel Hog Goblins Inferno Tower Zap Princess
Ice Golem Minions Guards Miner Goblins Musketeer Log Furnace

chip cycle deck 2

The Basic Strategy:

How to play with a Chip-Cycle Deck

Warning: Chip-Cycle Decks are not everyone’s playstyle. If you choose to play this Deck type you may need some practice in order to be a strong player with the Deck type.

Even though Chip-Cycle may appear to be the hardest play-style possible, it actually can be quite easy once you get the hang of it. I have broken this playstyle down into three parts: How to respond to a lone tank, How to counter a large push, and When to rush your opponent.

How to respond to a lone tank:

The best move to respond to a tank in the back is to rush the other lane with your offensive troop, or play a siege card like the Princess forcing them to respond. This way they can’t afford to put supporting units behind their tank, making it easier to be taken out by your strong defense.

If a good offensive card is not in your hand, I would suggest dropping a cycle card or putting high damage cards a few tiles behind the bridge to put your offensive troop in front.

TL;DR: Rush the other lane and be prepared to counter the tank with a strong defense

How to counter a large push:

Countering a larger push can be somewhat difficult. However, lucky for the simple formula-tank killer, support distracter, support killer, and spells for swarms you should be perfectly fine.

Say for example you have Inferno Tower, Skeletons, Zap, and Knight in my hand when your opponent drops Royal Giant and Electro Wizard at the bridge. You should drop Inferno in a frontal plant for the Royal Giant and Knight to take care of the Electro Wizard.

Say you rushed the other lane in response to a Golem with Hog Goblins but your opponent Cannon Zapped killing your push. Now they are able to place a Baby Dragon, Musketeer, and Minion Horde at your Tower. You play a building in the kill zone to kill the tank, a support killer like the Valkyrie for the Musketeer, a ranged or air-targeting troop like a Musketeer for the Baby Dragon, and finally a splash troop like a Wizard or spell for the Minion Horde. Now you have many troops for a powerful counter-push and should put an offensive troop in front for a counter-push.

TL;DR: Use a tank killer, support distracter, support killer, and spells to counter large pushes, and then counter-push with what’s left of your defense and an offensive troop

When to rush your opponent:

There is four main situations where you know you should rush your opponent.

  • When you know they are out of Elixir. You can do this by gaining continuous positive Elixir trades and using your arena towers to help out.
  • When you know their counter to your offensive troop is in rotation. If you see them drop their main defensive card as an offense or in a high health Tower lane it is a great idea to rush them.
  • When you know you have a troop or spell ready to counter their defense. If you know your opponents defenses saving a spell or hard counter to their defense is a great move.
  • Finally, when you have countered an expensive push. Now they have little Elixir and will most likely only have cheap troops. A strong counter-push is a strong rusher like Hog Rider or Elite Barbarians supported by a swarm or splasher and a spell on hand.

chip cycle deck 4

Deck Match-Ups

Chip-Cycle Decks are generally a well-rounded Deck against all decks. Below will be a summary of both what you should expect, and how to play against all the other decks archetypes in the game.

Against Beat-Down (Golem, Giant, and Lava hound)

Beat-down decks are a very powerful Deck archetype. It is key to know this Deck’s fatal weakness, in that the Deck will have poor defense and requires a lot of Elixir to build the three-crowning push. Therefore, this Deck match-up will be decided by your ability to apply constant pressure on your opponent, dealing damage to their towers well avoiding their massive pushes.

Against Hog Decks

Hog decks are very common right now at the top of the leaderboards because of their power on both offense and defense. What’s key to defeating this Deck is knowing that most Hog decks have powerful, expensive, singular-unit defenses like Valkyrie, Musketeer, Cannon, etc. That being said splitting up your offense after they pushed or any time you have an Elixir advantage is a smart move.

Against Royal Giant

Most of the time you will win because the Royal Giant needs proper support to be effective. Putting pressure on your opponent avoids this. Also, Royal Giant decks are weak to counter-pushes which can result in one push take-outs. The only thing to watch out for is Electro Wizard and Minions if you are using Inferno Tower since it can be distracted or killed.

Against Zap Bait

This purely depends on the cards in your Deck. Splashers will counter Minion and Goblin cards well and spells can crush Goblin Barrel and Skeleton Army. Having many spells and splashers basically insure the win. Always make sure you use the right card for the job, and don’t let your cards fall out of rotation.

Against Miner-Chip Decks

Chip-Cycle Decks have lots of cheap cards so the Miner will have a rough time hitting your Tower. Even if they have spells for you cheap troops you will always have more counters. On offense simply focus on letting your opponent push, and then counter push. Miner decks have poor defense due to their highly composed offense.

Against Three-Musketeers

Chip-Cycle Decks may face some problems against three-Musketeers because they crush cheap troops. However, if you use modified Deck types like in my templates above, you can manage a few stronger cards. Having both a medium and light spell and/or a strong support killer will crush three-Musketeers as long as you have them in rotation. Even though they are a nine Elixir card, it is not a good idea to rush them because you will need lots of Elixir to defend. It’s not like your countering a lone tank, you could be a two-three Elixir watching a Mini-tank and three Musketeers take both towers.

Advanced Strategy

How to get the best value

Value trades are one of the most important plays to make in a match using a Chip-Cycle Deck. A value trade or positive Elixir trade is when you counter an opponent’s card with a card cheaper than theirs. Chip-Cycle cards are one of the best Deck archetype to gain many value trades using cheap units and spells. Below will be listed the troops types in the game and their best value counters.

  • Tanks/Offenses: Use defenses to pull building targeting troops and a high damage cheap card like Goblins or Skeletons to deal even more damage and then counter-push. A tank on its own will be way easier to counter and you’ll receive better value.
  • Supports: Either surround with cheap troops like Skeletons/Goblins or counter directly with a support troop killer like Knight or Valkyrie. If a support is on its own, it’s best to surround since your Tower can help out. However, if a support is behind a tank you will need a support troop killer and defense or high damage card for the tank.
  • Swarms: This is the hardest area to gain value. Instead, you want to focus on getting their swarms out of rotation for your pushes, or always have a spell ready. If you bring only one spell, I would suggest saving it for their skeleton Army, and if they don’t have skeleton Army then for their Goblin Barrel. All other swarms are best taken out by a splash troop like a Wizard or Executioner.

chip cycle deck 3

What You Should Know:

Level Advantages/Disadvantages

Warning: Chip-Cycle Decks will be less effective if your cards are lower than your opponent, mainly because cheap troops have the greatest interaction change if they are lower level.

Over-leveled opponents are Chip-Cycle Deck’s kryptonite. If your opponent’s towers or cards are even one level higher than your cards, the battle could be completely different. With cheap troops, many interactions change when your opponent is higher leveled than you are. Here is a list of things you should know if you are facing people higher than you with a Chip-Cycle Deck.

Your Offense:

(Cheap Troops will deal decreased or no Tower damage)

Any cheap troop such as Archers, Minions, Spear Goblins, Goblins, Fire Spirits, and Ice Spirit will deal almost no damage when your opponent’s towers are one or more levels higher than your cheap troops. Also, if their Zap kills your Goblin Barrel, you should reconsider using it. Finally, if you are using furnace and their towers are three or more levels higher than your Furnace, they won’t make it to the Tower As an example, Minions equal level as your opponent’s towers will get off quite a few shots and at tournament standards, round up to about three-hundred and fifty damage. However, when your opponent’s towers are one or more levels higher, your Minions achieve less than seventy-five damage.

Facts to remember:

  • Zap six or more levels higher than Goblin Barrel will kill the Goblins
  • A crown Tower three or more levels higher than a furnace will not let fire spirits connect to the Tower
  • Your opponent can safely ignore your cheap troops if his towers are one or more levels higher than your cheap troops (Goblins, Spear Goblins, Archers, and Minions will get decreased damage, both the Ice Spirit and Fire Spirits will get no damage)

Your Defense:

(Spells will overrun your cheap cards)

On defense any cheap cards will be vulnerable to over-leveled spells, since they will kill cheap troops. For example, at equal level, Zap will not kill Minions, but if the Zap if two or more levels higher than the Minions, they will die. This means if your opponent plays a heavy-hitter or offense for your Tower and he has over-leveled spells for your cheap troops your Tower will be taken. You should be very cautious and have many defenses prepared against over-leveled spells.

Facts to remember:

  • Zap one or more levels higher than Goblins will kill them
  • Zap two or more levels higher than Minions will kill them
  • Zap two or more levels higher than an ice Spirit will kill it

Card Substitutes

Some players may find a great Chip-Cycle Deck that has a legendary or two in it that they do not have unlocked yet.

The world isn’t over, please do not panic.

Most players think that a card with no other cards like it has no substitutes, but they’re all wrong. What matters is that the substitute will have the same purpose as the original legendary.

All legendaries will have substitutes, no matter how similar or different the change will be. Just make sure to keep in mind that legendaries can be substituted, and to play the Deck how you should with the substitute and not the legendary.

Some substitutes might be a different cost, hit/not hit air, have more/less health, have more/less damage, etc.

Below are a list of legendaries commonly found in Chip-Cycle Decks and their most viable substitutes.

Types of Changes:

  • Attack Type (Splash/Single Attack)
  • Range (Melee/Ranged)
  • Elixir Cost (Higher/Lower)
  • Quantity (Singular/Plural)
  • Targeting (Ground, Buildings, Air & Ground)
  • Health (Higher/Lower)
  • Movement Speed (Faster/Slower)
  • Damage (Higher/Lower)
  • Card Type (Troop/Spirit/Spawner/Defense/Spell)

Here are some legendary substitutes to Chip-Cycle Legendaries:

  • Princess: Zap, Fire Spirits, Arrows, Archers, Dart Goblin, Musketeer, Baby Dragon, Wizard, Witch, Bowler, Executioner
  • Ice Wizard: Zap, Fire Spirits, Arrows, Archers, Minions, Mega Minion, Dart Goblin, Bomber, Musketeer, Baby Dragon, Wizard, Executioner, Witch, Bowler
  • Miner: Knight, Ice Golem, Hog,
  • Bandit: Knight, Mini P.E.K.K.A,
  • Lumberjack: Knight, Mini P.E.K.K.A, Valkyrie, Mega Minion
  • Log: Zap, Arrows, Fire Spirits,

Chip Cycle Decks:

Decks you can try!

Here are some Chip-Cycle Decks that I have used or am using right now and have worked out well:

  • Skeletons, Zap, Hog, Goblin Barrel, Arrows, Valkyrie, Inferno Tower, Minions
  • Furnace, Hog, Battle Ram, Log, Fire Spirits, Ice Golem, Musketeer, Mini-P.E.K.K.A
  • Goblin Gang, Miner, Battle Ram, Musketeer, Mega Minion, Zap, Fire Spirits, Mini-P.E.K.K.A
  • Miner, Skeletons, Knight, Ice Wizard, Wizard, Log, Fireball, Lightning
  • Ice Golem, Hog, Ice Spirit, Goblins, Cannon, Fireball, Zap, Musketeer, Skeletons
  • Battle Ram, Elite Barbarians, Zap, Goblin Barrel, Princess, Furnace, Fire Spirits, Ice Spirit

Conclusion

Chip-Cycle Decks are a very powerful, but hard learned Deck that can crush many metas in this game. Very few players are using this Deck archetype right now and are unaware of its capabilities.

I tried to cover every aspect of this Deck type in this article but if this still wasn’t enough I am truly sorry.

Please feel free to send me your decks or suggestions for more guides via the comment section below.

I may be starting a YouTube channel down the road and could feature all your unique decks.

Please try these decks if you are having trouble on the ladder, as these decks can crush the Royal Giant and Golem Metas all over Legendary Arena.

Thank you for your time and I hope you have a great day!

Legendary Chip Cycle Tournament Deck

245

Hey guys what is going on, it’s RSivak back with an absolutely amazing Tournament deck I’ve been playing with. It has been an absolute terror in tournaments and even helped me push to a new trophy high!

Let’s get into it.

Legendary Chip Cycle Tournament Deck

Clash Royale The LogClash Royale PrincessClash Royale MinerClash Royale Electro Wizard
Clash Royale ZapClash Royale BarbariansClash Royale MinionsClash Royale Goblin Gang

Legendary Chip Cycle Tournament Deck

Cards Breakdown

Princess: Siege card, the Princess is great at sieging down towers and forcing a response. She is also a great bait for The Log, Arrows and Fireball, which are all the biggest counters to some of your damage cards below.

She is perfect for finishing off a tower at the end, dealing 140 damage and when you play her, all those shots will add up to hundreds of damage.

The Log: Goblin Barrel counter and overall one of the best and most overused legendaries right now due to it’s cheap cost and versatility.

The Log is a perfect card to kill Princesses, Goblins, Fire Spirits, Guards (kill their shields) all for an equal or positive elixir trade.

Miner: My all time favorite Legendary and your tank for squishy troops. He can dip anywhere in the arena to kill Elixir Pumps and finish off Princesses. He is perfect for chipping away at an enemy tower and dealing massive damage combined with Goblin Gang, Minions, or Barbarians.

Ice Wizard/Electro Wizard: The original deck I noticed had Ice Wizard, and since I didn’t have it I substituted the Electro Wizard in and he does a good job. The main job of this slot is a defensive mage that can slow down pushes while dealing some damage, and since I find Ice Wizard to have such a low damage output I think Electro Wizard is a better substitute. Whichever one you use, they should be used for defense, and halting enemy pushes.

Zap: Still a great spell card as The Log cannot hit air troops, Zap spell is great for weakening Minion Horde, and killing Skeleton Armies in a pinch. Not much else to say, still one of the most useful cards in the game.

Minions: Minions are amazing at air defense and offensive, they can usually target a lot of troops without taking damage and they have a very high DPS.

Combined with a Miner at the tower, even if the opponent Zaps it won’t kill the Minions allowing you to deal hefty damage or elicit a stronger response from your opponent.

Barbarians: Your defense card, Barbarians will shred through any of the pushes they send, taking down Hog Riders, Giants, Golems, Giant Skeletons, and of course Elite Barbarians.

They are best reserved for defense, but once they are done defending you can pop up a Miner at their tower and if they don’t have a strong defense or they overcommitted then they might take some heavy damage.

A lot of games can be won when you play your Wizard in the back to start the defense and they Fireball it, leaving you open to defend with Barbarians and then counter push.

Goblin Gang: I didn’t use this card that much when it came out, but I find it to be an amazing card.

It is super versatile and deals heavy damage by itself, but when paired with the Miner it can completely bring a tower done, even if only the Spear Goblins survive, I’ve seen Towers go down to half health from a Miner and the 3 Spear Goblins left from the Gang.

It is just as amazing as Barbarians on defense, they have such a high DPS for such a cheap cost, but The Log can completely take them out and if you play overleveled opponents then their Zap might even kill the Stab Goblins.

General Gameplan:

A great start is a Princess in the back and seeing how they respond, if they Log her then I go Miner Goblin Gang if I have it, if they Arrows her then I try a Miner Minions push.

If they are wasting their spell cards on your Princess then it gives you the chance to send out a nice little Miner Minions, or Goblin Gang push.

If they drop a Golem or P.E.K.K.A in the back then you can rush the other and force a response or take a tower.

The key is to play this deck like a chip deck with strong defensive capabilities.

Barbarians will end up being the brunt of your defense. Tanky, and good damage they will chop thru most tanks and supports. If their Tank is being supported by a Wizard, Bomber, Witch, or some other splash damage card, then just drop Barbarians on the support, making sure to completely surround them to maximize damage taken. The Barbarians will then turn around and chop up the tank and you could have a strong push with Miner if they can’t respond well.

You want to keep changing Miner placements and keep sending out small pushes often, make sure you keep your Barbarians for Royal Giant, Elite Barbarians as they will be your best counter.

Always have enough elixir to defend anything, it will be the best way to win if you can keep up your elixir and make sure you don’t overextend or clump all your troops allowing one Fireball to decimate them.

Once you have dealt some decent damage to a tower, you can start dropping the Princess off at the bridge to get some chip damage in and force them to keep spending elixir on defense and not allow them to build any pushes.

A lone Goblin Gang can be a strong card, it can deal hundreds of damage, so if your opponent used The Log on the Princess and you don’t have Miner in your hand you can just drop a lone Goblin Gang and they will have trouble countering for a positive elixir trade.

Make sure you Miner down their Elixir Pumps, if they drop a Elixir Pump in the center in front of their King Tower, I like to drop a Miner on the Pump and rush both lanes, one with Minions and the other with the Goblin Gang, its high risk but it can deal tons of damage on both tower if they react to slow.

Counters: High Risk to Low Risk Matchups

3 Musketeers: The killer in this deck is the lack of Fireball, and 3 Musketeers can become a problem, make sure to not let them keep pumping and if they split the Musketeers, then drop Barbarians or Goblin Gang on the two and Minions on the other one. Usually difficult to play against, but all you need to do is stop them from pumping up.

Chip/Control: Chip/Control is very similar to this deck, and as a result more often than not you will end up with draws, your weakness against a chip deck is your Barbarians, usually there is nothing worth using them for and they might not be used at all. Just keep your defense up and don’t let too much chip damage onto your tower.

Lava Hound: Lava Hound decks, specifically LavaLoon can be challenging when first playing but you have a lot of air control in this deck, and usually, Zap + Spawn Zap of Electro Wizard kills off Minions, and the Hound doesn’t do much damage itself. Just make sure you have enough on defense and maybe sideline Minions to a defensive role, and use Barbarians more offensively. Princess comes in real handy on the other lane they are pushing in.

Royal Giant: Not really a major problem, Barbarians cut thru him, if they have Furnace or Fire Spirits, then Zap them, supplement with Electro Wizard if you need more help.

Elite Barbarians: Barbarians, Goblin Gang, Electro Wizard, not a threat at all. Make sure you keep enough elixir in reserve for defense.

beatdown: This deck is going to beat on beatdown decks. You have such a strong rock solid defense oriented cards, and your speed and chip cycling allows you to usually out cycle and eventually out damage them.

Overall: Biggest problem I face is deck with 3-4 splash unit cards, they can be an absolute menace and you have to play carefully. But decks with 3-4 splash units is unusual so it’s not that big of a threat especially in Tournaments which this deck seems to be made for.

Tips:

  • Princess is your bait card, so if they take the bait capitalize!
  • Do not overextend, this deck is not usually going to be taking entire towers down in one go, chip away and that’s how you will win.
  • Keep Barbarians for defense, and then convert them into an offense by dropping a Miner at their tower.
  • Electro Wizard or Ice Wizard? I’d pick Electro Wizard for his greater damage, in Tournaments Ice Wizard just seems too weak.

Alright guys, hope you enjoyed this cool deck guide and I hope you get some great trophy pushing or Tournament wins this deck. Later!

Control Deck 101 – How to Build and Play Control Decks

226

Hey, guys! My name is Blaze Stone and today I will be sharing with you how to play and build your own rocking Control Deck!

Control Deck Clash Royale

Control Deck 101

Table of Contents:

  1. What are deck archetypes? What are the differences between them?
  2. Pros and Cons of Control archetype.
  3. How to play using a Control Deck?
  4. Cards used in Control Decks.
  5. How to build your own Control Deck!
  6. Slot method for building P.E.K.K.A. Control Decks.

What are deck archetypes? What are the differences between them?

Deck archetype is basically the playstyle of your deck. It depends on how offensive or defensive you are, what technique you use to deal damage to the towers and what cards do you use.

There are 7 archetypes in my opinion:

  1. Beatdown: Use hard-hitting cards along with tanks to deal a lot of damage. More offense than defense.
  2. Control: Manipulate your opponent to negate as much damage as possible, gain elixir advantage and attack when you get the chance. More defense than offense.
  3. Siege: Use buildings (X-bow and Mortar) as Win-Conditions.
  4. Spell Bait: Use cheap cards which have a common weakness (to spells) in one deck. This is in order to bait out the spell by one or two cards and attack with the third.
  5. Cycle Decks: Use cheap cards along with a win-condition( Hog rider, Miner, and Rocket) to constantly and quite frequently attack the tower with it slowly and steadily so that finally opponent doesn’t have anything to counter.
  6. Hut Spam (Kinda Siege): Use huts (Goblin Hut and Barbarian Hut) to constantly pressure your opponent with waves of troops and slowly wear him/her down.
  7. Hybrid: This is a combination of two archetypes use together in one deck. These are hard to create, hard to play with and if used properly, hard to defend against.

There is also a guide on Clash Royale Arena talking about deck archetype. You can take a look at here for more details!

What is Control Archetype?

Control Archetype is a playstyle in which you manipulate the opponent. You defend against his/her pushes at the same time gaining elixir advantage and slowly wear him/her down by counter push and chip damage. And finally, when you have a big advantage, push and finish of the slowly weakened tower.

This is the most difficult archetype to play with IMO as it requires a lot of skills and knowledge about different cards.

Pros and Cons:

Every deck archetype has its Pros and Cons, so no deck archetype is perfect.

Pros:

  • Strong against beatdown decks as it has huge defensive potential.
  • Strong against spell bait decks and hut spam decks due to large amount of AOE cards in the deck.
  • These have the ability to be strong in any Meta.
  • Most strongest archetype in challenges and tournaments.

Cons:

  • Hard to learn and master.
  • A bit weak against Siege decks.
  • Not good for Crown Farming.
  • May result in draws many times.

battle ram poison 2

How to play Control Deck?  – General Gameplan

3:00-2:00

Control decks are filled with mostly reactive cards so you should wait for the opponent’s moves to act.

However, if you use Furnace you may want to start with it.

Otherwise, you may use cheap cards to deal chip damage or just see what your opponent uses to counter your win-condition by sending the alone.

2:00-1:00

Understand your opponents playstyle, defend against his/her pushes( gain elixir advantage) and perform weak counter pushes. Also, don’t forget to deal chip damage to the towers.

1:00 to Overtime

Shift to a more offensive mode now by performing stronger counter pushes. However, never let your defense be weak and focus on elixir advantage.

Overtime:

Be extremely careful on defense now and shift to the most offensive mode. Sometimes. Offense is the best defense. And use your spells mostly on towers and less on troops.

Yeah! We are more than halfway through the guide but the main thing isn’t started yet….so stay with me!

Best Cards for Control Decks

Win Conditions:

There are six good win conditions in Control Decks.

Clash Royale MinerClash Royale Hog RiderClash Royale GraveyardClash Royale Battle Ram

Miner: Miner is good in control decks as it constantly offers a good chip damage to towers and is one of the easiest cards( yet effective) to counter-push by placing it after a successful defense to tank for weakened troops.

Hog Rider: Hog Rider is a pretty versatile card as it used in nearly every archetype( nearly every cuz you can’t have it in siege decks. If you use it in it..it will become a Hybrid deck). Hog Rider is used for dealing huge bits of damage and a counter push when opponent is low will really punish them.

Battle Ram: This card is steadily becoming popular in many decks but I think it has the highest potential in control decks as it fits properly in the definition. It is good for chip damage even if it doesn’t connect as long as one barbarian hits the tower. When opponents low on elixir it really punishes them with charge damage and finish off with barbarians.

graveyard: Graveyard is good in control decks because a graveyard used when opponent is low on elixir and troops left on defense tanking, and you have spells in hand..well you are guaranteed a tower because graveyard is devastating if not counter properly.

P.E.K.K.A.: P.E.K.K.A. is also good in control decks as it is good on defense since it deployment time was changed to one second. It is also a good tank and win condition. The slot method of P.E.K.K.A. control is slightly different than other win-conditions so you can directly scroll down below if you wanna read only about P.E.K.K.A. as I made a different section for her.

Spell Cards which give you Control

These are spells which somehow give you the ability to manipulate your opponent.

Clash Royale TornadoClash Royale FreezeClash Royale Poison

Poison: Honestly, Poison doesn’t manipulate the opponent since its slow-down was removed. But it is the only card which deals medium damage in such a big radius. Because of it you can damage a lot of troops with considerable damage in a large area which really helps in controlling.

Freeze: What is better type controlling if you can just stop the opponents cards whenever you like. It is strong on defense if you really can’t afford damage, especially in the last 10 seconds before OT. Also, a surprise with hog or graveyard when opponent is low on elixir is pretty strong.

Tornado: Last but no the least is the tornado. Pull troops together wherever you wish. Activate your king tower if you need more damage to defending. It is so versatile!

Troops with ‘SPECIAL EFFECT’

This are basically cards with a sort of special ability or effect (sorry, I couldn’t come up with any other name for it). These cards really help in control and you will understand what I mean when you see them.

Clash Royale BowlerClash Royale ExecutionerClash Royale Ice WizardClash Royale Electro Wizard

Bowler: Bowler special effect is the push-back. It helps in control as it pushes small and medium size troops.

Executioner: Executioner doesn’t have a proper special ability but it is the only troop card which can deal ground and air damage in a wide linear area. and coupled with Tornado its insane crowd control.

Ice Wizard: Though, this guy doesn’t deal that much damage it has the very first special ability..the slow down effect. It slows down troops and buildings in an area by 35% along with dealing damage. Good Control.

Electro Wizard: Stun two troops at simultaneously and drop in the most dramatic way be dealing zap..good control.

Buildings

In Control Decks, mostly these two buildings are used.

Clash Royale FurnaceClash Royale Inferno Tower

Inferno Tower: Most popular building right now. Roast troops from hogs to golems.

Furnace: Good card because it provides lot of chip damage, more splash damage and serves also as distractions for win conditions.

Slot Method For Control Decks:

I always use the following slot method while building control decks. After this, I will give you examples of decks created with it for each win-condition. As I said before, slot method for P.E.K.K.A. control is different which you can see below.

Slot 1: Win Condition (Hog Rider, Miner, Battle Ram, Graveyard)

Slot 2: Spell which gives control (Poison, Freeze, Tornado)

Slot 3: Cheap Spell (Zap, The Log, Arrows)

Slot 4: Troop with Special Effect (Bowler, Executioner, Ice Wizard, Electro Wizard)

Slot 5: Area damaging Troop(Valkyrie, Wizard,etc.). You can also use another splash damaging troop with special effect in this slot other than Electro Wizard( he doesn’t deal area damage). However, I recommend one of the Legendary Card in Slot 4 and the Epic Card in Slot 5 as this type of combination is stronger than 2 legendary or 2 epic.

Slot 6: Cheap Utility Card( Minions, Archers, Goblin Gang)

Slot 7: Building (Furnace, Inferno Tower)

Since Furnace and Inferno tower are different types of buildings, the card type in slot 8 is different for both.

  • Case I: Furnace – As Furnace is mostly for distraction, splash damage and chip damage, you need a strong tank killer.
  • Case II: Inferno Tower – As Inferno Tower can easily take care of tank on its own you have a variety of options for Slot 8.

Slot 8:

  1. Tank Killer. If you have difficulty against decks which use two win condition like RG+Hog, use a tank killer.(Mini P.E.K.K.A., Knight,etc.)
  2. Mini Tank (Knight, Ice Golem, Valkyrie,etc.)
  3. Cheap utility card for chip damage and cycling( Any cheap multi-unit card that is less than or equal to 3 elixir)

Another Cheap Spell (Zap, The Log, Arrows). Tornado can also be used here as it is cheaper.

Now that I have explained the slot method I will show you decks with it.

Examples

Battle Ram Poison Control:

This is the deck I use currently and have already posted it here.

  • Slot 1: Win condition (Battle Ram)
  • Slot 2: Control spell (Poison)
  • Slot 3: Cheap Spell (Zap)
  • Slot 4: Special Effect Troop (Ice wizard)
  • Slot 5: Splash Damager (Valkyrie)
  • Slot 6: Cheap Utility (Minions)
  • Slot 7: Building (Inferno Tower)
  • Slot 8: Another cheap utility (Archers)

Miner Poison Burner:

  • Slot 1: Win condition (Miner)
  • Slot 2: Control Spell (Poison)
  • Slot 3: Cheap spell (The Log)
  • Slot 4: Special ability troop (wins)
  • Slot 5: Splash Damager (Executioner)
  • Slot 6: Cheap Utility (Minions)
  • Slot 7: Building (Furnace)
  • Slot 8: Tank Killer (Knight)

Hog Poison Control:

  • Slot 1: Win condition(Hog rider)
  • Slot 2: Control Spell(Poison)
  • Slot 3: Cheap spell(The Log)
  • Slot 4: Special effect Troop (Electro Wizard)
  • Slot 5: Splash Damager (Valkyrie)
  • Slot 6: Cheap Utility (Minions)
  • Slot 7: Building (Inferno Tower)
  • Slot 8: Another Cheap Utility (Ice Spirit)

Electro Gravy Bowl:

  • Slot 1: Win condition( Graveyard)
  • Slot 2: Control Spell( Freeze)
  • Slot 3: Cheap Spell( Arrows)
  • Slot 4: Special ability troop( Electro Wizard)
  • Slot 5: Splash Damager( Bowler)
  • Slot 6: Cheap Utility( Minions)
  • Slot 7: Building( Furnace)
  • Slot 8: Tank Killer( Knight)

So, these are the 4 control decks with different win conditions and they seem pretty good, don’t they? Also, remember this is the slot method I use. There are good control decks out there with different slot method.

Slot method for P.E.K.K.A. Control decks

The slot method for P.E.K.K.A. is different because it is not a dependable win condition. So, you gotta use it with other win conditions. Also, in these decks, she acts not only as a win condition but also as a tank and tank killer. And for the same reason use furnace in the building slot as it synergies well with her.

  • Slot 1: P.E.K.K.A.
  • Slot 2: 2nd Win condition (Miner, Hog Rider, Battle Ram). Graveyard not recommended as it increases deck cost which is not good for control decks IMO.
  • Slot 3: Control Spell
  • Slot 4: Cheap Spell
  • Slot 5: Special ability troop
  • Slot 6: Splash damager
  • Slot 7: Cheap Utility
  • Slot 8: Building i.e. Furnace

P.E.K.K.A. Ram Control:

This is powerful deck I created and I chose this to be posted instead of hog or miner as they are already popular so this will be different,

  • Slot 1: P.E.K.K.A.
  • Slot 2: Win condition (Battle ram)
  • Slot 3: Control Spell (Tornado)
  • Slot 4: Cheap Spell (The Log)
  • Slot 5: Special ability Troop (Electro Wizard)
  • Slot 6: Splash damager (Executioner)
  • Slot 7: Cheap Utility (Minions)
  • Slot 8: Furnace

See, seems pretty strong again, right? Also, I think I should explain why I use Minions in every deck and that’s because they are pretty versatile and cheap. Also, It is my favorite card.


So, Hope you guys enjoyed this pretty long guide about control decks. Ask me about anything in the comment section below!

By Blaze Stone

Old School Royal Giant Deck – Level 10 at 5,000 Club

1

Hey, It’s Infinite Light again!

I’ve made a couple posts about decks that level 10’s above 5k uses and you can take a look at here for more details.

Today, I got a great RG deck that my good friend Ironsy395 uses. He’s been using this deck for a long time, so he knows every last aspect of it. He used this deck to hit 5k as a level 10 before the 30 day season, and with the 30 day season, he hit 5.3k as a level 11. He could have pushed much higher, but he didn’t play for a while until after the season started.

Old School Royal Giant Deck

Clash Royale Royal GiantClash Royale Ice WizardClash Royale MinerClash Royale Minions
Clash Royale GoblinClash Royale BarbariansClash Royale ZapClash Royale elixir collector

Old School Royal Giant Deck

The deck:

Royal Giant: The main Tower taker. Must always be supported or put in front of leftover troops from defense. This card is in a good state right now, and I think it is balanced because many things can counter it without taking too much damage.

Ice Wizard: Beast defender. Mitigates hundreds of damage and can be paired with RG. My 3rd legendary, and one of my favorites. It provides so much value for only three Elixir. Kills Minions, skarmy, and any cheap troops with the help of your Tower.

Miner: Used if RG isn’t in your hand. Paired with Minions and Goblins can take Tower. This is my favorite legendary so far. I use it for many plays. If they use Archers or ice Wizard to defend your Tower, don’t be afraid to send in Miner to kill them. Then, Zap the Tower to target on to your Miner and let the Royal Giant continue shooting.

Minions: Great support troop that offers insane value. It will wreck anything that if used to stop the RG, so always pair it up if you can. Lots of DPS and is a cheap alternative to barbs when defending against hogs.

Goblins: Great chip troop and distraction. Does a lot of damage when paired with Miner. I really like this card, and Ironsy uses it for tricky plays. It can be used to cycle and chip the Tower, but it is also a great defender and distraction. It can be used to distract Mega Minions and also chip the Tower, distract Mini P.E.K.K.A so it won’t even hit your Tower, and much more.

Barbarians: Main defense card. It can and will shred through every tank there is, and when paired with Ice Wiz can easily shut down any push. IMO, the best defensive card in the game. Perfect cost and DPS. Overleveled is annoying as hell to deal with, so make sure you spam the requests for this card! Also spam Royal Giants. This card is great because it defends well, and also requires immediate attention as ignoring them will lead to Tower destructions.

Zap: Use it for gob Barrel, Inferno Tower, Skarmy, you name it.

Elixir Collector: Cannot be replaced. When placed down, try to defend if they try to take it down. You should place it down in the beginning if you have barbs or Minions so you can defend their rush.

Overview

The Legendaries in the Deck CANNOT BE REPLACED. Elixir pump is a must have, as it allows you to cycle quickly. This Deck is a Royal Giant cycle Deck, even though the average cost is 3.8.

Synergies:

This Deck has many synergies. Goblins+Miner, Minions+Miner, RG+Minions, RG+leftovertroops, Miner+leftovertroops.

Goblins/Minions + Miner: This deals a ton of damage if ignored. Pretty cheap and Iron sometimes starts off like this to see how the opponent counters.

Leftover troops+Miner/RG: Delicious and annoying to deal with. The leftover troops will surround the RG, protecting it and also dealing with the defenses. Same goes for Miner.

RG+ Minions: This takes down towers quicker than you can say “Elite Barbarians”

Side Note: A lot of times, when they use ranged troops to defend against RG like Archers or Musketeer, don’t be afraid to send in Miner to kill it. If you have a Miner on the Tower and RG + something else, Zap the Tower so it targets the Miner and gives the RG extra shots off.

Defending:

With Barbarians: Barbarians aren’t used very often now, but they still provide insane value. Used against Hog is a -1 trade, but that’s fine because they now have to spend more Elixir to defend against the barbs. Note: Barbs can shut down Hog without it even touching your Tower if placed down quick enough.

With Ice Wizard: Ice Wizard is used mainly with something else, like Minions, Goblins, or Barbarians if they have a huge rush coming. The slow effect cannot be replaced, and is by far one of the best abilities.

With Goblins/Minions: Goblins are insane. One of my favorite cards, they can be used with Ice Wiz to defend Hog pushes. Same goes for Minions.

With Miner: Don’t, unless you run out of options. Miner does a decent amount of damage, but I usually use it to attack pump or princesses.

old school royal giant proof

Strategy/Gameplan:

This Royal Giant Deck takes a fair amount of skill.

Before you guys start ranting about how all you need to do is to place it down, think about why the RG is hitting your Tower. Is it because you can’t defend? Do you need a building? Is it your fault you run out of Elixir and they have enough to counterpush? This Deck cycles fast as hell, as I mentioned before. The pump also gives you lots of Elixir so you can keep cycling and defending.

What you want to do is to spend as little Elixir possible to defend, and focus on the counterpush.

If the Tower is really low and they send in something huge like a tank, just ignore it and go offensively. A lot of times, the games end in 2-1 wins because Iron ignores the push coming when his Tower is low, and instead goes offensively.

For example, there is a Hog Rider coming at your 500 health Tower and you know he has Fireball or Rocket. You already have one Tower down, and his other Tower is at half health. You would want to use Goblins instead of barbs, because the Tower is going down anyway, and you don’t want the Hog to stay alive much longer after it destroys your Tower. After you use Goblins, immediately place RG in the middle of the opponent’s side  so it starts shooting at the Tower for the win. Easy.

Another “strategy” is RG and Minions.

One of the most annoying combos, the Minions will distract or kill the defending troops/towers. When placed correctly, the Tower will lock onto the RG and the Minions will proceed to rip it to shreds. However, for Inferno Towers you want it to lock on to your Minions. The Minions will distract it and let the RG destroy and target the Tower.

Matchups:

Lavahound: Cancer Cancer Cancer. Always rush the other side with RG and Minions. Use Ice Wiz to defend, because the Lavahound itself won’t do too much damage. You can cycle quickly back to your Minions if you have to. If they have Lavahound Balloon, they usually have Arrows as well. That’s fine, just remember to pressure the other side so they may not get a chance to use the Balloon.

Here’s him beating a level 13 with Lavaloon:

old school royal giant proof 2

Royal Giant: Always be prepared to place down Barbarians. Ice Wiz and barbs work spectacular against RG Minions

Hog Cycle: You have many defenses in this Deck. Use them all. You cycle almost as fast as hogs, so you should have at least Goblins or Barbs everytime.

Siege: RG is their worst nightmare. Don’t be afraid and save your RG for the Siege. Use it on offense as much as you can. Mostly though, the game ends in a draw.

Beatdown Tanks: Against Giant and other tanks, remember to always use Ice Wizard and Barbarians together. Against Golem is a little harder, and against Golem Elite Barbarians is just pure cancer. Cycle and use your Goblins and/or your Barbarians and Miner.

Note: Don’t be afraid if they have a tank and Elite Barbarians. Use barbs for the Ebarbs if you have to. You can usually defend the tank with Ice Wiz and Minions/Goblins.

Overview

Overall, this Deck is insane. The synergies and offense is spectacular, and defense is pretty good. You want to try and spend as little Elixir as possible to defend, so you can focus on offense. I rate this Deck a 10/10, and I strongly suggest trying this Deck in ladder if you want to push.

Battle Ram Miner Control Deck – 12 Win GC and 1k Tournament Winner

465

What’s up guys! Corrosive Logic here with another Deck guide! Today I am featuring a Miner control Deck, with the Battle Ram and the Poison.

battle ram miner control

Battle Ram Miner Control Deck

I found this Deck by watching pro player Rob Stark win a 1k Tournament and also get multiple 12 wins in grand challenges, but to my knowledge this deck was made by Coltonw83.

I also played tried this Deck and came 3rd in a 200 man tournament, but perhaps it was luck as I’m not the best at this Deck (Rob Stark), anyhow I will try and explain how to use the Deck as best as I can and at the end I will show you the interview I had with Rob if you want some more detailed explanations.

Proof of winning the tournament:

battle ram miner control proof

Card Overview and Replacements:

Clash Royale Battle RamClash Royale MinerClash Royale PoisonClash Royale Electro Wizard
Clash Royale SkeletonClash Royale The LogClash Royale KnightClash Royale Inferno Tower

Miner – This is the decks main win condition. The Miner is used for chip damage, taking out pumps, and tanking for troops such as battle Ram or Electro Wizard.

Battle Ram – The battle Ram is the secondary win condition, you might not get it to your opponents Tower often but the two spawned Barbarians are great at taking out their counters.

Poison – This card is great against any Deck. In the current meta a lot of support cards can be killed by Poison for example Electro Wizard, Archers, Minions, gob Gang.

Knight – A solid defensive repertoire, a must need in many decks.

Skeletons – Skeletons are great for positive Elixir trades and high DPS for a cheap 1 Elixir.

Log – Possibly the best support spell out there.

Electro WizardProbably the best legendary in the game right now and possibly even the best support card.

Inferno Tower – Commonly used in control/bait decks, the  Inferno Tower is a must need against beatdown decks to compensate for the low damage per push in a control Deck.

For the legendary Log and Electro Wizard, a possible F2P replacement would be Zap and Musketeer, respectively. The Knight can be replaced with the Bandit in some Deck variations, more offense less defense. Rob actually plays the ice Spirit instead of Skeletons in the 1k tournament (I think), but he’s using Skeletons in GC. This Deck is also commonly played with Goblin Gang instead of Skeletons.

General Gameplan:

Good offense? Better defense.

Traditional Miner control decks have always done well against Golem and Lavahound beatdown. However, in the current meta Balloon and Lightning have been causing control players immense problems. Players could simply ignore your Miner push and continue adding support units to feed their massive push.

But in this Deck, the Battle Ram is a card that MUST be reacted to.

So basically when they play a Golem at the back, you could push with the battle Ram on the opposite lane so that they have to defend and have less Elixir for their big push.

Early on in the game, establish what your opponents Deck is, then push accordingly. You are looking to go with the Miner battle Ram, but if your battle Ram isn’t getting to the Tower then use battle Ram Miner so that your Ram tanks for the Miner. You can practically counter push with any another support unit by simply using the Miner to tank for it.

Don’t Miner Poison unless you can get value out of the Poison. Remember above I mentioned all the different popular support units  that can be killed by the Poison.

Swarm cards are often good at countering the battle Ram, so sometimes you should seek to Poison the battle Ram counters too.

Matchups

Golem/Hound Beatdown:

This control deck is quite good against Golem beatdown, but may be slightly weaker to air troops.

Once they play their tanks at the back you can rush the other lane with Battle Ram Miner, forcing them to divide their push and even enabling you to deal lots of damage.

The Miner is also a brilliant Elixir Pump counter, send the Miner in to take out their pump. If they use something to counter it then you can Poison the troop, the pump, and your opponents Tower. Taking out Pumps is crucial against beatdown decks so that they don’t have a massive push coming.

If you can divide their push then you’ll have an easy job defending with the Inferno Tower. Place the Electro Wizard on the other side of the push so that they get less Lightning value. Don’t be afraid to use the Poison defensively to take out their support units.

Hog:

Your Inferno is enough to counter lots of Hog pushes. A good Hog player will try and outcycle your Inferno so be ready for that. Remember combos with Electro Wizard and another card will usually completely shutdown a Hog too.

Siege:

This can be a bad matchup if they catch you off guard. Against Xbow the Knight is a cheap tank, also the battle Ram is great at taking out Xbows. I don’t recommend using Inferno to counter xbow unless they don’t have Electro Wizard or if it’s out of cycle. It’s a gamble because if they managed to get other troops in front of the xbow, the Inferno will lock onto the xbow too late.

Graveyard:

This is the toughest matchup for this Deck. Use the Knight to tank Skeletons and Log them when enough have surrounded the Knight. Electro Wizard is also a good Graveyard counter but it can be killed by Poison. Use your Inferno to take out the tank.

Best Miner Counter – Avoid the Knight

In the current meta, the Knight is in so many decks, and it’s one of the best counters to the Miner. The reason it’s so good at countering Miner is because it only costs 3 Elixir and it can’t be killed by Poison or Fireball.

Cards like the Knight will be used to counter your Miner, so it is essential that you vary your Miner placement everytime. If they use another troops with the Knight, for example Electro Wizard, then it’s ok to use the Poison as you will get value.

battle ram miner control 2

Battle Ram on Defense?

It’s interesting that both of this deck’s win conditions can be played defensively in emergency situations. The Battle Ram can tank multiple shots and the two Barbarians are obviously going to do work on defense.

Sometimes if you are almost full on Elixir and your opponent’s Electro Wizard has a little bit of health left coming back to your Tower. You can play the battle Ram to soak 1-2 shots and let your Tower finish the Electro Wizard, also you now have the battle Ram to conjure a push with the Miner etc.

Interview with Rob Stark (Exceptional Player)

What is your favorite card and why

My favourite card is X-bow, it’s just satisfying to win with as it requires you to understand your opponent’s cards and counters well to be able to win.

What made you play this Deck in CWA Champs Cup? Under what circumstance will you deem a Deck good enough to take to a big tournament or grand challenge?

Battle Ram seemed like an underrated card at the time, and I wanted to see how it would hold up in a competitive setting. I had won a few GC with it prior to the tournament, so I knew it was decent at the least. But it’s hard to tell exactly how it’s going to do until you test it in the right environment. Generally I’ll want to win a few GC in a row with a Deck before I consider it for competitive play.

What sort of decks/cards counter this Deck, and what do you do against them?

Lavaloon is probably the hardest match up for this Deck, you have to apply good pressure on the opposite lane of the Hound, and make sure you still have Elixir to defend with Inferno. Sometimes it will come down to who can 3 crown first.

Under what circumstance will you push the opposite lane?

Good times to push opposite lane are whenever your opponent makes a good size investment at the back (preferably 6+ Elixir but can do with 5). If you’re playing against a control type Deck you’ll probably want to go same lane though

Do you have any general tips for using this Deck?

Don’t go all in on pushes early until you understand their counters. Only play battle Ram at the bridge unless you’re using it defensively. If they’re countering battle Ram well send that in before Miner so it tanks for the Miner.

How would you recommend someone getting better at the game, do you think that your skill came from playing a lot, or is it more natural talent?

Getting better at the game involves two main things: repetition and learning. When trying a new Deck you need to get as many reps as possible, but you also need to learn from your mistakes along the way. Share replays asking for advice, but also look at them yourself and figure out all of your mistakes, and what the correct play would have been.

A lot of mistakes come from not knowing or recognizing the correct play fast enough. If you can figure out how you’re supposed to react to the popular Deck types, you’ll be able to minimize some of your mistakes.

Any tips for playing in tournaments?

For me, I try to play as many games as possible. But if I find myself tilting, I’ll take a small break before starting again, to make sure my head is clear and I’m not rushing into it. Better to wait a minute and refocus instead of taking another L.

I also have Rob Stark’s gameplay and Deck breakdown in a video below, so check it out!

Conclusion

This is a very solid Deck that works very well against every Deck besides possibly Graveyard and Lavahound. There’s no doubt that a lot of practise went into this Deck before it got used in challenges and tournaments.

A big thank you to Rob Stark for helping me make this guide, also I would really appreciate it if you could check out my video, as it encourages me to continue putting my time and effort into these guides!

Thank you.

Supreme Guide to Balloon Rage

15

Wassup guys! It’s DabMaster2 back at it again with another guide for you guys! This time I’ll be sharing the Ultimate Guide to using Raged Balloon! The raged Balloon is extremely deadly with the Rage allowing the Balloon to move way faster and to attack faster too.

There are two types of raged Balloon decks: The normal Balloon Rage, or the LumberLoon combo.

Let’s get into it!

rage loon

Supreme Guide to Raged Balloon

Table of Contents

  1. Why Rage Balloon is so good!
  2. Why Rage Balloon could be bad.
  3. General Gameplan
  4. Building a Rage Balloon deck.
  5. Example Decks

Why Rage Balloon Is Good

Very Surprising

Seeing a frightening Balloon floating towards the enemy Tower is intimidating enough but if it’s raged, your opponent will likely panic since one mistake and the Tower can take massive damage. Rage Balloon decks rely on surprising and fast attacks. It requires your opponent to play flawless defense or suffer the consequences.

Great for Comebacks

Rage Balloon decks are also great at comebacks. One Tower down? Don’t worry, you still have a chance to whittle down their Tower with the Rage Balloon. Like I said, one mistake and your opponent will suffer massive damage. Players tend to play more confidently when a Tower up but take advantage of that confidence strike hard with the comeback!

Crazy Damage

A regular non-raged Balloon has a hit speed of 3 seconds. Once raged, its hit speed is increased to about 2 seconds! This one second increase can allow your Balloon to get more hits and do much more damage.

Why Rage Balloon Could Be Bad

Hard to Use

As the Balloon is the only main win condition, it can sometimes be hard to get it to the Tower. Balloon decks require precise timing with spells. Getting too aggressive on a push can also result in getting crushed by the counter-push.

Weak against Multiple Anti-Air troops

Since this Deck only relies on the Rage spell, of your opponent has many air-targeting troops, the Balloon will have a challenging time getting to the Tower. Tornado is even more frustrating. You may think your Balloon is getting to the Tower then BAM! The Tornado drags it away.

Less Defensive Troops

Using the Rage spell can result in less defensive units since the Rage takes up a card slot. Your Deck may have a harder time defending. Rage Balloon decks rely on mostly defensive units then 2 to 3 main offensive cards.

General Gameplan

Every battle is different. This is an outline for how you should play.

Start of Match (0:00 – 0:30)

In the beginning, find out what your opponent’s win conditions are and what their counter cards are to your Balloon. Don’t play too aggressively since losing in the beginning of the match can still be hard to make up for even though this Deck is good at comebacks.

Mid Game (0:31 – 1:59)

Now that you have found out your opponent’s counter cards and win condition, you can start making more pushes. Play mostly passively then counter-push with your remaining defensive cards. If your opponent is playing passively too, start with some troops in the back and if your opponent is really waiting for you to make the first move, rush them with a small Rage Balloon push, nothing too big so you don’t get destroyed by the counter-push.

Double Elixir (2:00 – 3:00)

Once double Elixir strikes, it’s party time! Play much more aggressively with as many Rage Balloon attacks as possible. With the extra Elixir flowing, you can make much larger and stronger pushes more often. If you have successfully defended a push with more troops left over, counter attack immediately if you have the Elixir.

Overtime

If you’ve made it this far, the battle is probably a close one. Continue to chip cycle damage on the Tower to whittle it down. Preserve your Tower since one mistake can lead to a defeat. Sometimes, you just can’t do any damage to the Tower. In that case, wait for the right moment then surprise your opponent with an opposite lane push! The beauty of the Rage Balloon is that it can easily take a Tower in one push.

lumberloon deck 2

Building a Rage Balloon Deck

There are 2 types of Rage Balloon decks:

  • Normal Rage Balloon
  • LumberLoon

The Normal Rage Balloon is more versatile on offense since you can place the Rage any way you want and the LumberLoon is more focused on defense with the Lumberjack and Balloon as the main offensive units. You can choose which you prefer. Here I’ll show you the slot method for building your very own Rage Balloon Deck!

Balloon Rage

  • Slot 1 and 2 – Balloon and Rage. This is obvious since the Deck is a Balloon Rage Deck.
  • Slot 3 – Spell(s). In this Deck, you choose to use either 1 support spells or 2 support spells. Having only 1 support spell allows you to have more defensive units but less spells to help on offense and vice versa for having 2 support spells. If you choose to have 2 spells take out Slot 6 (defensive support 2). Examples are: Arrows, Zap, Fireball, Poison.
  • Slot 4 – Main defense. This card can either be a heavy hitting tank killer like the Mini-P.E.K.K.A, or a building for a more solid defense. Rage Balloon decks should have a very solid defense like an Inferno Tower since you will have less card slots to work with. Examples are: Inferno Tower, Tombstone, Mini-P.E.K.K.A.
  • Slot 5 – Defensive support 1. The defensive support should be an all-round versatile card to defend with. Rely heavily on this card to support your main defense. Examples are: Executioner, ice Wizard, Musketeer.
  • Slot 6 – Defensive support 2. This is another card which will help on defense. This is used to back up the defensive support and/or and main defense. Examples are: skeleton Army, Goblin Gang, Minions, Mega minion.
  • Slot 7 – Offensive tank/support. Your offensive tank is a card which will absorb damage from your Balloon so the Balloon can float by with less damage taken. Examples are: Knight, ice Golem, Miner.
  • Slot 8 – Versatile response card. As a versatile response card, it should able to be used in many situations and help on both offense and defense. Examples are: ice Spirit, Skeletons, fire spirits, any swarm card.

LumberLoon Deck

  • Slot 1 and 2 – Balloon and Lumberjack. Once again, obvious choice.
  • Slot 3 – Spells. Spells are what you need to make up for the weaknesses of your other cars. Lacking splash damage? Use a Fireball to make up for it. You might even be able to use Freeze!
  • Slot 4 – Main defense. This card can either be a tank killer or a building for a solid defense. This doesn’t have to be too much of a main defense since you will have more cards to work with. Examples are: Inferno Tower, Tombstone, Mini-P.E.K.K.A.
  • Slot 5 – Defensive support 1. The defensive support should be an all-round versatile card to defend with. Rely heavily on this card to support your main defense. Since this Deck has more units, this card doesn’t have to be relied on as much. Examples are: Executioner, Ice Wizard, Musketeer.
  • Slot 6 – Defensive support 2. This is another card which will help on defense. This is used to back up the defensive support and/or and main defense. Examples are: skeleton Army, Goblin Gang, Minions, Mega minion, Inferno Dragon.
  • Slot 7 – Defensive swarm. Any swarm will work. This will help immensely to stop pushes Examples are: Skeleton Army, Goblin Gang, Guards.
  • Slot 8 – Offensive tank/versatile response card. In this Deck, the main tank for the Balloon is the Lumberjack. If you don’t like using the Lumberjack to protect the Balloon because he is too fragile, you can use ice Golem or Knight. If you don’t need an offensive tank, instead use a versatile response card. Examples are: Minions, Mega Minion, Miner, Knight, Ice Golem, Ice Spirit, Fire Spirits.

Example Decks

Remember, these decks aren’t always the right one for you. These are only examples. If you don’t like to use these decks you can make your own.

Rage Balloon

Clash Royale BalloonClash Royale RageClash Royale Inferno TowerClash Royale Arrows
Clash Royale Skeleton ArmyClash Royale Ice GolemClash Royale MusketeerClash Royale Minions

  • Balloon – It’s hard to have a Balloon Deck without a Balloon…
  • Rage – In normal Elixir time, only Rage the Balloon when you know it will get to Tower. Only in double Elixir you can start playing much more rages.
  • Inferno Tower – Your defensive building. Only play it reactively against tanks and hogs.
  • Arrows – This is your one and only spell (not counting Rage). Use it wisely! On offense, these Arrows come in handy against minion hordes. With a lack of splash damage in this Deck, being caught without Arrows can be devastating.
  • Skeleton Army – This will be your versatile response card. Use it to swarms and assassinate single-targeting troops.
  • Musketeer – This is your defensive support 1. She provides extra DPS to help with the Inferno Tower.
  • Ice Golem – He is your offensive tank to protect the Balloon.
  • Minions – Minions are the defensive support 2. They can also transition to offense well to support the Balloon for extra DPS.

Another example Rage Balloon Deck is the Pompeyo Rage Balloon Cycle Deck

LumberLoon Deck

Clash Royale LumberjackClash Royale BalloonClash Royale TombstoneClash Royale Ice Wizard
Clash Royale Inferno DragonClash Royale Skeleton ArmyClash Royale fireballClash Royale Zap

  • Balloon – It’s hard to have a LumberLoon Deck without a Balloon…
  • Lumberjack – It’s a pity he’s not used often. He is great on offense with the high DPS he offers. Although, he is not too great on defense since he has low health. Lumberjack deserves an HP buff to increase his usability on defense.
  • Tombstone – This is your main building. You can place it early to bank Elixir and it can swarm (no skill) Elite Barbs.
  • Ice Wizard – He is your defensive support 1. His slowness ability is invaluable in allowing other support troops to do extra damage and help to slow down attacks so that over leveled (no skill) RG might not get the extra hit off.
  • Inferno Dragon – This is your defensive support 2. Use him mainly as a tank killer since this Deck lacks a tank killer (skarmy gets zapped and Lumberjack dies fast). He is underestimates by most people but he can be very useful on defense to take down big tanks, although he is basically useless on offense.
  • Skeleton Army – Skarmy is your swarm card. They help to clean up pushes against single-target troops and surround splash attackers.
  • Fireball – Mostly only use it on defense. It provides much value and use it on clustered medium-health troops.
  • Zap – Do I even need to explain this? 😊

Another example is my original OG LumberLoon Deck.


That it for now! Any compliments, questions, or insults, post them in the comments below.

Have a Clashtastic Day!

Top 10 Cards To Clone!

1
Lava Clone

Hey guys and gals LatusOcto here, I have been playing around with the Clone Spell for months now and as well as having a lot of fun I have surprisingly been able to push well on the ladder with it. My view on the Clone Spell is that it is effective and a tonne of fun to use which is awesome!

Top 10 Cards To Clone

Best Cards to use with the Clone Spell

Clone Spell is a 3-Elixir card that copies any of your troops in a radius of  3. These clones have the exact same stats as the original save for the health, which becomes 1. The Clone Spell is a very risky card to play and even riskier to play if you are not fully aware of its potential. In this comprehensive guide to the Clone Spell, I aim to list of every aspect of the Clone Spell and when it can be best used.

There are many times where using a Clone Spell might be tempting, such as when the tower is distracted on your tank and your Musketeer looks ready for cloning, but this will usually result in Elixir loss. When a troop is being cloned, the troop stops and cannot attack or move. This will give your opponent time to Arrow, Log, Zap or play any other spell to destroy your clones. So, does this mean that Clone is not worth playing? Most definitely not.

The Clone Spell is best used on troops that have a death effect and in spell bait decks. I will go in-depth on the latter soon.

Troops with Death Effects

Troops that have a death effect in Clash Royale:

  • Golem (deals damage and creates two Golemites)
  • Lavahound (creates 6 Lavapups)
  • Balloon (drops a bomb)
  • Giant Skeleton (also drops a bomb)
  • Battle Ram (deals damage and creates two Barbarians)

(technically Fire Spirits and Ice Spirits have a death effect but it is not triggered if the Spirits do not attack first)

Lava Hound

The most commonly cloned card seems to be Lavahound and for a good reason.

6 Lava Pups are very valuable, and since the Lavahound only targets buildings, it is not easy to distract like the Giant Skeleton.

Cloning any of these troops near the tower makes for a great investment because even upon death they continue to threaten their towers.

Balloon

Again, Lavahound is a great card to clone and when you clone it with a Balloon behind it like many decks do, it creates a combo that cannot be ignored.

If they don’t counter your cloned Balloon, they will take massive damage, but if they do counter your cloned Balloon, the bomb will drop, doing damage to everything around it and can kill minions attacking your Lavahound or Balloon.

Golem 

Cloning the Golem is amazing since even cloning a dying Golem provides you with a new Golem which does 259 damage to the tower and two Golemites which do 53 damage each for a total of 365 damage (at tournament levels), and this is assuming your clones don’t do any damage!

Giant Skeleton

Giant Skeleton is very hard to get to the tower and I personally do not recommend attempting to do so, but it creates by far the best value for 3 Elixir, creating a clone that when killed, does 957, almost a 1000 damage to the tower for only 3 Elixir (at tournament levels).

Battle Ram

Battle Ram is interesting because if your opponent tries to pull your Battle Ram with a building, you can clone the Battle Ram and push the clone to the right, making it ignore the building and go for the tower which will do 492 damage at impact (at tournament levels).

Using Clone for Spell Bait

So, you’ve seen how cloned troops can devastate the tower, but now let’s talk about using clone in a spell bait deck.

As I mentioned before, spells can shut down clones but you can use this do your advantage.

For example, if you have a Princess and Minion Horde in your deck but they keep Logging your Princess and Arrowing your Minion Horde, you can play Princess in the back and clone her, giving you Princesses in both lanes and forcing them to use both their spells to take out the Princesses.

You can use the same concept for any spell bait card.

Play Goblin Gang at the back and clone it, giving your opponent two Goblin Gangs on both sides to worry about. For 3 Elixir, you can clone those couple of skeletons at the tower that your opponent ignored for massive chip damage, forcing your opponent to use his spells or AOEs to counter it.


Thank you for reading my first-ever guide on Clash.World, I hope to continue to write articles to help you all!

Completed Guide to Miner Placements

80

My name is IK-_-IK, I posted this guide onto Reddit earlier and it got a lot of attention so I want to repost it here. My Reddit username is u/Ikizzyk, you can DM me if you need proof that it is me.

Hey Guys! Today I will be talking about the different tile placements of the Miner. In terms of placement, the Miner is probably the most complex card and there are a huge amount of possibilities which can massively vary the outcome of the play and so this guide will be purely focused on the placement of the card.

Before we start this is a colour coded map which this guide is based on:

best miner placements

Best Miner Placements

Direct Damage Placement

When using the Miner, you want to take advantage of the fact that it can be placed anywhere on the map. One way to do this is by directly placing it onto the opponents’ towers so that it deals damage. When spawning the Miner in this way there are 3 key rules to remember in order to be successful.

  • Place it on one of the tiles directly surrounding the tower (16 for arena towers, 20 for king towers) This is to minimize walking distance and maximize damage
  • Mix up placement as much as possible to prevent your opponent from predicting your plays
  • Avoid placements that will put you at a disadvantage in certain situations (more on this later)

So for direct damage, we have a choice of 16 tiles for arena towers. These tiles can be put into 5 different groups, all having advantages and disadvantages of their own. These groups are shown in the map; the blue zone, yellow zone, red zone, green zone and purple zone. For this section of the guide we will pretend that this is an opponent’s left arena tower (from your view). For the right tower, everything is simply mirrored vertically.

Blue ZoneGreen ZoneYellow ZoneRed ZonePurple ZoneKing''s Tower

Pros

  • Covered from buildings and troops in the centre of the map
  • Cannot be targeted by other arena tower
  • Not very vulnerable to being tornado pulled and having the king tower activated

Cons

  • This is the placement used by most players and so it is the most predictable
  • Can be targeted by king tower (once activated)

Pros

  • Mostly out of range from buildings and troops in the centre of the map
  • Cannot be targeted by other arena tower
  • Only placement which is completely invulnerable to being tornado pulled to the king tower
  • Only placement which cannot be targeted by the king tower (once activated)

Cons

  • Common placement and so fairly easily predicted and countered
  • When trying to fireball or rocket a troop deployed to counter the miner, it is harder to hit both the tower and the troop since the placement is close to the front of the tower

Pros

  • Cannot be targeted by other arena tower
  • Unless constantly used throughout the match, it is hard to predict this placement
  • Not very vulnerable to tornado
  • Easier to get good value from poison to hit both the arena tower, a building (eg elixir collector) and any troops that are placed to defend the miner

Cons

  • When trying to fireball or rocket a troop deployed to counter the miner, it is harder to hit both the tower and the troop since the placement is close to the front of the tower
  • Can be targeted by king tower (once activated)
  • Vulnerable to troops or defensive buildings placed in the centre of the map

Pros

  • Very hard to predict
  • Decent placement for getting positive trades with rocket, fireball or poison

Cons

  • Can be targeted by other arena tower (for this reason alone, this placement should be almost always avoided)
  • Vulnerable to tornado
  • Can be targeted by king tower (once activated)
  • Vulnerable to troops or defensive buildings placed in the centre of the map

Pros

  • Covered from buildings and troops in the centre of the map
  • Hard to predict
  • Cannot be targeted by other arena tower

Cons

  • Very vulnerable to tornado
  • Can be targeted by king tower (once activated)

Although it depends on the deck, due to the nature of the Miner (chip damage card), most times you will (and should) not be attacking the king tower with your Miner. A smarter option using a Miner control deck would be to attack the other arena tower or play for a draw. However in the rare case that you do attack the king tower with the miner, there is not much to it except for 3 tile placements which can give you an advantage when the opponent has an arena tower still up. These are shown as the black zone in the map.

The black spots are blind spots for arena towers and so if one tower is down, the miner should be placed on one of the black tiles on the opposite side of the arena tower which is still alive.

Overall summary for the groups:

  • Blue is the standard option but since It is predictable, yellow and purple should also be used to maximise damage output
  • The 5 vertical tiles on the right side are the least predictable. Use them especially when you need the last few hits to win the game
  • Green is the best placement when the king tower is activated, also the best to prevent king tower activation from tornado
  • Mostly avoid red due to it being in range of the other arena tower

Other Miner Placements

As mentioned earlier, in most cases you will want to get direct chip damage from the Miner. However it is very situational. In this section of the guide, other uses and placements for the Miner will be explained.

Tanking for troops

When the Miner is tanking for a troop/ troops, placement should be varied depending on the situation.

  • When tanking for low HP hordes of troops – it is a good idea to plant the miner in a way to block any splash troops from targeting the low HP troops. For example if there is an executioner facing directly towards your minion horde, plant the miner behind the executioner. If there is a furnace in the centre of the map, place the miner in front of the building to absorb the wave of fire spirits. Also if the opponent relies on spells to take out your low HP troops, avoid Miner placement in the front side of the tower (Yellow, Green and part of Blue zone). This is to avoid spells hitting both the Miner and troops its tanking for.
  • When tanking for ranged troops – it is usually optimal to plant the Miner behind the tower, this way the opponent has 2 separate things to deal with.

Taking out troops

A common strategy in Golem or Lava Hound decks is to use the Miner to take out ranged troops while the troop is locked onto to your main tank. The key to being successful with this is to decide whether you should or shouldn’t make the target re-agro onto the Miner. In some cases for example when the target is locked onto a Lava Hound, you don’t want to make the target re-agro since the Miner will be vital to tank for the pups after the hound dies. On the other hand, if you were sending in a Miner tanking for a skeleton army to kill a princess, you want it to retarget as one princess shot can wipe out the whole army. There are specific methods required to do this.

  • To not make target re-agro – Do not plant the Miner directly onto the troop as it will make it re-agro. Instead, it should be placed at least 1.5 tiles away from the target to allow the Miner to take out the troop undisturbed.
  • To make the target re-agro onto the Miner – the easiest way to do this is to place the Miner on top of the target. When the Miner pops up from underground, it will cause the target to move slightly causing it to retarget.

Be extra cautious when using the Miner in this way. For example if you know the opponent has a skeleton army in hand, it is likely that they will use it to block your Miner. Always have the right cards prepared and don’t use this method if there are many other troops surrounding the target.

Taking out buildings

The Miner is often used to take out buildings such as spawners and elixir collectors. Again, placement is important.

  • Against spawners – Do not use the Miner on a tombstone, it is a waste. Against other spawners, it is best to wait a few seconds after a new wave has spawned before planting the Miner (especially key vs barb hut)
  • Elixir Collector – Important to note that a collector placed in front of a king tower means the Miner will be targeted by both arena towers but behind a tower only 1 will target it. Also it is useful to prepare a zap when using the miner to take out a collector in order to kill low HP troops as well as getting 2 more elixir off the collector. The grey tiles (shown on map) can be described as a gamble spot. After taking out the collector, the Miner will proceed to activate the king tower but that is only if the Miner is untouched. The positioning will usually not cause any trouble however against skilled players, be aware that they could use this to their advantage.
  • Against Inferno Tower – In some decks, the Miner is used as a mini tank along with another main tank such as the Giant, Golem, Lava Hound, Royal Giant, Pekka. Against Inferno towers an effective strategy is to let the Miner take the inferno towers agro which will both damage it and give your main tank more time to approach the building.

And that’s all folks! If you made it here you are now a master of Miner placement! … Not quite. The last step is to practice, this will help you make these decisions on placement almost innately.

Until next time, peace.

How to Build Your Own Unstoppable Balloon Freeze Deck

5

Hey guys, D-mate here. Today I want to share with you a unique Deck: Balloon Freeze.

Rarely seen in the meta, this deck packs a surprising punch.

I will do my best to describe the most common playing styles, but every Deck plays differently, and there are thousands of different Balloon Freeze decks.

Without further ado, let me get started!

balloon freeze deck

The Ultimate Guide to Balloon Freeze

Table of Contents


What makes Balloon Freeze a good deck?

This Deck is pretty rare in the meta. You may have never seen it, or even heard of it! Because of that, let me share some reasons on why you may want to try this out.

It is very surprising

Rarely do you ever have a Deck with a Balloon as the main offensive unit. Sure you have Lavaloon and Giant Balloon, but with those Balloon has a lot of support, and is equal partners on its strength. Here, it’s all Balloon, all in. Your opponent may be surprised at seeing a single Balloon and put out a sub-par defense. And you can bet they won’t be expecting a Freeze!

It is versatile

Any good Balloon Freeze Deck will have many offensive threats and offensive answers to threats. Using multiple air units for a flawless defense creates a strong counter push when paired with spells or units such as the Miner. You may not have an answer to everything, but you can be sure the same applies to them.

It packs a punch

The Balloon is a great unit for offense. Not only does it have insane damage per bomb, but the death damage is also insane, equal to Arrows on units or a Fireball on the towers, so even failed attacks have some power to them.

It has few hard counters you can’t learn to deal with

This Deck is all about reaction speed, and a masterful Balloon Freeze player will have this down to the wire. Minions? Pre spell! Glass Cannon? Miner Zap! Inferno Tower? Zap Freeze! No matter what the card, a skilled Balloon player can shred it to pieces.

What makes Balloon Freeze a bad deck?

Of course, every Deck has its downfalls, and Balloon Freeze is no expectation. Here are some things to consider when deciding whether or not you should try Balloon Freeze

It is hard to play

You will be putting on a lot more effort than current meta decks. It’s not just Ebarb cycle Zap win. Every play takes an immense amount of effort, and playing it incorrectly can result in crushing losses. This makes Balloon Freeze a very hard Deck to get into without a lot of trophy losses and time

It has poor ground/air troop ratios

On defense, it may feel clunky in a sense, because you have such little units to defend ground units with compared to other decks. You’re depending on 1-2 ground units for support, which can get troublesome against Ebarbs, Hog, and other common win conditions.

It requires a finicky play style

There aren’t many people who can properly play a good Balloon Freeze decks. They need to be working on always changing how they defend and attack without too many cards that can be played in different ways. Hog Freeze can do this much easier with unique Hog plays, but the Balloon is different. It’s a slow unit with mediocre HP, and there are few ways to get it to the Tower. Being creative will definitely help you with this Deck.

balloon freeze

Minute-By-Minute Gameplay

As with the Hog Freeze guide, now I’m going to go over how to play a Balloon Deck. But remember, every match is different, and this is only an outline.

3:00 to 2:00

This is when you analyze their deck. Unless you can’t avoid it, I would advise against showing either your Balloon or your Freeze spell.

The Balloon packs some serious punch, and if they have a counter, you want to be prepared and not waste the element of surprise.

The good thing is most Balloon counters are versatile and used in many ways. It’s not uncommon to see Minions and glass cannons used on your cheap counter attack units, so take inventory

2:00 to 1:00

Now you want to use your Balloon and get a cycle going.

The first push should come from a counter push and not overextended. Here you want to show them your Balloon and hopefully use your prepared counters to their defensive units to get the Balloon to the Tower.

Unless your Balloon has a substantial amount of HP left, say 1/4, don’t show your Freeze. If you keep them on there toes all game you can pressure them into a loss.

If your Balloon does have enough health, it is often worth a Freeze, even if it is just for one or two extra hits, that can be more then enough to win games, thanks to the 500+ bomb damage + death bomb, but only do this if it is worth the loss of a surprise tactic

1:00 to Overtime

Now your going to get creative.

They know you have the Balloon and that you are prepared for there counters.

This can lead to difficulties with preparing for there defenses, because they will expect you to prepare for them. However, you should be ready for anything. Anticipate there choices and prepare.

For example, if you pre-Arrows Minions last time, they will probably place them at the bridge next time. That’s why you throw in a few Fire Spirits or place those Arrows away from the Tower.

Your main goal is to get the Balloon to the Tower with as much HP as possible. Because of this, early Freeze becomes a viable option.

For example, if your Balloon has half health and just takes out an Inferno Tower, freezing then works well to guarantee Tower damage and prevent things such as Fireball from ruining the push

Overtime

Here you should be just chip cycling. Follow all the rules of child cycle decks: apply light pressure, don’t slow down, don’t try to do a knockout push, spells are your biggest friend.

Make as many Mini pushes as you can for quick little bursts of damage until your spells can deal with it.

You want to keep them forced to stay on the defense for as long as possible and not allow big counter pushes until you can crush there Tower.

Building a Balloon Freeze Deck

Now I’m going to be sharing with you a Balloon Freeze Deck.

Remember, everyone plays differently, and there is no “right” variation. These our guidelines for making a decent Hog Freeze Deck

Step 1: Balloon and Freeze

Hard to have a Balloon Freeze Deck without em!

Step 2: Spells

For this there are a few common choices: Arrows Zap, Lightning Arrows, and Lightning Zap. These spells each have their own uses. Arrows work great for eliminating Minions, the most common Balloon counter, Zap works well for retargeting units and being a soft counter to the Inferno Tower. The Lightning takes out glass cannons, Mega Minions, and Inferno Tower, but doubles the push cost.

Step 3: Building

Any good Deck will need a building, no matter which one. The building you choose is entirely up to you. Cannon gets positive Elixir trades on cheap units, the Inferno Tower can get equal trades on expensive tanks, and the Tombstone can get positive Elixir trades on expensive non-tanks.

Step 4: Air units

One of the balloons biggest weaknesses is its slow movement speed. Luckily, every other air unit in the game (other than the Lava hound) has a much faster movement speed. Thanks to the balloons large size, this can be used to push the Balloon forward. Because of this, you should carry at least one. I suggest you choose from either Minions, minion Horde, and the baby Dragon.

Step 4: Ground units

This should fill in to counter units like the Mini P.E.K.K.A and Elite Barbarians, which need distractions. Depending on your defensive unit, there are different cards I would suggest. If you chose the Inferno Tower, you want a swarm unit. Guards and Goblin Gang work well because the have a better spell immunity so that they aren’t just a spell away from being dead. If you chose the Tombstone or Cannon, you want preferably a swarm unit and a Mini tank, but if not, the Mini tanks is more important. I would suggest ice Golem, Mini P.E.K.K.A, or Prince.

balloon freeze 2

Example Balloon Freeze Deck

Clash Royale BalloonClash Royale FreezeClash Royale MinerClash Royale Zap
Clash Royale ArrowsClash Royale Goblin GangClash Royale Baby DragonClash Royale Inferno Tower

Here is the Deck I made for using Balloon Freeze. However, everyone plays differently, and this Deck is not a one-size-fits-all. Keep this in mind when considering substitutions.

  • Balloon: Main DPS unit
  • Freeze: Allows maximum Balloon damage
  • Miner: A really strong unit, he is a huge assistance to the Deck. He is great at allowing counter-push chip attacks, and if played right can be a 3 Elixir Freeze that will deal the damage of a Rocket!
  • Goblin Gang:Another strong versatile unit, this offers great support. Being partly un zappable helps add to spell resistant, and being partly ranged partly melee makes it really versatile.
  • Arrows: A strong choice for a spell, Arrows have a large radius and take out many units. With such a huge radius and the now increased spawn speed it is great for pre-arrowing common counters such as Minions, Princess, and Goblin Gang
  • Zap:A good card to reduce the threat of pushes. Re targeting is the main strength though. On defense, it allows you to make units re target on buildings or units over your towers and on offense it re target units to others, primarily Balloon to Miner for insane Tower damage.
  • Inferno Tower:Necessary to deal with big pushes, this wipes out all the biggest threats and lets your units crush there glass cannons with ease. With a high HP and life span it can take a beating for your units as well, and be a hard last second counter the cards like the Hog Rider.
  • Baby Dragon:A beefy, splashed flying unit. The Balloon is really helpful for dealing with Minions, Barbarians, Skeletons, and other common units without losing too much health. It also is great at pushing the Balloon, and due to its size is u likely to fly past it.

Thanks for reading! As always share any questions or comments down below and I will be sure to get back to you. D-Mate out!