Resulting in a total of 28,500 gold and 565 cards potentially costing you 0 gems!
Cannon Cart’s Basic Stats
Cost
Hit Speed
Speed
Deploy Time
Range
Target
5
1.2 sec
Fast (90)
1 sec
5.5
Ground
Level
HP
Shield HP
Damage
DPS
1
524
524
153
127
2
576
576
168
140
3
634
634
185
154
4
696
696
203
169
5
765
765
223
185
6
838
838
244
203
7
922
922
269
224
8
1,011
1,011
295
245
Tips for 2v2 Draft
Pick a win condition!
In 2v2 matches, some win-conditions are not good as they are in normal matches.
For example, Graveyard is not really that great in 2v2 battles. This is because of the slow Elixir flow that might end up you taking too long to deploy a Poison or Arrows while Giant, Golem etc are reasonably good win conditions. Also, with 2 hands and 20 cards, your opponents will find it easier to deal with Graveyard in 2v2 matches.
Similarly, Goblin Barrel and 3 Musketeers are not really great in 2v2 matches due to the number of spells might be chosen here.
Good win-conditions for 2v2:
Not so good win-conditions for 2v2
Note that when picking a win condition, be aware of what your partner has chosen. For an example if your opponent picks Graveyard, rather than choosing something like Hog, it’s better to pick a Giant, or a Golem as these two would synergize well with each other. There are times when you will have to pick one win condition even if it’s not the best win condition but it’s better than nothing.
For example, If you pick Graveyard as your win condition, make sure you have a spell to clear counters (Fireball, Arrows, Zap, Poison), a tank for the Graveyard and some good defensive cards along with some cheap cycle cards. You don’t want to have a 4+ average cost Graveyard deck.
Another example is that you ended up with a Giant deck, you want a way to counter Executioner Tornado, pick a high damage spell like the Rocket, Lightning etc as well as swarm clearing spell like Log, Zap and/or troops like Executioner, Wizard etc.
Also if you are not too comfortable with how the Cannon Cart works or If you are not really able to make sense of how to use it, I do advice not picking it! Watch OJ’s video first to take a look at how it works.
Pick counters!
If you had to choose between a Wizard and Minion Horde, pick the Wizard.
Log or Barrel? You would most likely choose The Log.
Valkyrie or Graveyard? Although Graveyard is a win condition, you should avoid the possibility of getting hard countered by your opponent because of a bad pick.
It is very important to be able to handle the onslaught coming at you if you and your teammate end up on defending.
In order to succeed, you will need cards that provide great crowd control. This means, prioritize picking cards like:
If you pick a card like Wizard and get to choose between Tornado and something else, the safest bet is getting Tornado because that will make defending so much easier.
Always pick Spells!
Now you ideally need 1 swarm clearing spell and a high damage spell that can finish off the game. There are also some spells you should avoid entirely in 2v2.
Clearing Spell –
Direct damage –
Avoid –
When choosing spells I always go for counter spells to something my opponent picked.
Between two spells assuming only real difference is damage (Fireball and Rocket), I would pick a Rocket. Simply because of higher damage and potential of getting value when Rocketing on defense. (Hog+ Barbarians push for an example)
Other General Tips
Keep your deck cheap but not too cheap otherwise you will need to play with 10 fingers.
In draft challenge, normally the choices will be pretty similar (for example Minions vs Minion Horde). Choose the cheaper cards! It’s best to keep your deck cheaper. We never know what the opponents give us.
If you pick too many expensive cards, you will give the opponents good opportunities to get positive Elixir trades with heavy spells (above).
Always hover your cards for a few seconds!
This is a super-important tip. Players waste tons of Elixir every day because of not doing this.
Hover your cards so your teammate will have a decent amount of time to do the right things.
You guys are a team!
^ this.
Sometimes, when I place my Golem down, my teammate decides to play his Giant Graveyard push on the opposite lane (wute?).
Support each other!
If you get a bad teammate, try the best!
There is nothing we can do her.
Don’t leave the game If your teammate Logs Minions or Fireballs Golem. Try your best to help him/her out.
I got coupled with a bad teammate once. I did the best to cover him on defense and all he could do was to place his Graveyard when I play my Golem. We won that one.
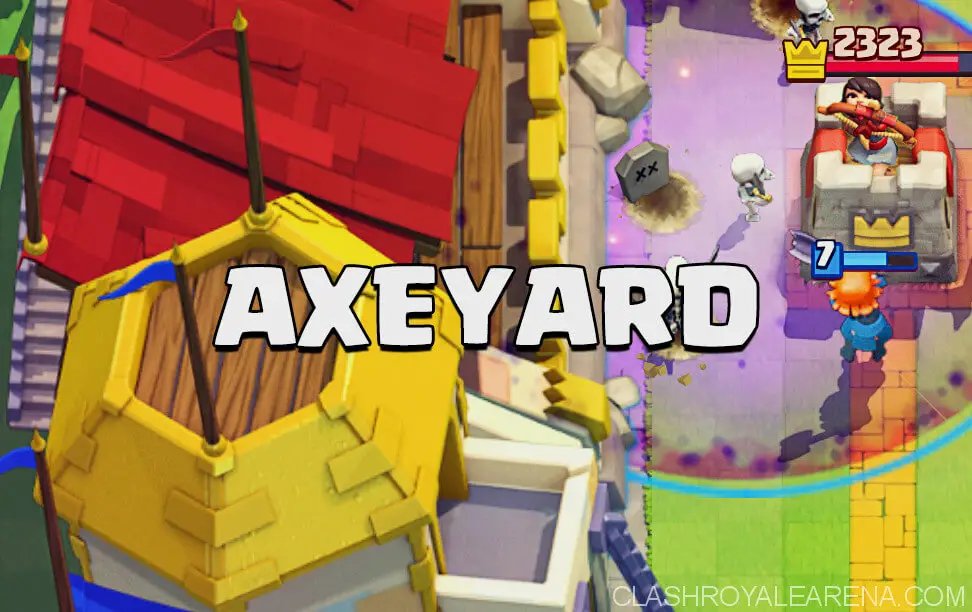
Tips for the Cannon Cart
Cannon Card is basically a moving Cannon with a shield. While the shield is up, Cannon can move. Once the shield comes off it’s a regular Cannon.
Building targeting troops don’t hit Cannon Cart when it’s still on the wheels.
Cannon Card can tank 1 hit from any troop or spell like Sparky, P.E.K.K.A, Prince charge, Rocket etc.
It is a 5 Elixir card so I do not recommend you cycle the Cannon Cart, instead use it in response to a certain card.
The Cannon Cart is obviously a glass cannon but with a decent amount of HP. This means sometimes it can act as a mini tank or a glass cannon at the same time.
However, it’s better to treat it as a glass cannon in all cases.
Here are some cards that can potentially complement defensively and offensively when used with it:
Hey Guys! It’s lightningmaster823 here and today I will show you a good Night Witch Graveyard deck that had gotten me 11-3 in a Classic Challenge (sad life).
Graveyard: Your win condition, it is absolutely devastating on offense especially when paired with Poison and a tank (Night Witch, Valkyrie, or even Ice Wizard), can really pack a punch as a punishment.
Valkyrie: She is such a good defense unit with her 360° splash; she can devastate many popular cards such as Graveyard, Witch, Wizard, Executioner, etc. She also can act as a good tank for the Graveyard due to her high HP.
Night Witch: One of your main jack-all-trades cards, she is excellent on defense as well as offense. Her bats distract lots of troops and is really good when she is paired with Graveyard. Probably one of the best cards in the game right now despite the fairly recent nerf.
Inferno Tower: Your main defense card, it does high damage against many tanks such as Giant, Golem, etc. just make sure you know where to place it if you know your opponent’s rotation.
Minions: These guys provide a lot of value for 3 elixir, they can destroy Graveyard, Night Witch, Electro Wizard, Musketeer, and many other cards with proper timing, they also can be used for cycling purposes. They’re probably one of my favorite common cards at the moment.
Arrows: This spell is very good if you were to be able to wipe out Goblin Barrel AND still be able to wipe out a Minion Horde (unlike The Log, which can take out Barrel, but can’t hit air units), and it also can be placed anywhere on the map.
Poison: This spell should be expected in a Graveyard deck, ever since it was able to do more damage per tick, it spiked in usage and is also effective against Graveyard as well.
Ice Wizard: He is very underrated due to his weak damage and the Electro Wizard overshadowing him. But in this deck, he is another defensive unit, having the ability to distract troops AND slowing them down by 35%, he also acts as a great tank for your Graveyard as he has a fair amount of HP.
If you have the worst starting hand (Graveyard, Poison, Arrows, Inferno Tower), then wait for your opponent to make a first move, and use what you have to counter it.
Make light pushes and maybe attempt an aggressive Graveyard push if you can, make lots of positive elixir trades (OJ)
Middle (2:00-1:00):
Keep applying pressure on your opponent and defend well, make lots of counterpushes with your surviving defense units and then pairing them with Graveyard and maybe poison if you can afford it.
This is when the deck really comes into play, keep making positive elixir trades on defense, but it is easier to counterpush with Graveyard + Poison + Surviving Defense Troops.
Overtime:
Like x2 elixir time, keep making positive elixir trades and counterpushing, but since challenges have longer overtime (3 minutes instead of 1), you can chip away the tower with Valkyrie, Graveyard and Poison, just beware of upcoming pushes.
Taking Down a Second Tower
This part was taken from B-Yatch’CH (aka DabMaster2) guide before.
If you are taking down a second tower, place the Graveyard directly in the middle of the tower to allow more Skeletons to accumulate on the tower and you wouldn’t need to worry about activating the king tower again.
I usually don’t place any troops in the middle of your opponent’s base because that troops will just get owned. The only card to play in the pocket is the Knight for taking damage.
Matchups:
Hog Cycle: as I actually came across a 2.6 Hog deck while testing this deck in the classic challenge that I got 11-3 in, the main thing you should do is to defend with what you have, then counterpush with the Graveyard, just don’t let your opponent outcycle you.
P.E.K.K.A.: Valkyrie is the key to victory; use her against Night Witch, Bandit, and Battle Ram, but accompany her with Ice Wizard, Minions, or Night Witch, as well as Inferno on the P.E.K.K.A. (just be careful if your opponent has Poison)
Graveyard: You have 3 of the Graveyard’s worst enemies in this deck, this shouldn’t be too much of a problem unless they have Freeze or Tornado, or that they outcycle you as this deck is 3.9 (SplashYard is 3.4 or 3.5)
Golem Lightning: Place your Inferno Tower in the anti-Lightning position, but beware of distractions, this is a hard matchup as Golem pushes can easily overwhelm you.
3 Musketeers: This is by far the hardest matchup with this deck as you don’t really have anything good against 3 Musketeers, if you face them, you’re basically screwed.
Giant: The procedure is similar to the Golem, but it is easier against the Giant as Giant doesn’t split into 2 smaller units, however, since Giant is 5 elixir, your opponent could possibly have more troops behind it if compared to a Golem, Valkyrie usually wrecks the support units.
Lava Hound: Inferno on the Hound, and Minions on the Balloon, just be aware of Lightning, Arrows, and other support units.
Royal Giant: Inferno on the RG, Valkyrie and/or Night Witch on Supports, beware of Lightning however as it will shred your Inferno Tower and Night Witch.
Spell-Bait: Graveyard Poison usually wrecks Spell-Bait Decks, just save your Arrows for their Barrel, Valkyrie can take out most of the other troops.
Elite Barbarians (yes, I see them a lot in classic challenges as well): Valkyrie and Night Witch can easily deal with them, then counterpush. This shouldn’t be too hard.
Hog ExeNado: This is another fairly hard matchup as it contains the Night Witch’s worst enemy, but it can be done, I have faced ExeNado and managed to win by outcycling his Executioner
Siege: Inferno Tower on the siege weapon, and make aggressive Graveyard pushes, this is pretty easy.
Spawners: A rare matchup, but it is pretty hard to play against, especially Furnace. But can be done by using Poison + Graveyard to chip away the tower and the Spawners.
Miner: Valkyrie or Arrows on Supports, Night Witch or Ice Wizard on Miner, in cases where you’re low on elixir, ignore the Miner and deal with supports.
Any Deck with Valkyrie: This is the 2nd hardest matchup as Valkyrie completely destroys Graveyard, your best option is to try to outcycle the Valkyrie or bait her out, then punish. You can also attempt to chip the opponent’s tower with Graveyard + Poison.
Replacements:
*: not recommended
Night Witch: *Lumberjack, *Mini P.E.K.K.A., *Knight
Graveyard: None
Valkyrie: Knight, Dark Prince, Baby Dragon, Executioner
Hope you enjoy my 4th guide! Be sure to ask anything in the comments, doubts, or even a few feedbacks in the comments, Clash on, everyone! (And try to gain lots of trophies while you’re at it)
Hey guys, in this guide I want to show you some great defensive combos which require tiny Elixir to deal with certain troops and get zero damage done on your Tower.
The gifs below were taken from Mighty’s video. You should take a look at his video at the bottom to see more details!
A few things to note
In these situations, the Arena Tower is helping take out the enemy troops.
The incoming troop is a lone, or not supported by any troop.
Everything is at Tournament standard.
These matchups were taken after the balance change in June.
Giant
Ice Spirit + Goblins combo can completely shut down the Giant. Positive Elixir trade!
Hey Guys, Godzilla here (Hog Rider FTW), and I am bringing to you the most OP Hog NW Elite Barbs deck for Elite Players like meJ.
This is the deck that got me to my Personal Best of 4704, with Level 11 Elite Barbarians so they don’t need to be over leveled to be good.
This deck does have two legendries (Night Witch and Electro Wizard), so they can be replaced with Executioner and Tornado instead, if you don’t have them. If you have one of the Legendries, but not the other, then I still recommend using Executioner and Tornado instead.
Anyways, here is the deck!
Elite Hog Rider
Hog Rider: This card is your primary win condition, so you have to spam Hog whenever you have the chance.
Best times to push are when the opponent puts something expensive at the back, or just used a lot of elixir on an offensive push.
If he puts down an Elixir Collector, make him regret it, if you can’t, then Fireball it.
Also use it to bait Elite Barb counters, such as regular Barbs, Knight, Ice Spirit, etc.
Elite Barbarians: Use this card to brutally punish every mistake your opponent makes, or make him regret putting down a Pump.
This card is also great on defense; they shut down 10+ Elixir pushes, and make your opponent Rage.
If they have around ½ health left, then drop a Hog or Ice Golem in front to tank for a counter push. If they reach the Tower, it’s GG.
Also, remember to NEVER rush with them if Zap isn’t in rotation. It is heart breaking to watch them get wrecked by Skeleton Army.
Night Witch: The most OP card since the Elite Barb Meta (the best one imo). She is your main defense, so do not push with her offensively, unless it is a counter push.
Beware of Executioner, Lightning, and Zap.
Electro Wizard: He is your anti-trashcanonwheels, so use him wisely if you are facing one.
His stun is also very helpful on defense, especially since he resets the charge of Battle Ram.
Executioner/Tornado (replacements): They also serve the same purpose as Night Witch and E Wiz, they are mainly for defense. The Exenado combo can shut down entire pushes.
Zap: No explanation needed. Use with Elite Barbarians. Use to clear swarms.
Ice Golem: Use as a mini tank on defense, or to tank for Hog/E Barbarians on offense.
Match Ups
P.E.K.K.A: This is an annoying one, use clear support with Fireball, and use Ice Golem/Goblin Gang to dis tract while E wiz takes it out.
Golem NW: Use NW/E Barbarians to kill Golem while you tank/clear support with Ice Golem and Fireball. Kill the support first. Can make insane counter pushes. Push when he puts down Golem, but don’t overcommit.
Bridge Spam: If you lose to this, then shame on you. They usually don’t have that many counters to e Barbarians unless they have P.E.K.K.A, in which case; refer to the P.E.K.K.A section above. If they don’t have P.E.K.K.A, then rush Hog to bait out NW, Bandit, Ice Spirit, etc. Then rush e Barbarians, they usually get a couple shots each time.
Royal Giant: E Barbarians and Night Witch cut through it like butter, and sets you up for a counter push.
Elite Barbarians: Do not defend their E Barbarians with yours, use Ice Golem and Night Witch or E wiz.
Three Musketeers: Do not Fireball Pump, Fireball Zap the two Musketeers (when the split) in case they have Heal. Simply, rush Hog or e Barbarians if they put down Pump. E Barbarians can also kill the Musketeers, if you screw up and Fireball Pump. E wiz’s spawn Zap + Regular Zap can kill Minion Horde, leaving a full health E wiz for a counter push.
Hog Cycle: Defend Hog with Night Witch, e wiz, or Goblin Gang, and then counter push. Tornado the Hog to the king Tower if you are using the Exenado version.
Spell Bait: VERY ANNOYING, luckily, I only see them once in 20 matches. Save Zap to rush with E Barbarians, use Fireball/anything you have on Goblin Barrel. Exenado makes it a lot easier. Usually you lose due to the amount of swarms. I rarely see this, so it isn’t a big deal.
Lava Hound: Start with Night Witch to accumulate Bats and use e wiz. Exenado makes it a lot easier. Again I only see this deck 1 in 15 matches, so it’s okay.
Common Mistakes:
When you send in a lone Hog and the counter with Inferno Tower, don’t Zap it. It will still counter Hog, unless it is level 1, so it’s a waste of 2 elixirs.
Rushing E Barbarians when you don’t have Zap in rotation.
Overcommitting on pushes, you won’t have Elixir for a defense, especially against Golem decks, where they will 3 crown you if you don’t have Elixir of a defense.
Fireballing the Elixir Pump against a Three Musketeers deck.
Not BMing. Remember to BM at the end! After all, you are using Elite Barbarians. Lol.
Anyway, that’s it for this guide. Go ahead and enjoy this deck, it even works in challenges, I’ve gotten 12 wins in classic challenges 3 times, I haven’t tried it in Grand Challenges though.
The History of the Hog Rider
Before delving into the Elite variant, it’s important to understand the original Hog Rider’s legacy. The Hog Rider has long been a staple in many decks due to its fast movement speed and direct path to enemy towers. Its ability to quickly chip away at an opponent’s defenses has made it a favorite among players at all levels.
The Introduction of the Elite Hog Rider
The Elite Hog Rider, introduced as a more formidable version of the classic card, boasts increased hit points and damage. However, its higher elixir cost initially made it a less attractive option for many players who preferred the original Hog Rider’s lower cost and quicker cycle.
Recent Buffs and Meta Shifts
So, what has changed? Recent balance updates have significantly buffed the Elite Hog Rider, enhancing its viability in the current meta. These updates have made it tankier and more capable of surviving against defensive structures and counter-attacks, addressing one of its primary weaknesses.
Additionally, the meta has seen a shift towards more defensive and control-oriented decks. The Elite Hog Rider’s increased durability makes it a perfect fit for breaking through these tougher defenses. Its ability to withstand hits from high-damage units and buildings has made it a valuable asset for players looking to deal consistent damage to enemy towers.
Pro Players Leading the Charge
One of the most telling signs of the Elite Hog Rider’s resurgence is its adoption by professional players. In recent tournaments, several top-tier players have incorporated the Elite Hog Rider into their decks, showcasing its potential in high-stakes matches. This endorsement from the pros has undoubtedly influenced the wider player base, leading to an increase in its usage across all arenas.
Effective Deck Combinations
The Elite Hog Rider shines in decks that can support its aggressive playstyle while providing ample defense. Popular combinations include pairing it with cards like the Electro Wizard for stunning support, the Inferno Dragon for melting tanks, and the Log for clearing out swarm units. These synergies help maximize the Elite Hog Rider’s impact on the battlefield.
Community Reception
The Clash Royale community has had mixed reactions to the Elite Hog Rider’s comeback. Some players appreciate the card’s renewed relevance and the strategic depth it adds to the game. Others, however, are concerned about the potential for it to dominate the meta, leading to less diversity in viable deck options. Supercell, the developer of Clash Royale, will need to keep a close eye on the card’s performance to ensure a balanced and enjoyable experience for all players.
Feel free to comment, or even hate, if you want to. Make sure to BM at the end.
Nice to see ya guys, Cosmincreato here once again with a powerful 3.6 Balloon Deck running the 2 Witches which caught my attention, tested on 2v2,on ladder and I’m pretty proud of the results.
Balloon: Your win condition. Keep it safe until the mid-to-late game.
Never send it alone until you are 100% sure he has NO counter to it and you need to get that tower down really fast.
There is really not a lot to say about it since its only role is to destroy the enemy towers, and the main push has been said above.
Witch: Main support of your deck and a great defensive tool for its Splash Ability and the Skeletons used for distraction and chip damage.
The Witch was a pretty powerful card a long time ago, until cards like Bowler and Executioner have faded her, but I think she is, well I cannot say underrated, but not used that much anymore, when there are lots of Decks that need the Witch to explore.
Anyway, back to her role in the deck, she is a great counter against charge/dash effect cards due to her Skeletons while Inferno Tower is doing what it is supposed to do.
Night Witch: She is totally incredibile. Main defensive troop in the Deck.
I said earlier that this deck may not be that good against Splash Troops, but she is pretty decent against Ground-Only Splash Troops since her Bats will kill the troop.
Can be used on attack as well since the tower will be most likely done if they can’t kill the Balloon and the NW in time.
Knight: The Knight, the ol’ good card that everyone used to play in Arena 1 is actually one of the greatest cards in the entire game, its stats are totally crazy for a 3 Elixir-cost card, attacking really fast and being a great Mini-Tank.
It’s also very good at distracting troops, I actually think it’s a Top 3 card at the moment.
If I were you, I’d check out this great in-depth guide about the Knight: click!
Fireball: I’ve always seen the Fireball as a Meta Card because you can totally destroy pushes when zapping the Glass Cannons after the Fireball to destroy them (if they’re not destroyed by an overleveled Fireball), leaving the Tank alone. From there you can use the Inferno Tower to stop their whole attack.
Also better than Poison in 3M Heal Bridge Spam Matchups.
Zap: Cheap, Low-Damage, Stun-Effect card for an easier Card Cycle.
Pretty important for reseting Inferno Towers/Dragons, Trash Cans etc.
Inferno Tower: Tank destroyer. Just be sure to not let troops attack it, you’ve got Ice Spirit and Knight for distraction.
Also, while troops are frozen by the Spirit, Inferno will deal lots of damage, maybe even shutting the Tank down, so that’s a pretty nice combo.
Ice Spirit: This little dude is insanely good for 1 Elixir. He freezes and destroys Minion Hordes with the help from Arena Tower. He also retargets troops and resets their abilities.
He’s incredibly versatile, just like the other 1 Elixir card.
Inferno Tower is for Tanks and Mini-Tanks. Ice Spirit helps your troops to deal lots of damage by freezing the enemy push.
Knight is a perfect card for distraction, which can also turn into a Mini-Tank for the Balloon and the two Witches who finish stabilizing your defense.
After that, you can start your main push with the Knight as a front line, the Balloon behind him and the two Witches as the supports.
The shortest cycle in your deck is 10 Elixir: Ice Spirit, Zap, Knight and Fireball/NW.
Alright, now let’s apply this!
Early game:
Defend, defend, defend, do not show your Balloon yet, let your opponent play his anti-Air Cards in his pushes without giving him any sign that you play a Balloon deck.
You can attack once in a while in the Early Game, but don’t force yourself too much, do small attacks with Knight, Witch(es) and Ice Spirit to see how he responds, because you won’t have all the time to analyze his defensive moves and change your counters later on.
Don’t need to stress about the Positive Elixir Trades by now since you’ll mainly defend, but at least you gotta try to make some.
Try to deal damage to Pumps whenever you can, Fireball works but don’t forget about your opponent’s Glass Cannons and when he will play ’em.
Mid Game:
Keep on defending, now you will mainly know what’s gonna be your opponent’s next move and how to counter it.
You may now know his cards and you can start more powerful pushes.
Always start your first Balloon push right after your opponent plays his main Aerial Defense (e.g. Minions, Executioner, Mega Minion etc.) He will be forced to cycle, not too easy for all the decks.
Late Game:
Now you’ve got enough Elixir to build fast, powerful pushes at 10 Elixir.Knight in the front, Balloon behind him and the Witch behind the Balloon, having Ice Spirit, Zap, NW or Fireball ready for what you know he’ll play. Mega Minion?Bring the NW.Minion Horde? Zap+Ice Spirit, if Ice Spirit won’t hit them all Witch will clear it up, and so on. Beside that, you’ll have enough time to respond since the Knight is tanking.
Best Starting Hand:
In a whole, defend, start understanding your opponent’s deck, wait for him to use his aerial defense, then start attacking.
Matchups:
Trifecta: Trifecta isn’t seen that much anymore, but I’ll still talk about it.
Hog Cycle: NW as main defense against Hog. Have a Knight in the front as well so Ice Spirit can freeze it. From there on, start a counterpush.
Lavaloon: The problem isn’t countering the Lavaloon itself, but attacking while their deck is full of Air Troops.
You’re still favorite in this matchup since your deck is made to stop Air.
Golem NW: The NW is kinda annoying since she won’t die to Fireball, but you can do it.
Once again, Knight to distract, eventually freeze ’em all and Fireball them all together. Let the Inferno kill the Golem.
Vietnam’s Bridge Spam: Their Poison is gonna be powerful against your NW. Expect their Poison and protect your NW.
Their main defense against Air are NW’s Bats and the Inferno Dragon. You should concentrate into killing the Inferno while the Knight takes Bats’ hits.
Read more about Vietnam’s Bridge Spam here: click!
3M Heal Bridge Spam: This is somehow easier than No-Heal Bridge Spam since not all the 3M Heal Decks run Inferno Dragon who can be annoying.
A fast Fireball+Zap to kill their Musks is also really great. Don’t use your Fireballs on anything else or you may be surprised with 3M spawned in front of your tower.
Log-Bait: Zap, Witch, Fireball and most of the time NW and Knight.You can do it.
Siege: Keep the Knight as a distraction.Try to attack Mortars and X-Bows with the NW and eventually finish them with a Fireball.
Replacements:
That’s all for today guys!I wanna hear your opinions! What do you think about this deck and how are you doing with it?
Okay, before getting into the main subject, let me tell you about dual-synergy.
Just like two cards synergize with each other in a duel, two decks also synergize with each other during a 2v2 battle. Although you can possibly win tons of battles without actually caring about synergy (that’s what we do in a Quick Match), having two decks with synergistic combo between them greatly increases your chances of winning.
There are many deck combos that work better together. The list below covers some useful combos that I believe can help you in 2v2 matches ahead!
Note: This list is incomplete. Feel free to add more combos if you know, in the comment section below. I’ll update the post with your ideas!
Giant Beatdown + Graveyard Cycle
I guess all of us are aware of the infamous Tank+GY synergy.
This dual-synergy is based on the same principle. While there is a beatdown going on, a GY added in the mix, is devastating especially if it’s a GY poison cycle.
Moreover, due to RNG feature of GY, just a simple Giant + GY combo is threatening if the opponent is not prepared. The cycling ability of the GY deck, allows to magnify even a small beat down push.
Here’s an example of this combo:
Deck #1
Deck #2
Gameplan:
Let’s assume Player #1 is using Giant Beatdown and Player #2 is using GY cycle.
During the start of the match, it’s better to cycle cards at the back and not go for a push. But if the opponent places a big tank at the back, feel free to Giant+GY them.
During the middle phase, push whenever you can after a successful defense by plopping a Giant in front of the alive troops and placing the Graveyard once the Giant crosses the river.
In 2v2 matches, Beatdown pushes can get easily defended, especially if it’s Giant Beatdown.
So the mindset while playing this dual-combo will be to cause as much damage as possible through GY+Spell combo and not letting them counterpush. Player #1 should save their defensive troops since Player #2 doesn’t have decent defense.
The Push: Giant+Splash Troop+GY+Spells should be a decent push in my opinion.
Bridge Spam+Spell-Bait
The bridge spam deck is really useful to bait opponent’s Log or Zap since it has battle ram. 9/10 times your opponent will use his Log on Battle Ram if he has it in hand. That’s where the spell bait deck shines.
Moreover, the ultimate defense of spell bait decks is useful to counter the opponent’s counterpush after a bridge spam push. The key is to not use ‘Log-able’ or Zappable troops together such as Battle Ram + GobGang.
Use Goblin Barrel as your win condition. If the opponent uses Skarmy/Minions/Gobgang to counter Goblin Barrel, then Poison comes handy, providing an awesome elixir advantage and an area denial for both your Battle Ram and the Goblin Barrel.
As starting hand, GobGang at the bridge or Princess or Knight at the back is preferred for Player #2.
Always remember to place the Princess in the opposite lane to force out their cards. Once the opponent uses his spell, feel free to toss Goblin Barrel. Poison if needed. Player #1 should play as usual. Read more about Vietnam’s Bridge Spam here.
The Push: Basically, Goblin Barrel and the spells does all the damage. Battle Ram+Goblin Barrel+Poison +Bandit is a decent push.
The reason why two Hog Cycle decks work amazingly is the same reason why Hog Cycle decks are popular; the ability to out cycle their counters and apply constant pressure.
Since both of the decks have cards that are meant to support the Hog push, the two players can do constant Hog pushes and can counter their counters easily. The players can also Dual lane pressure the opponent to baffle them up.
The Push: The small Hog pushes are your damage dealer. There’s no specific push to be honest. Spells can be also used to take down their tower during Sudden Death when everything’s is rapid.
However, counterpushing with remaining defense troops (like the Musketeer and Executioner) is your best push possible.
3M + Spammer
This one is interesting! And effective too!
I actually tried this combo with my friend and it worked wonderfully great! The reason why it works is because there are a lot of units that forces your opponent to use their medium/heavy spell, such as The Barbarian Hut, Goblin Hut, Elixir Collector, Furnace.
Once your opponent uses his Fireball, you know the next. 3M!
The spammer cards, being spell-bait, are also useful to apply dual lane pressure, which 3M decks aim to!
You can simply split your 3M with the lone Musketeer supported by the spawned Barbs and the other two by Battle Ram. And it becomes a pretty devastating push.
Example of this combo:
Deck #1
Deck #2
Gameplan:
As you might have figured out, both of the decks are heavy. So play defensively at first, pumping as much as possible.
Strategy:Spawner decks can overwhelm opponents by continuously spawning troops that chip away at towers and distract enemies. In 2v2, the constant pressure from spawners forces opponents to split their attention and resources. Pairing this with defensive cards like Electro Wizard and Mega Minion ensures you can counter your opponents’ pushes effectively.
Strategy: The Golem deck is a classic for a reason. Its high health and destructive potential make it a formidable win condition. In 2v2, having a partner who can support the Golem with additional troops or spells can create unstoppable pushes. The Night Witch provides excellent support with her bat spawning ability, while the Lumberjack can add a rage boost to the mix. Use Tornado and Baby Dragon for effective defense and counter-push potential.
Strategy: Hog Cycle decks focus on fast, relentless pressure. The Hog Rider is quick and can deal significant damage if left unchecked. Pair this with a control deck that focuses on solid defense and counter-attacks. The cycle aspect allows for frequent Hog Rider pushes, keeping the pressure on opponents while your partner supports with heavier defensive or offensive cards.
Strategy: The LavaLoon combo is devastating when executed correctly. The Lava Hound serves as a tank while the Balloon deals massive damage to towers. In 2v2, coordinating with your partner to protect the Balloon and Lava Pups can lead to explosive damage. The Miner and Poison combo is excellent for taking out defending troops and chipping away at towers.
Strategy:Royal Giant’s range allows it to chip away at towers from a distance, making it a solid win condition. When paired with Sparky, you create a high-risk, high-reward scenario. Sparky’s splash damage can annihilate defending troops, paving the way for the Royal Giant. Support these heavy hitters with defensive cards and spells to protect them and maximize their potential.
Tips for 2v2 Success
Communication is Key: Whether you’re playing with a friend or a random ally, communication can make or break your strategy. Use the in-game emotes and chat to coordinate attacks and defenses.
Complementary Decks: Ensure that your decks complement each other. If one player uses a heavy deck, the other should consider a lighter, faster deck to balance out the elixir cost.
Adapt to Your Opponents: Be ready to adjust your strategy based on what your opponents are playing. Flexibility is crucial in 2v2 battles.
Elixir Management: With two players, elixir management becomes even more critical. Coordinate to ensure you’re not both low on elixir at crucial moments.
It’s awesome to hear that we are going to have the next huge 2v2 special Challenge, the 2v2 Double Elixir Draft Challenge. Here, I am going to give you the best tips for this challenge and hopefully we all can get that Legendary Chest!
So far, this is the most unique Challenge we have had!
General Information
As normal, the first entry is free. The next ones cost 10 Gems each.
You will be paired up with a random teammate.
Pick 4 cards and receive 4 cards from your opponents.
All of them work very well in any Draft Challenge as they require specific counters. If your opponents do not have one of those counters, they will find it very difficult to deal with these cards.
Pick a direct damage spell.
Sometimes, you are not lucky enough to get for your own win condition. You will need a direct damage spell then to take out the Tower. This challenge is “Double Elixir” so you will cycle back to your spell very fast. Also, since the Elixir regeneration rate is very fast, your opponent will probably drop multiple troops at once, giving you chances to get positive Elixir trades.
Moreover, spell cycle is very strong in Double Elixir Challenges. Once the enemy Tower is below 2xRocket threshold, you win the game.
In draft challenge, normally the choices will be pretty similar (for example Minions vs Minion Horde). Choose the cheaper cards! It’s best to keep your deck cheaper. We never know what the opponents give us.
However, because this is 2v2 Double Elixir battle, don’t hesitate to pick heavy tanks and aim for huge pushes.
Make sure most of your cards are well rounded.
Choose the cards which can counter a variety of cards!
For example, Zap, Fireball, Skeleton Army, Goblin Gang, Knight etc can deal with various cards; they are also relatively cheap, making them great choices.
Like mentioned at the second tip, maybe your opponent got some specific cards which are hard to deal with with specific counters, it’s better to get versatile cards.
Don’t forget pocket card!
This is the card which your opponent would never think of, giving you the opportunity to play it at the right moment.
It is ideal to have at least 1 pocket card. It could be Freeze, Balloon, Graveyard, Three Musketeers etc.
Don’t forget that this challenge is based on teamwork a lot. So, don’t forget to look at your teammate’s picks. If your teammate picks Graveyard, pick Poison instead of Rocket. Etc.
This is a super-important tip. Players are tons of Elixir every day because of not doing this.
Hover your cards so your teammate will have a decent amount of time to do the right things.
You guys are a team!
^ this.
Sometimes, when I place my Golem down, my teammate decides to play his Giant Graveyard push on the opposite lane (wute?).
Support each other!
If you get a bad teammate, try the best!
There is nothing we can do her.
Top 8 Winning Strategies
1. Coordinate with Your Teammate
Communication is key in any 2v2 mode. If possible, use an external chat or voice communication app to discuss strategy with your teammate. Talk about your preferred playstyles, card choices, and potential counters. During the match, communicate about elixir levels and card rotations to ensure seamless synergy.
2. Draft Wisely
The draft phase is crucial. Here are some tips for making smart picks:
Balance Your Decks: Aim for a mix of offensive and defensive cards. Ensure you have counters for various threats, like swarms, tanks, and air units.
Elixir Management: Be mindful of elixir costs. Draft a mix of low, medium, and high-cost cards to avoid getting stuck with an overly expensive deck.
Synergy: Look for cards that complement each other. For example, pairing a tank like a Giant with a support unit like a Musketeer can create strong pushes.
3. Double Elixir Advantage
With double elixir, the pace of the game is much faster. Here’s how to leverage this:
Aggressive Pushes: Don’t be afraid to mount aggressive pushes, as elixir regenerates quickly. Coordinate with your teammate to launch synchronized attacks.
Defend Efficiently: Use your elixir advantage to quickly cycle to your defensive cards. Don’t overcommit on defense, as you’ll need to counter-push immediately.
4. Card Placement and Timing
Card placement is even more critical in 2v2. Proper positioning can make the difference between a successful defense and a tower loss.
Defensive Positioning: Place defensive buildings and units strategically to maximize their effectiveness. For example, place Tornado and Splash units like Baby Dragon or Executioner to maximize damage against grouped enemies.
Offensive Timing: Time your offensive plays to coincide with your teammate’s pushes. This can overwhelm your opponents and create unstoppable pushes.
Offensive Spells: Coordinate the use of spells like Fireball, Poison, and Lightning to eliminate key defensive units or support your pushes.
Defensive Spells: Use spells like Tornado, Log, and Zap to counter swarms and reset targeting. Communicate with your teammate to avoid wasting spells on the same targets.
6. Adapt and React
Flexibility is vital in the draft challenge. Be prepared to adapt your strategy based on the cards you and your opponents draft. If your initial plan isn’t working, communicate with your teammate and adjust your approach.
7. Focus on One Tower
In 2v2 matches, splitting your focus can lead to inefficient elixir use. Unless you have a significant advantage, it’s often better to concentrate your attacks on one tower. Coordinate with your teammate to apply consistent pressure on one side, making it harder for your opponents to defend.
8. Watch and Learn
Finally, take the time to watch replays and learn from your matches. Analyze your wins and losses to identify areas for improvement. Pay attention to successful strategies used by top players and adapt them to your playstyle.
By following these tips, you can enhance your performance in the 2v2 Double Elixir Draft Challenge and increase your chances of victory. Remember, communication and synergy with your teammate are just as important as individual skill. Good luck, and may your towers stand strong!
Don’t leave the game If your teammate Logs Minions or Fireballs Golem. Try your best to help him/her out.
I got coupled with a bad teammate once. I did the best to cover him on defense and all he could do was to place his Graveyard when I play my Golem. We won that one.
Hey guys it’s Ash and today I’m going to give you guys my rankings of all the cards in Clash Royale, from the best cards in the game to the worst cards.
Ash’s All Card Rankings
Rankings of these cards are based off of the following factors:
How successful and popularly used these cards are among top players on the Ladder, Tournaments, and Challenges.
How versatile these cards are. Meaning that they can be used successfully in many decks, not just one or two.
The potential of these cards in the current meta and the meta that would be divulging within the next couple of weeks.
Criteria for Ranking
Success and Popularity: How successful and popularly used these cards are among top players on the Ladder, in Tournaments, and in Challenges.
Versatility: How versatile these cards are, meaning that they can be used successfully in many decks, not just one or two.
Meta Potential: The potential of these cards in the current meta and the meta that is expected to evolve in the coming weeks.
Let’s start with the top 5 cards, which are the main utility cards that will almost always give you an Elixir advantage in a battle. These 5 cards are the most popularly used cards among top players.
If you scroll through all the decks the top 200 global players are using right now, you’re going to see that their decks are filled with these cards.
#1 – The Log
The Log is the most used card among top players. It provides incredible value against all ground units, kills Goblin Barrel, Dart Goblin, Princess, Skeleton Army, and Goblin Gang for a positive Elixir trade.
Success and Popularity: The Log remains one of the most used and successful spells in the game, providing cheap and effective crowd control. It is prevalent in all forms of competitive play.
Versatility: The Log can be included in almost any deck, providing utility against swarms, resetting charges, and offering chip damage.
Meta Potential: Given the frequent use of swarm cards, The Log’s efficiency in dealing with these threats ensures its place in the meta.
#2 – Zap
Zap is also a super versatile card that can instantly kill threats such as Skeletons and Bats, as well as stun and reset the target of units, as well as reset the charge of units such as Inferno Tower, Inferno Dragon, Battle Ram, and so on. All for just 2 Elixir.
Success and Popularity: Ice Spirit’s low cost and utility make it a popular choice for cycle and control decks. It is commonly used by top players in all competitive formats.
Versatility: Ice Spirit can fit into almost any deck, providing a freeze effect that can disrupt enemy pushes and support your own.
Meta Potential: With the emphasis on quick cycle and control strategies, Ice Spirit’s low cost and utility keep it relevant in the current and upcoming meta.
#4 – Knight
Knight is the best support distractor and mini-tank in the game. He has very great HP for only a 3 Elixir card, while also has a fast attack rate and can deal a lot of damage if left alone.
Next, we have the 4 most powerful offensive threats in the entire game. These cards can absolutely devastate your opponent with a high return value with low risk.
#6 Night Witch
Even after her recent nerf, she’s still one of the most deadliest offensive threats in the game. It’s just insanely scary when she’s behind a tank such as Giant or Golem or even a 2 Elixir Ice Golem. She poses way too much pressure, as you not only have to worry about her behind a tank, but also her Bats that she continually spawns.
#7 Battle Ram
Battle Ram is a super dangerous card. It can get a charge going fast, and if its charge lands on your Arena Tower, it does massive damage. You not only have to worry about its charge, but also the two Barbarians, which together can deal much more damage if left alone.
#8 Graveyard
Although there are plenty of ways to stop the Graveyard Skeletons, there are very few ways to stop it when it’s used in combination with a spell card such as Poison, and when your Arena Tower is distracted. And damage racks up incredibly fast if you don’t have a good answer for it.
#9 Three Musketeers
Three Musketeers have never been as strong as they are now. Thanks to Battle Ram and Heal Spell making Three Musketeers even better, the Three Musketeer Battle Ram deck is one of the most used decks by top players, and it’s incredibly difficult to stop it when they’ve safely placed down an Elixir Collector.
Poison is one of the best counters to Graveyard, as it can kill Skeletons in one tick. Its large radius is also super beneficial on both offense and defense. It’s also very useful against Night Witch.
#11 – Fireball
Fireball is becoming a very important card to carry right now as opposed to Poison because the Heal Spell card completely cancels out Poison’s damage.
Success and Popularity: Fireball is a highly effective spell that offers high damage and versatility, commonly seen in top-tier decks across all competitive modes.
Versatility: Fireball’s ability to deal significant damage to troops and buildings makes it a versatile choice in various deck archetypes, including control and beatdown.
Meta Potential: As a reliable answer to many high-damage threats and defensive structures, Fireball’s place in the meta is secure.
#12 – Tornado
Tornado is a super powerful defensive card. It not only makes it very difficult to commit too long in a single lane, but it also makes it very difficult to play certain cards early due to Tornado’s ability to pull those units towards the King’s Tower and activate it.
#13 = Heal
The new Heal Spell card has quickly become one of the deadliest cards right now in the meta. The bigger the combination of troops, the more powerful Heal is, meaning if you allow your opponent play something heavy such as Three Musketeers and Battle Ram, then you’re going to have a really hard time stopping that when Heal can make your spell cards quite useless.
Then we have more of the best cards that offer a lot of utility:
#14 – Ice Golem
Ice Golem doesn’t attack units like a Knight would, but the Ice Golem is cheaper and his death splash damage and slow down is super useful against big threats. Not only that, you can use him to kite away threats such as a P.E.K.K.A.
#15 – Goblins
Now that Goblins can survive against a Zap Spell and since the 1 Elixir Skeletons card got nerfed to only 3 Skeletons, the 2 Elixir Goblins card has taken its place in most decks. Even though Goblins die to The Log, this can actually be a good thing as this will allow you to bait The Log and use certain defensive cards such as Tombstone safely.
#16 – Princess
Princess is currently a pretty underrated card, and probably should see more usage in non-bait decks. Although she’s super good in Log bait decks, she’s also super useful in other decks with her long range splash allowing her to safely sprinkle Arrows around from a distance or the other lane.
#17 – Mega Minion
Mega Minion is still a super versatile card for only 3 Elixir. Can survive a Fireball, does a lot of damage, and of course it flies and targets flying units. Mega Minion is a very useful card right now because of all the Night Witches flying around.
Success and Popularity: The Mega Minion is frequently seen in top-tier decks due to its high damage output and reasonable elixir cost. Its presence is strong across all competitive play modes.
Versatility: Mega Minion fits into many deck archetypes, from beatdown to control, providing air defense and consistent damage.
Bandit is a very powerful card, costing only 3 Elixir while being able to instantly pressure an opponent with her speed and dash. If you don’t react quickly enough or have a proper counter in your hand, then she can do a lot of damage quickly.
#19 – Electro Wizard
Electro Wizard is a very powerful card on defense and offense. He comes with a Zap, which can stun and reset his targets. He can survive a Fireball, making him pretty deadly behind a tank. He makes defending easier with his constant stun.
#20 – Baby Dragon
Baby Dragon is like the all inclusive versatile card. Decent HP, damage, speed, everything is decent with the Baby Dragon. Can’t go wrong.
Success and Popularity: The Baby Dragon’s splash damage and moderate health make it a popular choice for handling swarms and supporting pushes. It is a common pick in competitive play.
Versatility: Baby Dragon works well in various deck types, including beatdown, control, and splashyard decks, adding to its utility.
Meta Potential: The Baby Dragon’s splash damage and synergy with Tornado keep it valuable in the current meta and likely in the near future.
#21 – Skeletons
Skeletons used to be a top 5 card when there were 4 of them. Unfortunately, removing one of them took a big hit. Going from 4 to 3 is a 33% difference, and that’s huge. Still, Skeletons are a very useful card for cycling and keeping your Average Elixir Cost low.
#22 – Goblin Gang
Although Goblin Gang now has one less Spear Goblin, it is still a very useful card and is excellent for baiting The Log and can deal a large amount of damage if left ignored.
#23 – Executioner
Executioner is one of the best defensive cards in the game. Couple him with Tornado and he can shut down huge pushes. Not only that, he’s the best counter to the Night Witch.
#24 – Goblin Barrel
Goblin Barrel is a very deadly card due to the fact that you can’t use Zap to kill the Goblins, so you have to mostly rely on using The Log, which can be baited pretty easily by cards such as Princess or Goblin Gang.
#25 – Hog Rider
Hog Rider is almost always among the most popularly used offensive cards in the game, ever since the start of the game. Fast, bulky, and does a lot of damage.
#26 – Giant
For only 5 Elixir, the Giant has so much more HP than a Hog Rider, but is slow. Being slow is actually a good thing for him because you can build up really big pushes while using him as shield.
#27 – P.E.K.K.A
P.E.K.K.A is currently seeing the most usage ever right now because of how well she’s able to counter common threats such as Battle Ram, Three Musketeers, Hog Rider, Giant, and Golem.
#28 – Golem
Although Golem costs 8 Elixir, he can reward you big time if you make smart positive Elixir trades or carry the Elixir Collector. If you give your opponent the Elixir lead, it becomes an absolute nightmare to stop a Golem backed up by something like a Night Witch and Baby Dragon.
#29 – Miner
Miner is quite an underrated card and is mostly seen in bait decks. But he’s very useful in other decks and is also a great counter to the Elixir Collector. Using him to shield Goblins, Skeletons, Bats, or Minions can allow you to deal a massive amount of damage to an Arena Tower.
Success and Popularity: The Miner continues to be a favorite among top players for its ability to target backline units and chip away at enemy towers. It is widely used in both Ladder and Tournament play.
Versatility: The Miner is extremely versatile, fitting into control, cycle, and even some beatdown decks, providing both offensive and defensive utility.
Meta Potential: With the meta favoring cycle and control decks, the Miner’s ability to provide consistent chip damage ensures its ongoing relevance.
#30 – X-Bow
X-Bow is a super deadly card, as if you allow it to lock onto your Arena Tower, then prepare to lose a of HP as you helplessly try to take it down while your opponent continuously counters your counters.
#31 – Mortar
Similarly Mortar can be used the same way, less damage over time, but for the price of only 4 Elixir, allowing you to cycle quicker. The best X-Bow or Mortar siege players will play aggressively on defense when they’re leading, and then finish you off by cycling spell cards such as Rocket or Fireball at the end.
#32 – Rocket
Because of that, it’s very unsafe to take Tower damage against a Rocket user. If the player is losing, he can play aggressively on defense, while destroy your Arena Tower with Rocket and run away with a draw. Rocket also punishes heavy pushes. Just don’t miss.
#33 – Lightning
Lightning has a very big radius and can deal damage to three units with the highest HP. It’s biggest use is its ability to also stun and reset Inferno Towers. While it’s hindered by players who use Battle Ram, as the Battle Ram acts as three units, the Ram and the two Barbarians, so Lightning isn’t seeing as much usage as it should be.
#34 – Arrows
For decks that are very weak to Minion Horde, Arrows offers great value with its very large radius. Not often seen due to The Log, Zap, Fireball, Poison, and Tornado being more versatile. But with the rise in usage of Heal and Minion Horde, more players are using Arrows.
#35 – Minions
Minions are a cheap 3 Elixir card that deal a lot of damage together, fly, and also are a great counter to big threats such as Night Witch and Graveyard. Oh and they can’t be killed by Log or Zap.
#36 – Minion Horde
Becoming much more deadlier with Heal and are also a great counter to Night Witch and Graveyard. They are very deadly with Three Musketeers as they can be used to also bait Fireball and Poison.
#37 -Bats
Fast, cheap, great for cycling and great for baiting zap.
They are cute.
#38 – Archers
Archers can be split into two lanes, have great range, deal a lot of damage, and do not die to Log or Zap. They are also great against Graveyard, and excellent on defense when used with a support distractor like Knight or Ice Golem.
#39 – Tombstone
Tombstone is probably the best defensive building in the game right now because it’s the best defense against Battle Ram, while also costing only 3 Elixir, as opposed to a 5 Elixir Inferno Tower. Tombstone can effectively counter Hog Rider, P.E.K.K.A, Golem, Giant, and other big threats.
#40 – Inferno Tower
Inferno Tower is still the best tank-killing defense. The best counter to Golem, Giant, P.E.K.K.A, Lava Hound, Balloon, and so on.
#41 – Dart Goblin
Dart Goblin has one of the biggest ranges in the game. He can lock on an Arena Tower quick and deal quick damage before your opponent can usually react. He’s also an excellent bait for The Log.
#42 – Skeleton Army
Although Skeleton Army isn’t as threatening as Goblin Gang on offense and dies to Zap, it does an immense amount of damage on defense quick. Just make sure you have another card that can bait Zap and Log.
#43 – Bowler
Bowler is one of the best defensive troops in the game. Killing and pushing back most troops. Unfortunately, his inability to target air troops is what sets him apart from the Executioner.
#44 – Balloon
Balloon is a super deadly offensive card when behind a tank such as Lava Hound. However, with Three Musketeers, Night Witch, Executioner and Tornado being everywhere in this meta, Lavaloon isn’t as intimidating as it once was.
#45 – Lava Hound
Lava Hound struggles in a meta where there’s so many Three Musketeers and Night Witch users. Night Witch can basically summon Bats to deal with Lava Hound, while focus on counterpushing you with a tank.
#46 – Musketeer
Musketeer is a still a very useful long ranged attacker in many decks, but her inability to counter Graveyard as effectively as Archers is what sets her apart.
#47 – Valkyrie
Valkyrie is a very underrated card in this meta. She’s super useful against Graveyard Poison users, Battle Ram users, and also great against Three Musketeers. Just use another distractor like Ice Golem in front of her when countering a big Three Musketeers Battle Ram Push, and watch her quickly counter it.
#48 – Witch
Witch is also one of the best counters to Graveyard, able to kill Skeletons in one hit, while also being able to survive Fireball and Poison. She can also be super powerful on offense. If you opponent has a counter such as Executioner or Bowler, just make sure to play Witch on the other lane.
#49 – Mini P.E.K.K.A
Mini P.E.K.K.A is also another very underrated card. He’s an excellent counter to Battle Ram, Bandit, Hog Rider, Giant, Golem, Royal Giant, and so on. You can even use Mini P.E.K.K.A with an Ice Spirit behind or Ice Golem in front to effectively counter Three Musketeers.
#50 Lumberjack
Although Lumberjack isn’t as tanky as Mini P.E.K.K.A, he can provide a very beneficial Rage after his death, and this can be very deadly in the right deck. Something like Giant, Night Witch, and Lumberjack can be very dangerous as Rage will also increase Night Witch’s spawn rate.
#51 – Ice Wizard
Ice Wizard used to be one of the best cards in the game, and the best defensive card in the game, but unfortunately it has fallen a lot due to its inability to kill Skeletons and Bats in one hit. Ice Wizard is still one of the best cards in the lower Arenas, but at the top, it fails to find good homes.
#52 – Fire Spirits
Fire Spirits are very underrated as well, being very useful taking out a Minion Horde on Heal quickly, dealing tons of damage to Battle Ram and Barbarians, can finish off a Night Witch and her Bats, and can also be used to quickly finish off 2 splitted Musketeers. They need to be used more.
#53 – Furnace
Furnace is decent, but fails to counter big tank threats such as Golem, P.E.K.K.A, and Giant. While also isn’t as effective against Battle Ram and Hog Rider as Tombstone is for less cost.
#54 – Cannon
Cannon has dropped a lot, as it just doesn’t provide the same defensive value as Tombstone. Tombstone can take a charge from Battle Ram and continue to defend against the Barbarians with Skeletons. Cannon can’t, but has the benefit of not being weak to The Log.
#55 – Inferno Dragon
Inferno Dragon is seeing a lot more use, especially in those bridge spam decks. However, it’s still a very easy card to counter, and Ice Spirit and Zap are everywhere in this meta.
#56 – Guards
Guards are another very underrated card, having the advantage of not being weak to The Log, like the Goblin Gang is. Guards are an excellent defense against Graveyard, Bandit, 2 Musketeers, and many other big threats.
#57 – Royal Giant
Royal Giant is a decent card. However, because it’s a Common card, it’s very easy to level it up, and so you have a lot of low level players with high level Royal Giants, and that can be annoying. When facing Royal Giants, make sure to plan out a counterpush before killing the Royal Giant. If you only focus on killing the Royal Giant, then you won’t win.
#58 – Elite Barbarians
Like Royal Giant, Elite Barbarians are also decent, but are a Common card. Overleveled Elite Barbarians can be quite annoying. Start working on your deployment reflexes or these guys are going to get to your Arena Tower.
#59 – Barbarians
Barbarians are an excellent defensive card against many threats such as Elite Barbarians, Royal Giant, Battle Ram, Three Musketeers, Graveyard, and almost all tanks except P.E.K.K.A. Problem is, they’re very weak to spells such as Fireball and Poison and are too slow to pose much pressure on offense.
#60 – Freeze
Freeze can be a very deadly card if you can catch your opponent off guard. A well timed and placed Freeze Spell can easily win you the game.
#61 – Prince
Unfortunately with The Log, Zap, Ice Spirit, which are three of the most used cards by top players being everywhere, it’s really hard to take advantage of the Prince’s charge. He’s 5 Elixir and easy distracted by low HP troops. However, with the right support he can be very deadly. He has very decent HP.
#62 – Barbarian Hut
Barbarian Hut is an excellent defense, but it’s the most expensive building in the game. It’s just too risky, regardless of where you place the Barbarian Hut, a Hog Rider or Battle Ram can bypass it and target your Arena Tower on the other lane.
#63 – Giant Skeleton
Giant Skeleton is an excellent defensive troop, with the ability to shut down big pushes like a Rocket. But the problem is, he’s too expensive and his death damage can go to waste easily. He doesn’t have that much HP to be a great tank like the Giant, and a smart player will always target the Giant Skeleton from behind to escape his death damage.
#64 – Wizard
Wizard isn’t bad, but he’s just so outclassed by the Executioner. Executioner can target multiple troops behind his target, survive Poison and Lightning unlike the Wizard. He also has a bigger splash radius and area of damage than the Wizard.
Dark Prince just can’t find a good place in this meta. He has that nice splash damage, but is easily surrounded and killed by something like Goblins. Valkyrie is just a better option and is so much more useful against Graveyard and Three Musketeers. Dark Prince does have that sweet charge, but again Log, Zap, and Ice Spirit are everywhere.
#67 – Bomber
Bomber does a lot of splash damage, but he only targets ground units and has very little HP, and his range isn’t that great. He’s just too easy to beat and doesn’t help against air troops.
#68 – Mirror
Mirror is a pretty fun card, but isn’t the best for competitive play. It’s just not very safe to use the same card twice, unless you’re using a bait deck. But even then, paying 1 more Elixir to use the same card twice isn’t always rewarding. However, I’ve found Mirror to be a lot more effective in 2v2 mode where you can Mirror spells or Miner to continually deal damage to win.
#69 – Clone
Like Mirror, Clone is another very fun card, but just isn’t the best card for competitive play. Log, Zap, and Ice Spirit are everywhere and can kill clones quick.
#70 – Rage
Rage is another fun card to play around with. Try out Rage with Witch and Night Witch, it not only speeds up their attack rate, but is also speeds up their Skeletons and Bats spawn rate.
#71 – Spear Goblins
Spear Goblins are good for chip damage, but oftentimes it’s not worth wasting 2 Elixir for some small chip damage. These guys are just too weak and die to Zap. Goblins are a lot better and do a lot more damage and do not die to equal level Zap.
#72 – Tesla
Tesla just doesn’t fit right now. Inferno Tower is way better for killing tanks and Lavaloon. While Tombstone and Cannon offer much more value against ground threats for cheaper.
#73 – Goblin Hut
The Spear Goblin Hut just isn’t intimidating, costing an expensive 5 Elixir to spawn Spear Goblins, the weakest troops in the game. You can simply just ignore the Goblin Hut and let the Spear Goblins deal chip damage and end up winning because you took advantage of your opponent spending 5 Elixir on this card.
#74 – Bomb Tower
Bomb Tower is quite a powerful ground defense, but it’s a very expensive 5 Elixir that can’t touch air units. If you’re using Bomb Tower, then you better pray your opponent doesn’t use something like Lavaloon. Even then, this card isn’t that good against tanks either, like Giant or Golem or even Royal Giant who can outrange it.
I am doing a $200 iTunes or Google Play giveaway ($20 gift cards for 10 chosen winners) for the whole month of July!
I am also doing a contest about the best decks with the total prize up to $1,000 (sponsored by Supercell).
To enter the giveaway, just Subscribe to my YouTube channel, Like the video, and leave a comment in the video above!
SuyogThePun here, bringing you my first ever guide on Clash.World, the Vietnam’s Bridge Spam Deck.
And what is the etter way to celebrate this than to review the new and cancerous archetype, Bridge Spam? That’s right. Without any further ado let’s get right into it.
Vietnam’s Bridge Spam Deck
Card Breakdown
Battle Ram. Win condition.
The Barbarians it spawns can be useful on defense. Use it when you are sure that the opponent does not have buildings in his hand or when you know that they just used up a counter.
Never use it as your first card, wait for them to make a move, counter them and punish them hard. Deploy it at the bridge for the special moments when they most vulnerable. Battle Ram Ice Golem combo is a deadly combination.
Bandit. Support/secondary win condition.
After the recent buff with her charge time being reduced, she’s crawling her way back to the meta. She is now much more viable against enemies and efficient at chip damage.
Use her to distract troops, get enemies off your Tower and for chip damage. However, she will not be ignored like Spear Goblins would. So, get a Zap spell ready for their swarm troops.
Night Witch. Support/Defense.
Night Witch is perhaps the most important one. She can 1v1 Knights, Mini P.E.K.K.A, Bandit, etc.
She doesn’t allow the Hog Rider to get more than one hit on the Tower (depends on the placement). Use her mainly to defend. Her Bats can build up and desecrate most pushes. She is the main troop killer in this Deck.
Pair her with the Bandit for a devastating combo.
Inferno Dragon. Tank defense/air defense.
It does what it’s supposed to do. It quickly melts any tank that gets in its way.
Use this in junction with Poison or Zap to clear about other troops and safely take out their tank. However, if the opponent runs decks suck as Hog cycle, the Inferno won’t be used most of the match.
Ice Golem. Mini tank/defensive meat shield.
The Ice Golem has a very basic purpose. He is to guard your cards whether it be defensively or offensively that being said he is and incredibly valuable card and shouldnt be replaced.
Ice Spirit. Support/cycle.
What can I say about this card that hasn’t already been said. It freezes and distracts troops all for 1 Elixir.
Use it to Freeze troops for your cards to get more damage in. But make sure that it jumps before troops like Elite Barbarians get a shot on it, otherwise it’s just an Elixir wasted.
Poison. Support/main damage spell.
Long have the glory days of Goison gone but the Poison spell still retains an absolutely important characteristic for this Deck. Area Denial.
The most important thing to remember is, How will your opponent counter if there is no way to counter? What are regular counters to Battle Ram, Night Witch, Bandit and Inferno Dragon?
Swarm troops like Skeleton Army and GobGang. Poison denies placement area for them. This why I strongly believe this is the most important card in the Deck.
Zap. Support/cheap spell.
Zap is another great spell costing very little to reset/get rid of swarms. Pretty basic function that all of you know how to play. The only tip I have for you is to use it in the right situations.
Strategy
Early game
Feel out your opponent. Let them make the first move and get the counter ready or cycle to it.
Hold off on playing the Inferno Dragon or the Night Witch as they are prime defenses for this Deck.
Make positive Elixir trades whenever possible and go on counter pushes immediately after.
Once the opponent uses their defense use Ice Golem and Battle Ram for a devastating blow to their Tower.
Primarily, get some chip damage and positive Elixir trades.
Punish the opponent when they place down a Pump or Poison the Pump itself. And DON’T let them build an Elixir advantage.
Mid game
Once you have made many positive Elixir trades, go on the attack and punish your opponent. Ice Golem, Battle Ram and Poison push primarily decimate towers.
Keep the Night Witch and Inferno Dragon for and tanks or for Elite Barbarians.
Keep using the Bandit to either fake push or take out a defensive building. But you should use the Battle Ram to take out Inferno Towers and Cannons because the Barbarians from the Ram will outlive the buildings and get a few shots on the Tower before they are taken out.
Late game
Now is when the real fun starts.
Like the nature of this Deck, bridge spam everything you have and keep cycling for more and more cards and throw down the Poison on the map for area denial. This Deck is surprisingly a three crown Deck.
If the opponent take out your Tower in the opposite lane. Don’t worry. Just defend enough so that they don’t take out your king Tower and keep attacking and you should, most of the times, get three crowns.
Matchups
Hog Cycle
Most Hog cycle pushes have the Hog and Ice Spirit. To take only 1 hit on your Tower, place an Ice Golem to absorb the Ice Spirit and place the Night Witch directly in front of the Hog and the Hog will only get one hit. To avoid any hits whatsoever, do everything I just stated but also include the Ice Spirit to Freeze the Hog. After you counter their play, get ready for a counter push with Battle Ram and Bandit and the defending Night Witch.
Log Bait
However strange it seems, don’t Zap the Goblin Barrel. Instead save it for the Skeleton Army and GobGang. Use your Bandit and Night Witch to defend against the barrels and get a heavy push going with the Ice Golem, Battle Ram and the remaining troops. Get the Poison spell in the mix if you have enough Elixir. Again, don’t worry if they place down and Inferno Tower. The Barbarians from the Ram and other troops will most likely clear it and heavily damage their towers.
Golem/Giant Beatdown
Focus on taking out the support cards for the tank before taking out the tank itself. Ice Golem, Night Witch can take out most supports. Add a Poison spell if there are Minions. After that build up more cards to take out the Golem. Then go on a massive counter push with all of the built up troops.
Three Muskies
Use Poison spell on pumps during the first minutes. Then save it for the muskies once 2X hits since most people play them during 2X. Once they start splitting the muskies, Poison the 2 Musketeers and use Bandit and Ice Golem(if needed) to take out the other musket,
Graveyard
Even though it seems better to Poison the Graveyard itself, it’s better to save it for offense and instead use Ice Golem or Night Witch to take out the Graveyard itself. Use Bandit to take out light tanks like Ice Golem and Knight.
Lavaloon
Place the Night Witch at the back once the Lava Hound is going to cross the bridge and then start cycling and getting more Bats to take out the Lava Hound and Balloon. Start a small push on the other side so that your opponent has to defend or lose the Tower. Save the Zap for pups but use it on the Balloon if it’s in critical condition and will make it to your Tower if left unattended.
Royal Giant
Inferno Dragon and Ice Spirit. RIP
Elite Barbarians
Defend but don’t waste Elixir on unnecessary stuff. Ice Golem Night Witch can take out Ebarbs (if they are not over leveled) and will set you up for a counter push.


 Cannon Card is basically a moving Cannon with a shield. While the shield is up, Cannon can move. Once the shield comes off it’s a regular Cannon.


 P.E.K.K.A.: Valkyrie is the key to victory; use her against Night Witch, Bandit, and Battle Ram, but accompany her with Ice Wizard, Minions, or Night Witch, as well as Inferno on the P.E.K.K.A. (just be careful if your opponent has Poison)
 Spell-Bait: Graveyard Poison usually wrecks Spell-Bait Decks, just save your Arrows for their Barrel, Valkyrie can take out most of the other troops.
 Siege: Inferno Tower on the siege weapon, and make aggressive Graveyard pushes, this is pretty easy.
 Spawners: A rare matchup, but it is pretty hard to play against, especially Furnace. But can be done by using
  Miner: Valkyrie or Arrows on Supports, Night Witch or Ice Wizard on Miner, in cases where you’re low on elixir, ignore the Miner and deal with supports.


 Bridge Spam: If you lose to this, then shame on you. They usually don’t have that many


 Vietnam’s Bridge Spam: Their Poison is gonna be powerful against your NW. Expect their


 #20 – Baby Dragon
 #31 – Mortar
 #37 -Bats
 #41 – Dart Goblin
 #49 – Mini P.E.K.K.A
 #50 Lumberjack
 #52 – Fire Spirits
 #56 – Guards
 #59 – Barbarians
 #60 – Freeze
 #61 – Prince
 #63 – Giant Skeleton
 #66 – Dark Prince
 #67 – Bomber
 #70 – Rage
 #71 – Spear Goblins
 #72 – Tesla
 #74 – Bomb Tower
